Adventures in Window Valancing!
(Yes thank you spell check, I know that is not a word)
***A small warning – I am going to get a bit personal for a moment.***
If you have been following my blog, you will know that I recently just moved into an apartment. The move comes after living at my parents’ house for about a year and a half. What you may not know is before I moved back home I was married and co-owned a house. The house wasn’t perfect, but it was the first time I had owned a home, which was exciting and scary at the same time. During my almost 2-year occupancy, I dug up mulch, painted walls and ceilings and constructed furniture. The place had potential. I remember one day bringing swatches of material home for the drapes I was going to make for our glass french doors that lead outside. But not everything in life is guaranteed, and sometimes people …well let’s just say sometimes people have real ugly sides that they don’t show all the time. My husband came to a realization:
- He didn’t want to be married to me anymore.
- He wanted to keep the house.
I knew I couldn’t fight him on the house, since I had just lost my job the previous month and had no way of making the mortgage payments by myself. It was heart breaking because I had put so much of myself into that house. And I had plans for it! This was the house we were going to make additions to. This was the house where we were going to raise our children we hadn’t had yet. It was all gone in an instant, and I was forced to pack 8 years of memories into boxes until I was able to unpack my life again.
Well, at least I never wasted any time on those drapes.
Renting after owning your own place takes some adjustment. I can’t change my white walls, but there are other ways to make this place my own. And here is where the window valances come in.
***END OF PERSONAL STUFF***
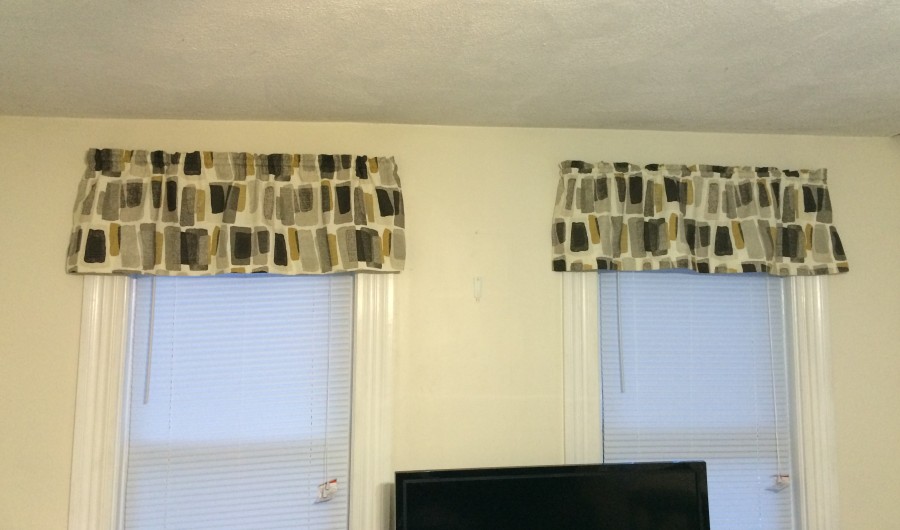
I wanted something pretty modern looking, but still matching the natural tones of the room. By natural tones, I think I mean boring. Anywho, the fabric I found matched the new brown couch I bought. Plus it was only $5.99 a yard (Sewfisticated Fabric, you did it again!). With the 2.5 yards I bought, I cut in half both lengthwise and across so I had 4 equal pieces. The steps are pretty easy.
- On each of the sides, fold and press a small finished edge and stitch up on both sides.
- Fold up and stitch roughly 3 inches for bottom hem (with finished edge of course).
- Fold down and stitch 2.5 inches for top.
- Sew an extra stitch line, roughly in the middle of the top hem, to create a sleeve for the curtain rod to fit through. You can eye-ball this. Just make sure the sleeve is big enough to fit the rod.
When finished, it will look something like this…a rectangle basically.

All that’s left is to scrunch it up onto the curtain rod. Something so simple that has brightened up my once-boring living room.
You can’t plan for everything. Houses aren’t guaranteed any more than husbands. These days I put a lot of myself into my sewing projects, which never fails to remind me what it means to be home.


I love the valences and the fabric is a beautiful choice!
Putting a personal stamp on your living space is so important and it’s easy to overlook. The first rental house my family lived in after selling our first house looked terrible for months because I refused to put any pictures up and I generally hated everything about living there. I finally put up the pictures and made curtains for my daughter’s room and it was like flipping a switch from transient housing to our home. Have fun making your home yours 🙂
LikeLiked by 1 person
Thanks! I liked making these more than I thought I would, probably because I see them every day. Going to attempt full curtains next.
LikeLiked by 1 person
Like you story, attitude and valances!
LikeLiked by 1 person
Thank you!
LikeLike
Love them. I love the retro looking “mod” fabric and it softens up the room without detracting from that beautiful woodwork on your windows. Well done! Hugs
LikeLiked by 1 person
Thanks Eva! I really like this fabric too. I went back and bought a different fabric at the same place to make curtains for the bedroom so that should be fun.
LikeLike
Ok just went back a post. Invisible zippers? I have so much to learn from you!!
LikeLiked by 1 person
Well miss, I continue to be impressed by your valences and love your fabric choice. Also loving that you’ve put all of this in a blog and are finding positives in your life.
If you should happen to know or figure out how to sew a zipper… I’d be all ears!
LikeLiked by 1 person
I’ll admit – I’m not great at zippers. My trick is to install invisible zippers whenever I can, where I have a special foot that makes it pretty idiot-proof. This winter I plan to make a pair of corduroy pants so I will have to put a regular zipper in and I will make sure log all my struggles. Stay tuned! And also, I’m a lot happier now :o)
LikeLike