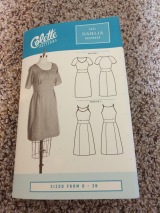
Pattern: Dahlia from Colette Patterns
New Skills Acquired:
- Machine blind hem stitch
When I look at some of my projects from last year…
I do! It may be a mini-obsession. I do have some non-plaid projects in the works, but for now….
This dress has been sitting as a draft in blog forever. I wanted to share this on The Monthly Stitch and even bumped it up in my project queue because the July theme was all about plaid. I rushed through all the hot sticky weather to try to finish this dress in time to post on the site and then…the blind hem stitch on my machine wasn’t working. On July 28th.
Yeah I know I could have just hemmed it by hand, but I really wanted to try out a new technique. And that was more important than trying to force a project into a theme. It’s all about my learnings as a sewist, right? (Back me up on this one) So in the corner this dress went while I worked on other stuff, involving other non-blind hems. I decided to pick this back up when my machine was properly repaired. Welp, at least I can also get that button-hole stitch fixed too.
Clash of the Tartans
I bought this fairly light-weight tartan fabric when I was on vacation in Scotland last summer. I had a picture in my head of the type of dress I wanted to make from it – something simple but also stylish that would really show off the plaid design. The Dahlia dress seemed perfect – the shape was similar to some highland-style dresses I had seen online, the bias binding on the neck and sleeves gave it some ease and simplicity, and there was an plaid example on the website. Huzzah! The website also features some online tutorials that tell you exactly how to match the plaid – even on the sleeves. They were extremely precise and helpful. One thing I am starting to love about indie patterns.
Well I didn’t get everything exactly matched, especially on the sleeves, but I think I did as well ad I could. And speaking of sleeves, I didn’t realize they would be so long when initially looking at the pattern. Although, looking now at the website, I can see they are definitely at the elbow, so this is my oversight. If I made this again, I think I would want them a bit shorter. That might be a bit challenging since they are raglan sleeves and shaped quite different than the sleeves I am used to. For this dress I think it works, since the colors do go well with the fall season and colder weather.
Zipper on the Side
The dress came together nicely and the directions were very clear, especially in telling you when it’s necessary to finish your seams. Most patterns don’t bother with this, and I think it’s really an important step. It is especially helpful for the beginner starting to figure out how to achieve a more professional look. I finished most of my seams by making french seams. This worked great for the bodice, but got a bit bunchy on the skirt so next time I think I would just bind the seam edges with some bias tape – which is what I ended up doing on the zipper side.
I’m not sure how I feel about the side zipper. It was slightly more difficult than installing one in the back and also, the dress takes some maneuvering to get in and out of (mostly out). I’m wondering if next time I would adjust so the zipper is in the back.
Other adjustments I did make was making the skirt a little more flared out to accommodate my body shape. I think I still achieved that slightly fitted look without it being too tight and unflattering.
Also, I was in such a rush to try to finish this for the July monthly stitch theme, that I forgot to take pictures as I went along, so you will just have to imagine all this in your head.
The Blind Hemming the Blind

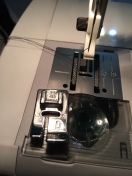
I have to admit – I was really scared to do this. I’ve read so many posts from people who attempt using the blind hem stitch and fail miserably, only to quit and hand sew. I was pretty confident this was not going to work, especially since I am so new to sewing. I started out by watching a few videos, but then became confused when I looked at what my machine called a blind hem foot. Then I did a search for instructions using my viking machine and it all made sense. This was the tutorial that finally cleared it all up for me – it totally made sense after watching it. But then I tried it on some scrap….and it wasn’t working at all.
So I tried a couple more times…and it took a few minutes to realize my stitches were the reverse of what was on the video. Hmmmm, was my machine sewing backwards? Did they screw something up at the shop when I got it fixed. Then I looked at my book real quick – I was on the wrong stitch. I have no idea what stitch I had the setting on, but it was not the blind hem. I tried this again:
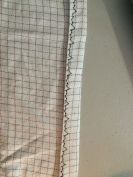
Result!
And on my first try :o)
Just in case this was a fluke, I tried it again:
Two in a row!
I was ready for the real deal:
…Well I don’t have a close-up picture of the actual hem, but I assure you it came out great! It was not difficult and so fast and efficient. With the plaid material, the small ticks on the outside are hardly seen at all. I will definitely try this stitch out again – so much better than hand stitching!

Speaking of Hand Stitching
Yeah speaking of hand stitching – there was plenty to go around on this one with all the bias tape. I will say it did make finishing up the sleeves and neckline very easy. But I just never like the way my hand stitching comes out – I can’t get it looking neat and uniform. This pattern uses double-fold bias tape – there are many tutorials and the directions are pretty clear. It has you open the bias tape up and attach one side to the right side (this can be done on the machine thankfully), then when you fold it back around, you hand stitch the tape to the dress on the inside. Then….
Lovely fall dress!
Some more fun with plaid – I really love how the middle is on the bias. This was also well explained in the pattern tutorials.
Well I think I this one was worth the wait, and I can definitely mark this as a success! Also, good to note that it made a great Christmas holiday party dress as well because of the colors.


Pingback: Jasmine blouse: Un-anchored by last minute decisions | Threading Lightly
Very cute. I need to try the blind stitch. I also need to push myself out of my comfort zone and learn some new skills.
LikeLiked by 1 person
I do love plaid! And I love your colours. I only just recently started using my blind hem foot. I do like it with some styles and fabrics.
LikeLiked by 1 person
Yes this came out really nicely. I have never really been pleased with the effect of machine hemming, but I may give it another try.
LikeLiked by 1 person
This came out so wonderful! Your attention to detail is inspiring. I really need to work on finishing hems by hand or with the blind hem foot instead of just top stitching everything, it makes such a lovely finished garment.
LikeLike
Thanks! I’m excited I get to try it again on the jumper I am making. I hope that one comes out as good as this one did – fingers crossed!
LikeLike
This came out so good, great job Monique!
LikeLike
Beautiful dress Monique! Love the bias waist band detail. I never like the way the blind hem turns out, so have gone back to hand stitching. But I don’t work with patterns. I’m considering a new machine purchase this year. Wish me luck!
LikeLike