Pants that are a cinch!

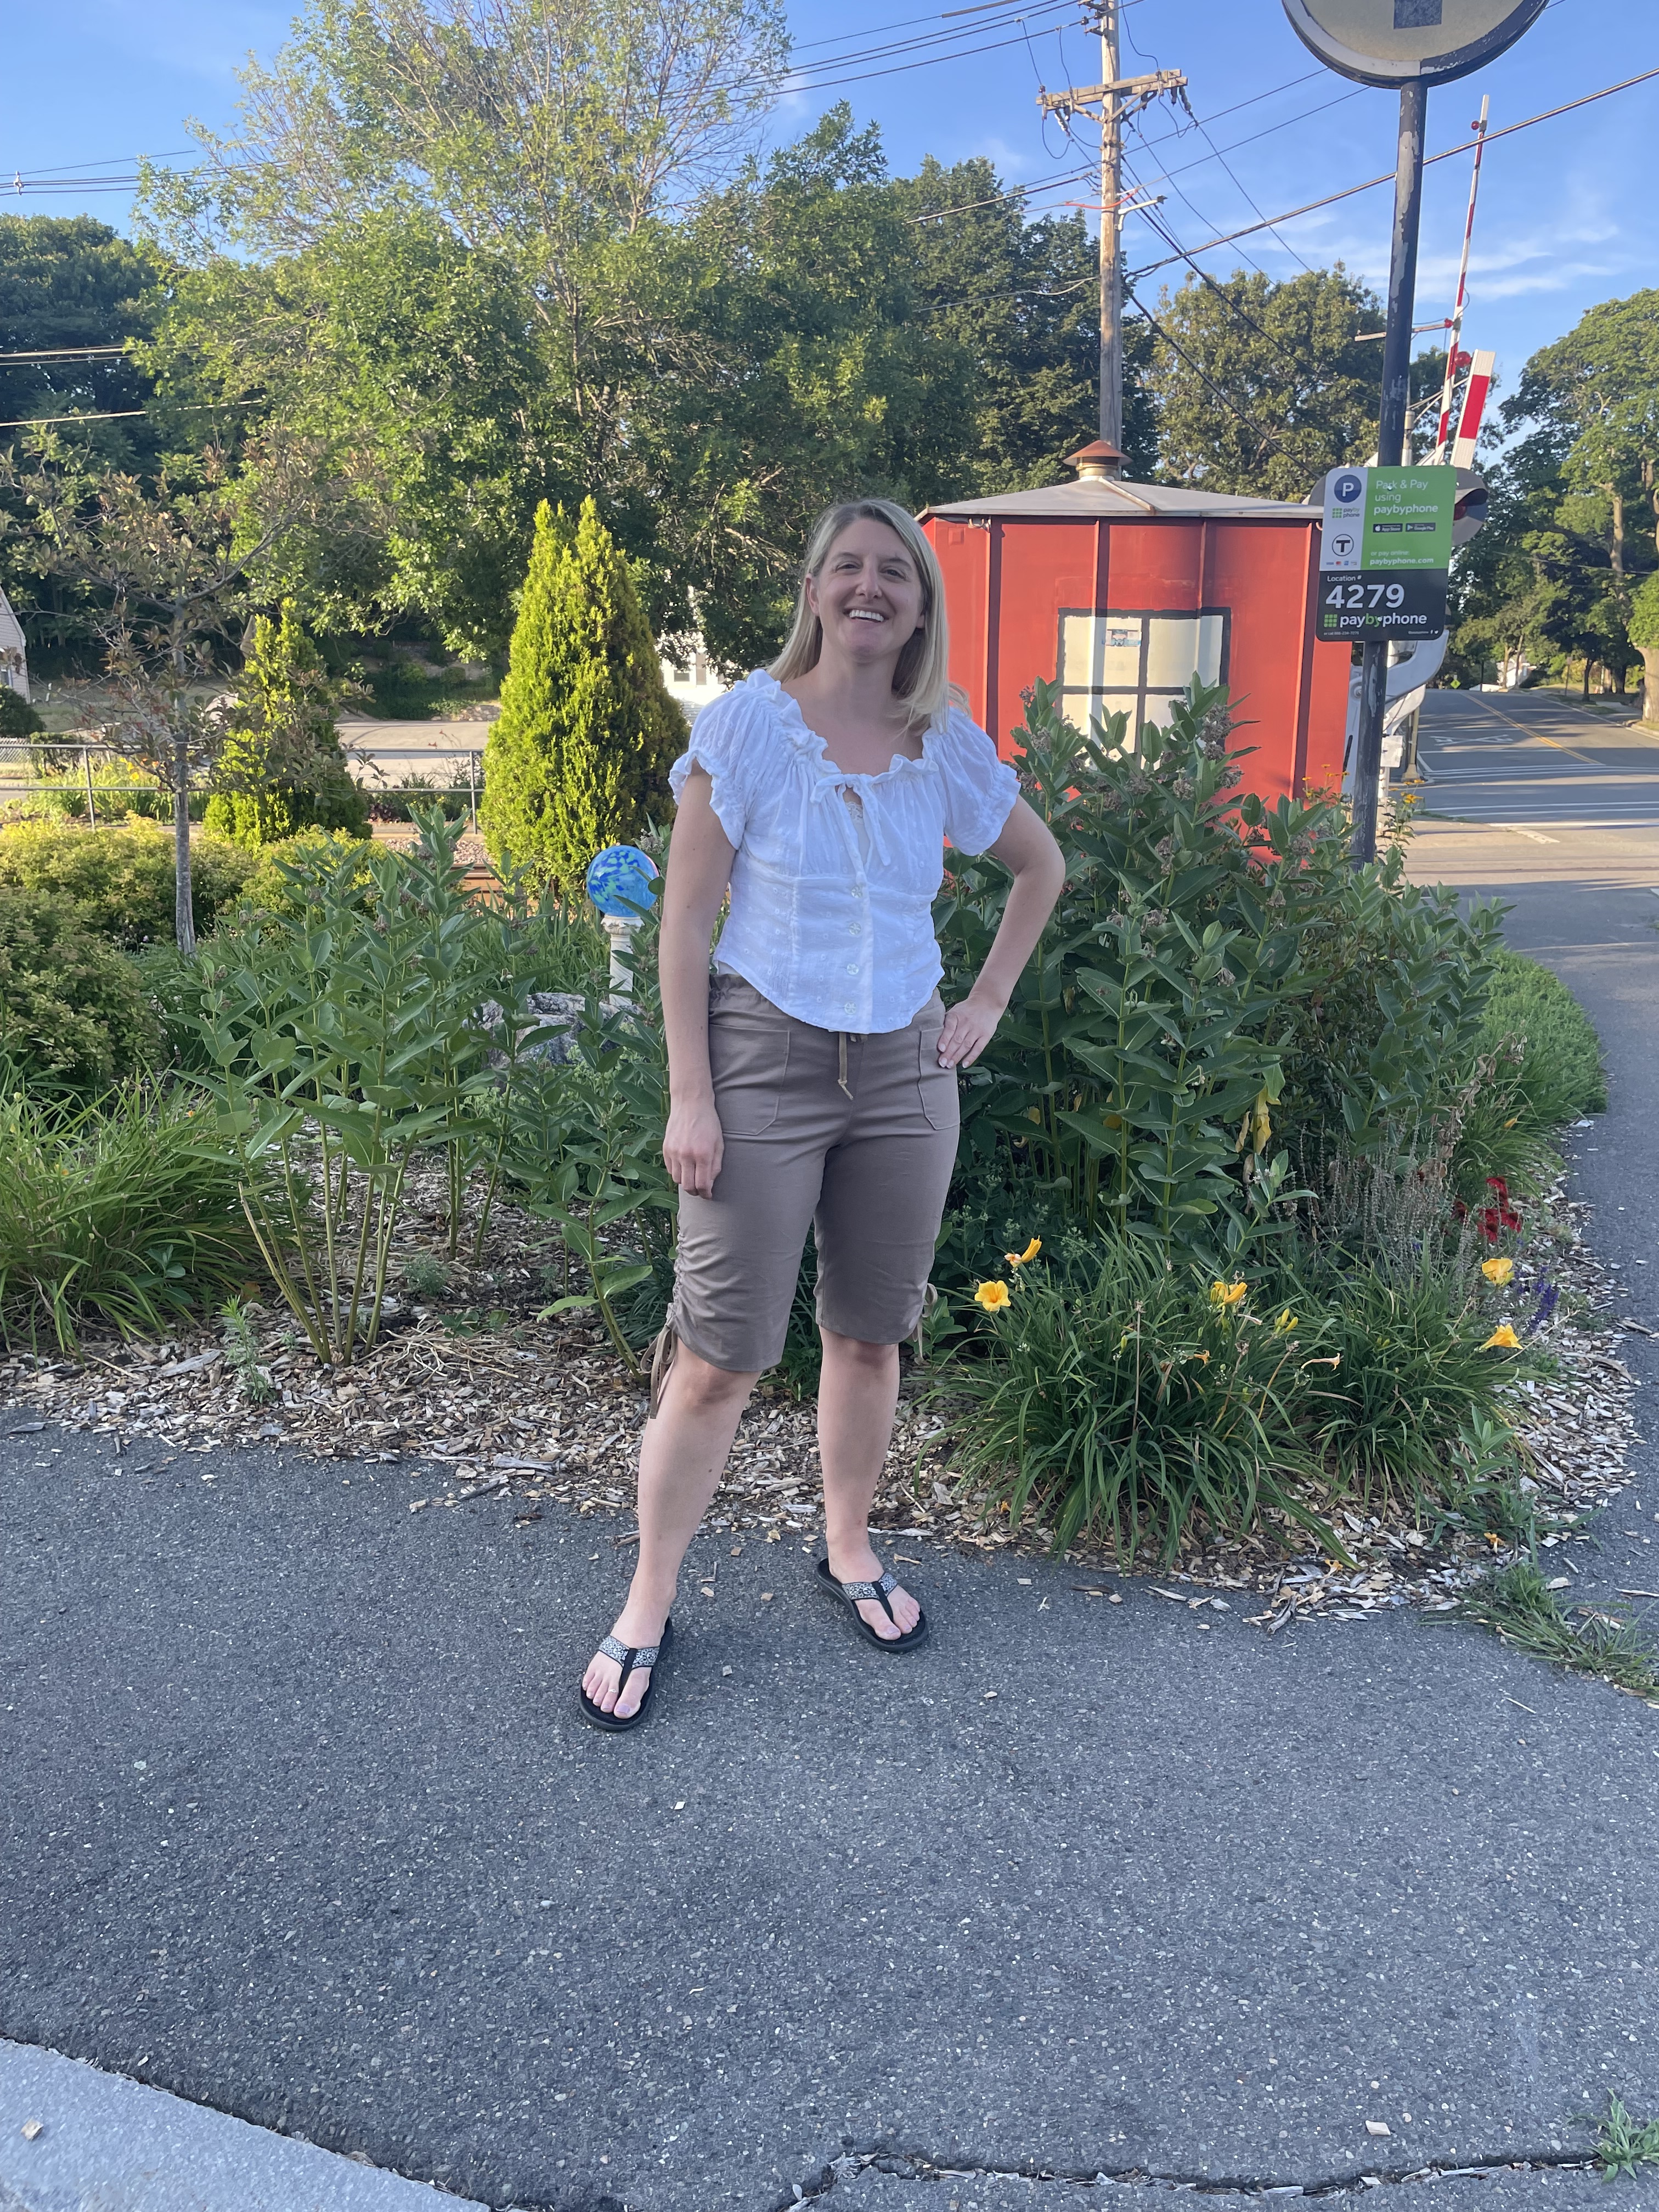
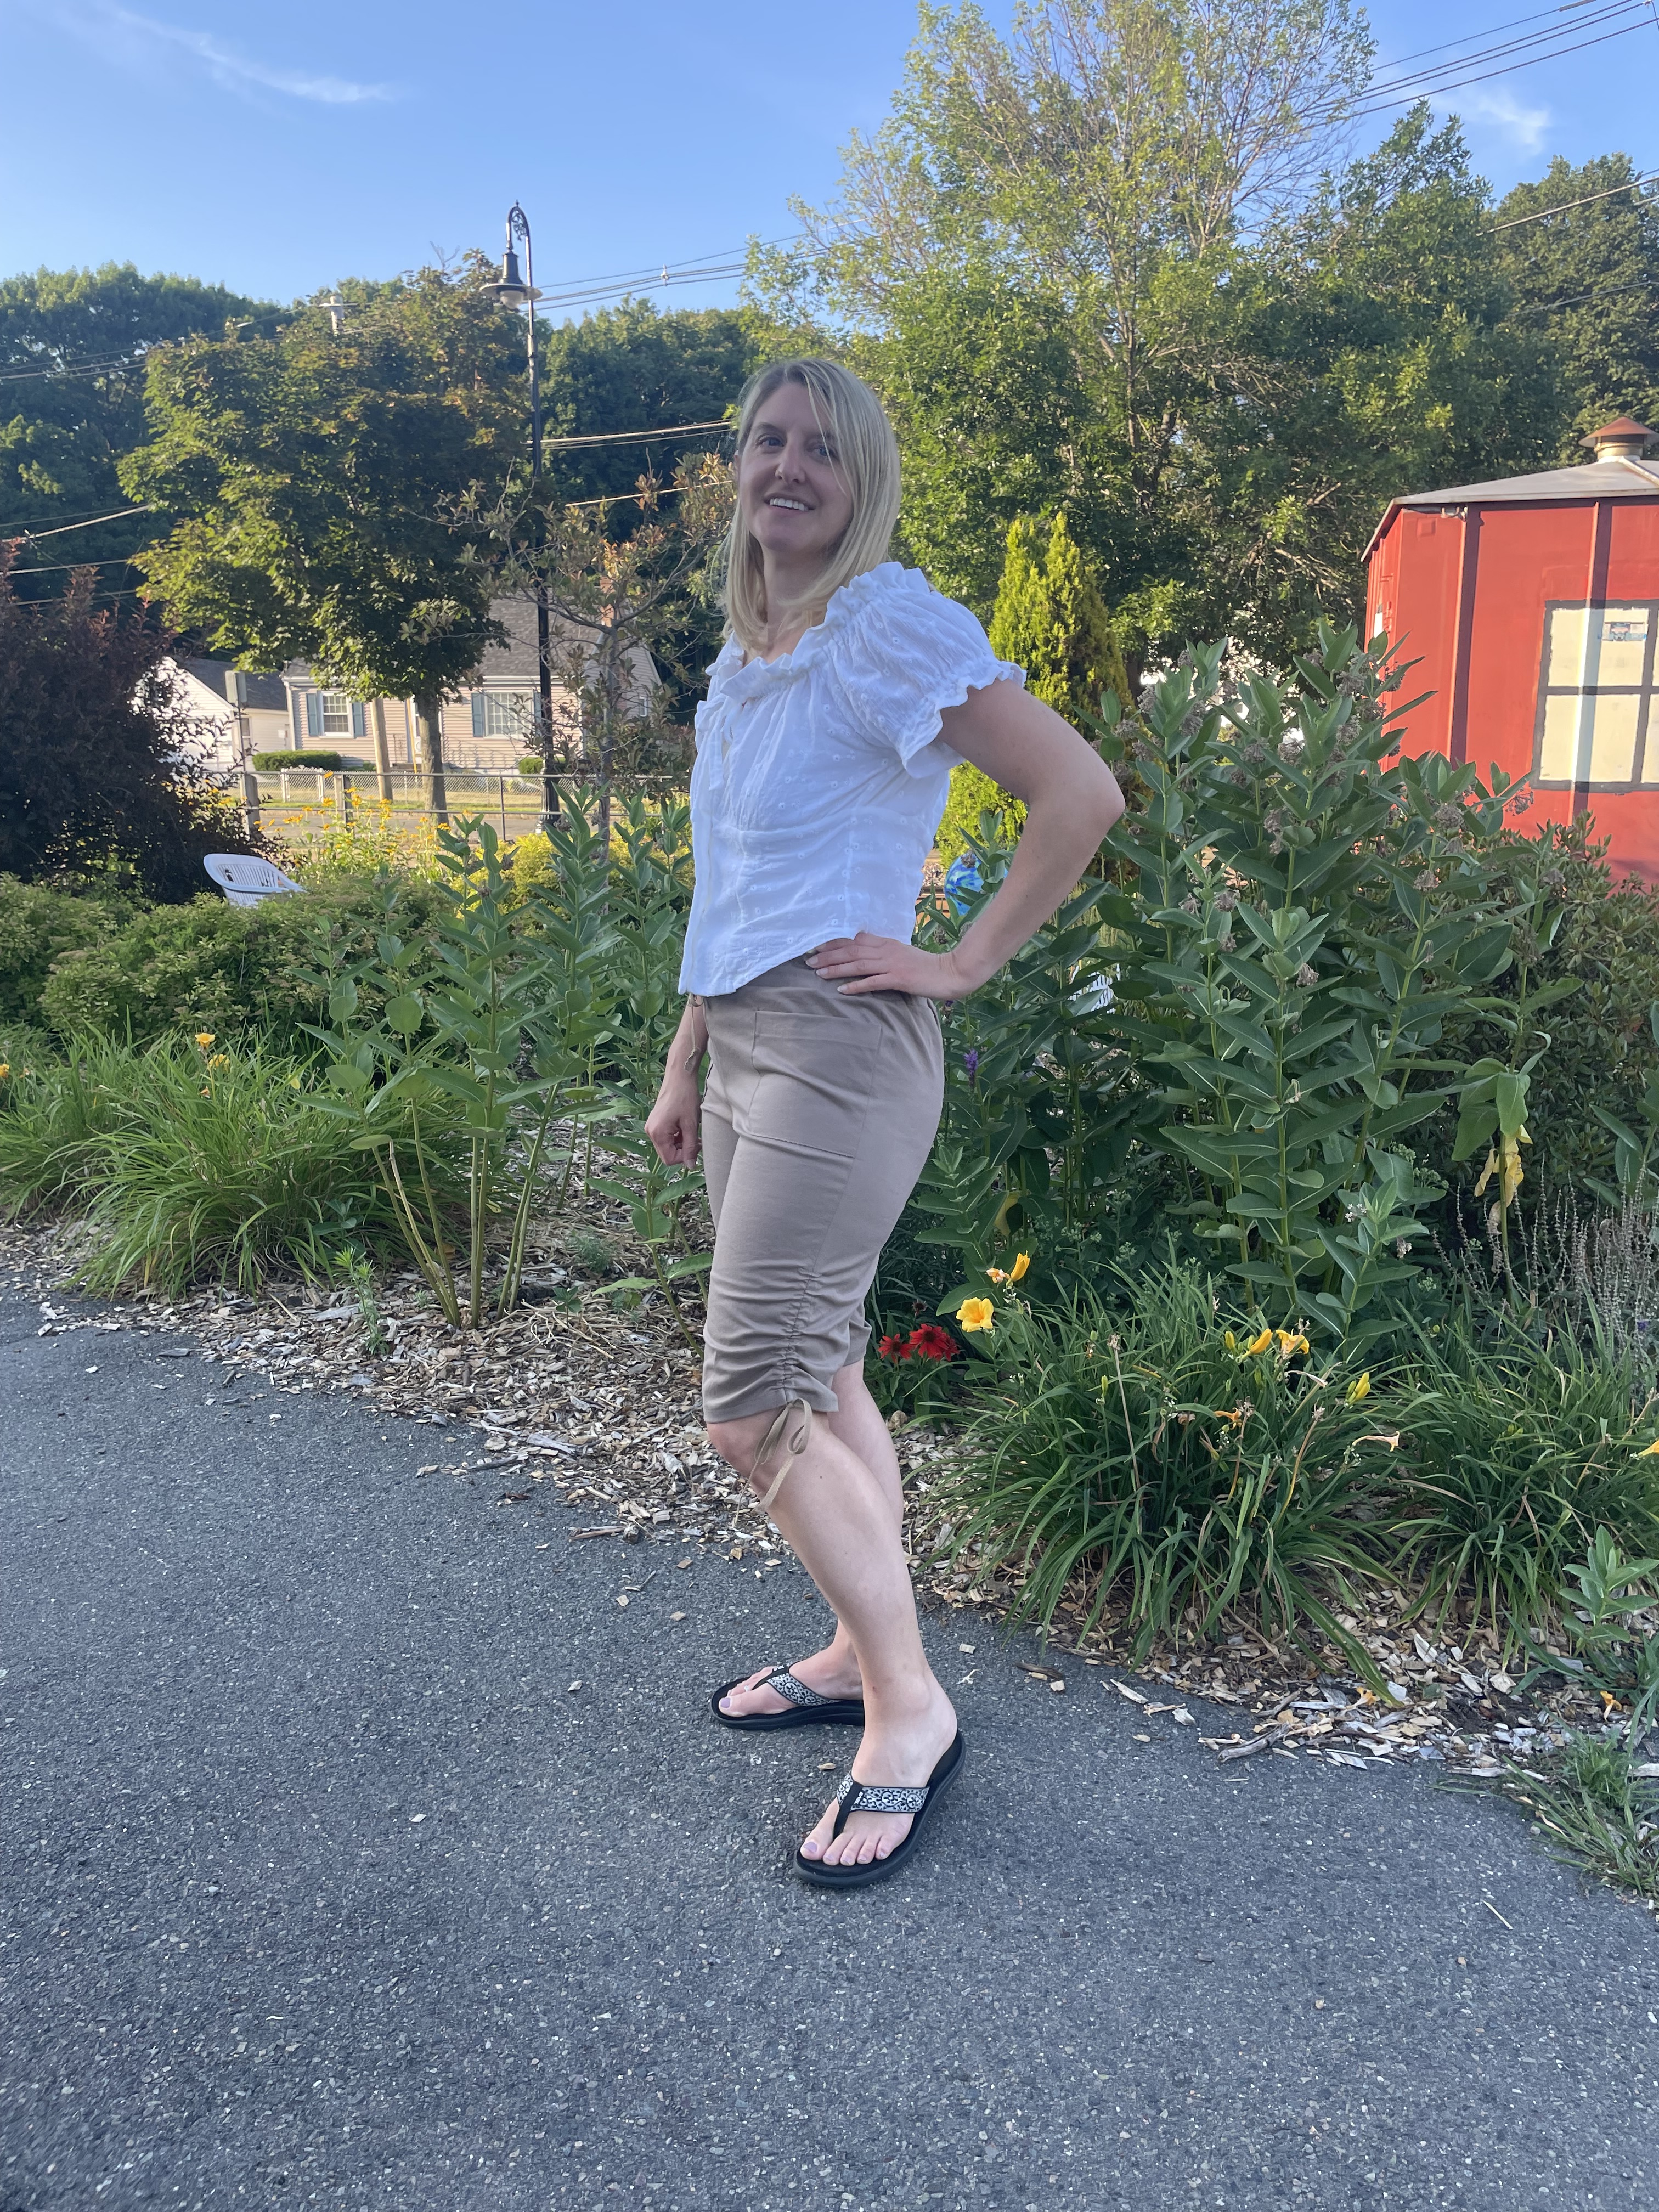
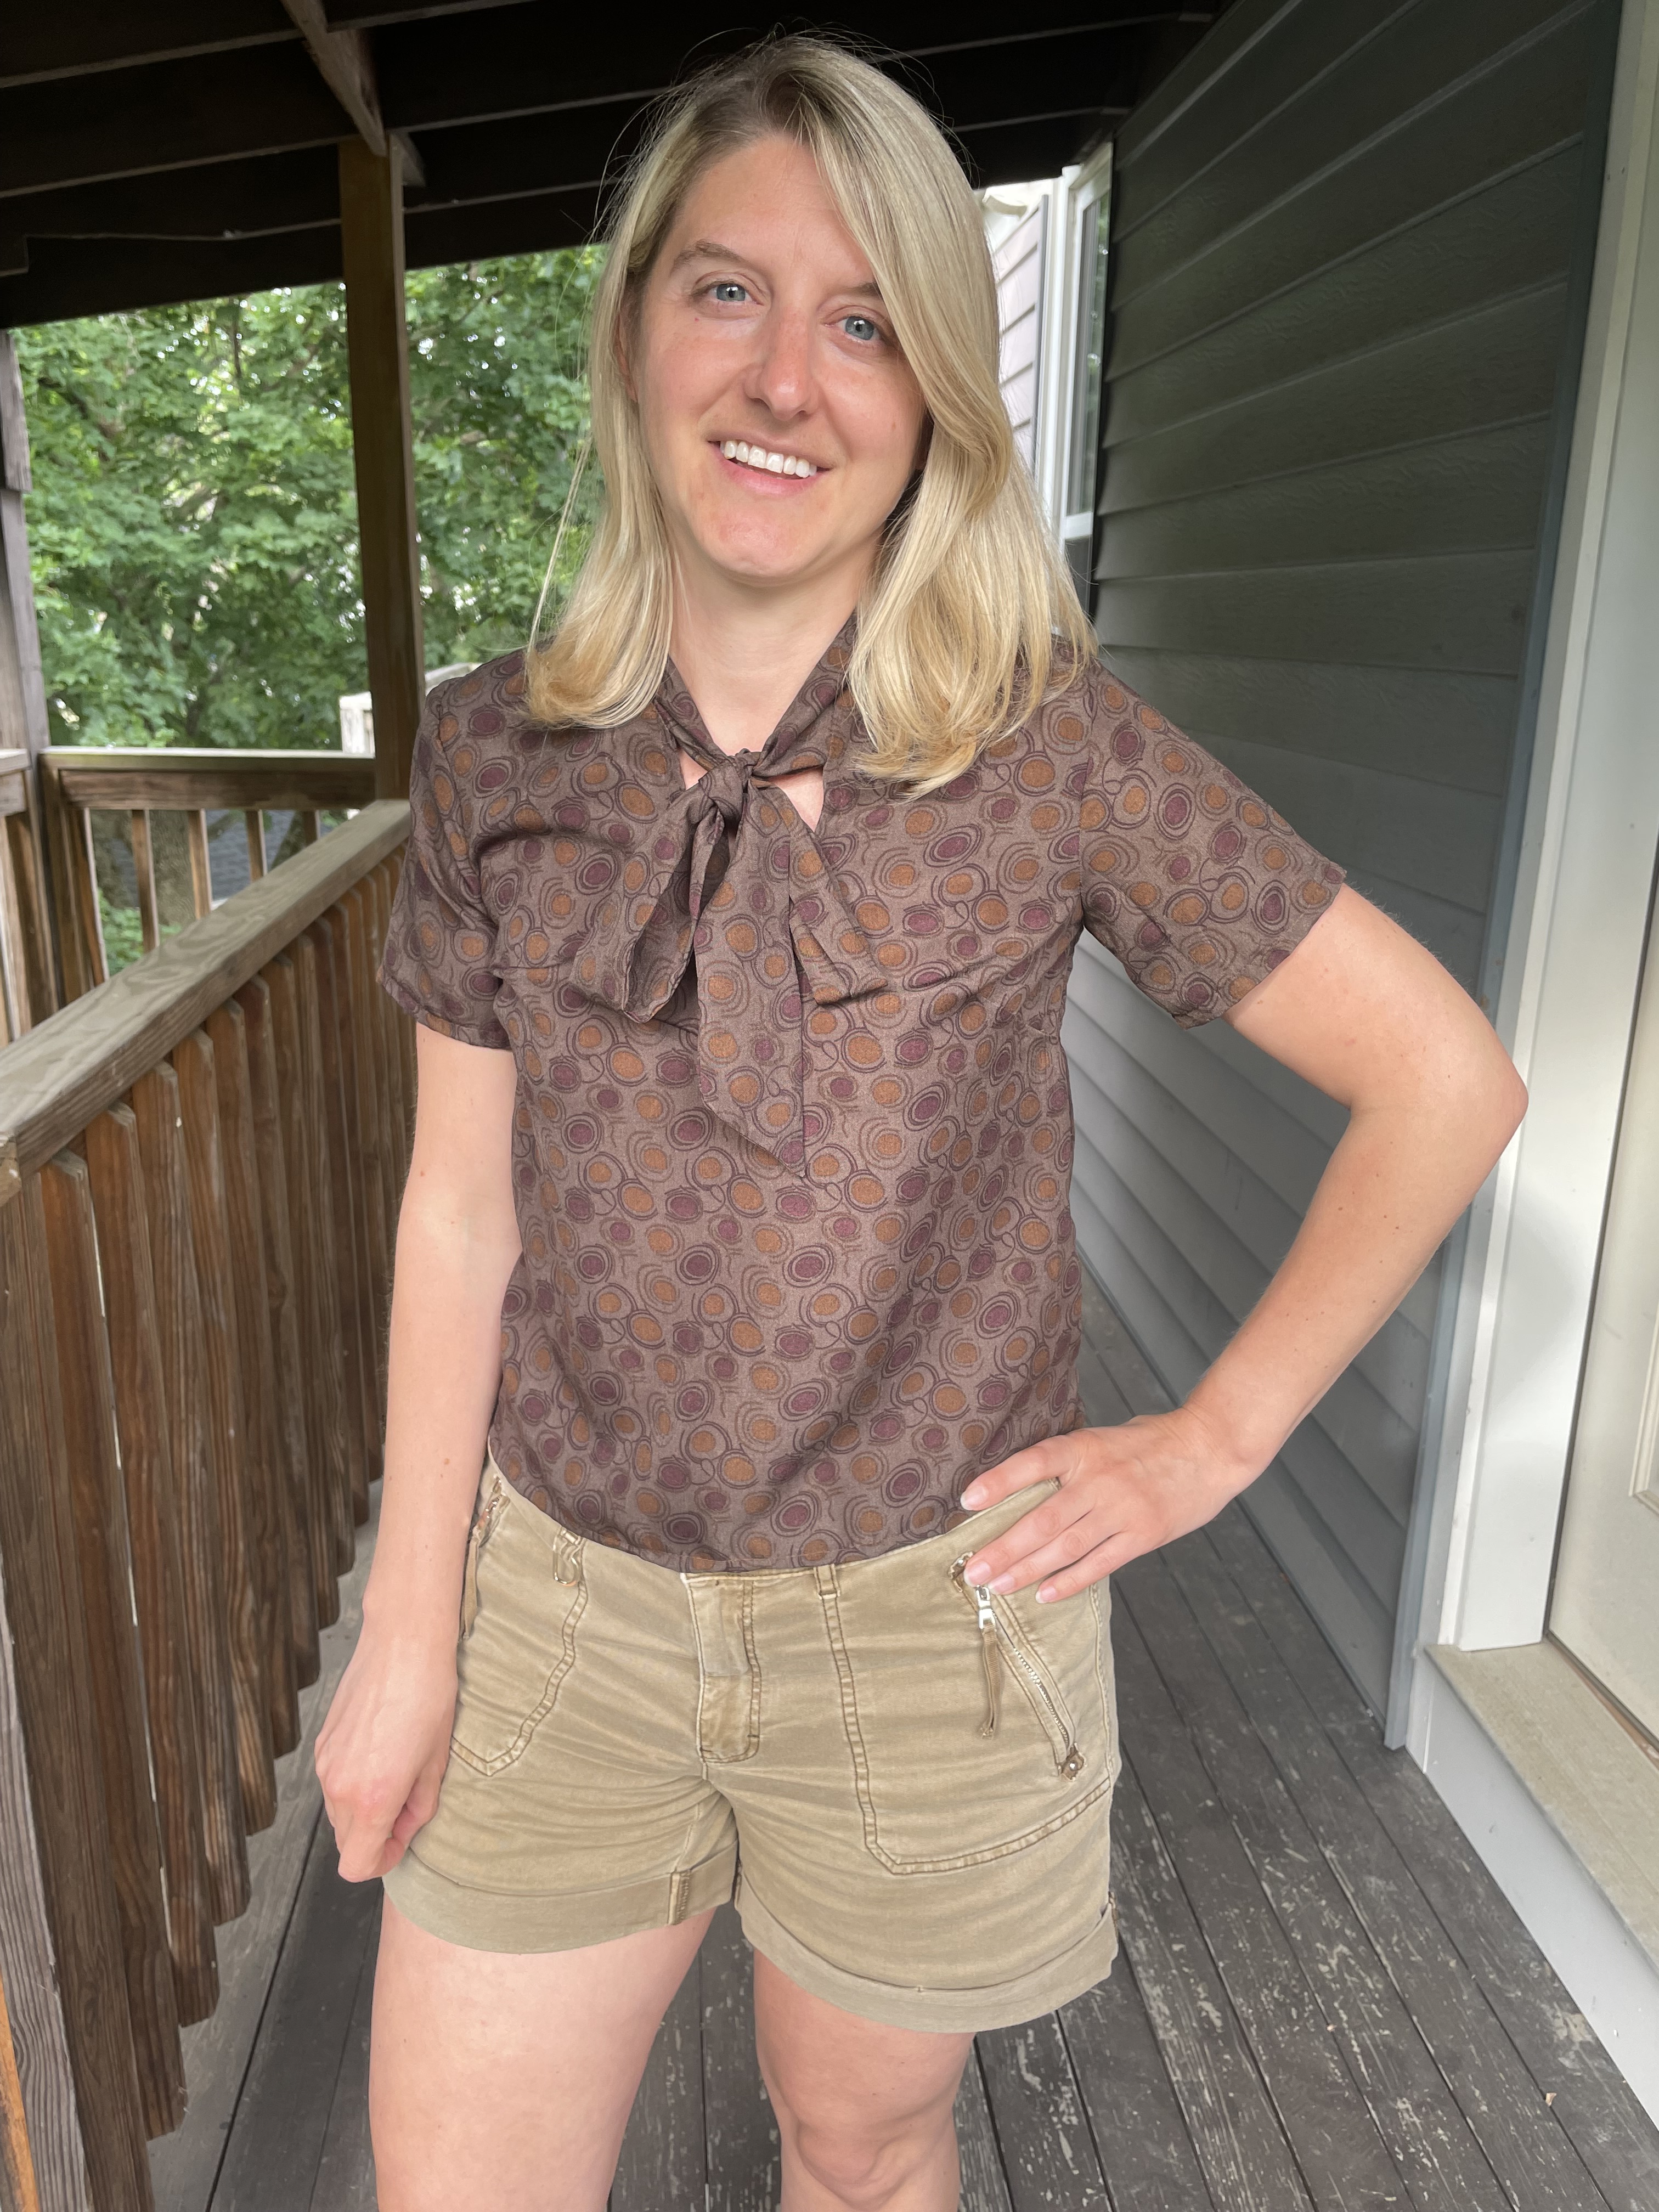
Pattern: Simplicity 2414

It’s time for another wardrobe builder and this time it’s for capri or three-quarter pants. I really like this style of shorter pants with the cinches up the side as I have a pair I purchased that I like to do light hiking in. The only problem with this pattern is that view C is technically shorts, even though they don’t look like it in the drawing. I ended up lengthening these a bit so they were more like capris, although the length is still on the shorter side. As is, they were a bit long for actual shorts anyways.

The pattern promises you can make these in an hour. I’m not sure I am that skilled – I mean cutting these out alone takes over a half hour including set up. However they did sew up fairly fast as I was able to sneak away on lunch breaks and after work to get these done.

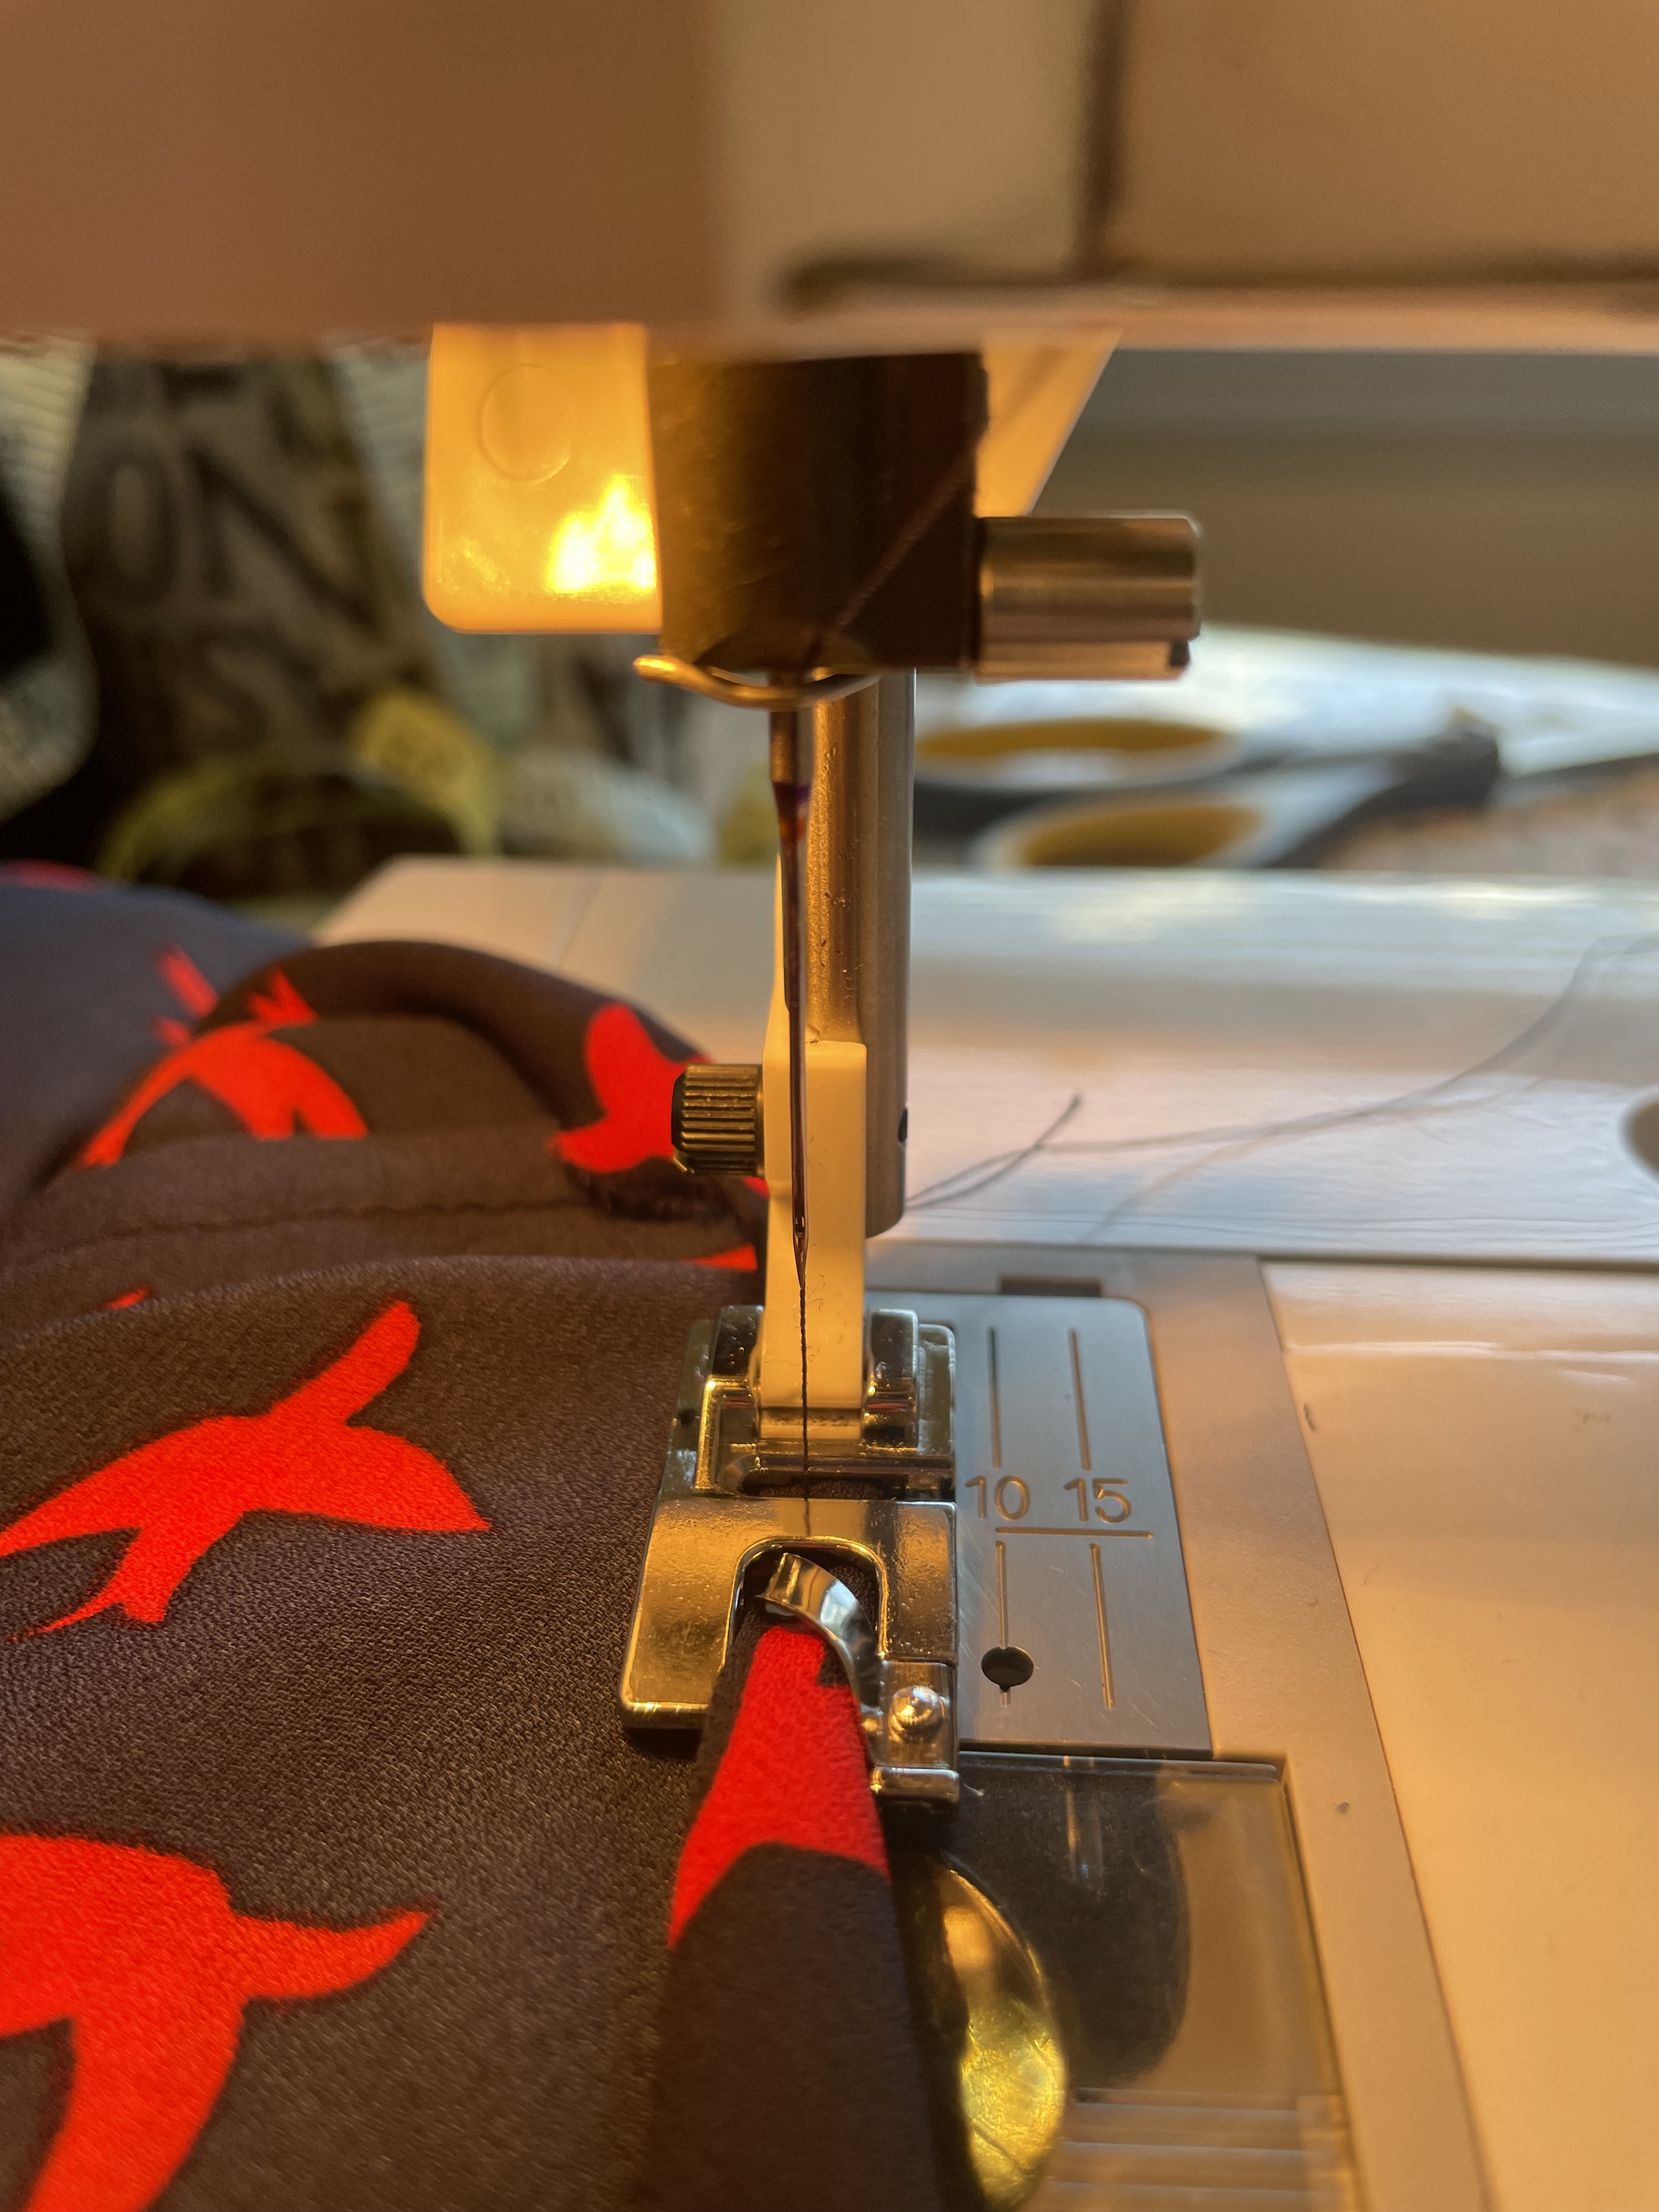
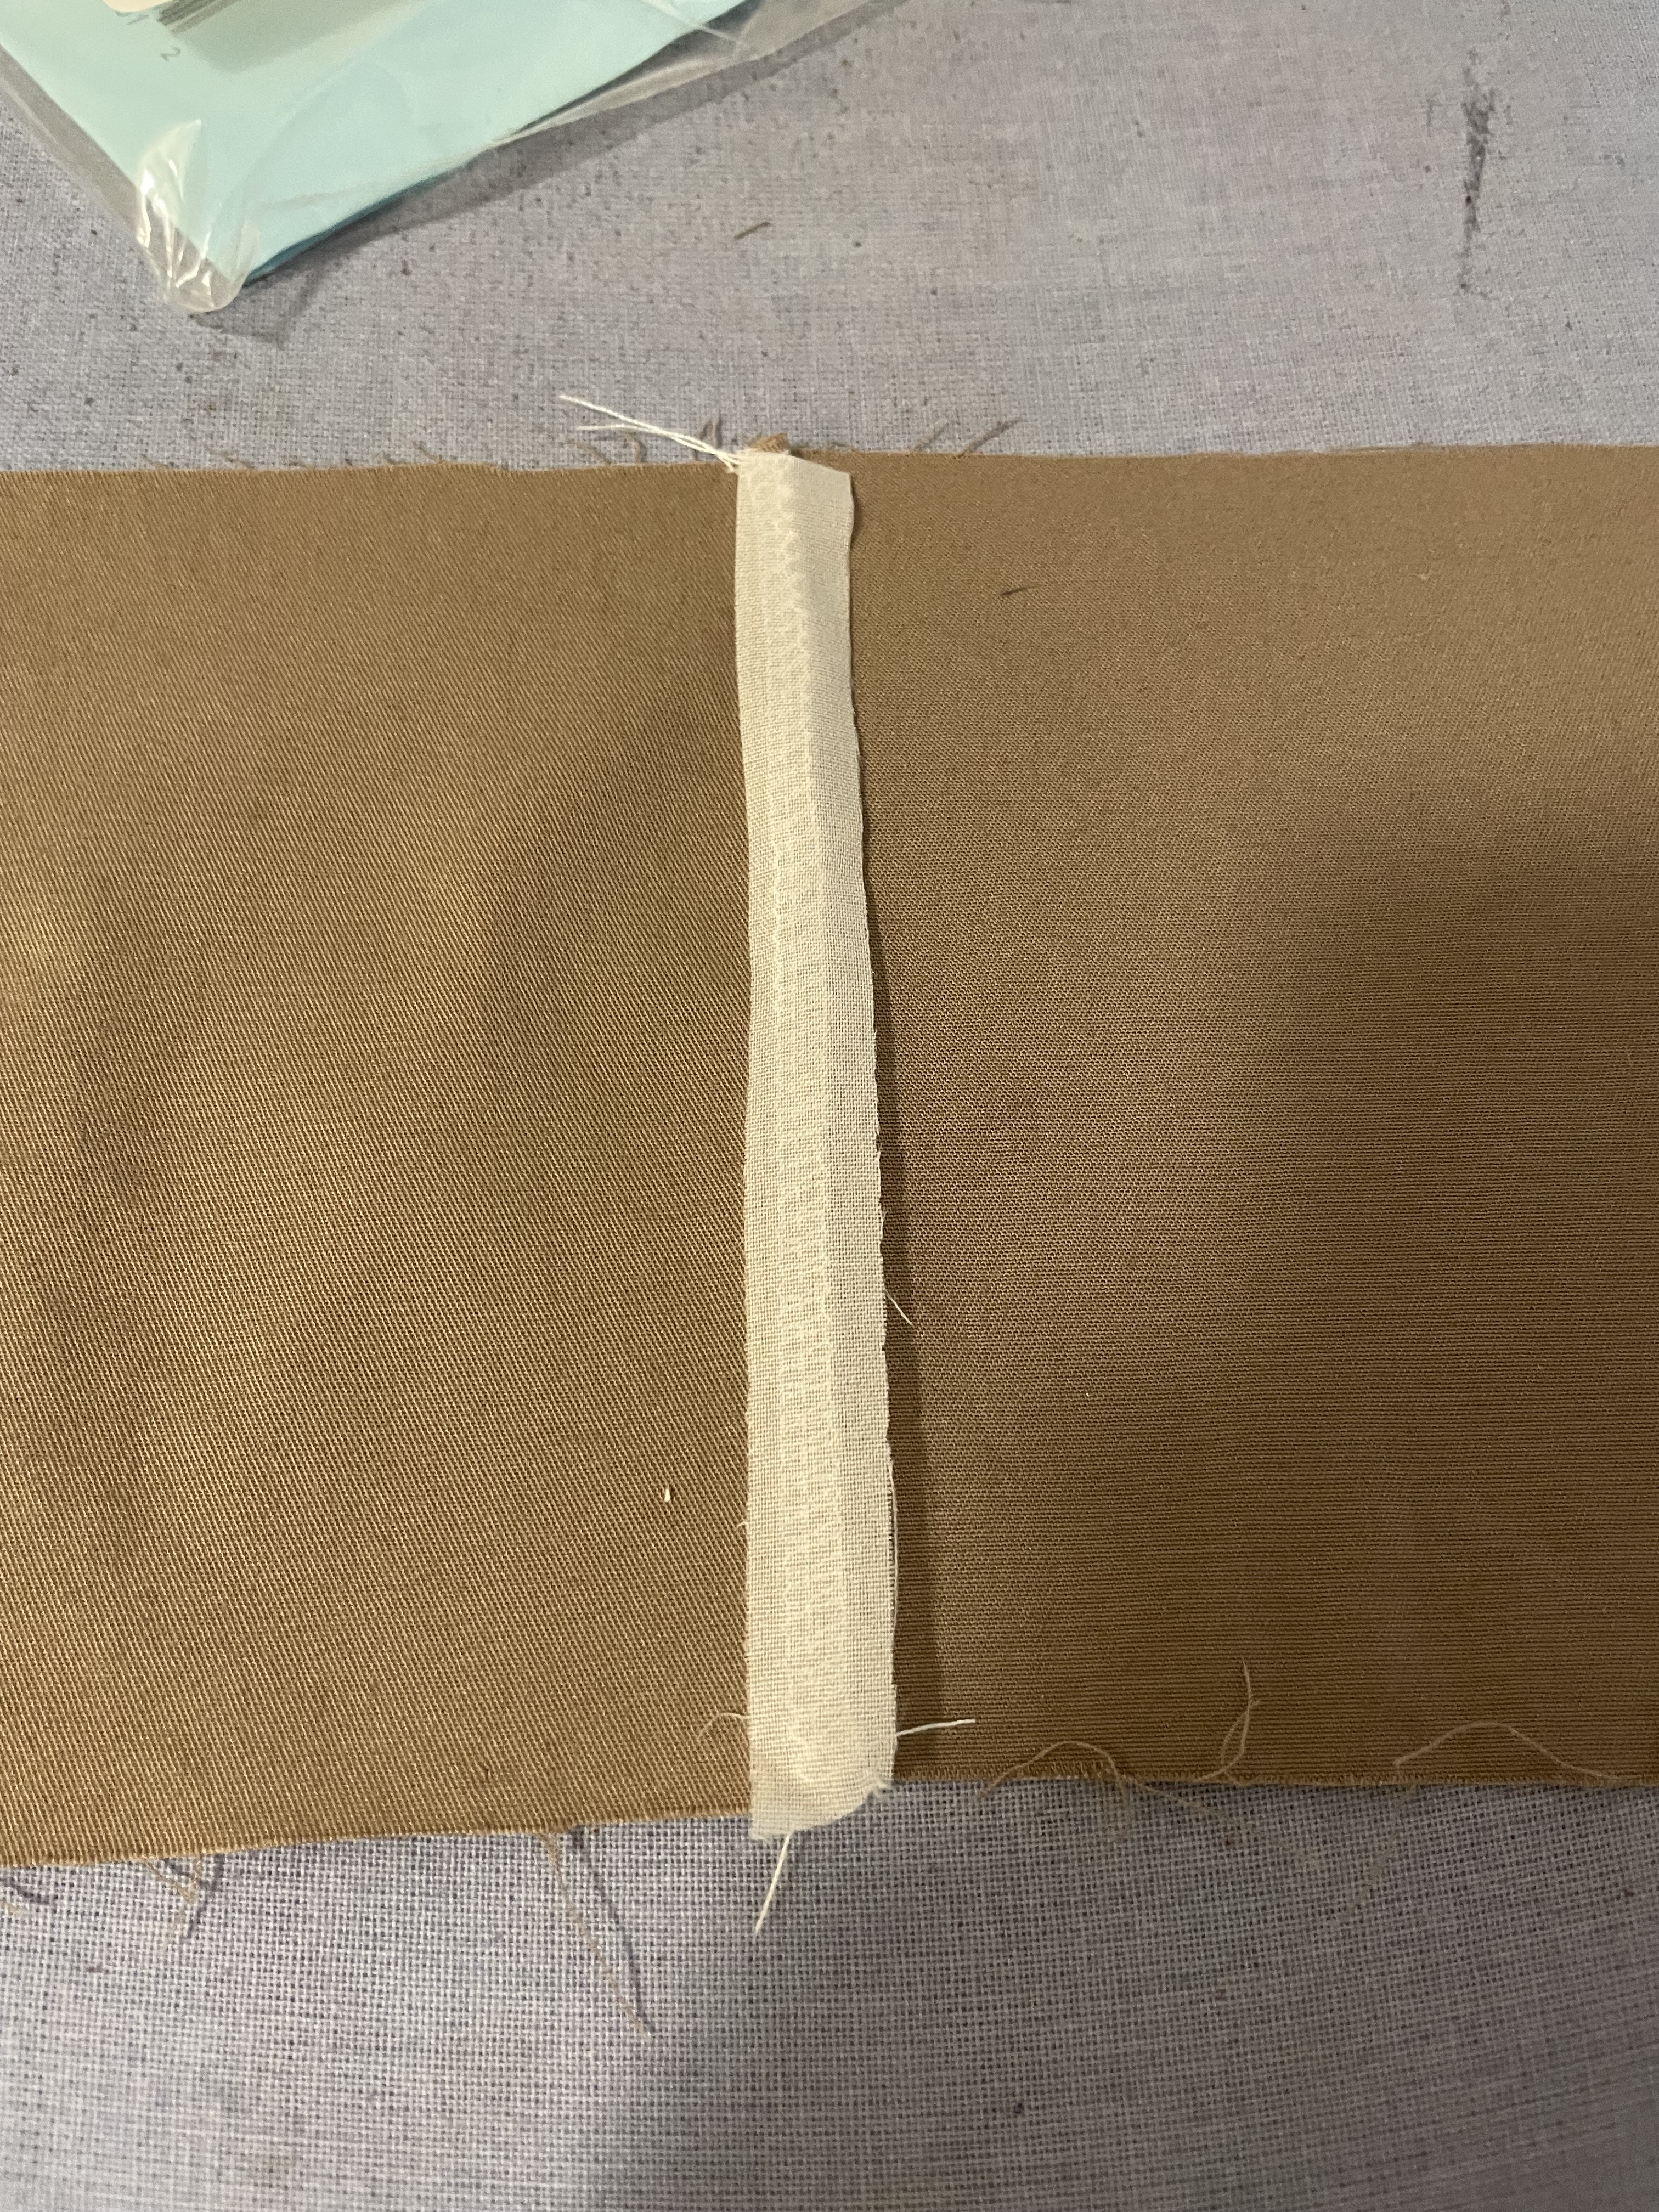
One of the things that tends to frustrate me about the Big 4 patterns, is that I sometimes come across directions that don’t make sense to me at first glance. On this pattern, it was telling me to keep the twill tape from getting stuck in the seam allowances when it’s inserted (into the waistband), use fusible web or machine basting to anchor “them” to garment within the casing area. It seems obvious now, but I was confused by why I would need to anchor the twill tape by basting it. Then I realized after re-reading the awkward sentence, the twill tape could get caught if I had sewed the waistband up with a regular unfinished seam. Since I had used a serger, I didn’t have giant seam allowances, but I did decide to iron some stay tape so the seam stayed flat. This would hopefully allow a smoother ride for my twill tape drawstring, around the waist.

Stuck this over the serged seam so it would lay flat when threading my drawstring around the waist

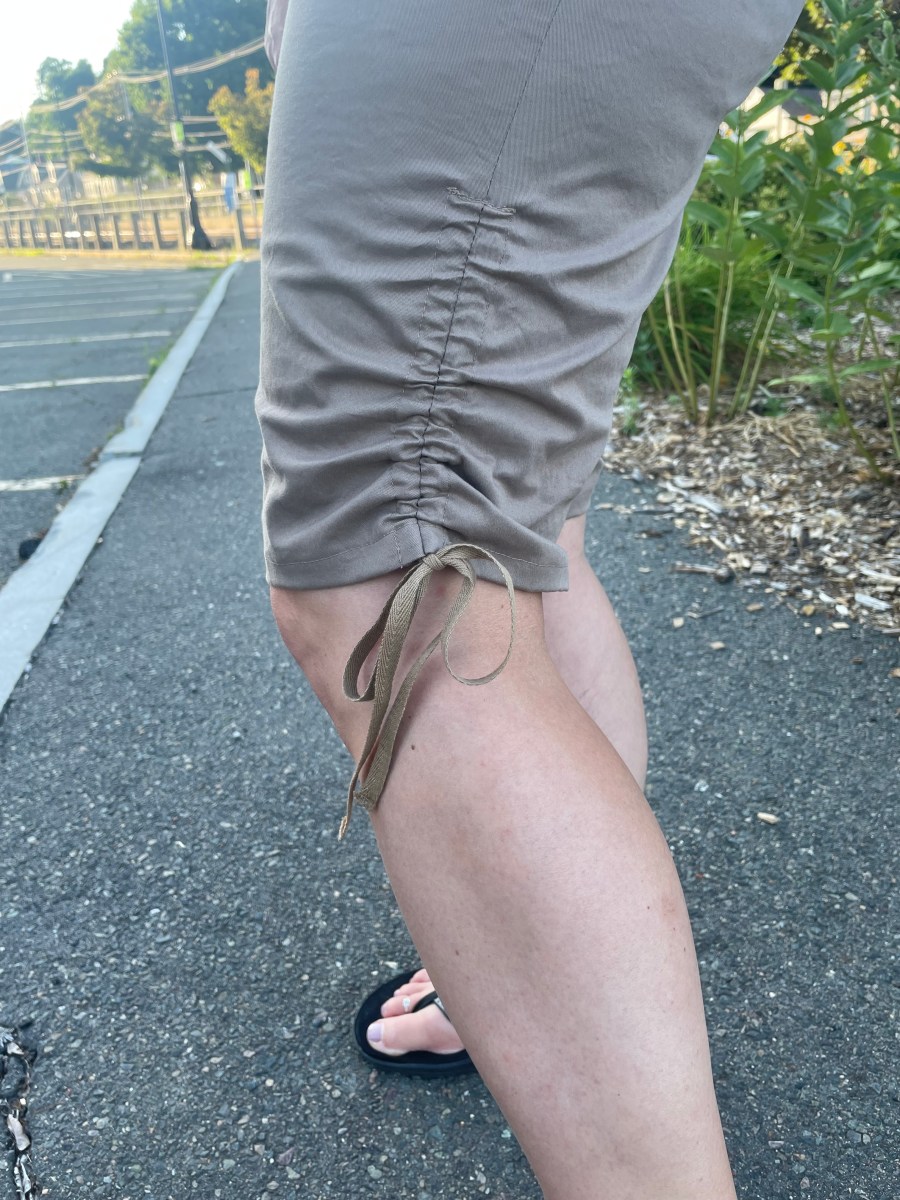
Another issue I had was making the casing on the side of the legs. The drawing made it look like I would sew a box for a casing before I inserted the twill tape with a safety pin. With the top of the casing sewn up, I had no way of removing the safety pin at the top so I could sew the twill tape in place. I finally had to undo the stitching to get the tape to come up to the top edge and then I sewed it in place to close up the casing. I’m not sure why this wasn’t described this way and the drawing seemed to show sewing this casing first. I’m baffled to how this would work, doing it this way.

This was a good first attempt with some practice fabric. Finding matching twill tape will probably be the biggest difficulty in making these again, as it was hard to even find a normal beige for these. If I do remake these, I think I would make the waist one size smaller and maybe do some adjustment on the crotch seam. I think the chances are good I will re-make these, maybe even a different view. These simple pants seem to have a lot of versatility and were very easy to make.

Take Two for 2022: Blouses from nightmare fabric

Patterns:

  • Butterick B6684
  • Itch to Stitch Mila Shirt

One thing I’ve been wanting to make is a sheer, flowy blouse. I have a few in my wardrobe that I’ve purchased over the years, but I’ve never attempted to make one. A few years ago, I purchased two different colored sheer crepe fabrics, both with a bird print on it. Looking at them, I envisioned a button down blouse with a sleeve tab, so I could roll up the sleeves. It took me a long time to find a pattern like this that I could use with a lightweight fabric. Or at least I wasn’t sure I could use a regular shirt pattern with material like this. I finally decided to go with the Itch to Stitch Mila shirt and started with my navy blue version of the fabric with red birds.

But first, I thought a quick project with some discount fabric would be an easy way to add a nice back-to-school-like blouse to my wardrobe. I’m not sure what type of fabric it was, because I got it off a discount table at Sewfisticated fabrics. I’m guessing it’s some sort of synthetic or polyester. It’s not as sheer as the crepe, but it had a slight flowy quality to it. And it was a bit slide-y when trying to cut it. I decided it would make a nice top with a neck bow, so I opted to use the Butterick pattern #6684. The top would be finished with french seams, but I was a little nervous about the fabric so I opted for a sharper needle. The results were not too bad, but the sleeves are a little tight and moving my arms forward in this top is quite a challenge. I’m guessing the french seams made this top a little tighter, so if I make this again, I will have to compensate on the seam allowances. It’s just so hard for me to use the proper seam allowances with this type of finish as I always seem to need to sew in a bit more to make sure no fabric is poking through the outside.

Since this wasn’t the blouse I was hoping it would be, I prayed I’d have better luck with my bird fabric. The one thing I noticed with that first blouse was sometimes the material would pucker a bit with the stitching. When I tried some practice stitches on the crepe, sometimes the fabric would actually get pulled into my sewing machine. I knew I needed some sort of stabilizer if I was going to make this work.

There were a few options, but I felt the easiest thing to do was to sew with tissue paper. The extra step of setting up the tissue paper under the fabric as I sewed and then tearing it off was annoying and time consuming, but definitely worth it. The stitches were definitely more even and the material kept its shape as I was sewing. I used french seams here too, which also added time to this project, but I like the end result. The other issue I had with this fabric was that it would not press at all, no matter how hot the iron was or how much steam I used. I’m guessing the fabric is synthetic, just from the feel of it. Since pressing was so much of an issue, I decided to do a rolled hem on the bottom, which required me to buy another foot for my sewing machine. I do think it will prove to be a good investment and I really liked the way it folded the fabric automatically as I sewed. It was difficult learning how to use it on a curved seam like the hem, but surprisingly I didn’t have to unpick and re-sew too much of it. I went pretty slow, trying to make sure the fabric wrapped around the foot correctly as I curved around. I think next time I make this with this type of fabric, I might use my serger to do the rolled hem as this fabric is so tough to control.

My new rolled hem foot
Rolled hem foot in action!

Making a shirt with just a front buttoned placket instead of a full button down was also a good choice for this top. I eventually want to make another one with the off-white crepe bird fabric I got as well, but after this project I definitely needed a break. It might be a few months before I attempt it again. The only other change I would make is to shorten the length a bit. I really like the tabs on the sleeves and would definitely keep these on the next version, even though again, it added more steps to the process.

I’m lucky this blouse fits so much better than the other one I made. It’s not perfect, but definitely close to what I had envisioned when I bought the fabric. I wonder though, is working with nightmare fabric like this worth all the suffering?