Take Two for 2022: One last skirt

Patterns:

  • Juniper Skirt by Mood Fabrics
  • McCalls 6402

Okay, I know it’s already 2023, but I did happen to finish my last skirt just under the wire on December 31st, so I’m counting this as part of 2022.

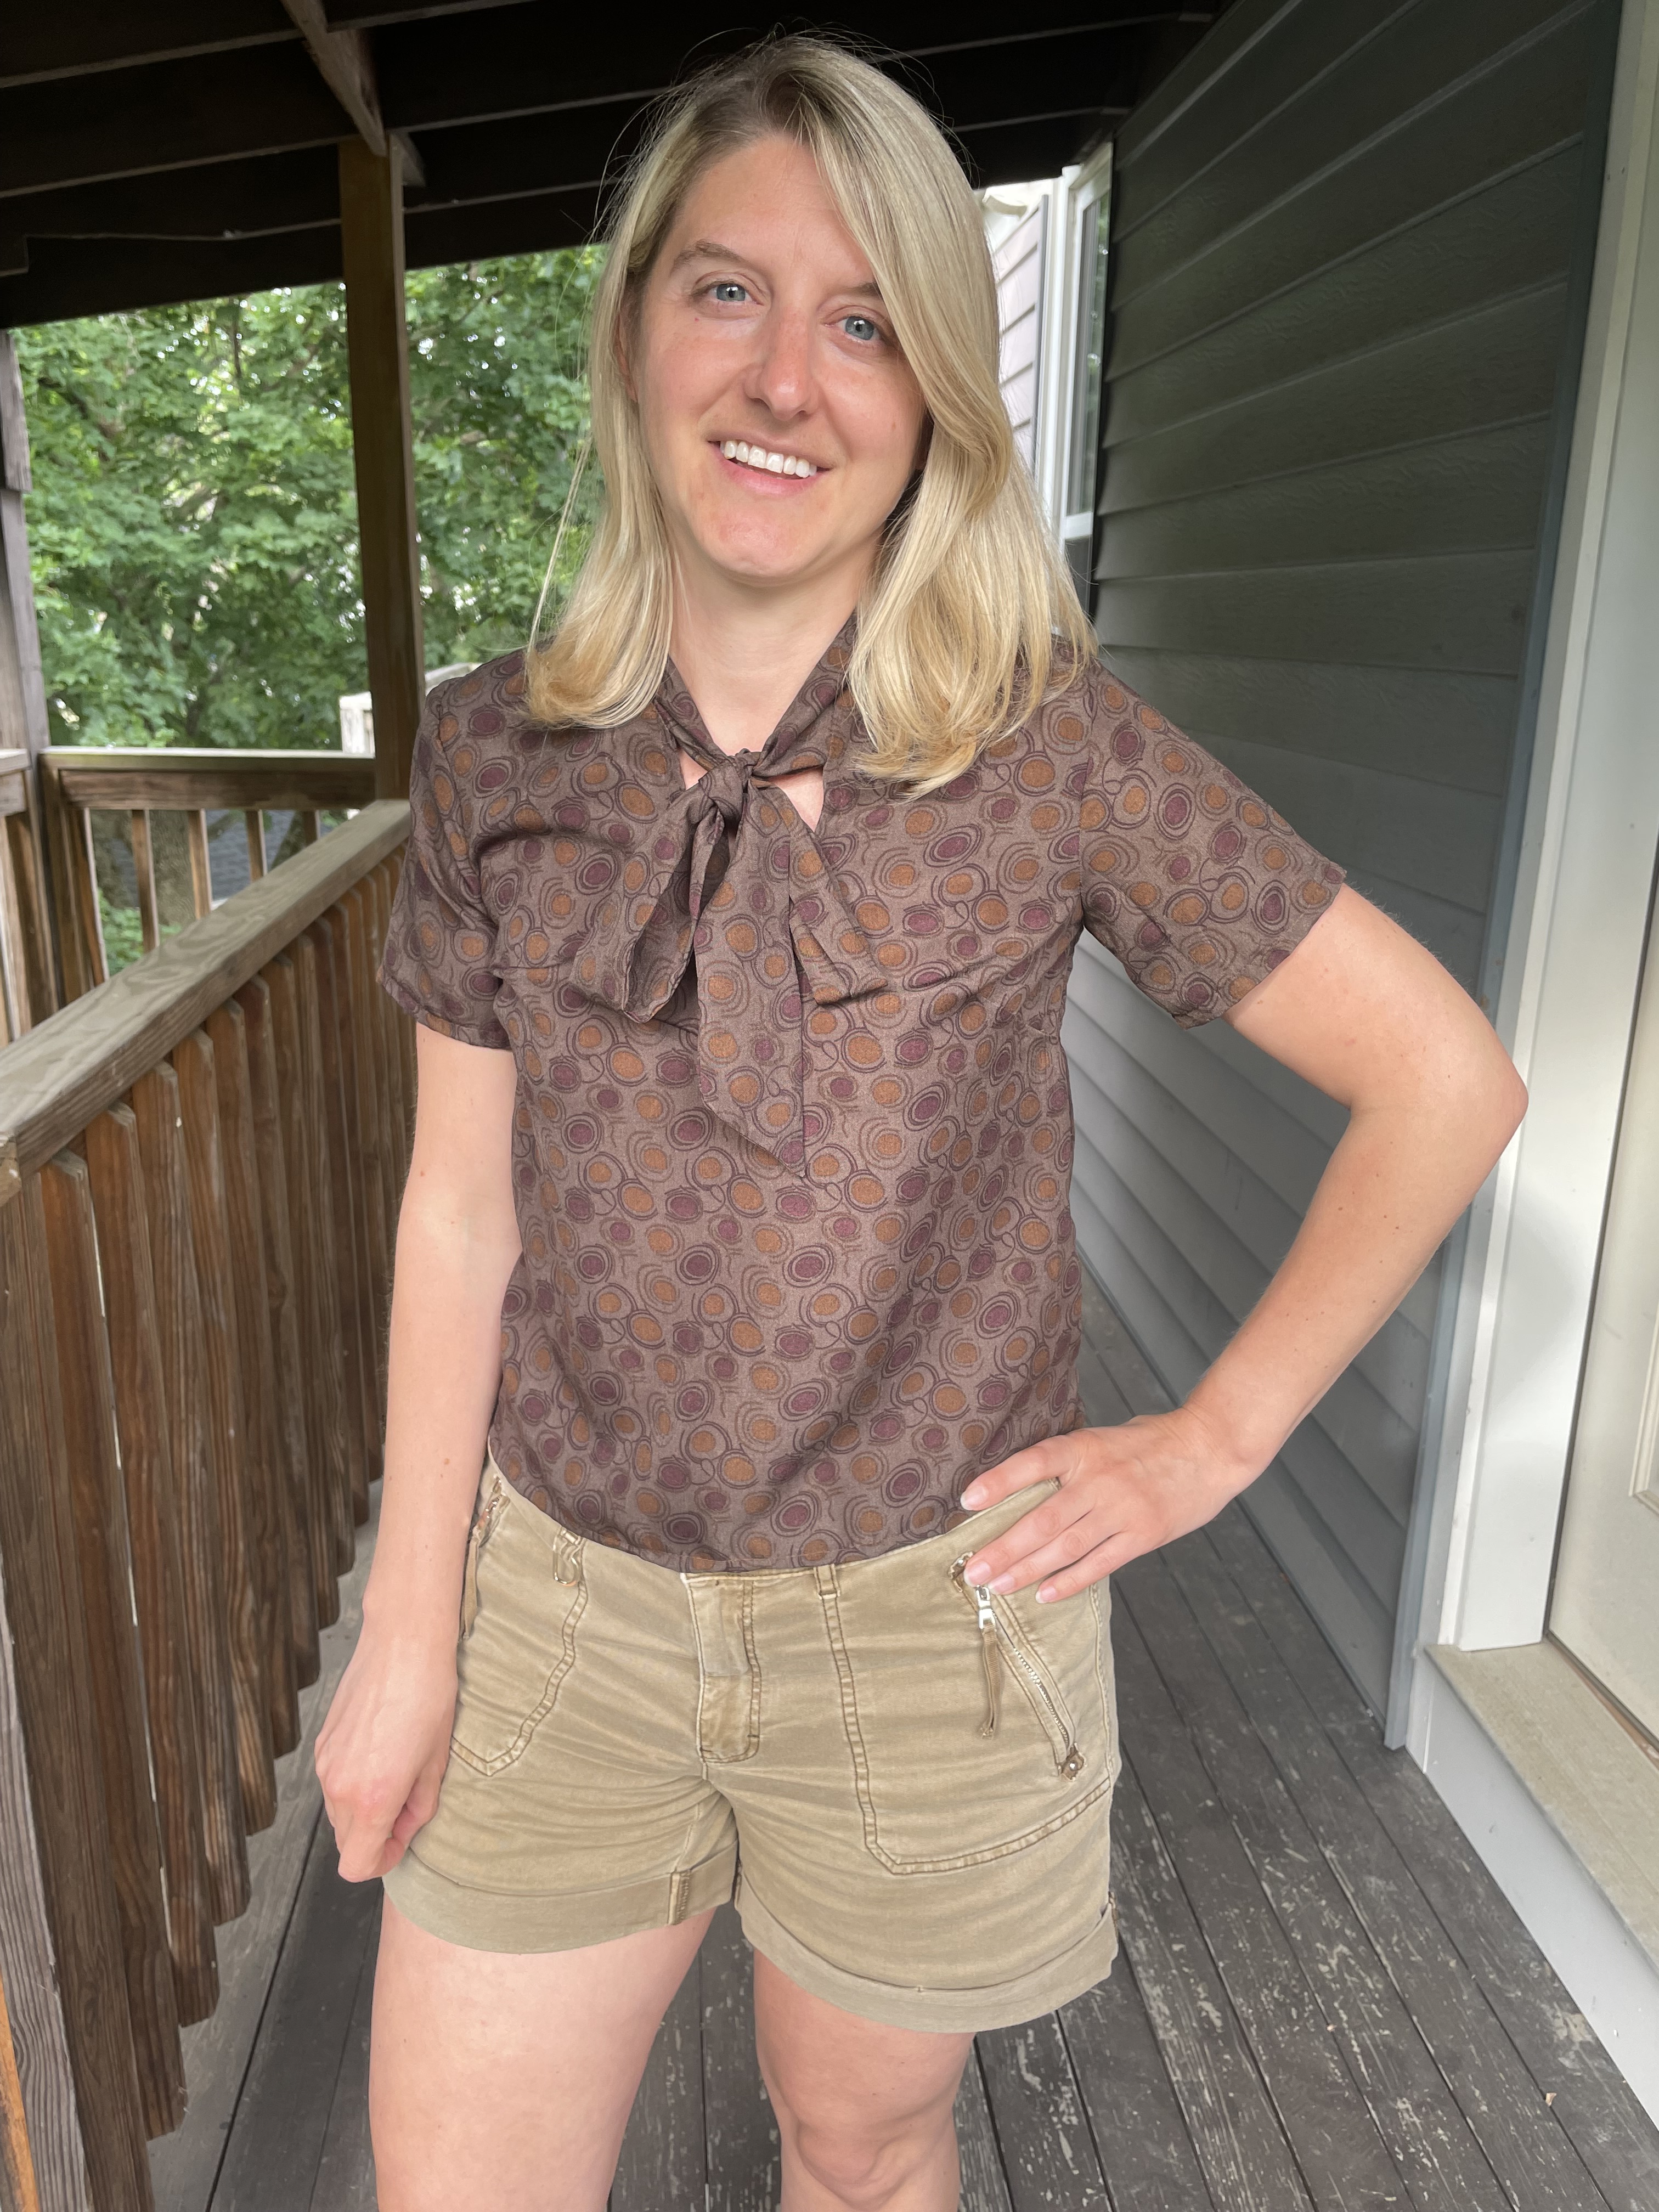
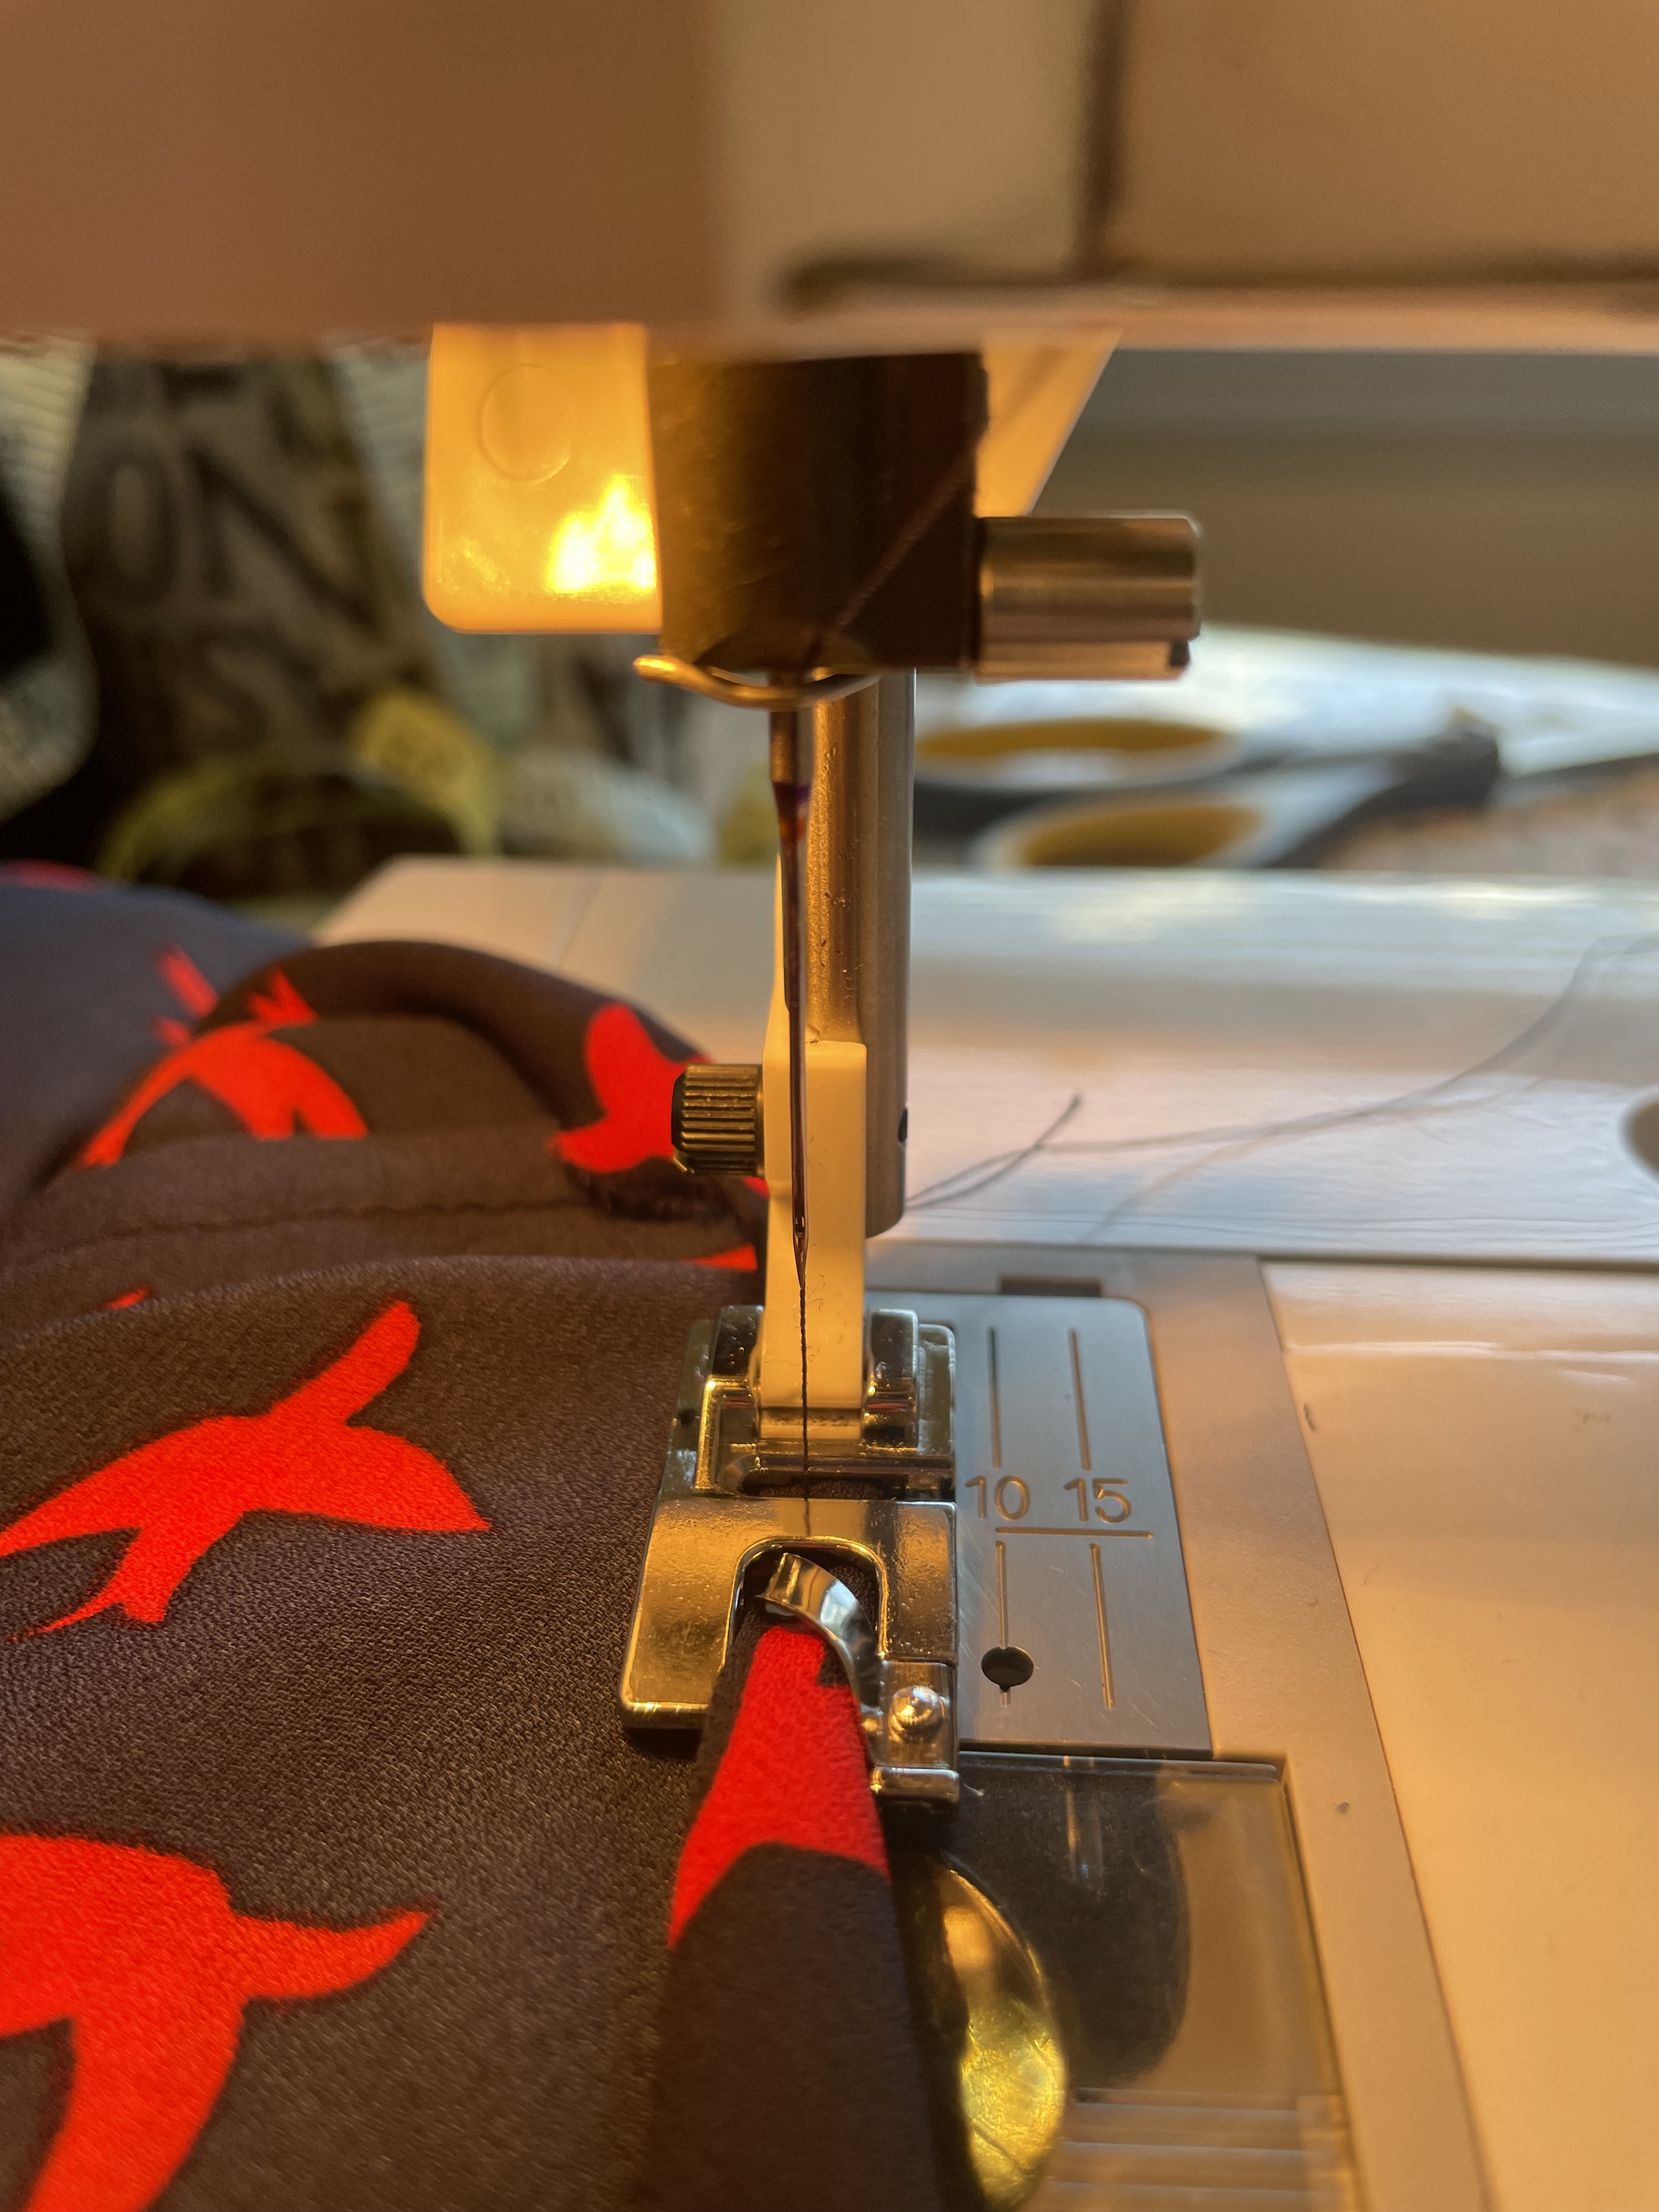
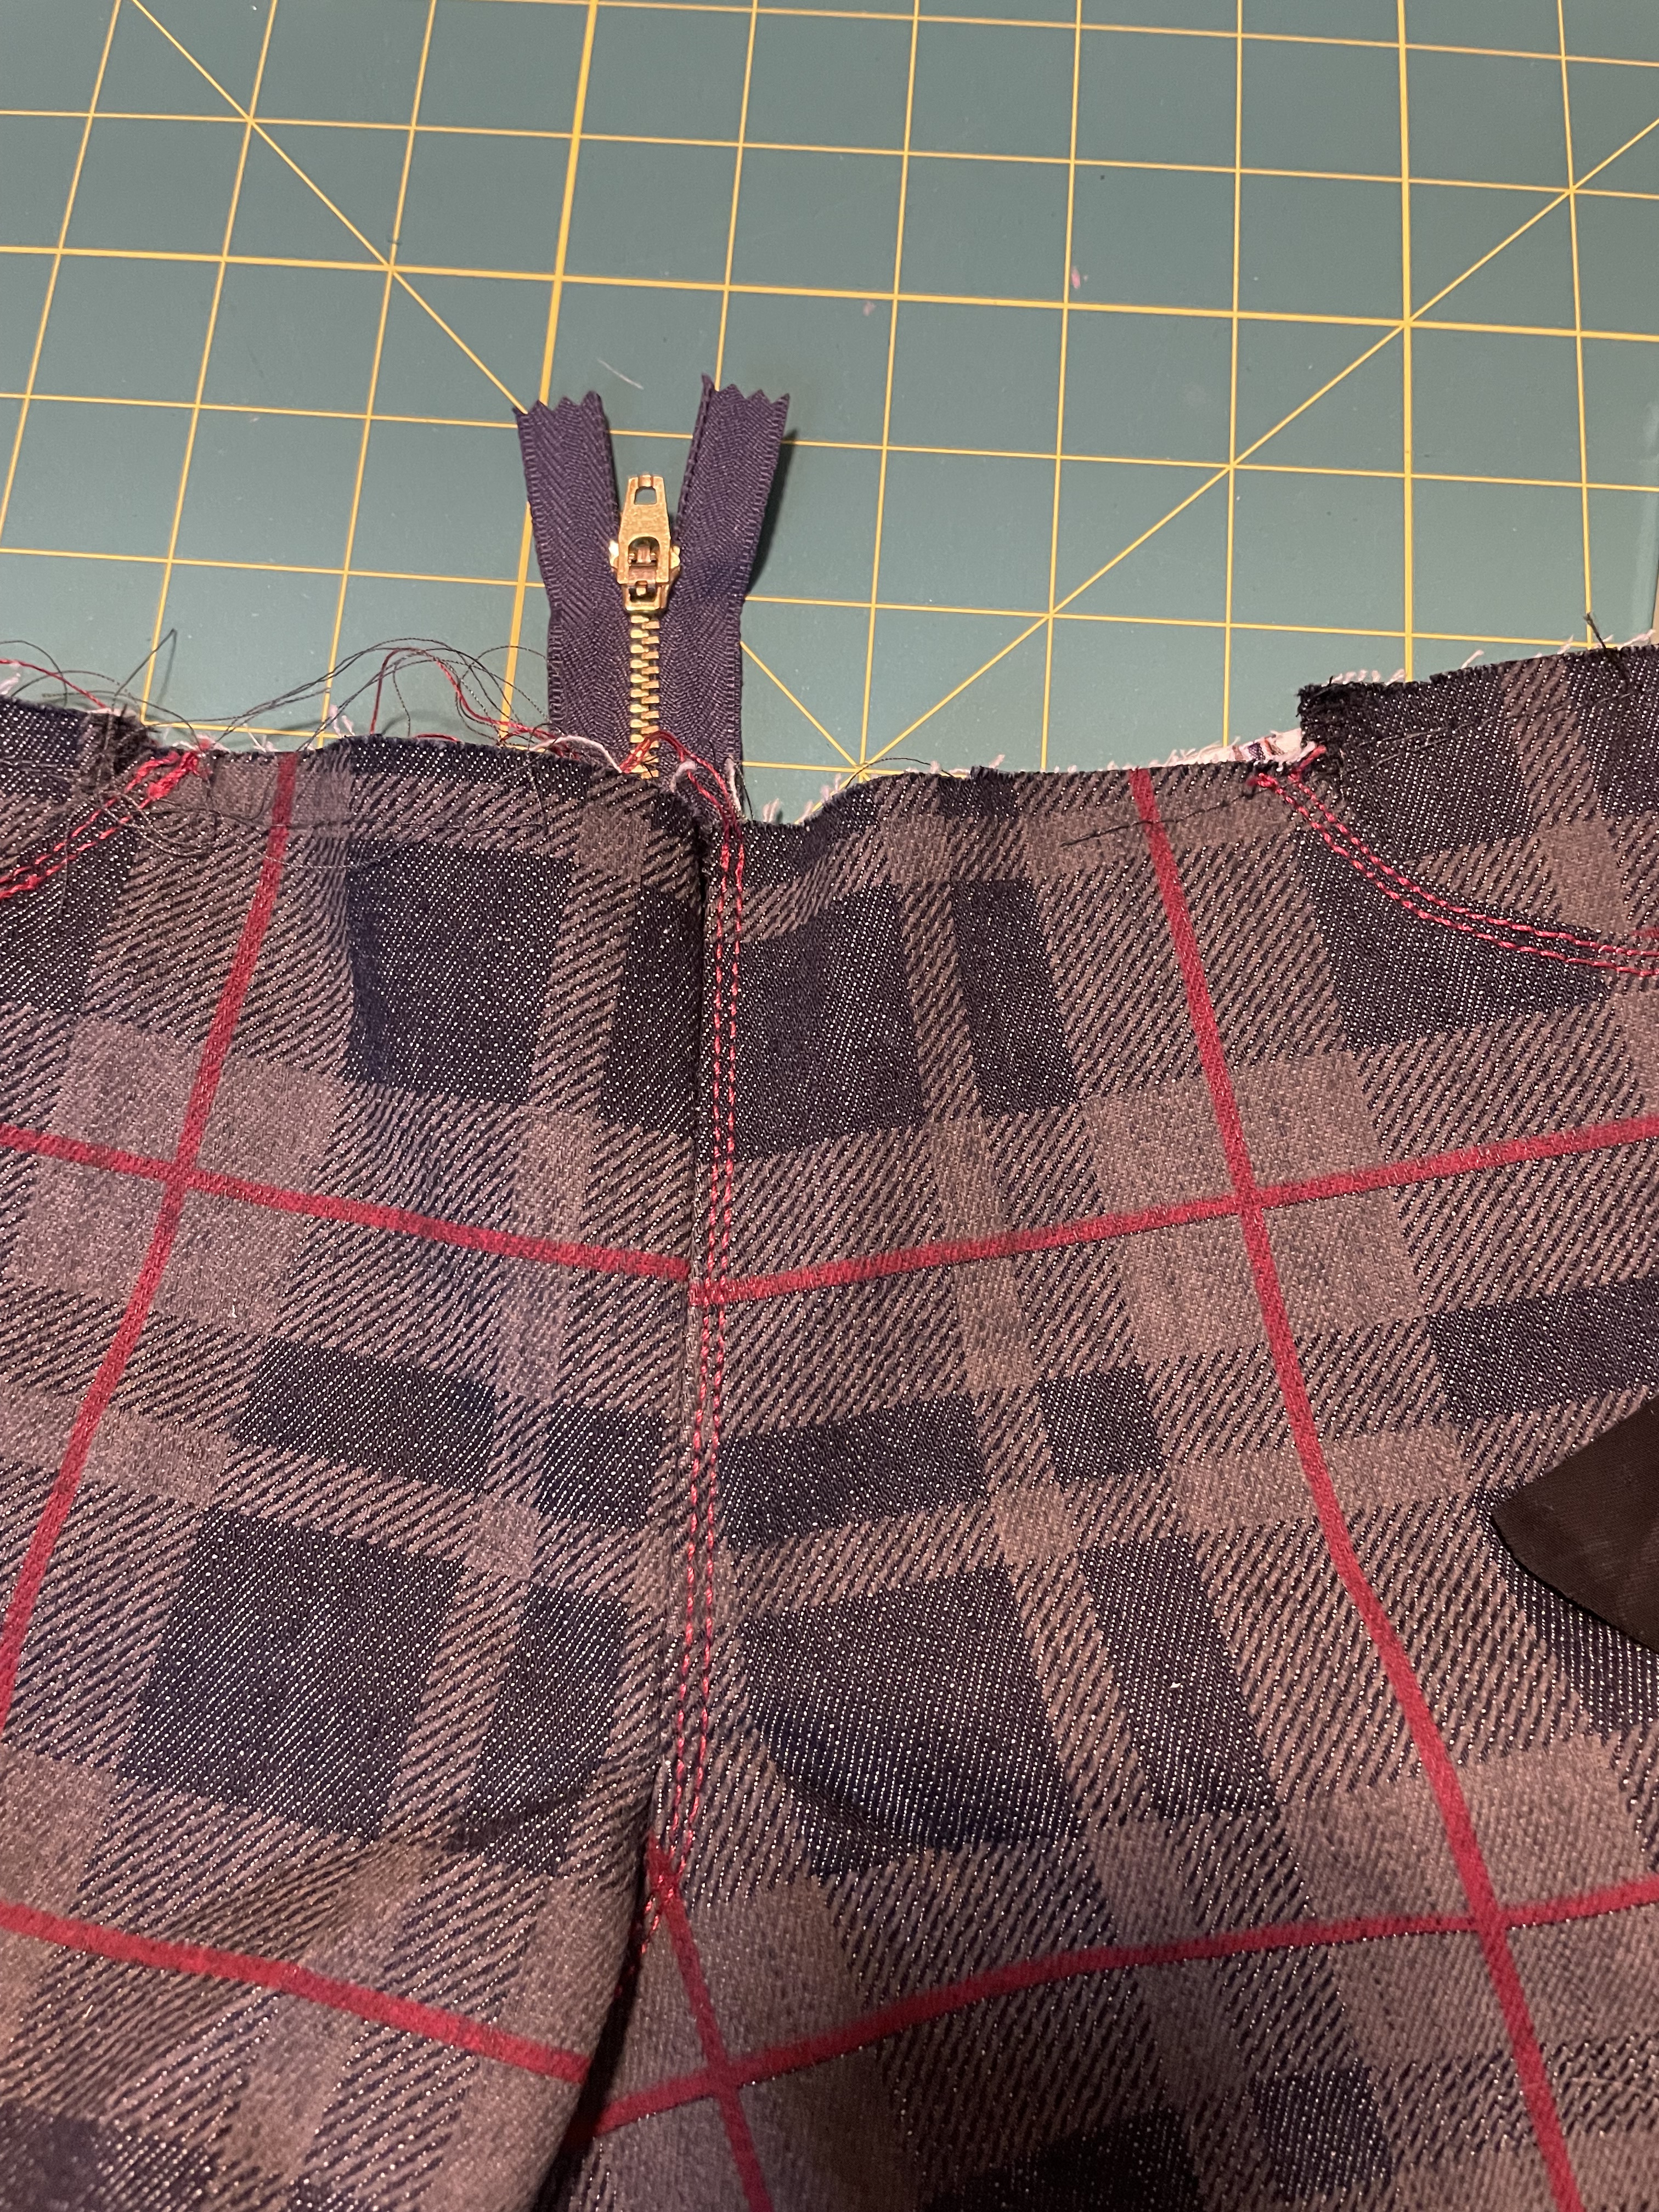
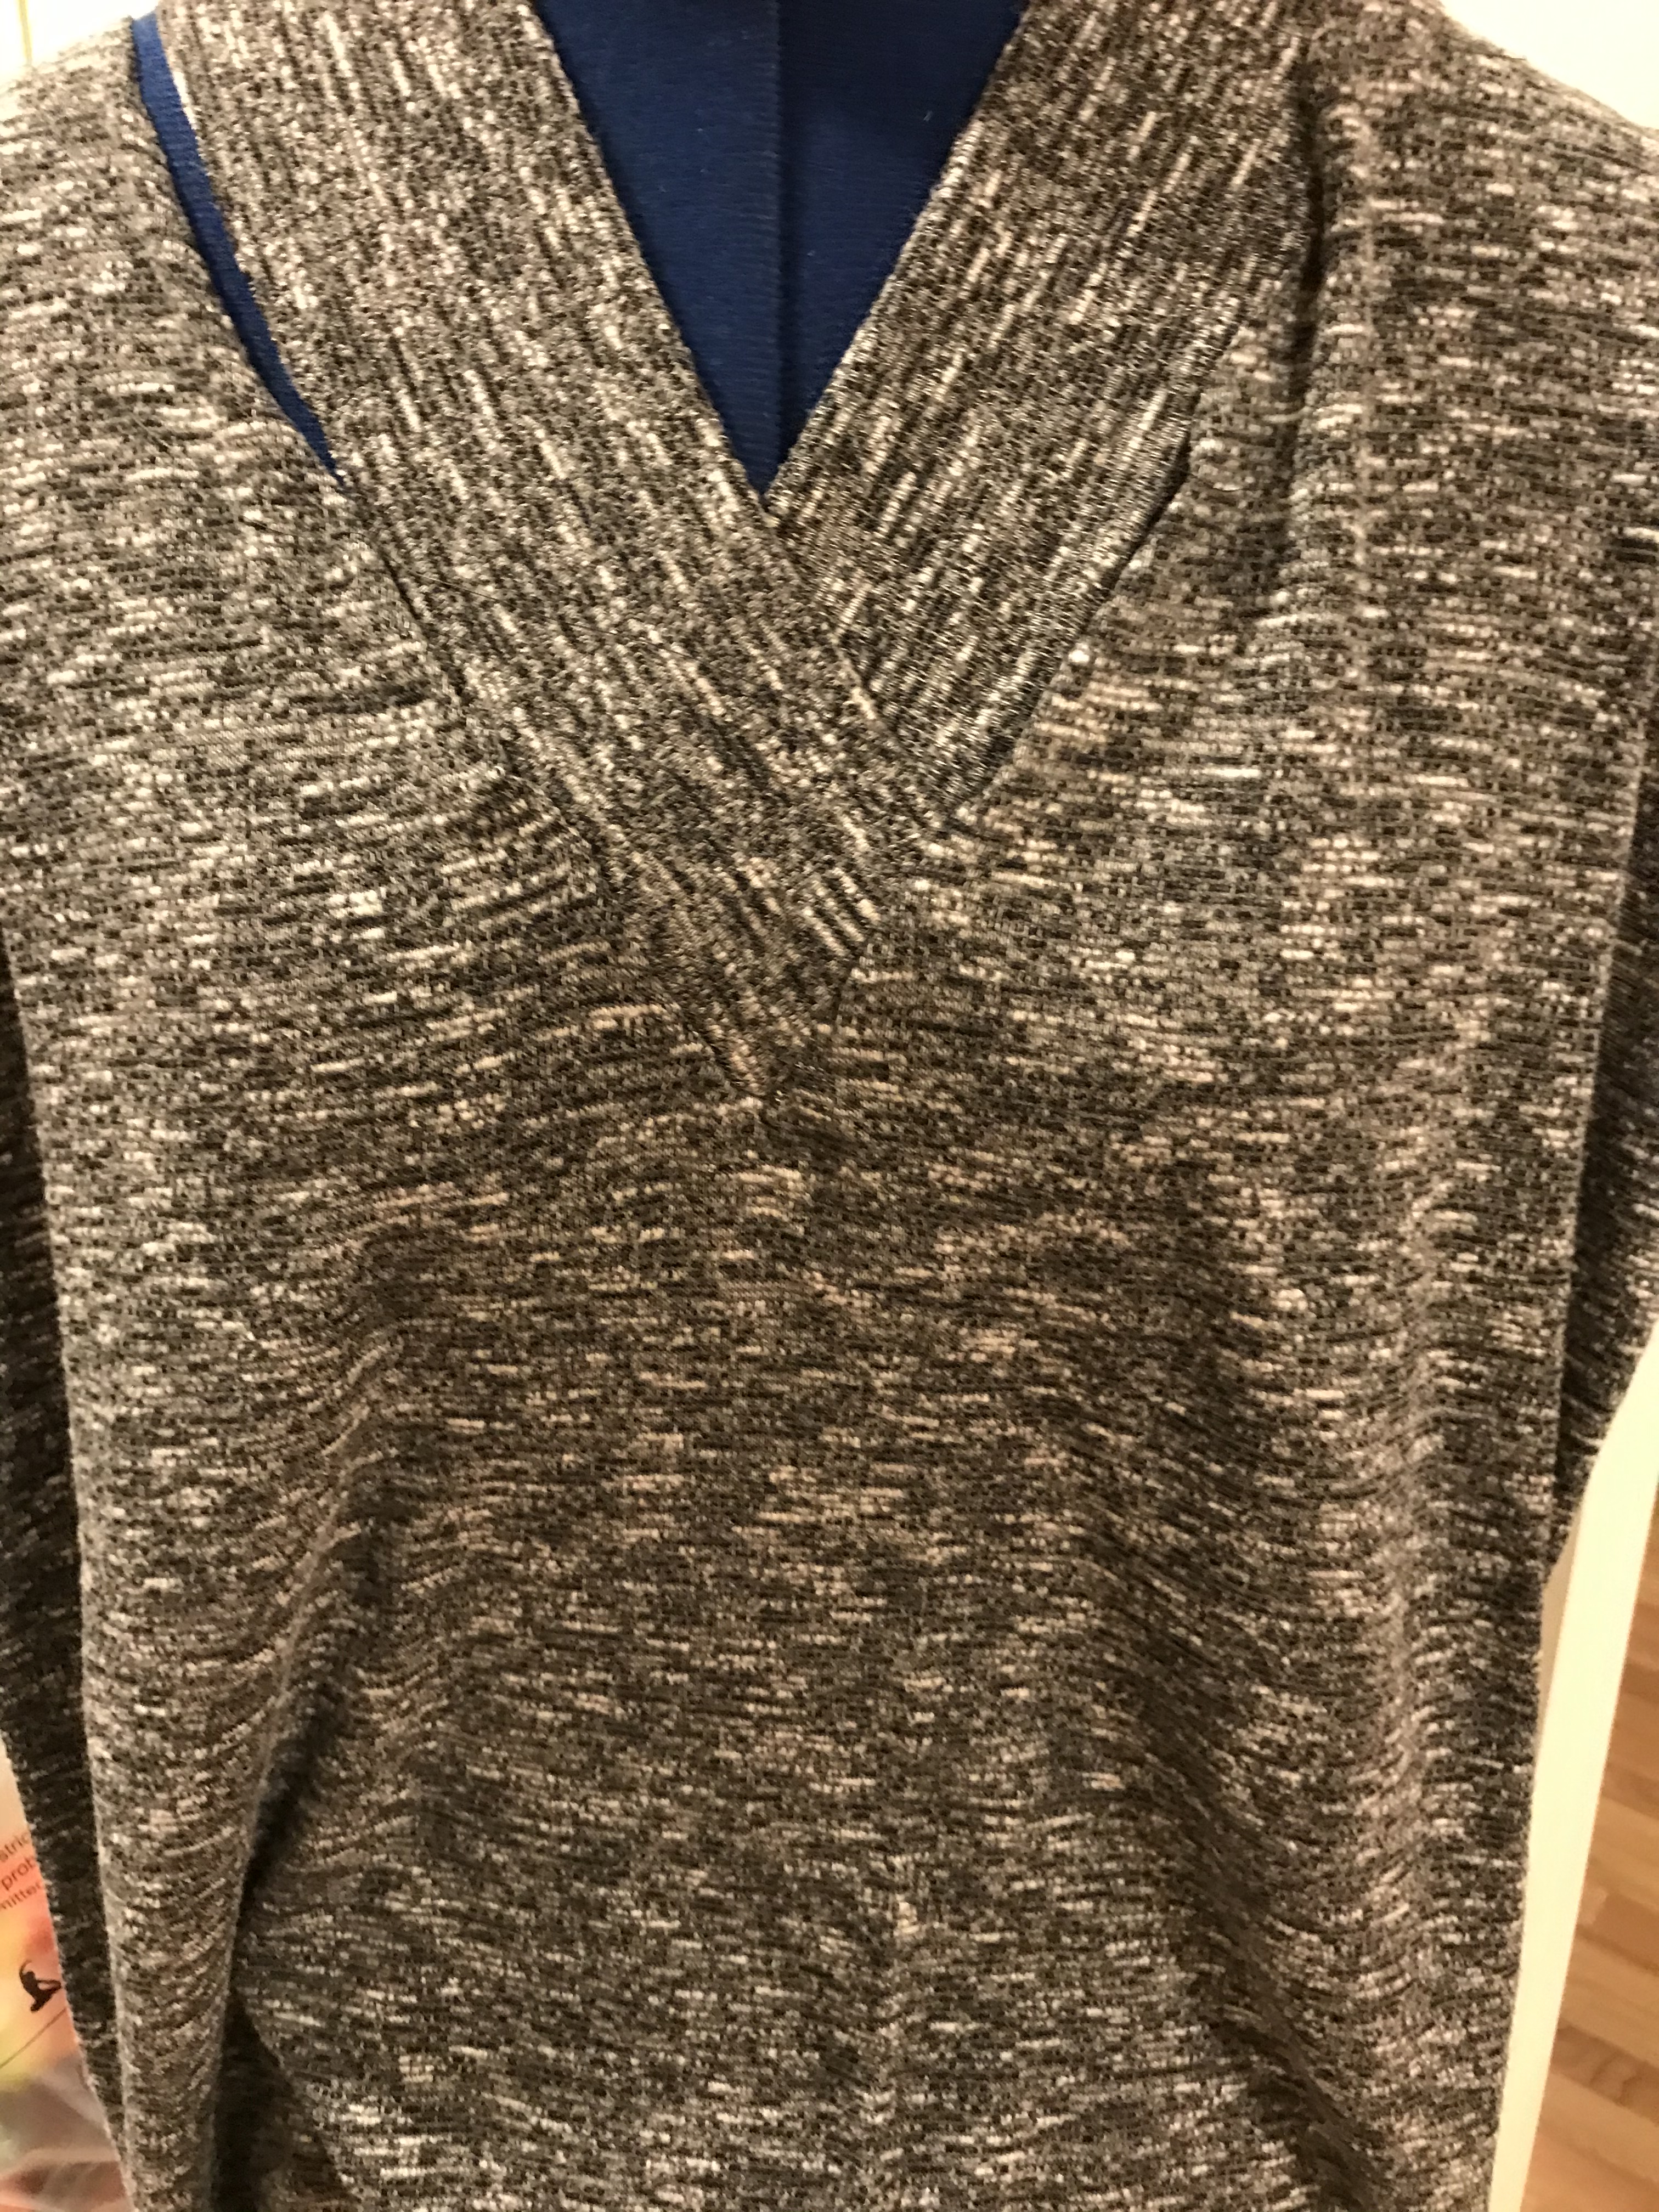
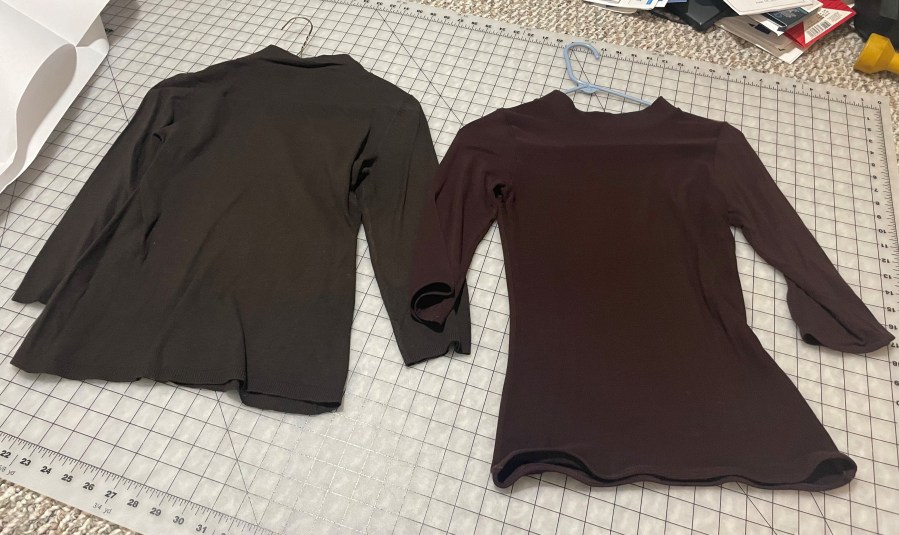
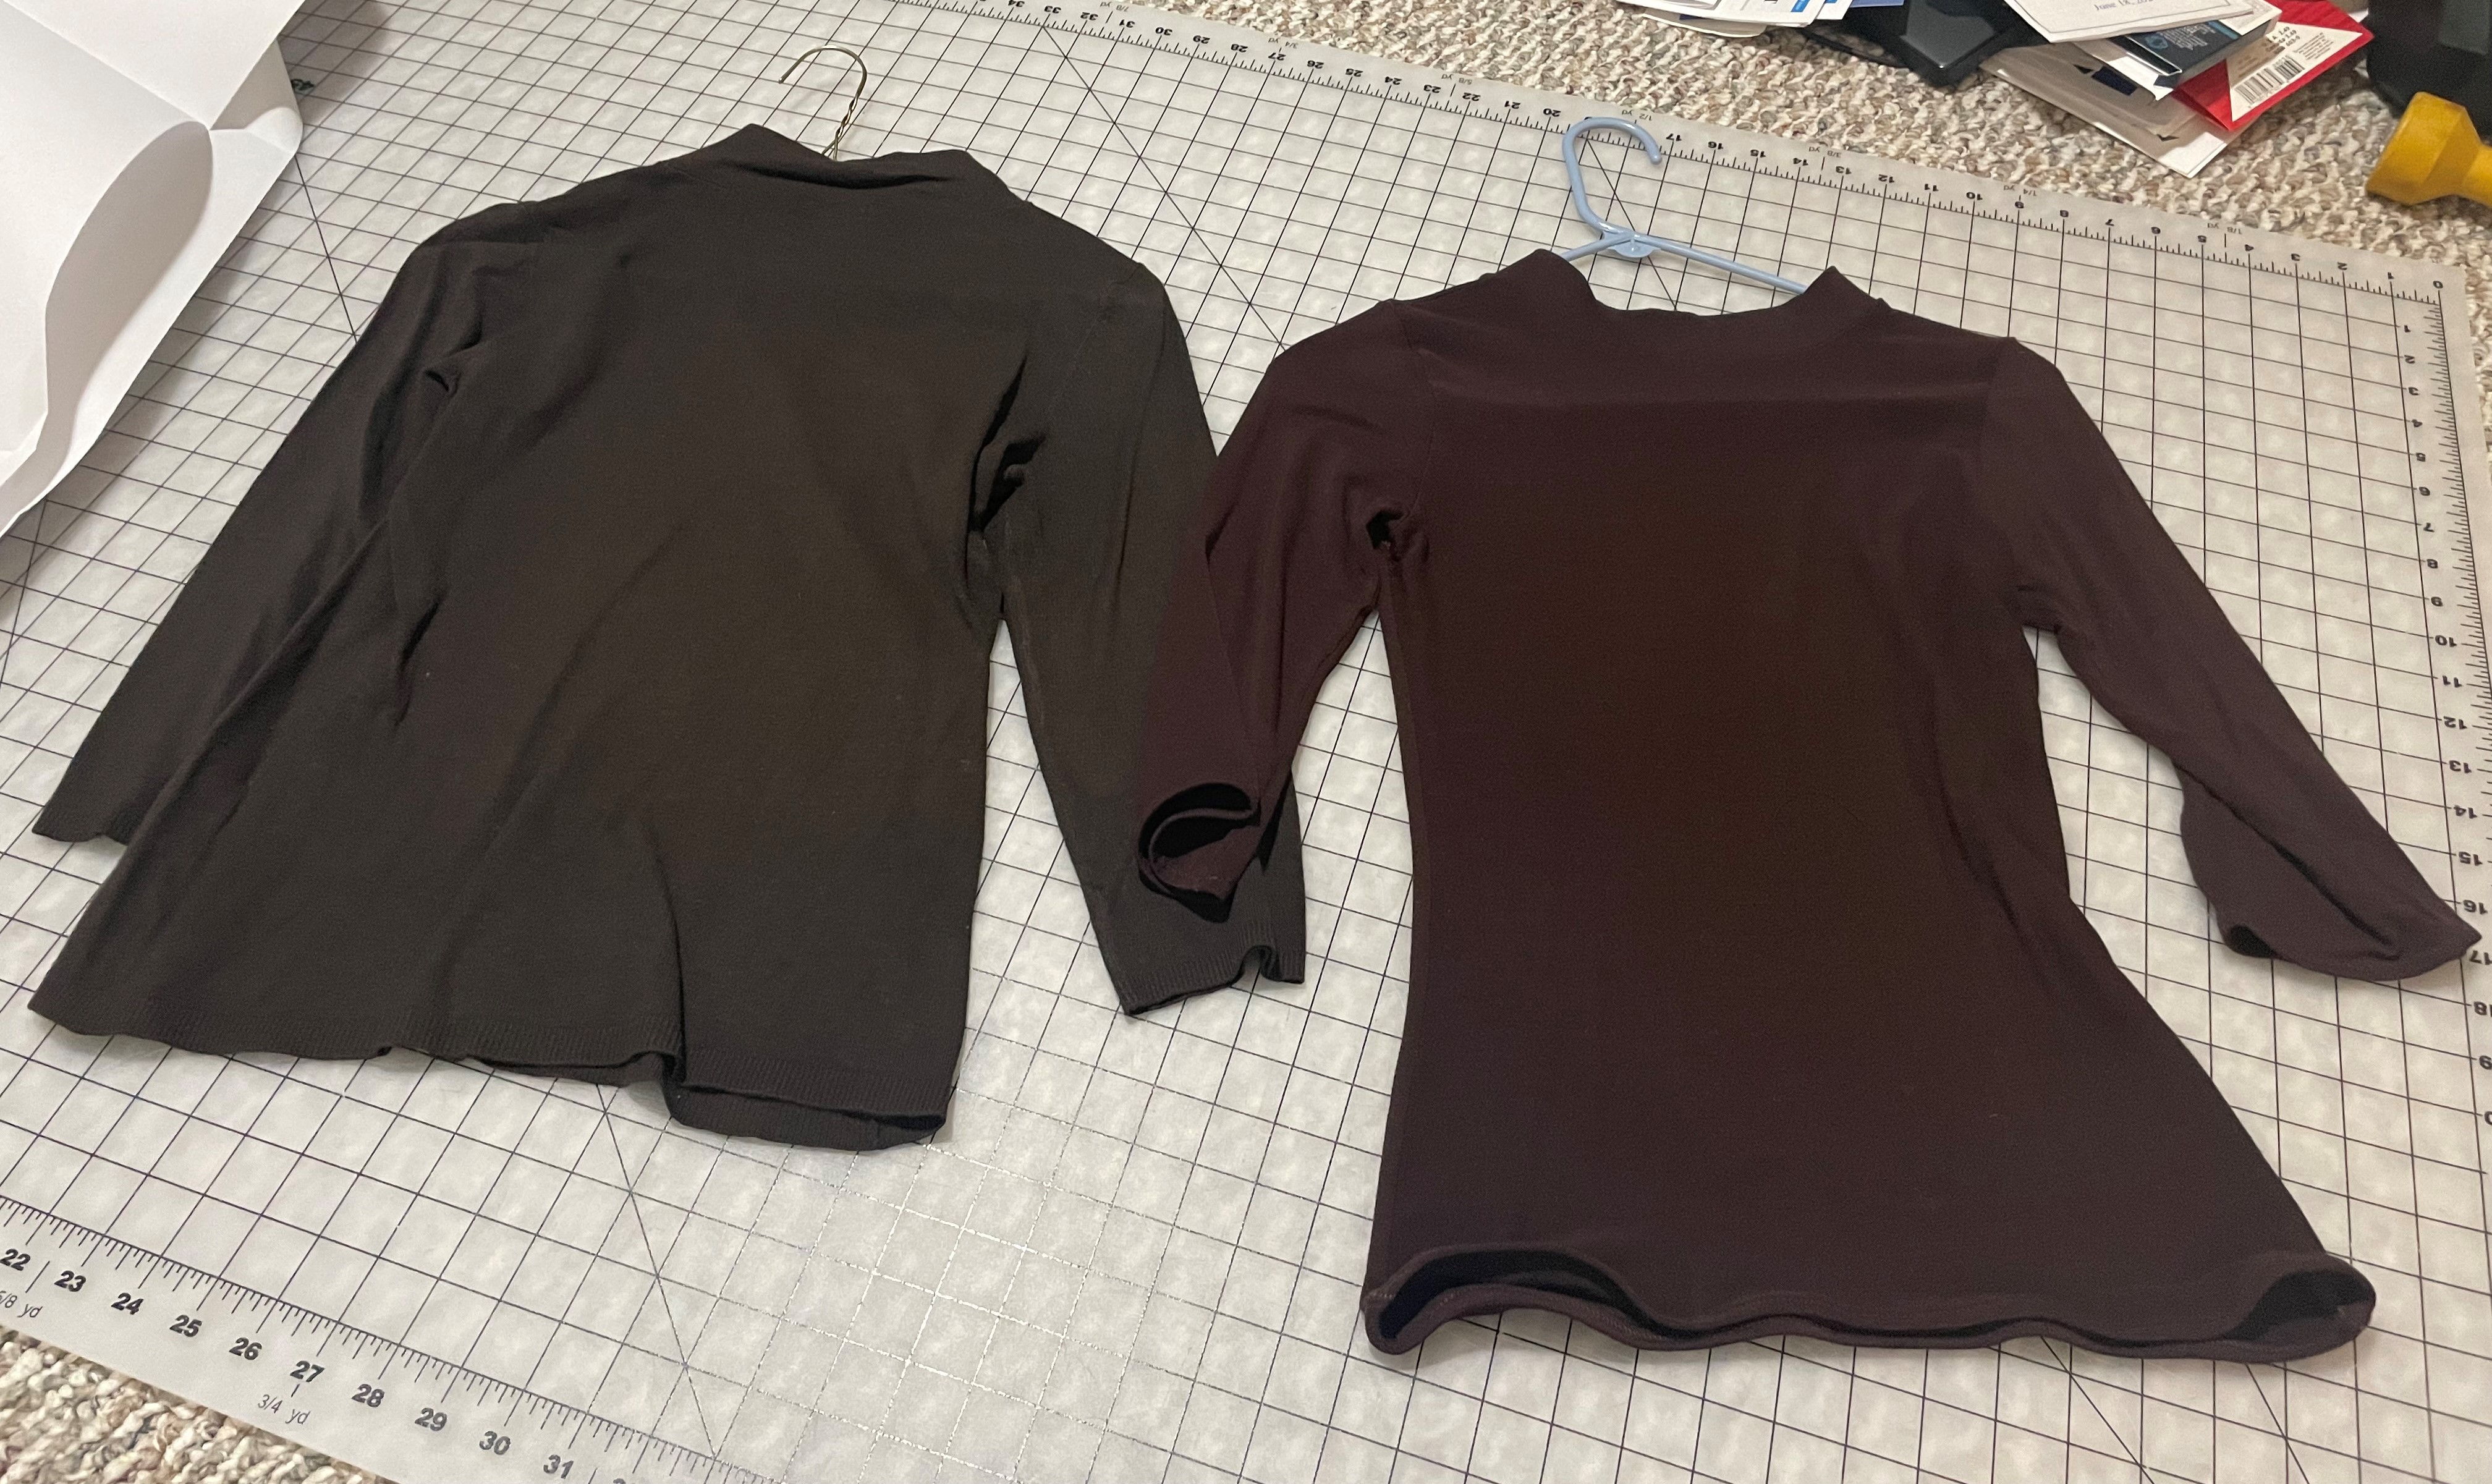
This is the story of a fabric that I just couldn’t tame and multiple bad pattern choices. We start back earlier this year when I scored this rather unusual looking fabric with a designed I just loved. I knew I had to make a skirt out of it, but I just couldn’t quite figure out the style that would work for it. The fabric felt a bit stiff, until I washed it and realized it had more of a flowy quality than I first realized. To this day I have no idea what this fabric is – I bought it at a discount off a remnant table. I’m thinking it’s probably a type of polyester. I would never have predicted how hard it would be to sew with. Despite the fabric being somewhat thin, it was still difficult to get a needle through. I opted for a microtex needle in my machine, which worked well enough.

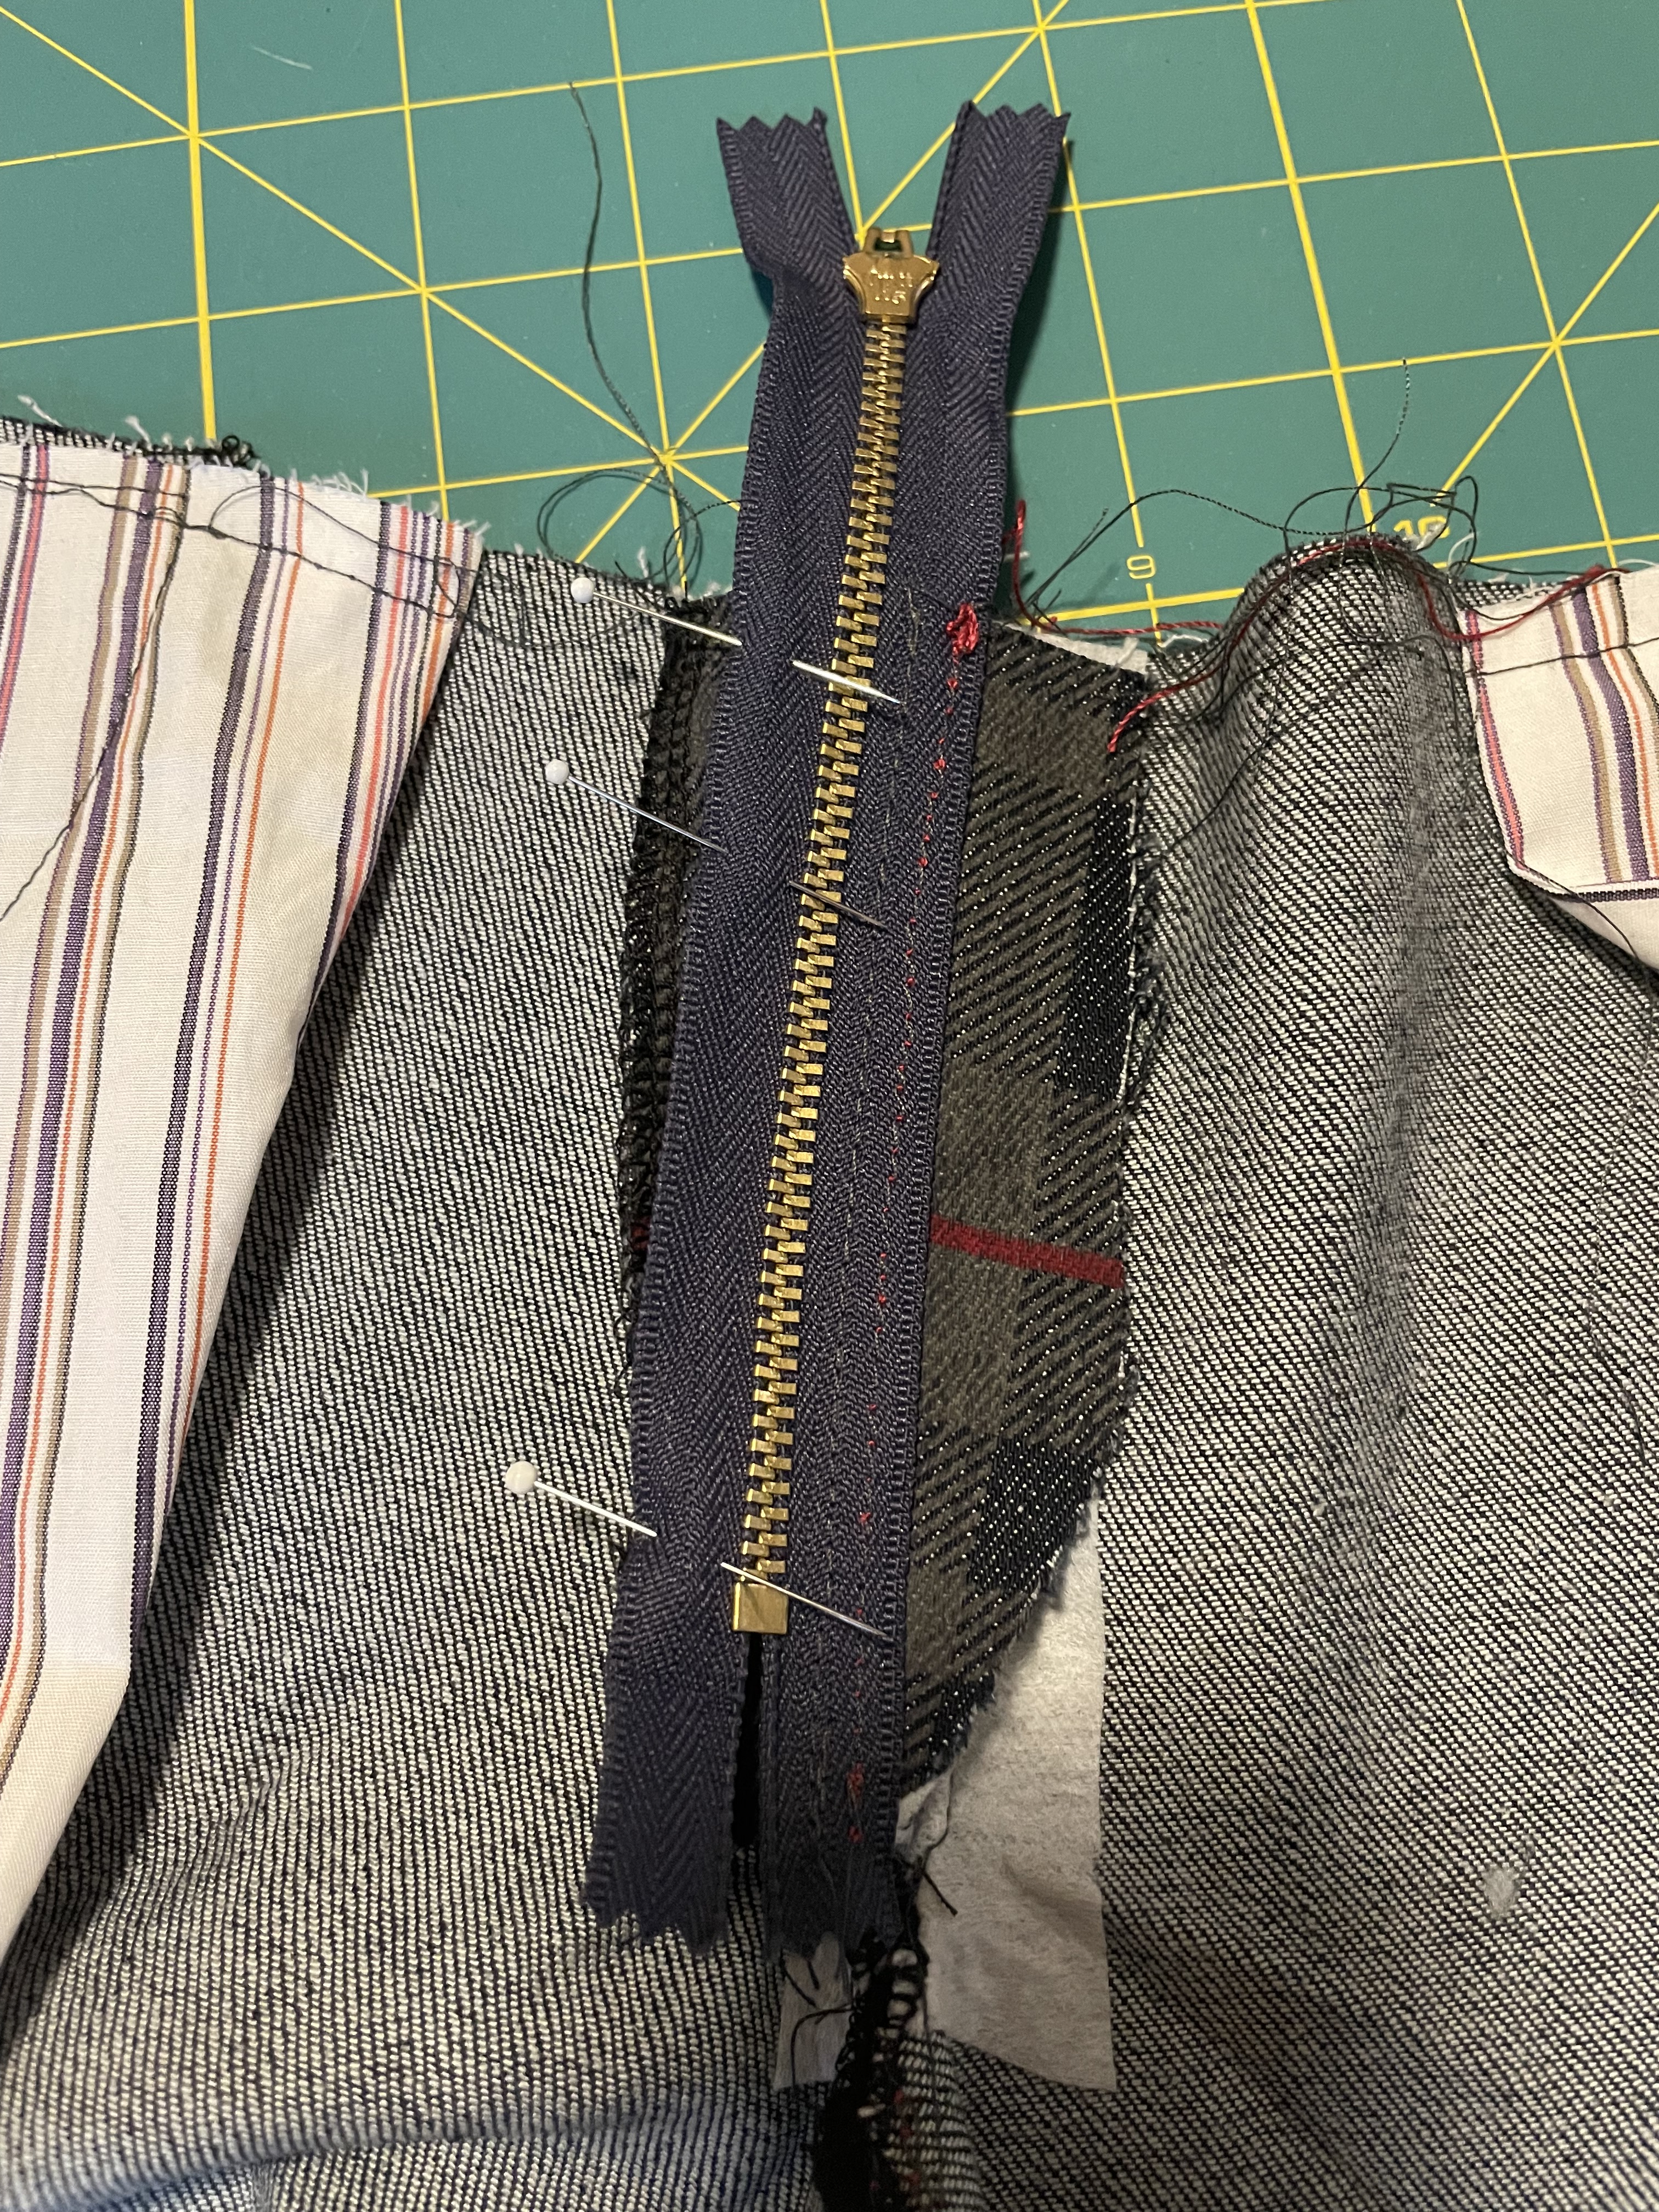
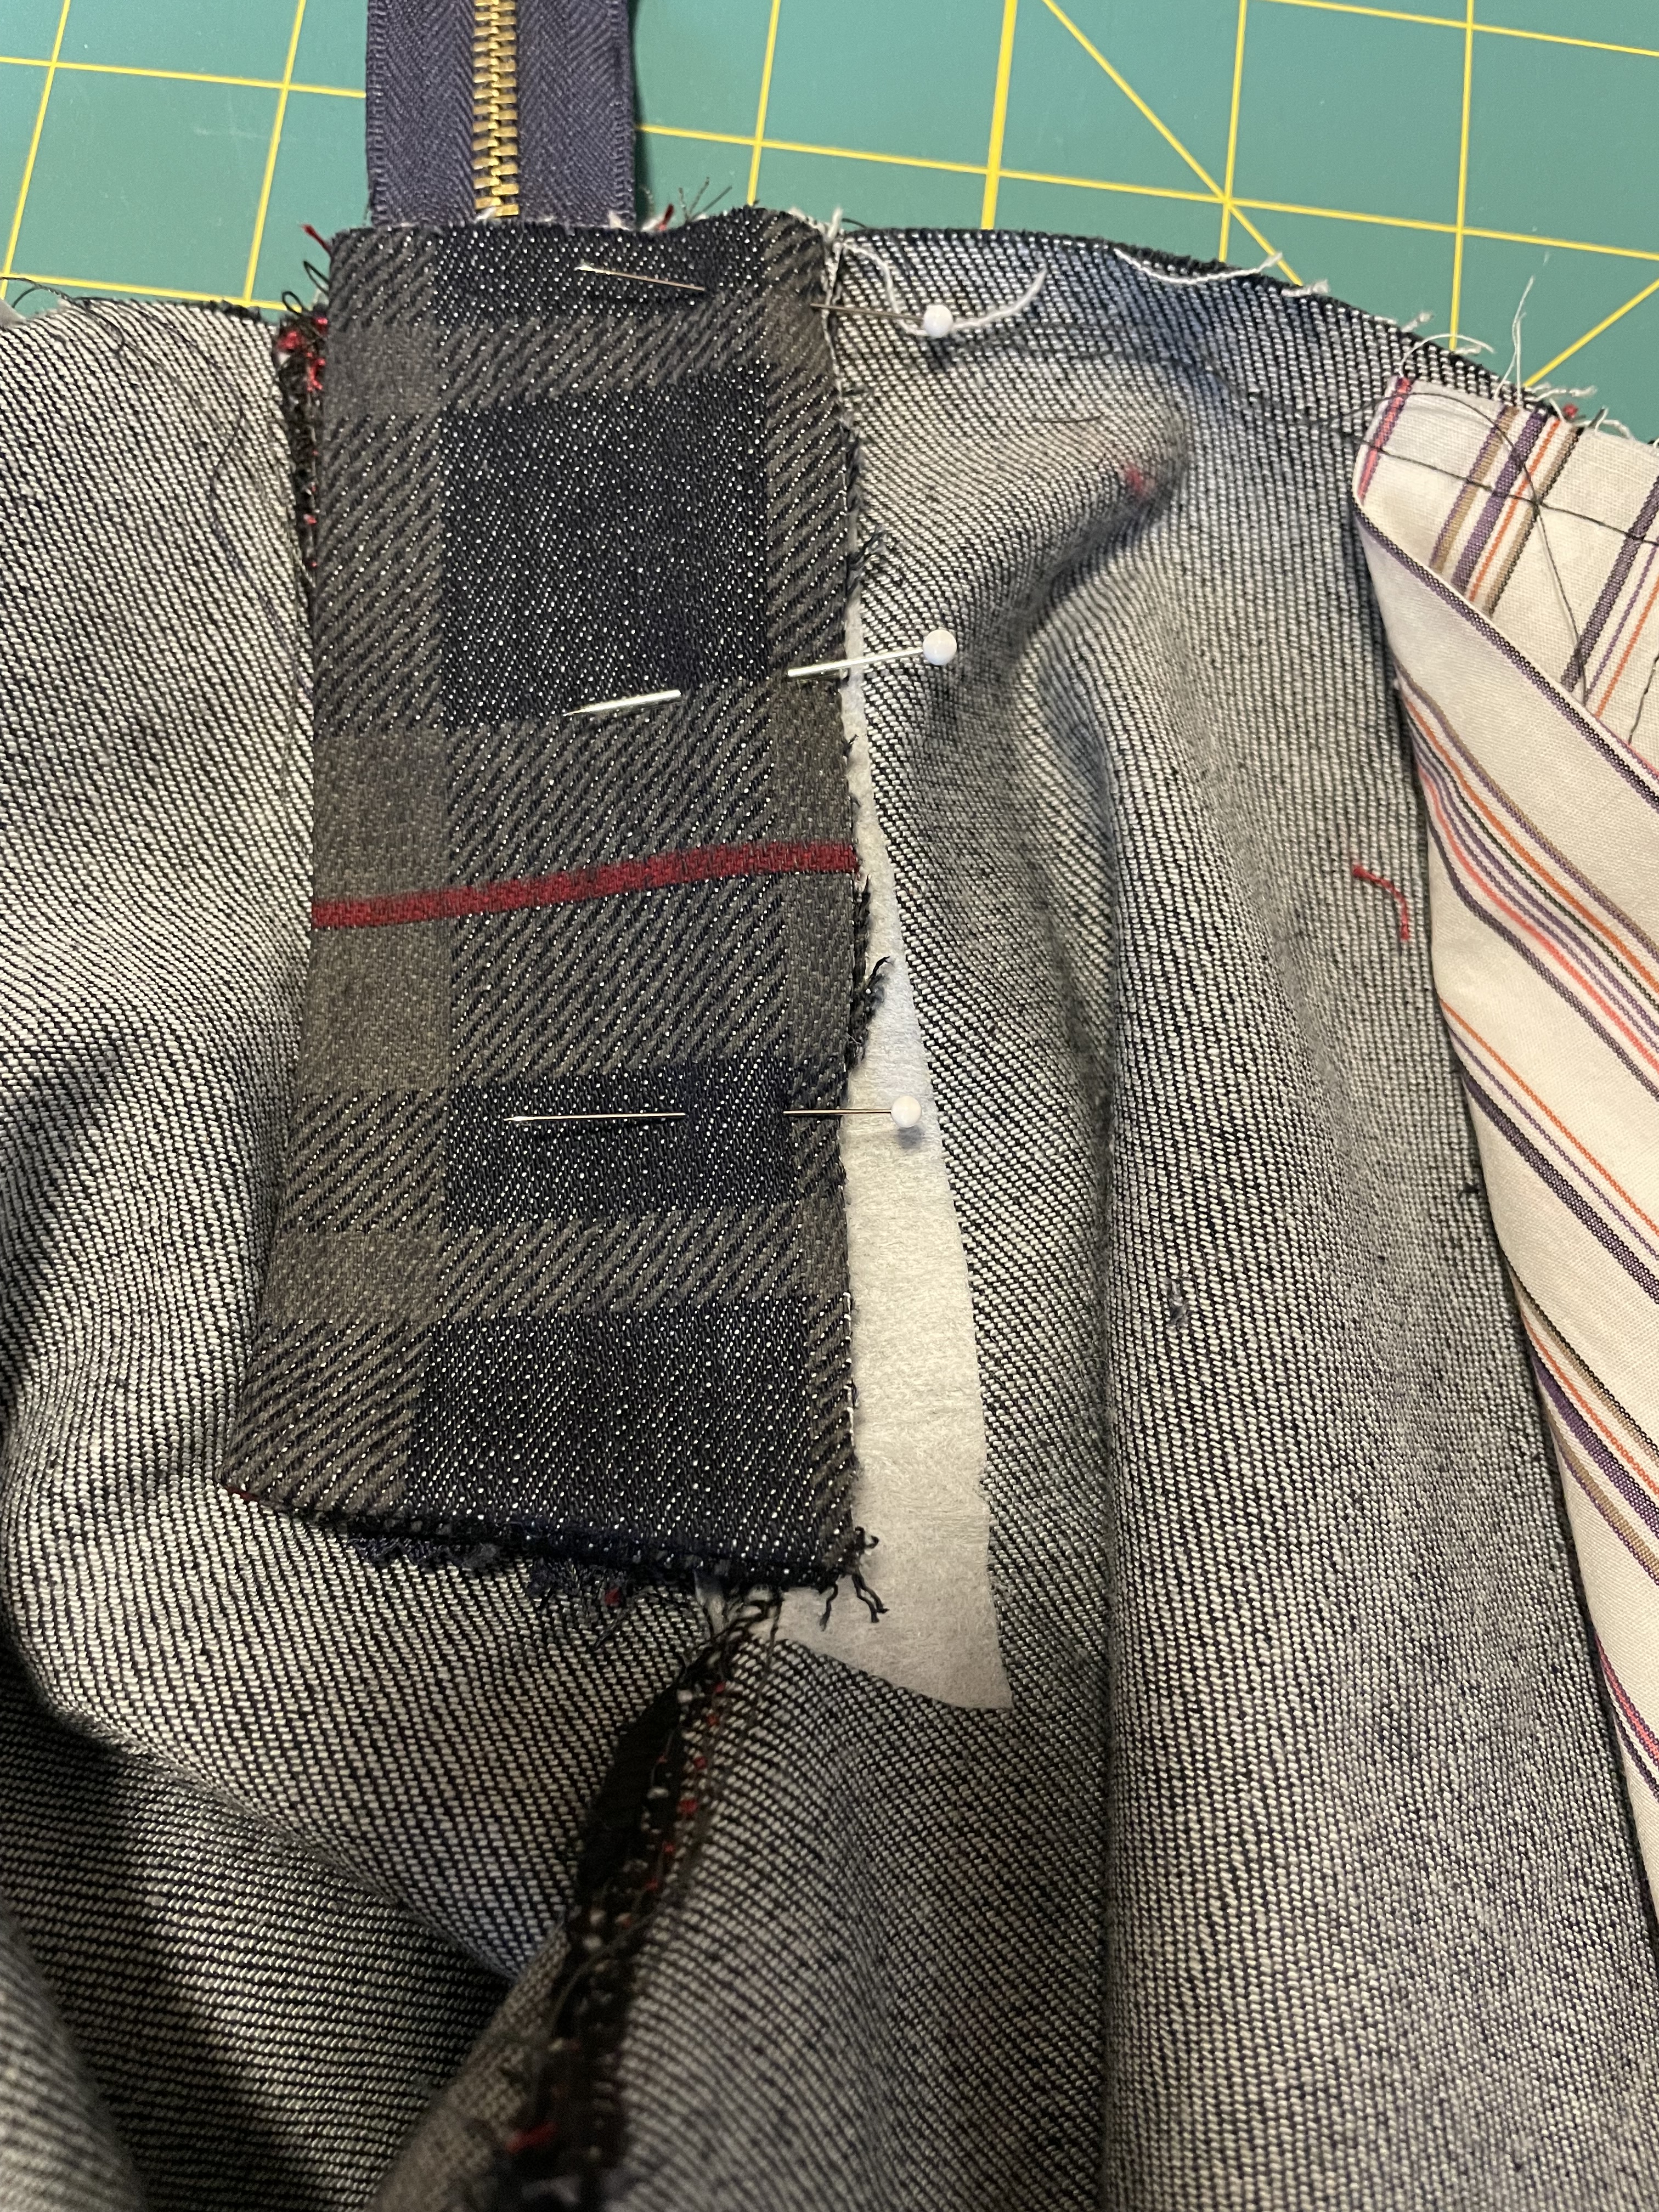
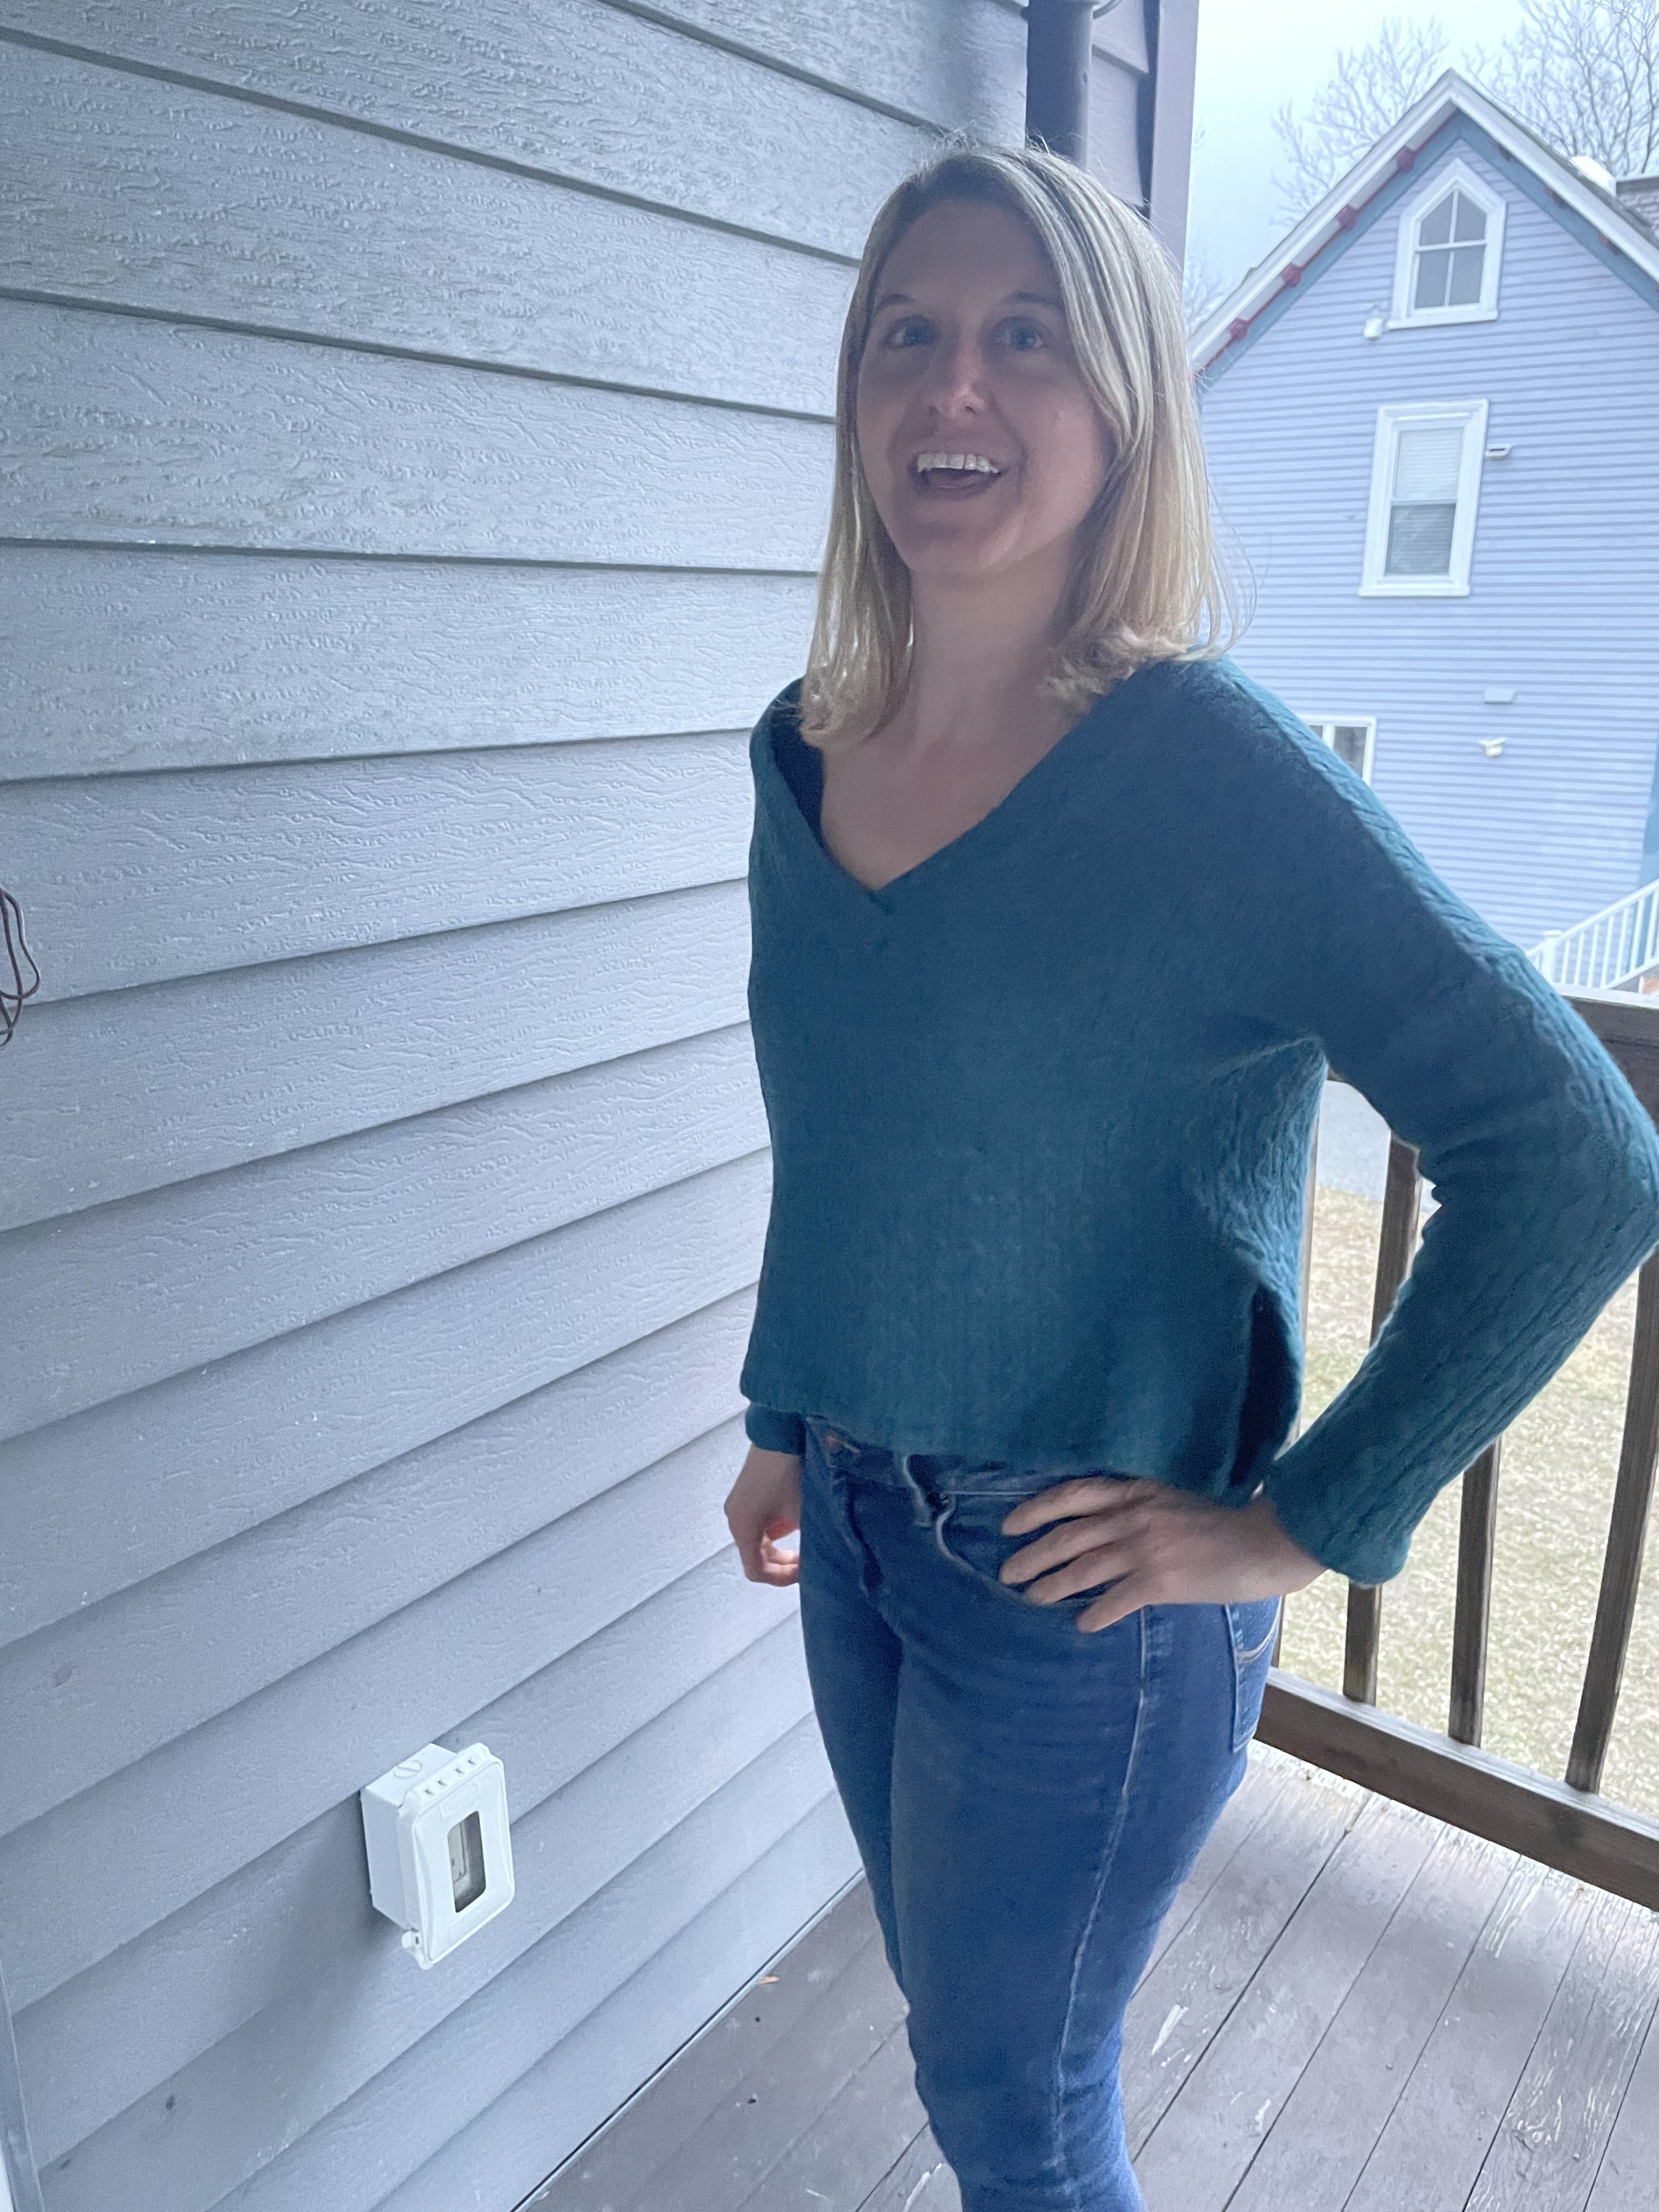
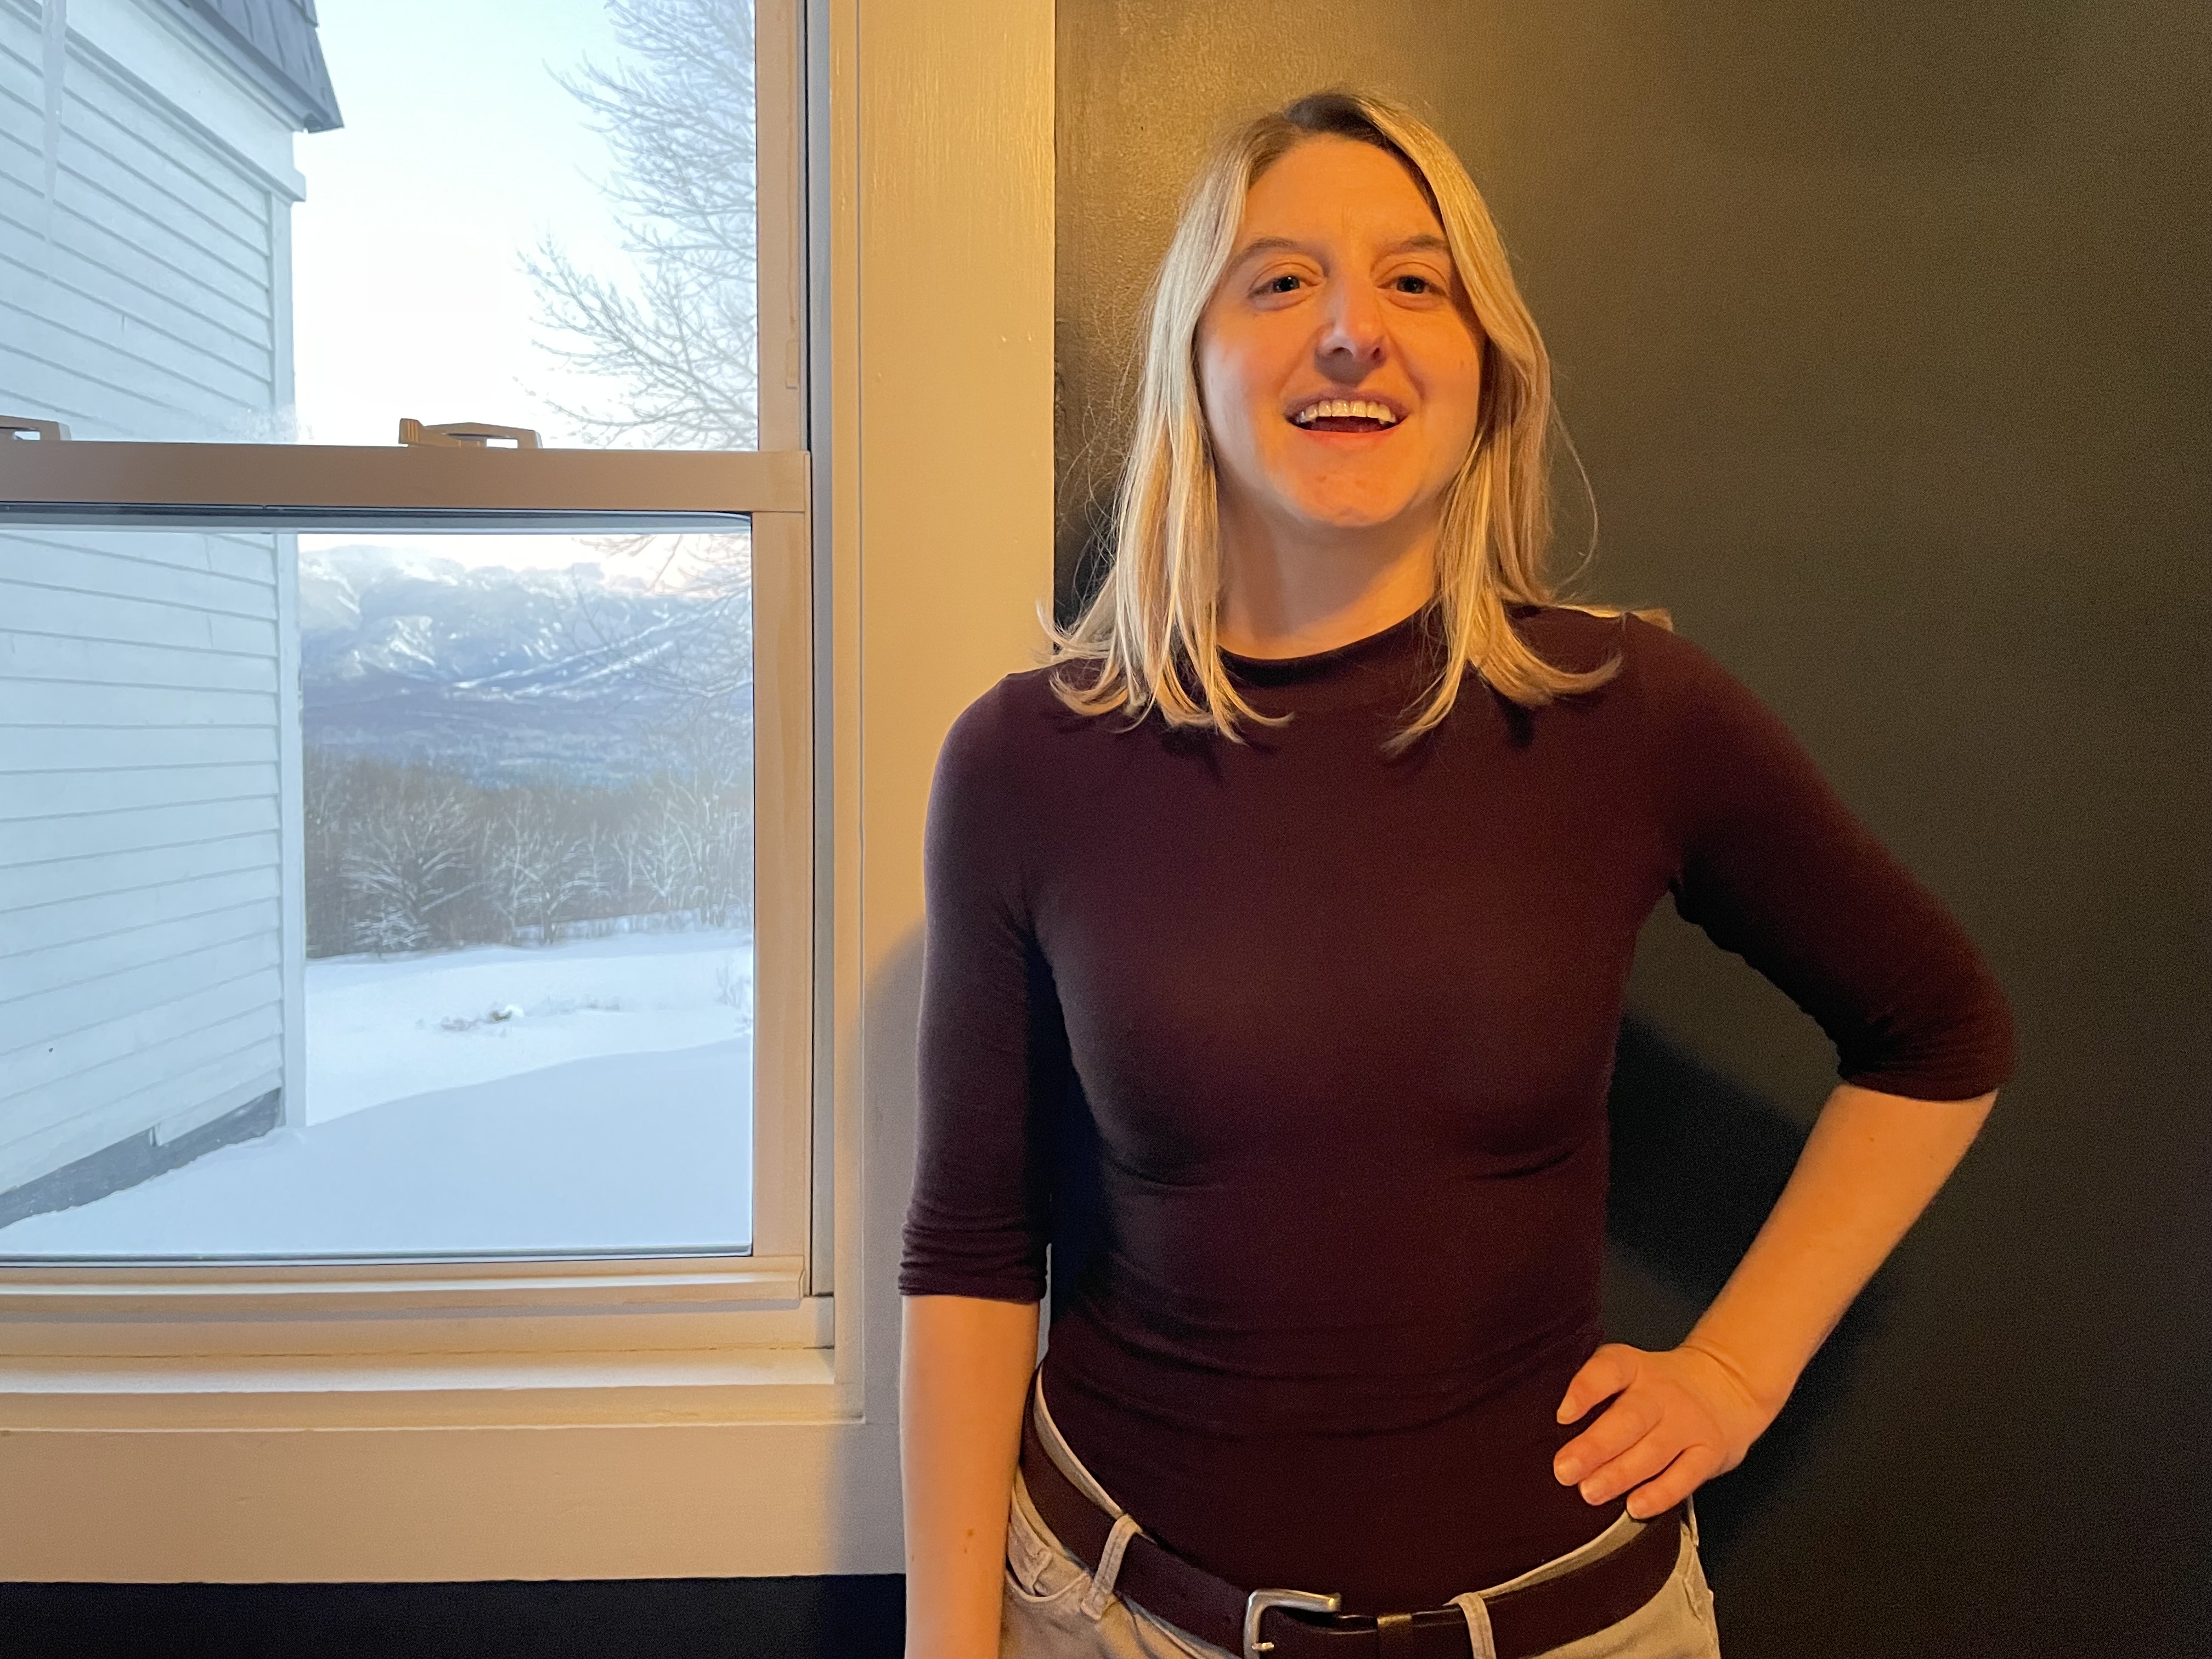
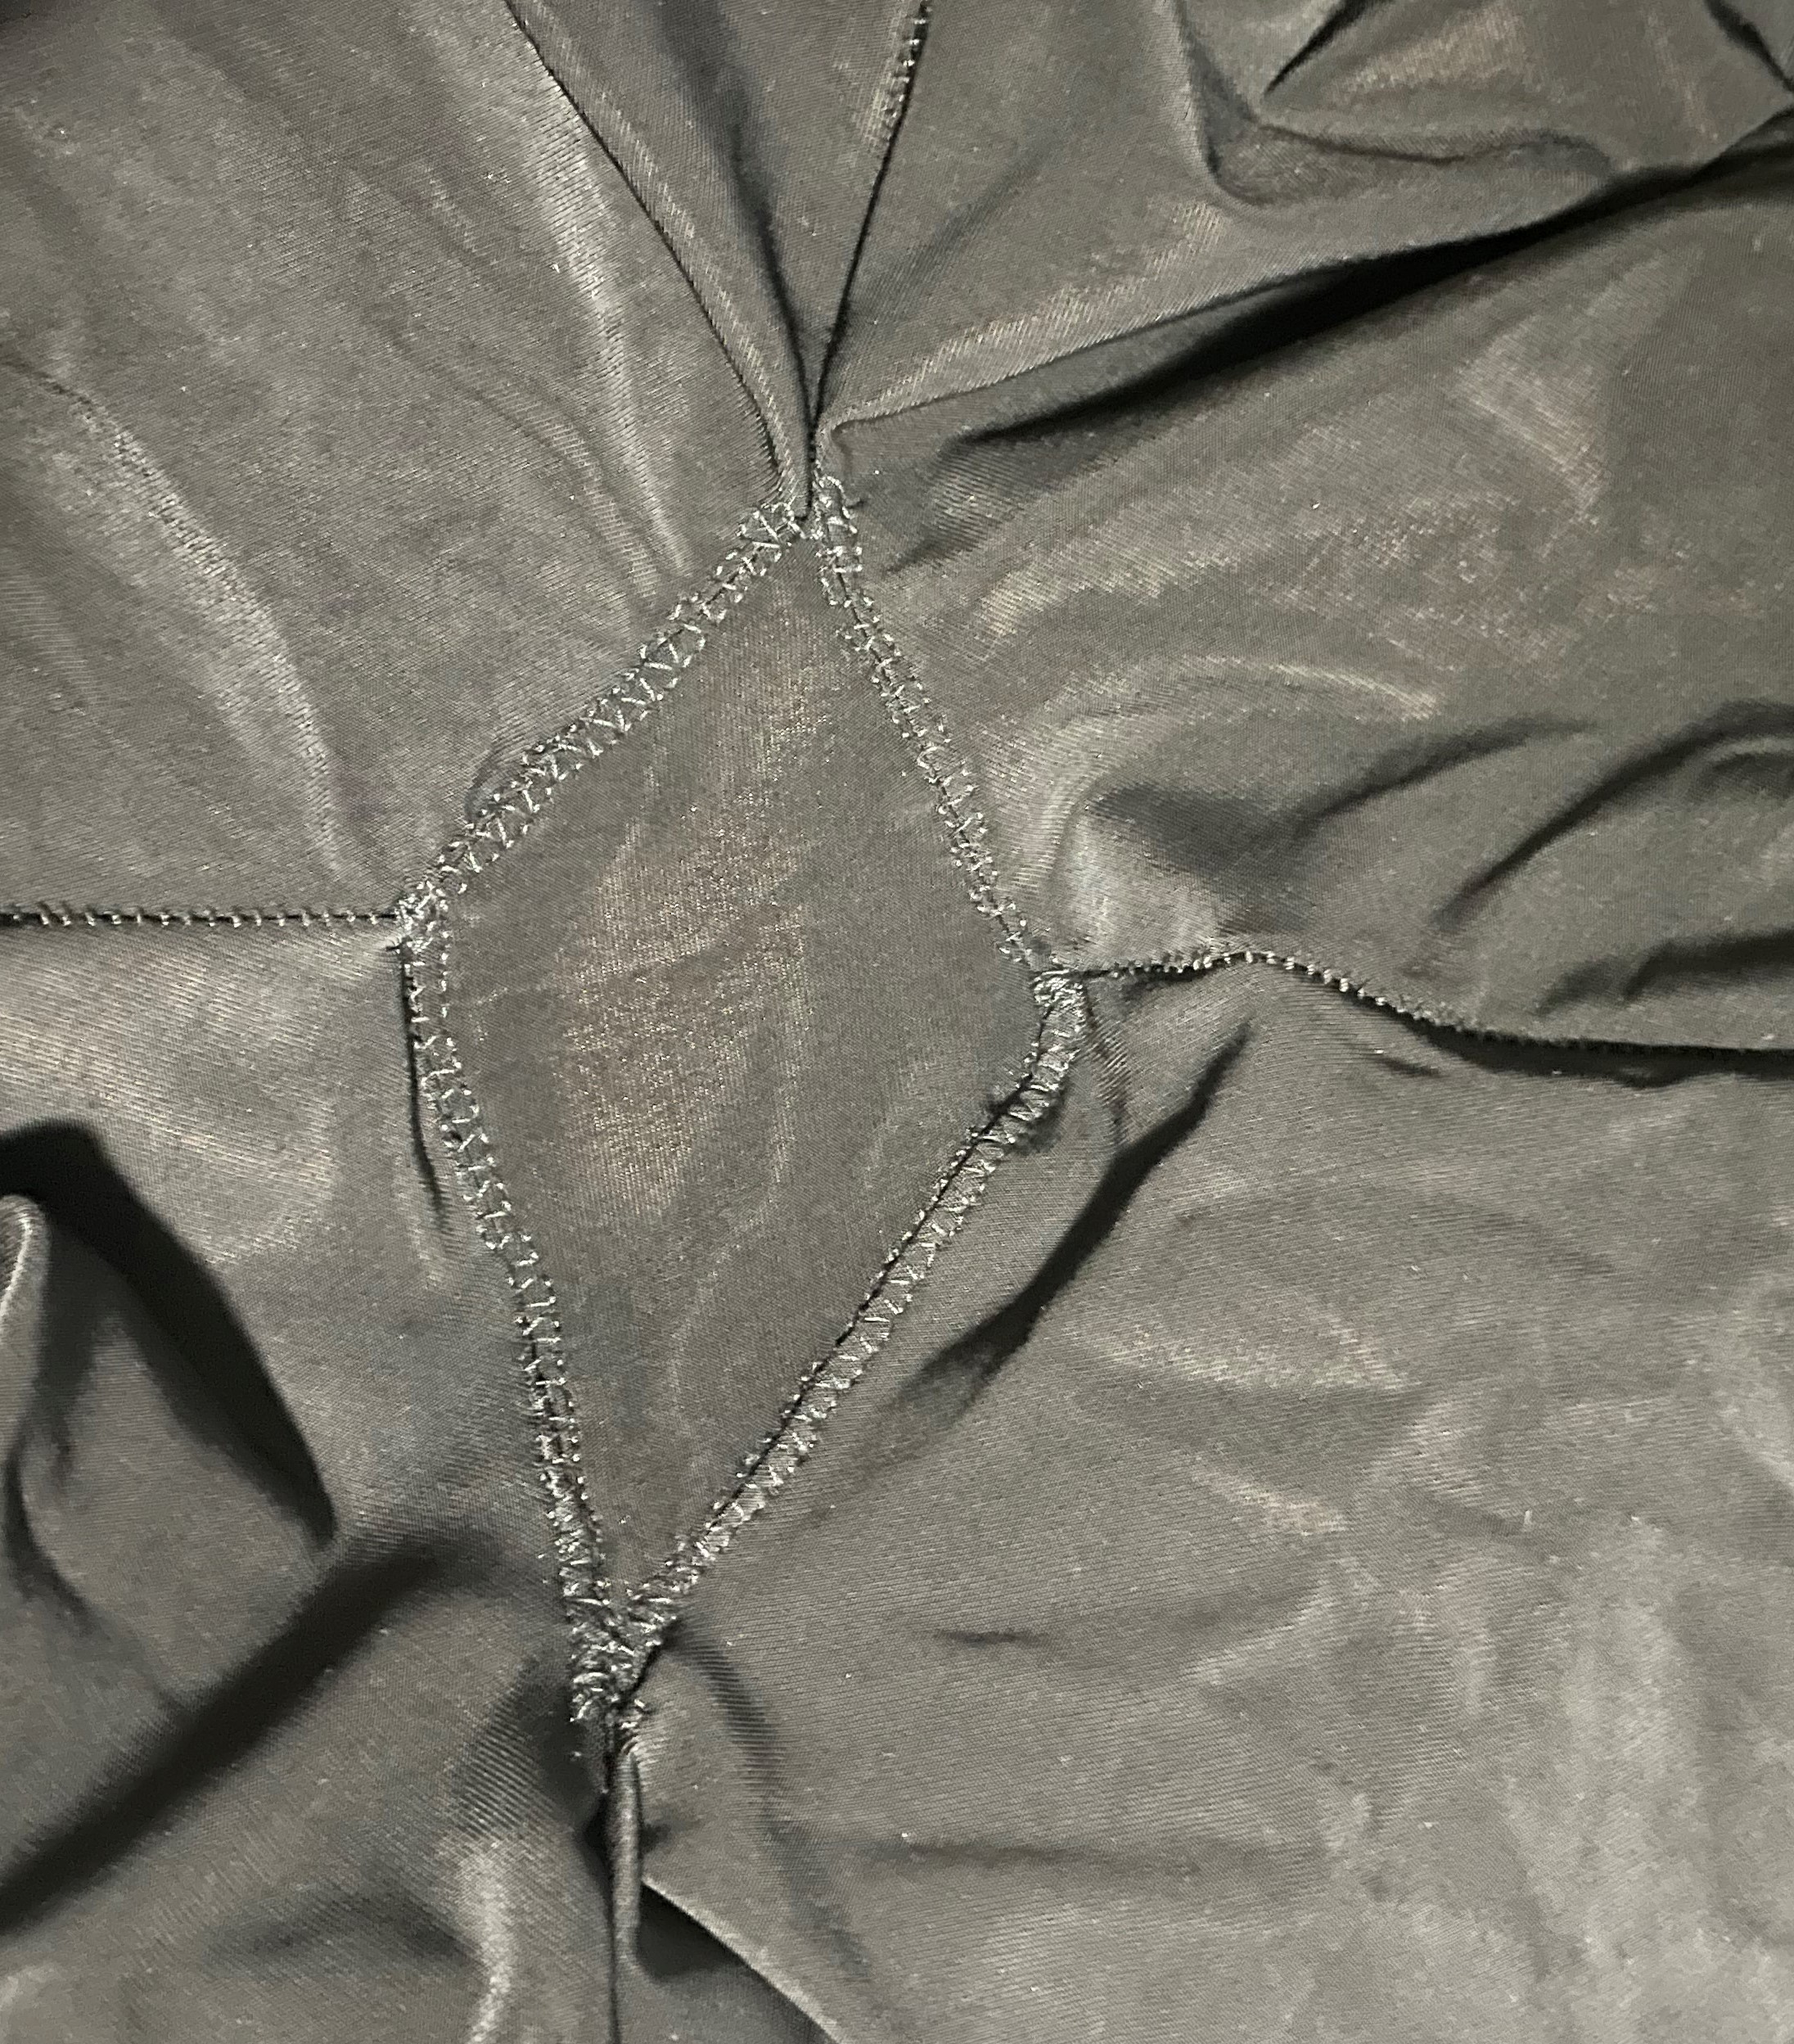
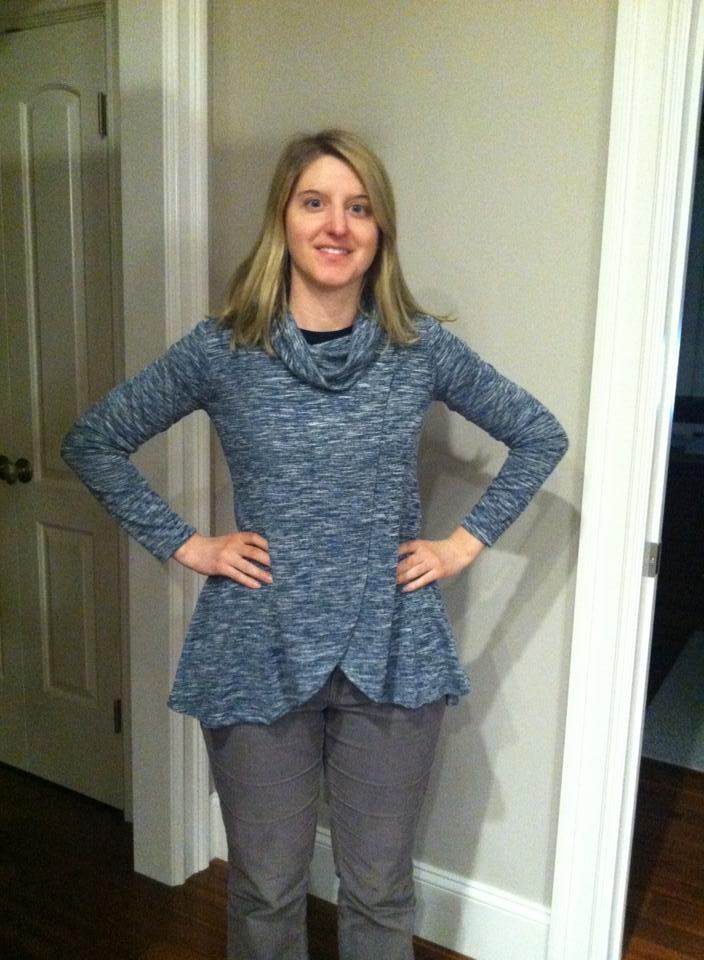
When I first saw the Juniper Skirt pattern from Mood Fabrics, I thought I had found the perfect match. I just needed to get some lining, but what do you use for lining when you have no idea what the main fabric even is? I decided on some black rayon twill that I could easily order online. I figured it was also synthetic material, so shrinking wouldn’t be an issue. All in all this seems to be the only correct choice I made as this did make a good lining which gave the skirt the right amount of structure. This was the first time using a free pattern from Mood Fabrics – they seem to make a lot of good ones and I had been curious to try one of them out. The directions on the website seemed easy enough to follow with detailed photos, however there were a few times I felt lost or that the directions were not complete. Where I think I went wrong is when I had to sandwich the overskirt between the front and back panels. I thought I had figured it all out, but somehow the skirt just didn’t line up right and to this day I’m not even sure why it’s off. I just know I’m unable to wear it as it is just crooked. It was one of my most disappointing moments in sewing history as I thought the style with the front flap seemed to fit with what I had pictured for this skirt. I was so baffled as to where it all went wrong, that I opted not to try again even though I had enough fabric for a second skirt. I was afraid it was the fault of the pattern and I would just end up wasting more fabric.

The overskirt section does not line up right when this skirt is on and I couldn’t figure out a way to fix it where it would fit properly.

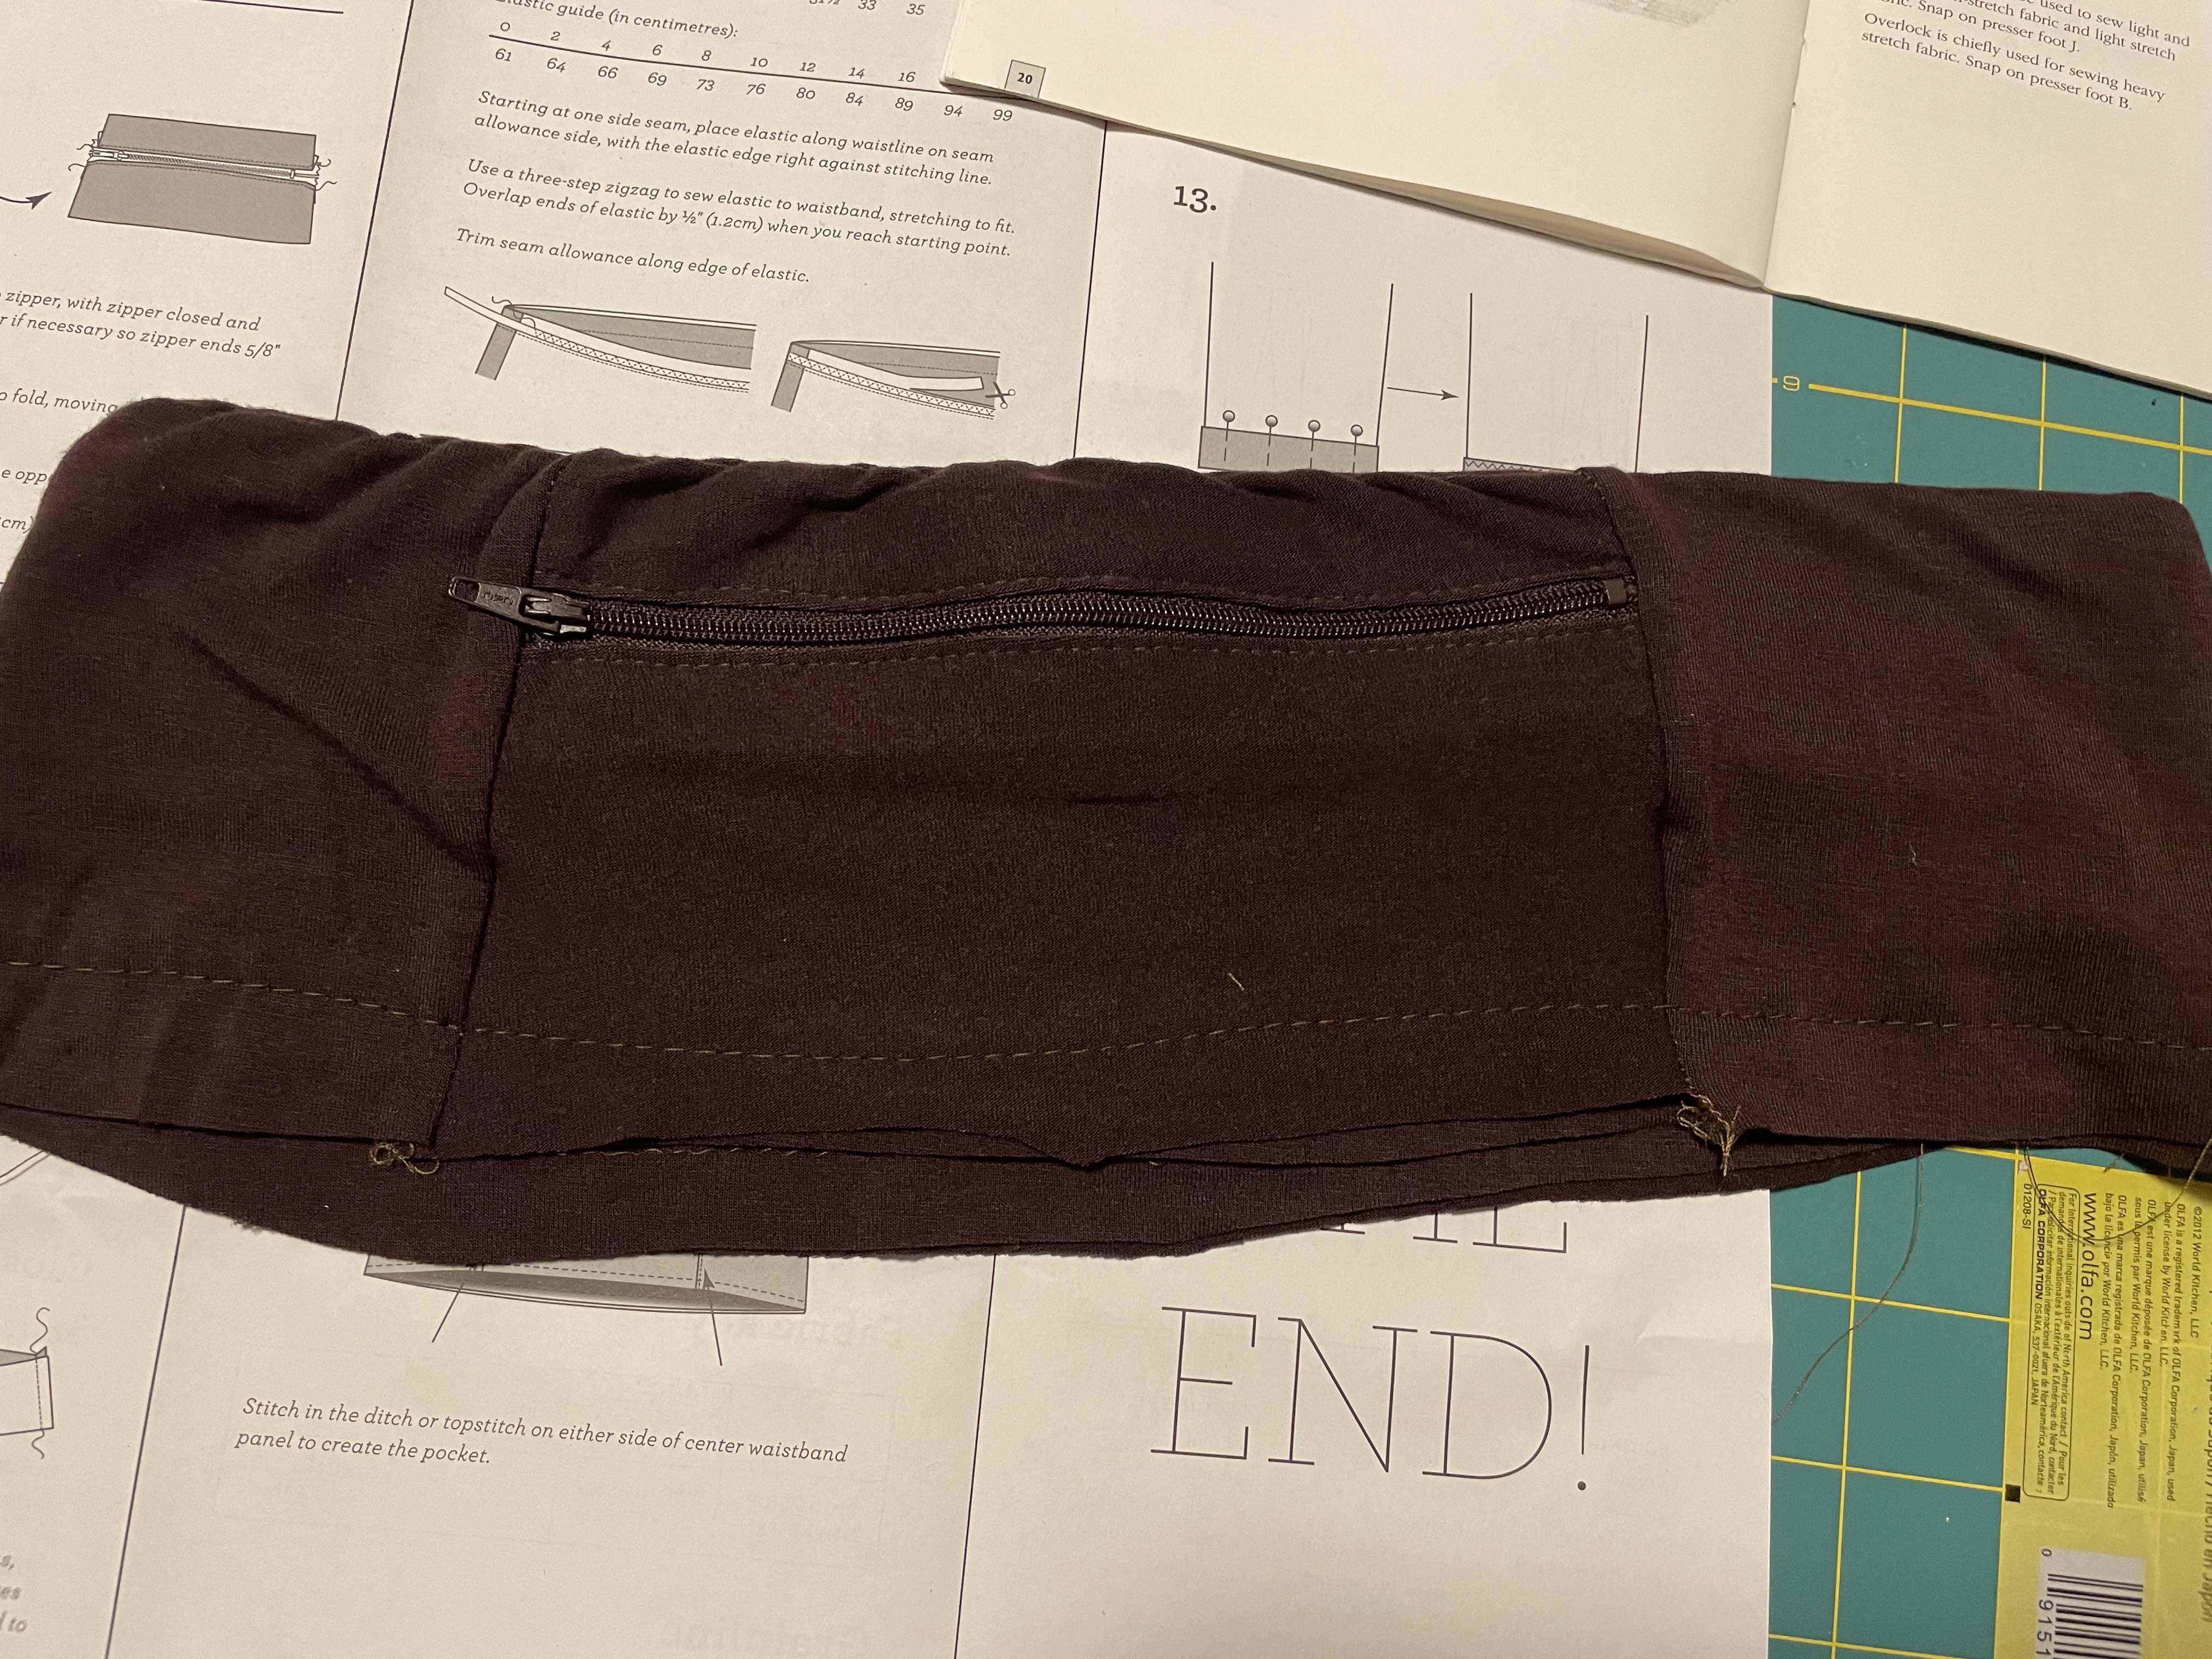
The one thing I liked about this pattern was there was no hem – the lining was cut a little shorter than the actual skirt and then you sew the lining to the bottom of the skirt. When the lining is lifted towards the waistband, the main skirt gets folded over, which creates a clean finish with no hemming required. I liked this look so much I decided that whatever pattern I chose for my next attempt, would use this method instead of a traditional hem.

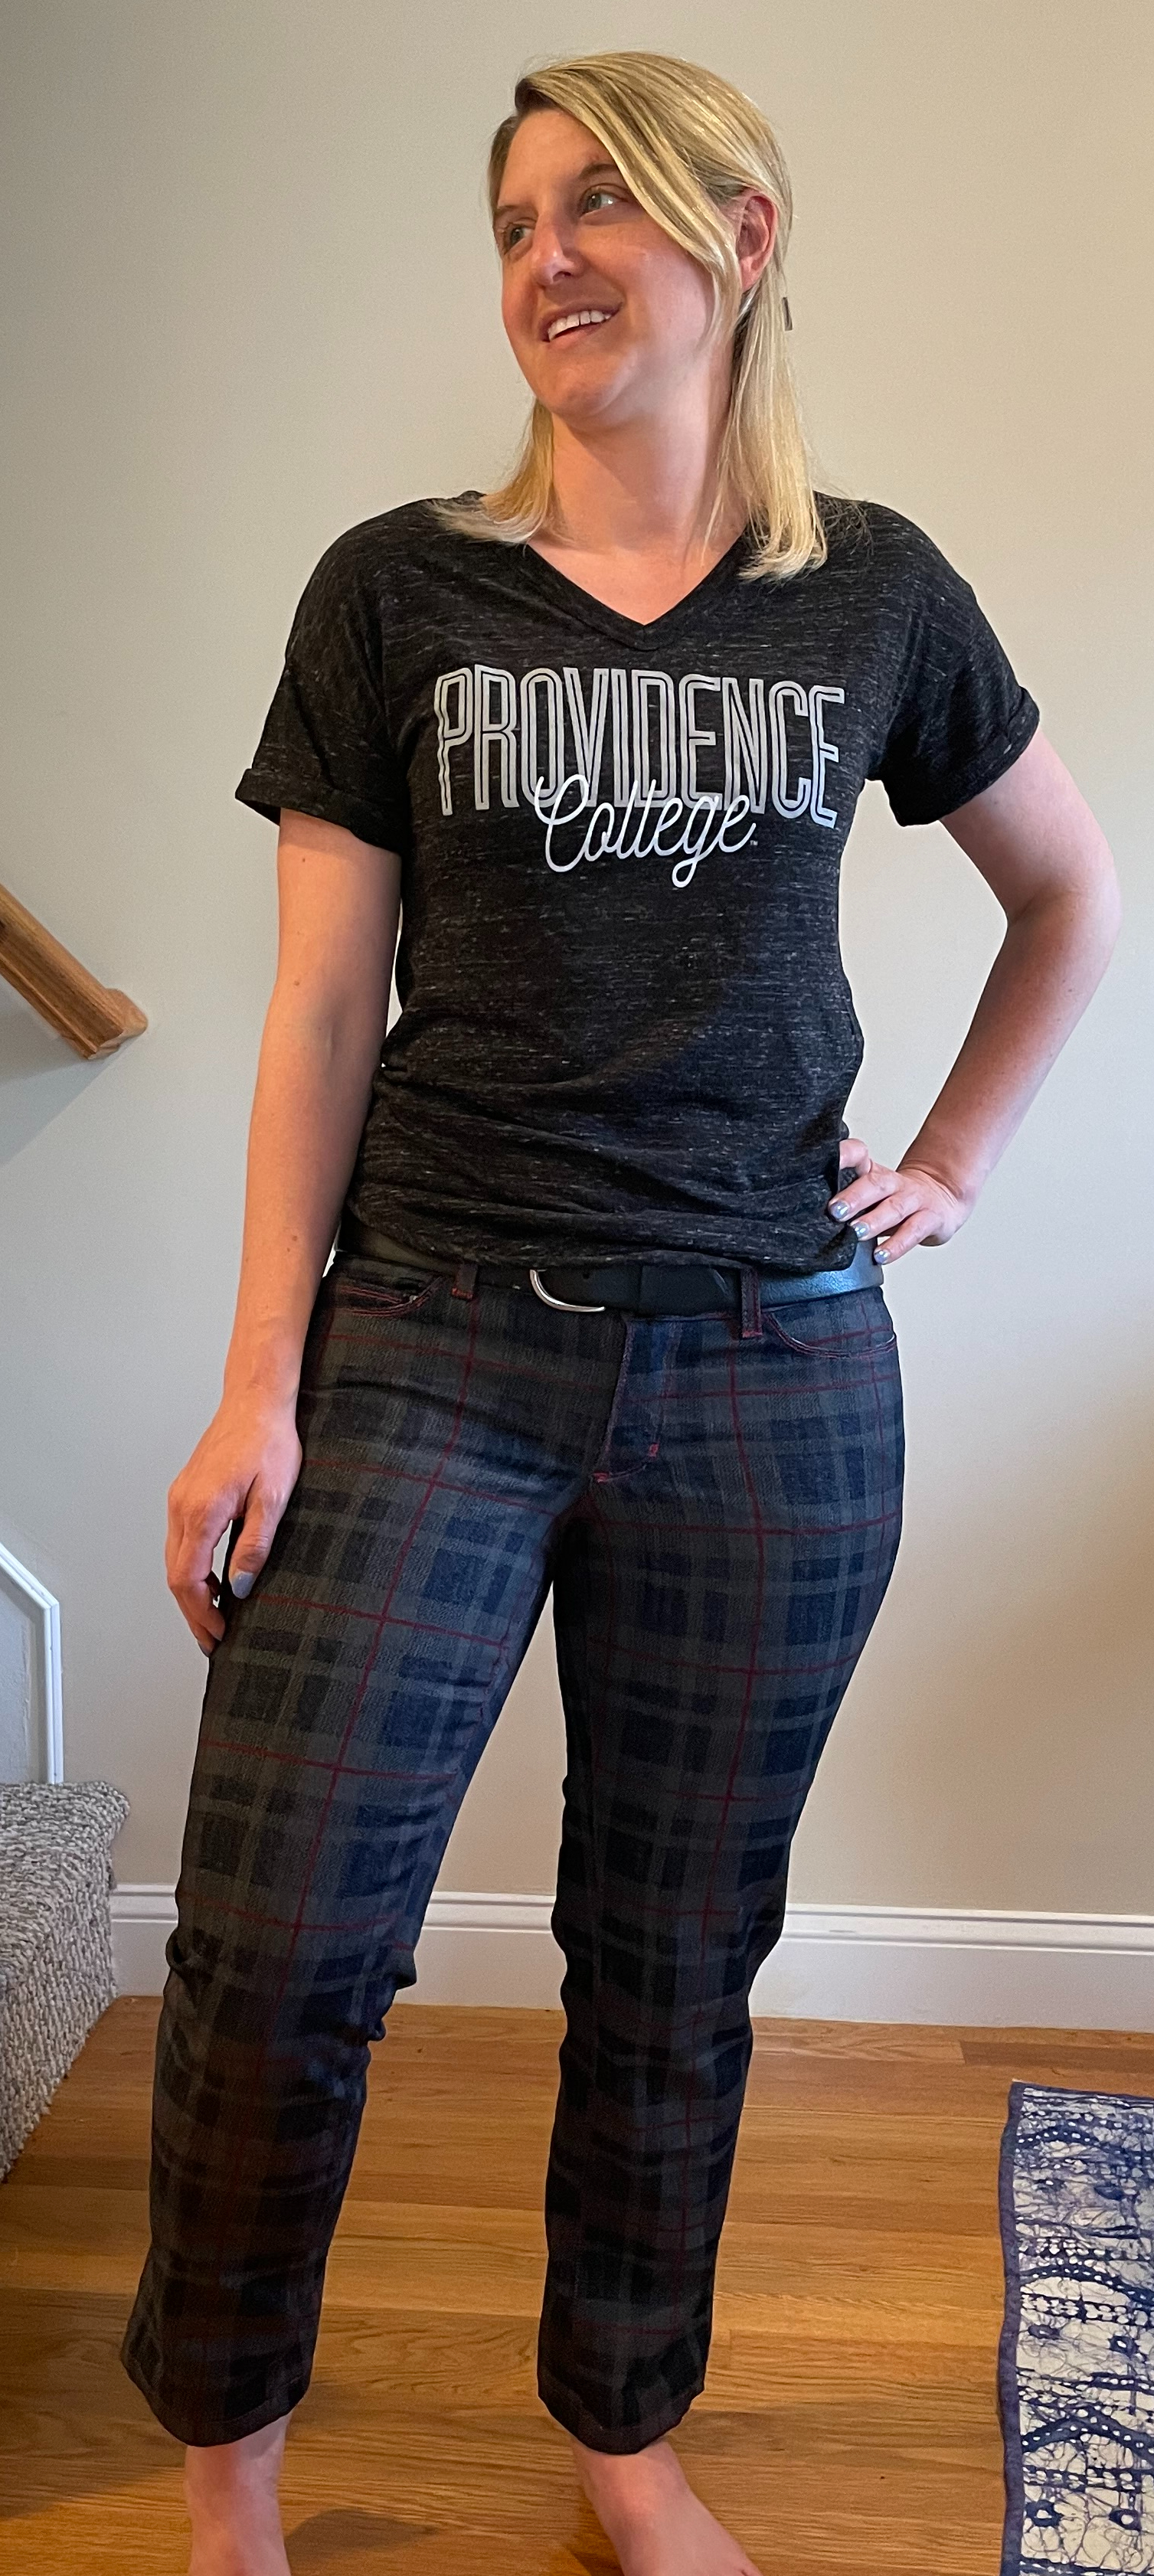
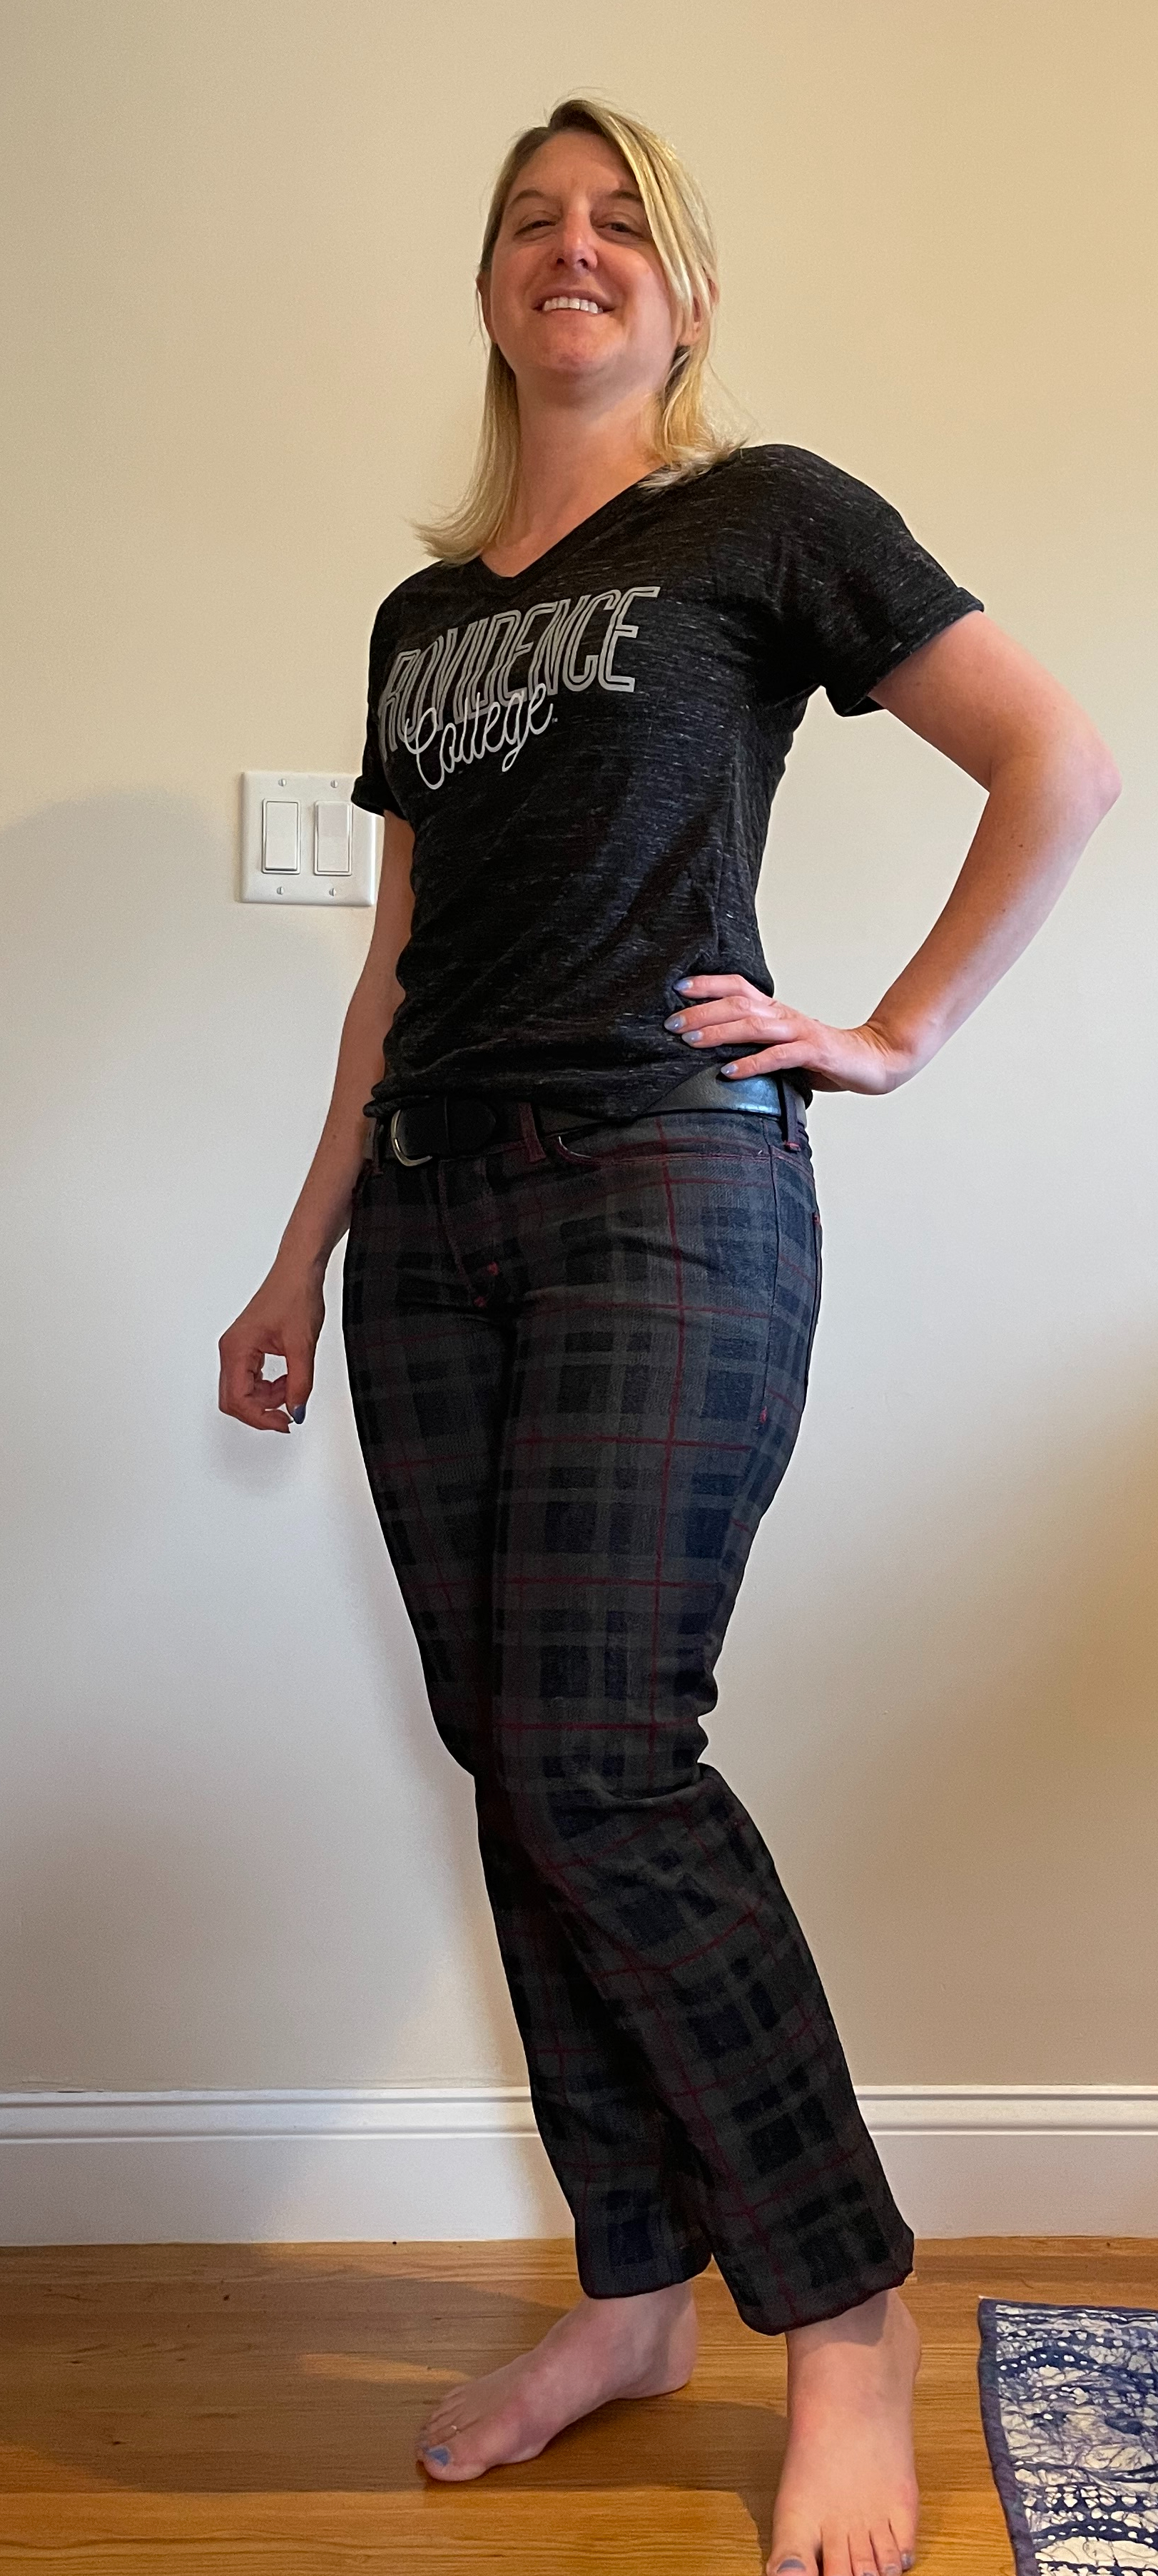
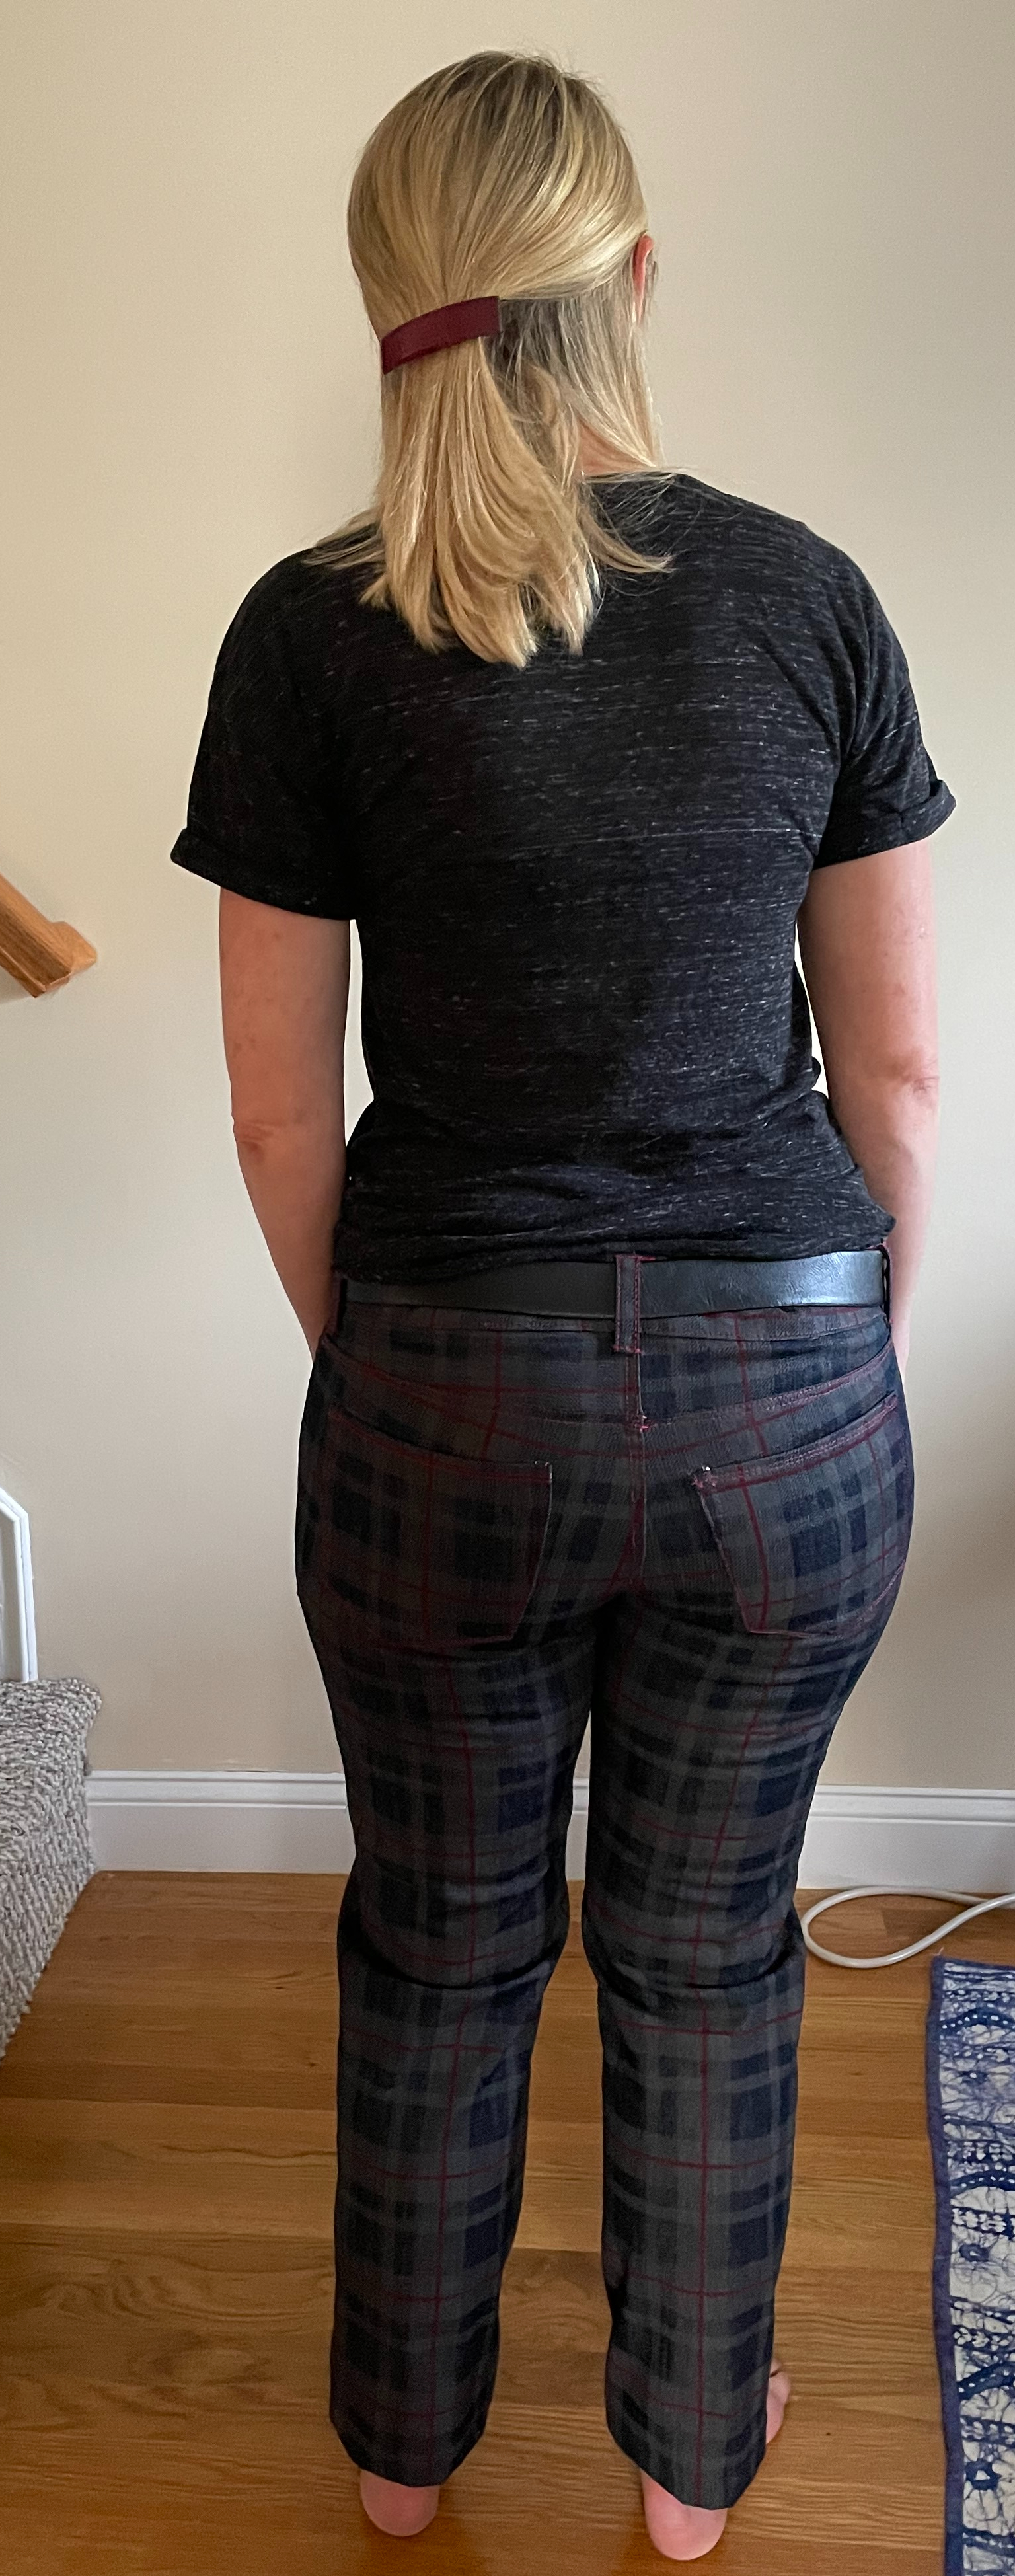
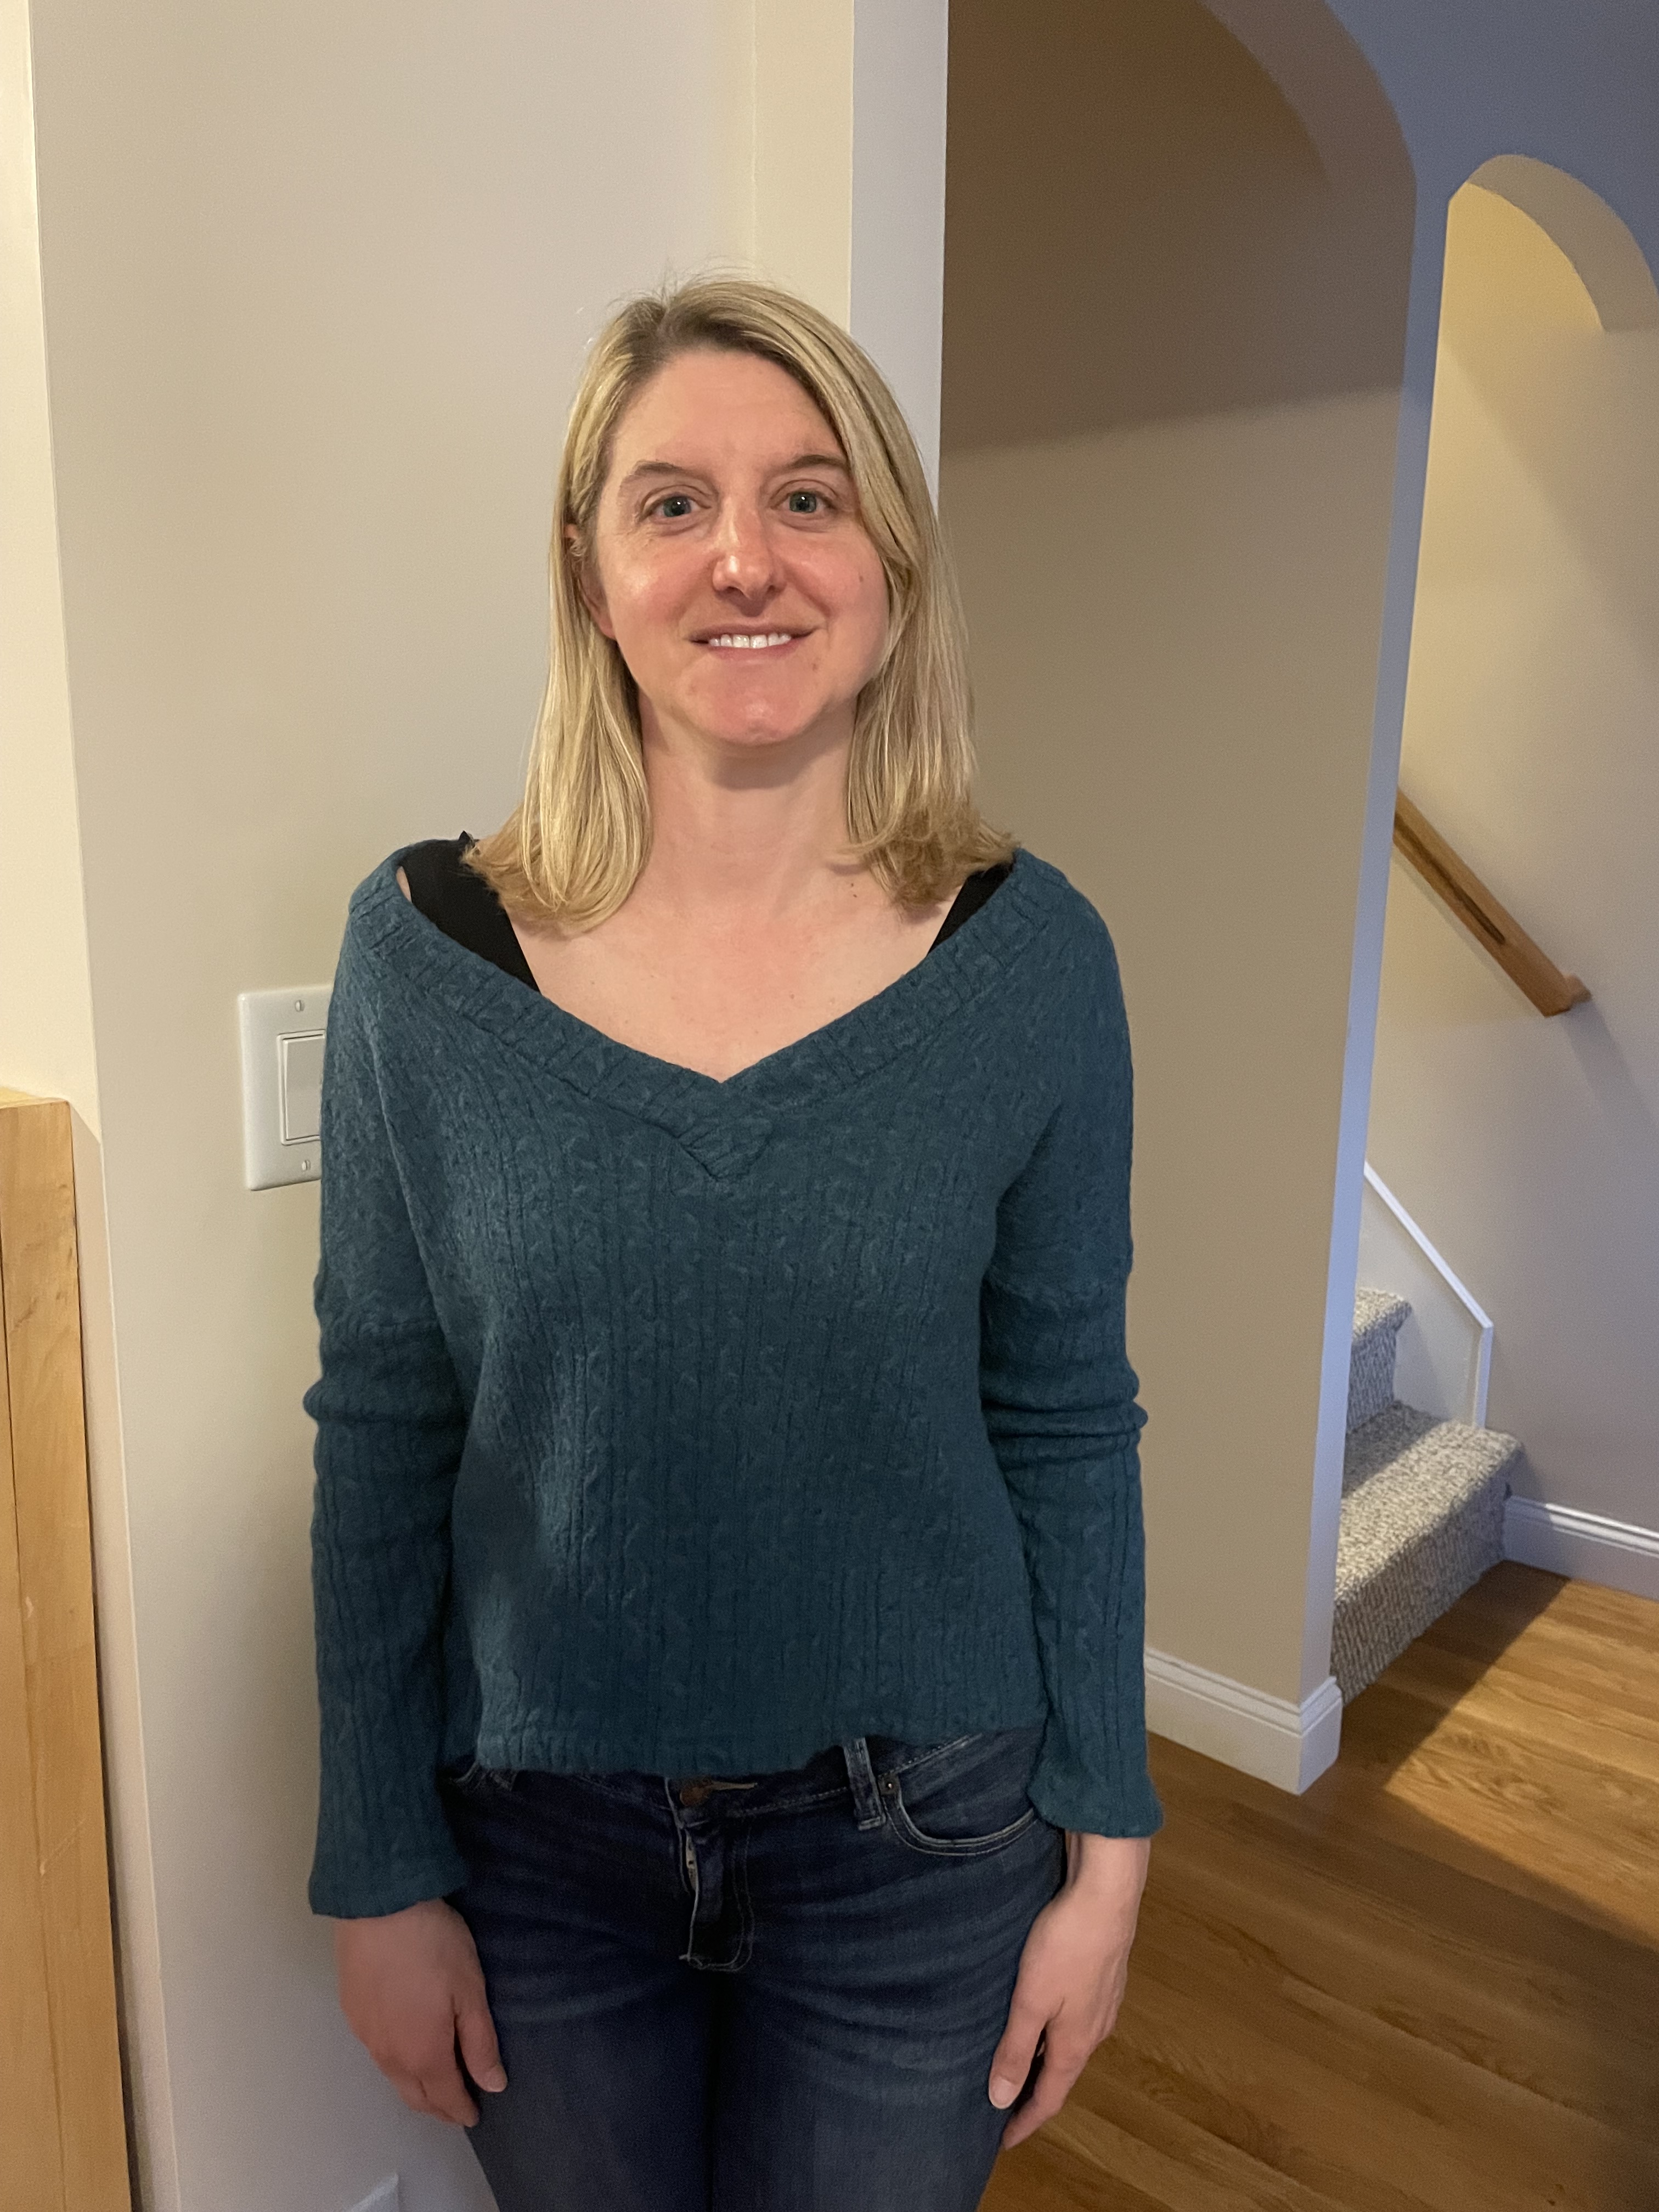
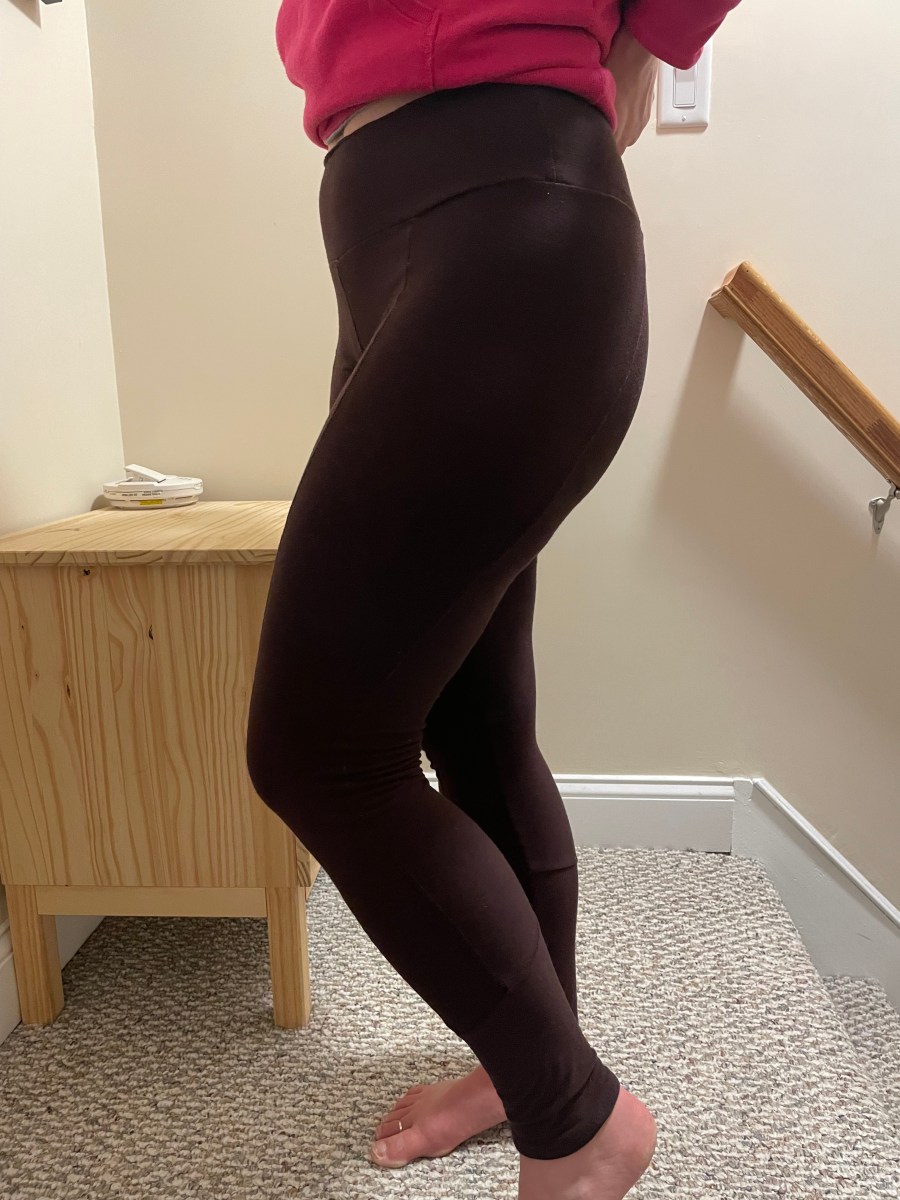
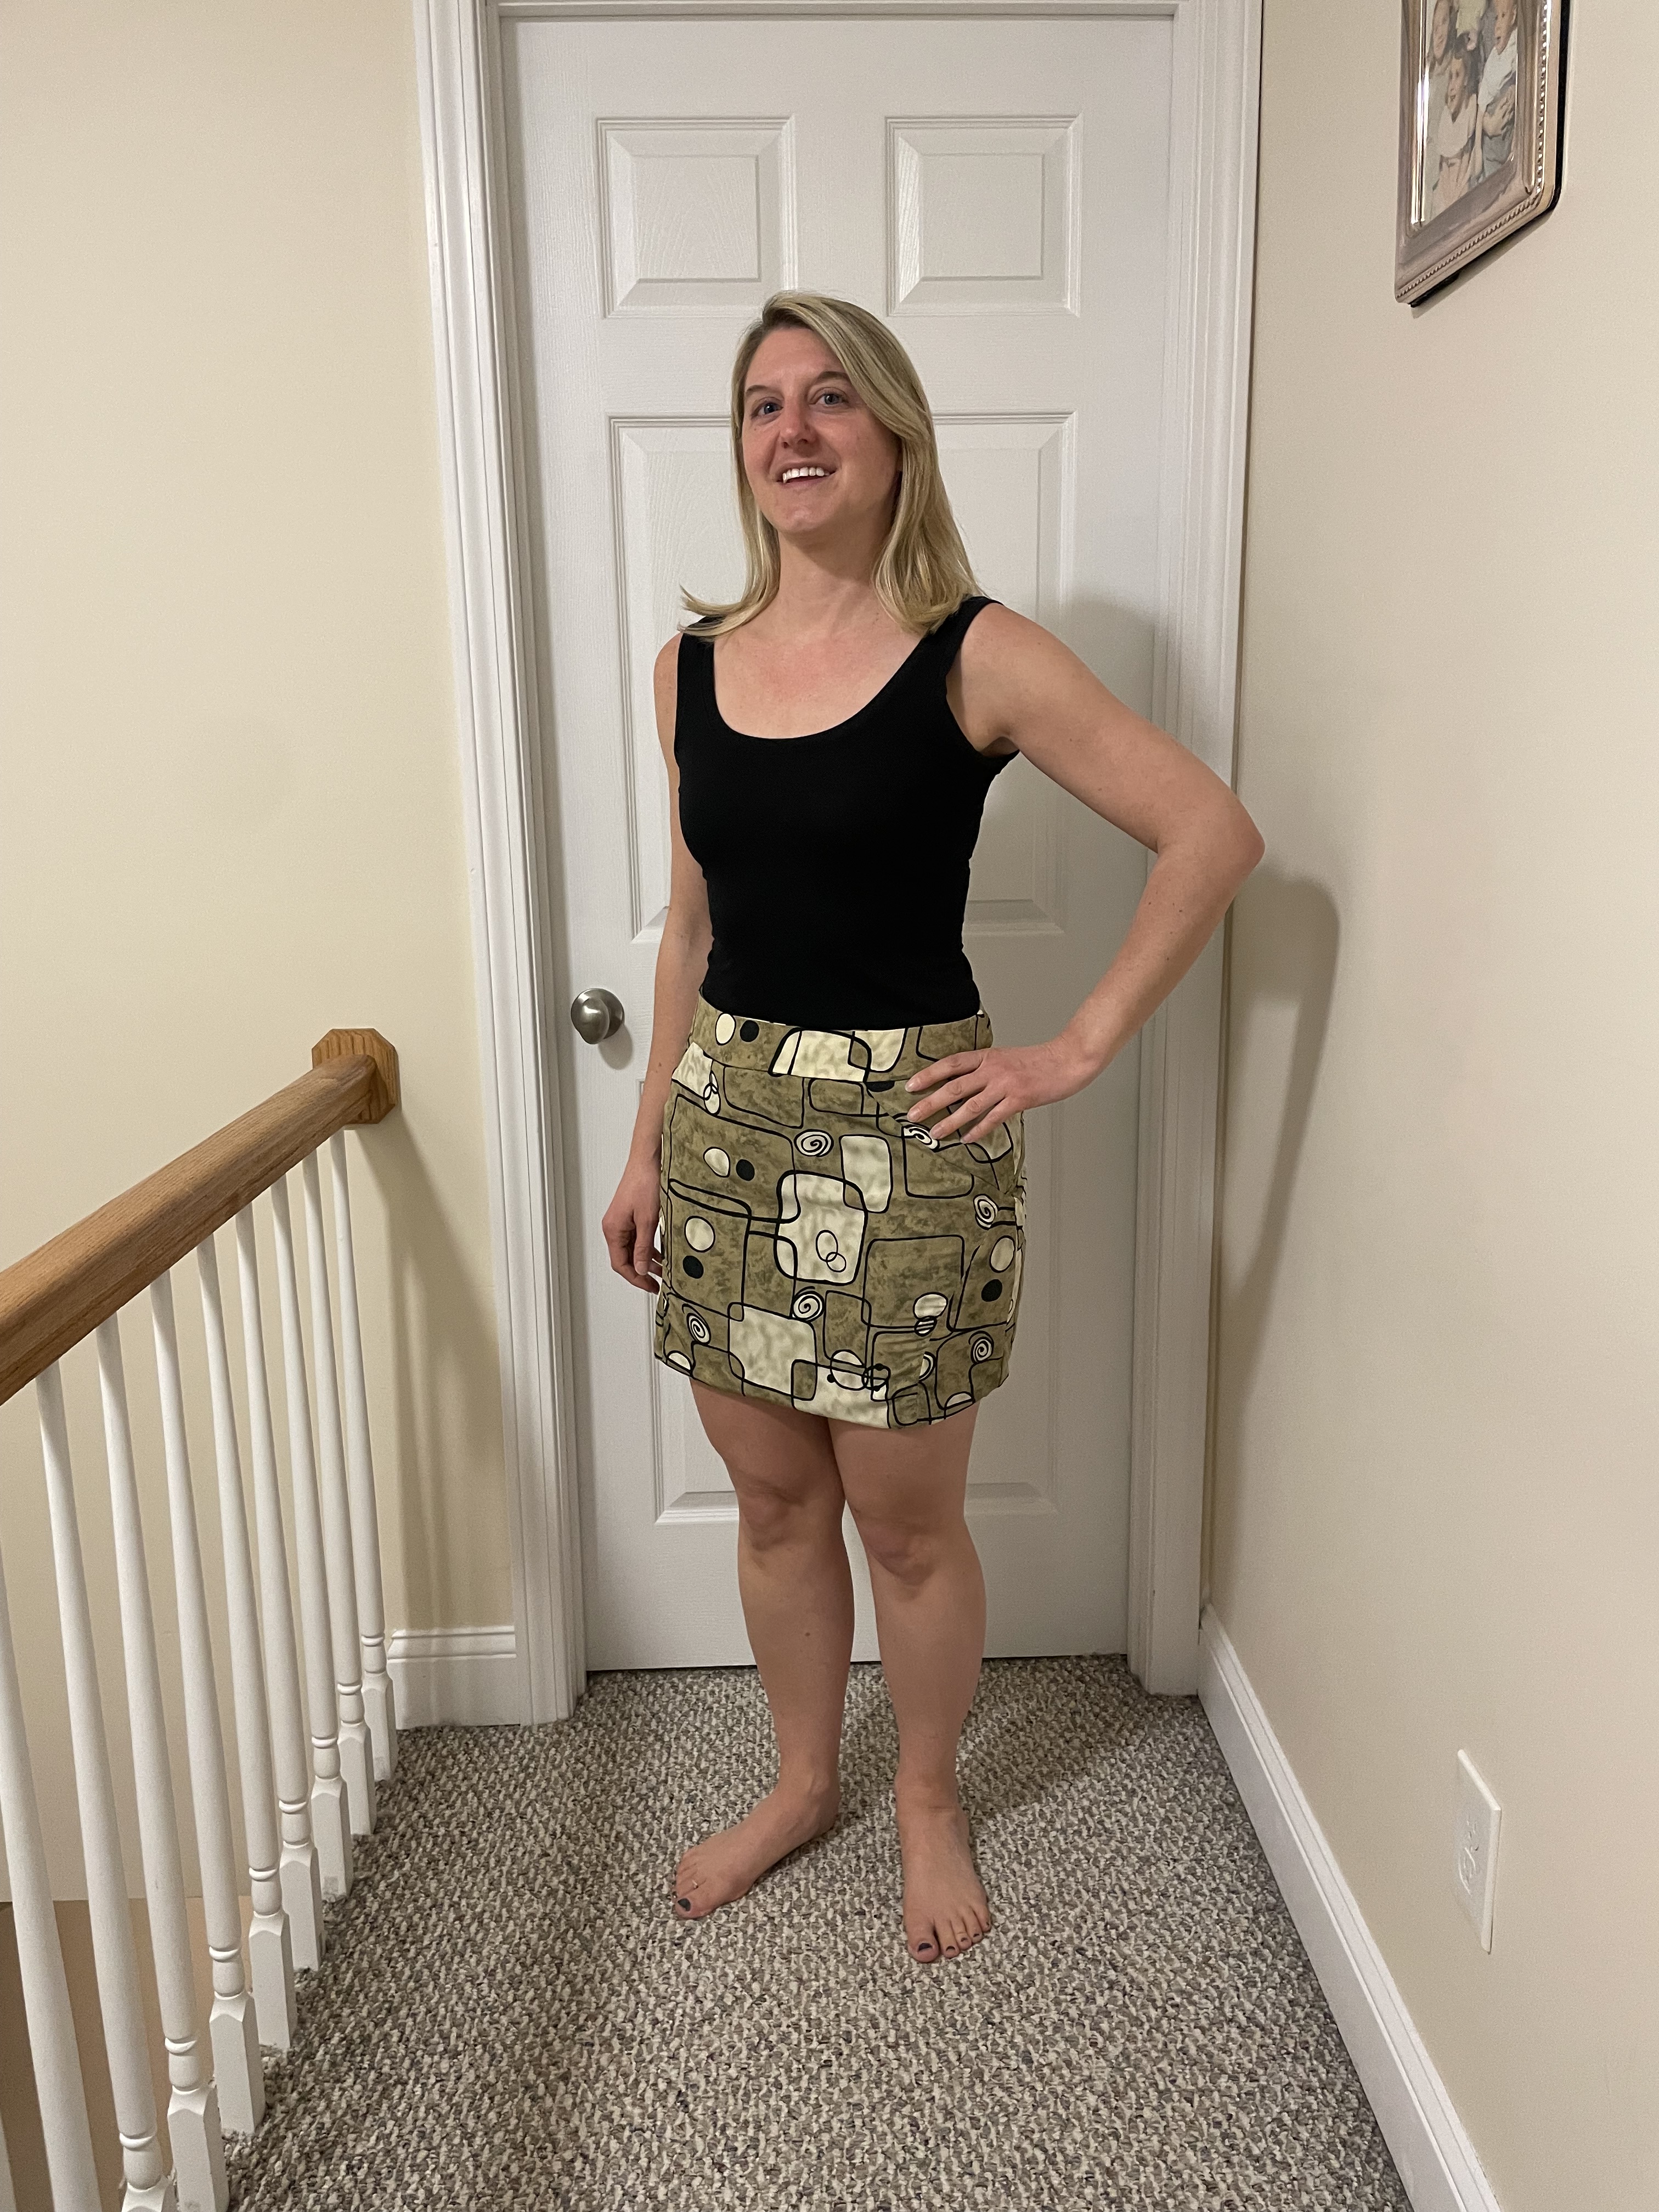
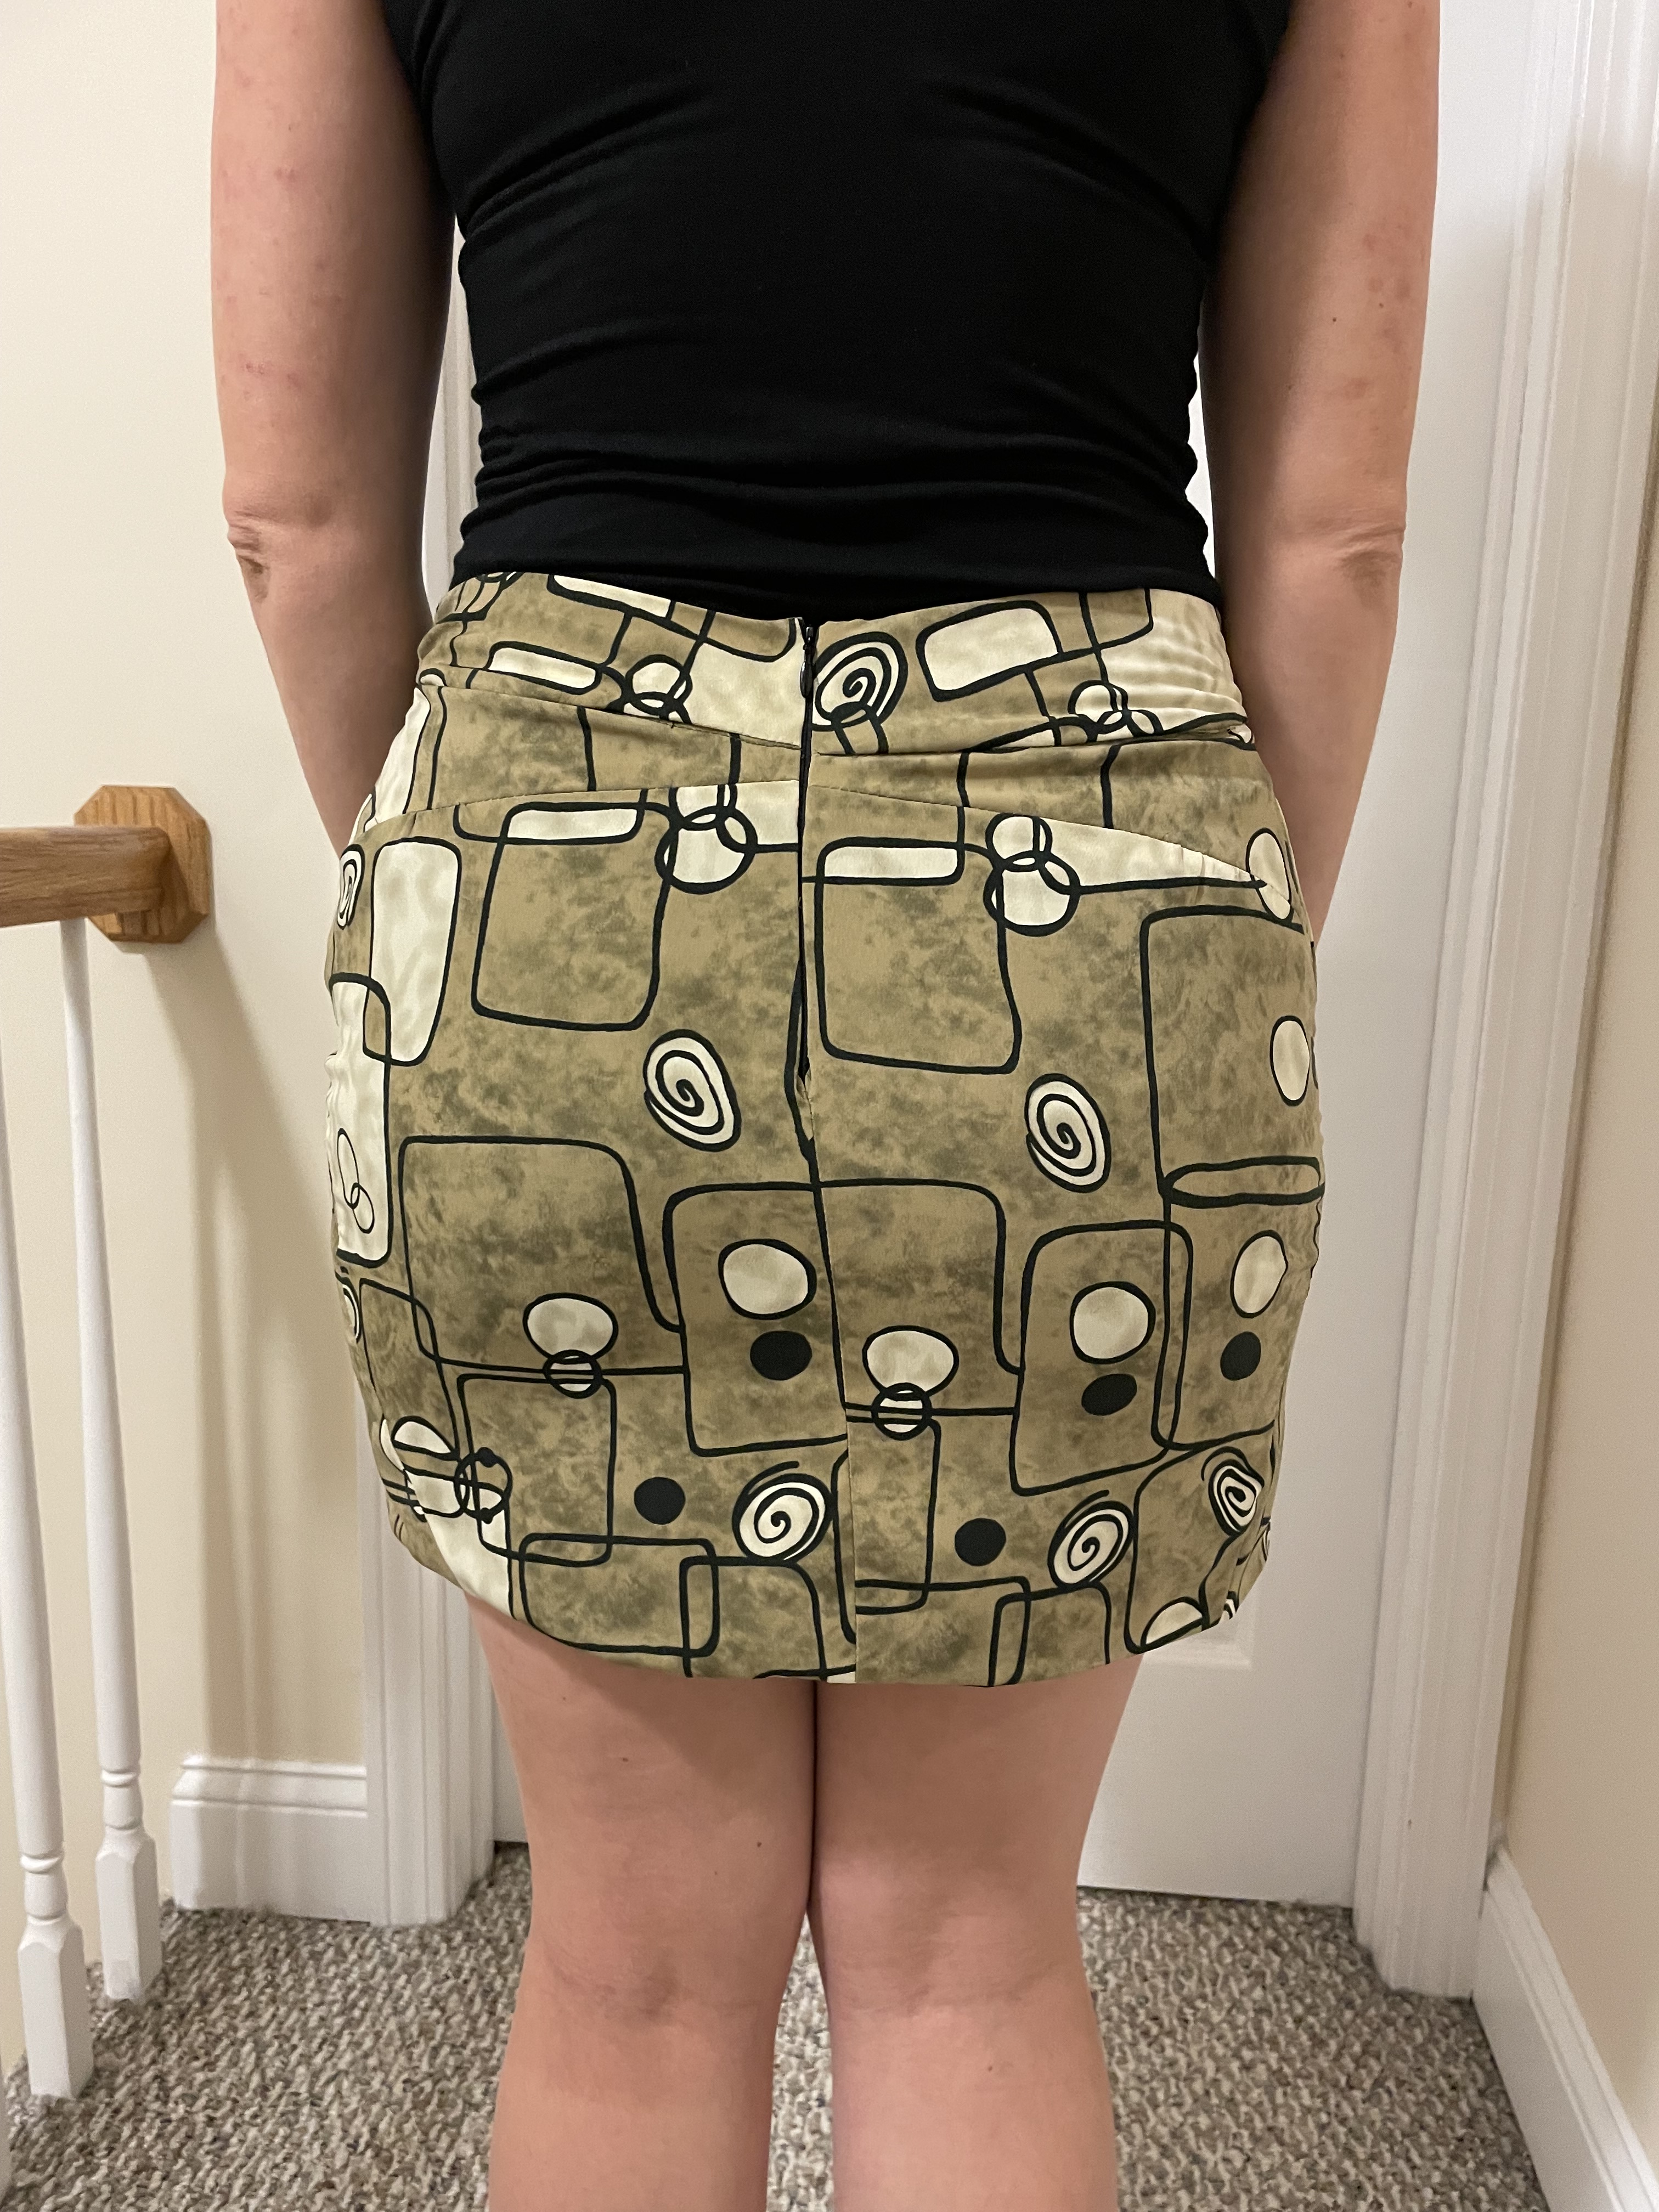
I didn’t want to give up on this skirt, so I was on the lookout for another pattern. One with maybe a similar style. I found the McCalls pattern in my stash and thought it had potential. I had wanted to make view E as I thought that front drape would look similar to what I had in mind for this fabric. However the more I looked into it, I could not figure out a way to line the skirt with that pattern. It would take skills I do not have in order to hack it to create the hemline I wanted. So then I looked at view A. This version was lined and so I could attempt my lining trick with the hem. And I figured that maybe the diagonal panel design might actually look cool with this geometric type design. For some reason I had some trouble understanding this pattern as well and the pieces didn’t really line up the way I think they should have. The results were…well the only good think I can say about the skirt is that it fits me. It tends to bunch up a bit when I move, so I’m not sure it will work as a wearable skirt. At least not one that I will want to wear often. I did end up getting the hem I wanted with this, however I do wonder if my changes to the pattern is another reason why this skirt doesn’t fall correctly. On a good note, it is one of the only skirts I’ve made where the waist is the right size and tapers in appropriately, so maybe I am getting better at something from this exercise.

In conclusion, my second skirt ended up being better, but I still didn’t get what I wanted out of this fabric. And I’m not sure if the problem lay with the fabric, which I admit was more difficult to work with than I first thought, or the patterns themselves. The confusion I had is probably on me – my lack of experience with sewing may be a main factor in why I couldn’t get these right. It doesn’t feel great to end this year on a failure (or at least a non-success), but I guess that’s life sometimes.

2022 is over, but I probably will still attempt some do-over projects in this coming year, since I love improving on stuff I’ve already made. I am still mulling over what my focus for this year will be and I think I have something so stay tuned! This past year has mostly been pretty triumphant with my sewing projects and I am looking forward to continued success into the next year. Happy New Year to my readers and hope to see you in 2023!

Take two for 2022: Bicycle shorts made from bicycles (fabric)

Pattern: Fehr Trade Duathlon Shorts

I ran a marathon!

Fehr Trade Duathlon Shorts pattern

The past few months have been extremely busy with training and working, I barely had time for sewing. And I definitely had no time for blogging. But I did get a chance to sew up some exercise shorts which were a re-do from one of the first times I attempted to sew workout clothes.

Back in the days when I couldn’t even fathom running a full marathon, I had made the capri length version of this pattern to wear for a half marathon. The pattern was easy to follow and the pants easy to sew up, but what I didn’t understand at that time was how to size them properly. I was going off of finished measurements, not remembering that running pants are supposed to fit tight and stretch over your body. Therefore the measurements should be smaller than your normal pants measurements. I ended up making them a size large, which fit extremely loose at the time. To make matters worse, I ended up losing some weight after my initial wear, which made these pants basically useless for exercising in. It was a bit disappointing since I really liked how they came out. I knew I had to make another pair at some point, and this time I would not be afraid to make a smaller size.

running pants - final

Even though I use these for running, they are technically bicycle shorts. I actually like to run in longer shorts because it prevents thigh chafing. I had gotten this bicycle fabric a while back because I thought the print would look cute for a pair of leggings. I happen to have the pink and purple spandex, which made a great contrast for the side pockets.

As I mentioned, my first attempt was a size large. These are a size small, which seems like the perfect fit for me. This time around I also used a twin needle for the a double row of stitching on the waist and hem. I didn’t need to do anything special to prevent the tunneling of the fabric, so it ended up being a good gamble.

Even though I made these right before the big race, I did not wear them for the marathon. However, I did do some sewing for the main event. I knew I needed to fuel up a lot since I would be out there for many hours, so I sewed up a few arm bands made from a free pattern by Fehr Trade that I had also made years ago. I also made a running belt to match, all matching the red, white and blue of my marathon outfit. The fabric was softer than spandex and the belt stayed in place a lot better than other ones I had made in the past. It was nice to have another way to carry fuel, since my pants pockets were already stuffed to the gills.

I haven’t had a chance to wear these new shorts on a run yet, I just put them on for a celebratory photo with my marathon medal. This marathon ended up being pretty special for me as I ran it with a giant group from my running club. We trained together all summer and fall and traveled to Washington DC for the main event. The weather was beautiful, the course was inspiring and even though I didn’t get quite the time I wanted, I did end up with a personal best. I’m not sure what my next running goal will be, but when that time comes, I’ll be ready with some new gear.

Take Two for 2022: Blouses from nightmare fabric

Patterns:

  • Butterick B6684
  • Itch to Stitch Mila Shirt

One thing I’ve been wanting to make is a sheer, flowy blouse. I have a few in my wardrobe that I’ve purchased over the years, but I’ve never attempted to make one. A few years ago, I purchased two different colored sheer crepe fabrics, both with a bird print on it. Looking at them, I envisioned a button down blouse with a sleeve tab, so I could roll up the sleeves. It took me a long time to find a pattern like this that I could use with a lightweight fabric. Or at least I wasn’t sure I could use a regular shirt pattern with material like this. I finally decided to go with the Itch to Stitch Mila shirt and started with my navy blue version of the fabric with red birds.

But first, I thought a quick project with some discount fabric would be an easy way to add a nice back-to-school-like blouse to my wardrobe. I’m not sure what type of fabric it was, because I got it off a discount table at Sewfisticated fabrics. I’m guessing it’s some sort of synthetic or polyester. It’s not as sheer as the crepe, but it had a slight flowy quality to it. And it was a bit slide-y when trying to cut it. I decided it would make a nice top with a neck bow, so I opted to use the Butterick pattern #6684. The top would be finished with french seams, but I was a little nervous about the fabric so I opted for a sharper needle. The results were not too bad, but the sleeves are a little tight and moving my arms forward in this top is quite a challenge. I’m guessing the french seams made this top a little tighter, so if I make this again, I will have to compensate on the seam allowances. It’s just so hard for me to use the proper seam allowances with this type of finish as I always seem to need to sew in a bit more to make sure no fabric is poking through the outside.

Since this wasn’t the blouse I was hoping it would be, I prayed I’d have better luck with my bird fabric. The one thing I noticed with that first blouse was sometimes the material would pucker a bit with the stitching. When I tried some practice stitches on the crepe, sometimes the fabric would actually get pulled into my sewing machine. I knew I needed some sort of stabilizer if I was going to make this work.

There were a few options, but I felt the easiest thing to do was to sew with tissue paper. The extra step of setting up the tissue paper under the fabric as I sewed and then tearing it off was annoying and time consuming, but definitely worth it. The stitches were definitely more even and the material kept its shape as I was sewing. I used french seams here too, which also added time to this project, but I like the end result. The other issue I had with this fabric was that it would not press at all, no matter how hot the iron was or how much steam I used. I’m guessing the fabric is synthetic, just from the feel of it. Since pressing was so much of an issue, I decided to do a rolled hem on the bottom, which required me to buy another foot for my sewing machine. I do think it will prove to be a good investment and I really liked the way it folded the fabric automatically as I sewed. It was difficult learning how to use it on a curved seam like the hem, but surprisingly I didn’t have to unpick and re-sew too much of it. I went pretty slow, trying to make sure the fabric wrapped around the foot correctly as I curved around. I think next time I make this with this type of fabric, I might use my serger to do the rolled hem as this fabric is so tough to control.

My new rolled hem foot
Rolled hem foot in action!

Making a shirt with just a front buttoned placket instead of a full button down was also a good choice for this top. I eventually want to make another one with the off-white crepe bird fabric I got as well, but after this project I definitely needed a break. It might be a few months before I attempt it again. The only other change I would make is to shorten the length a bit. I really like the tabs on the sleeves and would definitely keep these on the next version, even though again, it added more steps to the process.

I’m lucky this blouse fits so much better than the other one I made. It’s not perfect, but definitely close to what I had envisioned when I bought the fabric. I wonder though, is working with nightmare fabric like this worth all the suffering?

Take Two for 2022: Sew Buttons

Pattern: Vogue V9227 View B

I came back from vacation a few weeks ago, but I feel like I’m still catching up on things. Since I didn’t have much time to sew over the last few months, I decided to take both my sewing machine and serger for servicing, since it had been several years. With everything working in tip-top shape, I wanted to tackle another re-do with a completely new pattern. About 4 years ago, I made this knit top that had decorative buttons on the collar and arm seam. I liked the look of it on the pattern envelope, but the end result…not so much. I was cleaning out my closet this spring and happened to find it hanging in the back. Yeah…I knew I wouldn’t be wearing this. Before this, I had never gotten rid of a garment I had made myself. I never had the heart to throw away a make, no matter how flawed it was because of the time spent and the hard work put in. But I knew I couldn’t keep everything forever, especially things I just couldn’t wear. So in the trash it went, after I salvaged the buttons of course.

Navy blue knit top
The old top that I never really got to wear. I just couldn’t get over how wrong the buttons looked on this.

Even though this new shirt isn’t a do-over of a pattern, it had a similar style to the first shirt, with buttons that were decoratively placed on the arm seams. As with this other shirt, I knew would have to be careful and pay attention to where I put the buttonholes to make sure everything looked even. I had to be careful when constructing the collar as well, so everything lined up right. I knew I needed to take my time with this and not rush through it like last time. I think with knit tops especially, I tend to maybe not be as precise since they sew up so quickly.

View B on this pattern is actually a test drive for View A, which I thought would make a really unique winter top. I totally missed the boat getting it ready for the right season, but decided to sew up View B for fun anyways. I also wanted to give myself a break from another project I am working on with chiffon that is making me tear my hair out a bit.

Although I salvaged the buttons on that other shirt, these are not them. I got buttons that matched the fabric, but most importantly were the the right size for the garment.

It’s not perfect – the collar in the front could be a bit straighter and some of the seams could be better, but overall I like the result. This one is wearable for real this time. The panels on the seams look even and the buttons are lined up correctly this time. Most importantly, this is a better pattern that I am able to be successful at, which I think makes a big difference. I’m very excited I have a new, comfortable top for the fall and hopefully one that I will not throw out any time soon. So glad to have my serger back!

Take Two for 2022: The problem with pants pt. 3

It’s been awhile since part 1 and part 2, since I kept putting off finishing my jeans for a few reasons. First, I ran out of top stitch thread and had a real hard time finding the exact color online or in stores. Then my serger broke, making it not possible to finish my seams properly. However the worst problem I ran into was when I tried to sew the legs up together. I sewed up the inside leg seams and everything seemed okay, but when I tried to sew up the side seams, everything seemed really twisted and the sides were not matching up.

I went back and read and re-read the directions to see how I could have gotten it so wrong. Then I saw it – it mentioned the back leg was supposed to be shorter than the front. When I had adjusted the length on the legs to fit my height, I didn’t account for this. They were both the same length, which caused a problem for this pattern. Since I was not able to properly fix this by cutting out new legs, I decided to just trim from the bottom, so it would at least be able to line up right, even if the shape was not exactly correct. Now the directions made sense, where I needed to ease in part of the inside leg seam and how the sides would match up. Unfortunately, now the plaid didn’t match up, but I couldn’t really do anything about that. Because I had to re-do some of the stitching after I had already finished the seam, I knew these pants would be even tighter which made me nervous. I may not be able to zip them up.

To make sure this wouldn’t happen again, I traced out a new pattern for the front and back legs, properly measured to account for what the difference in length should be. I made sure to shorten where the pattern indicated and traced out a new pattern to use. It’s pretty hard to use a pants leg pattern piece when it’s folded to the right size, so I think this new piece will help for future jeans. After sewing on the waistband and belt loops and top stitching to death, it was time for the moment of truth…

Well they just barely zip up, but these are stretch jeans so they may stretch out a bit. It does seem like no matter what size I make jeans or pants, the waistband always seems too big and doesn’t fit my waist right. This is something I may need to research or work on with the next pair. Not a horrible attempt at this new pattern, but definitely some mistakes to learn from. I’m not sure if I like these better than my green cords, since the fit is not quite right, but it’s getting me closer to my own pair of homemade jeans.

Take Two for 2022: The Switzerland Sweater

Pattern: Sew House Seven Tabor V-Neck

Most of the time when you make a garment for the second time, it comes out better than the first. Unfortunately I learned this is not always the case, and there are certain factors to consider when attempting to recreate a item you have already made. In the case of my Switzerland Sweater, I didn’t realize the difference in fabric from my wearable muslin would make such a difference in the final outcome.

To back up a bit, this all started when I decided to buy this very expensive merino wool fabric when I was on vacation in Switzerland. I wanted something to remind me of the trip, and the blue wool knit seemed reminiscent of the electric blue lakes and rivers I had seen. I envisioned a cozy sweater that would transport me back to the mountains, even if I was just drinking coffee on my snowy back deck. The Tabor V-neck pattern by Sew House Seven seemed to have a look similar to what I was going for, but of course wanted to test it out before cutting into my pricey new fabric. I found a nice neutral gray sweater knit and went to work. Making a test version seemed like a great idea, especially since the V-neck construction was a bit confusing in the directions. I ended up carefully sewing the raw edge of collar towards the middle on both sides, being extremely careful about not getting the fabric to bunch up. I did not pivot at the tip of the v-neck, but actually sewed a seam on either side, towards the point. Then I finished the seam around on my serger, making sure the stretch was right. The result was better than I expected as the front stayed flat with no puckering.

The rest of it sewed up pretty fast and the fabric was so comfortable, this top has actually gotten a lot of wear this winter.

The sizing ended up being perfect as well and since everything had gone right, I had no fear cutting into my Switzerland fabric. I followed everything the same, but unfortunately…

It ended up being huge! The sleeves were too long, the neck was too wide and it just had a totally different look. I was so disappointed – this was not the sweater I had envisioned. I wanted a cozy sweater that was appropriate for the mountains. This was just an oversized boxy top that was falling off my shoulders.

Well of course I couldn’t leave well enough alone…so I decided to try to shrink it. With a little research, I got the idea to wash it in hot water. I mean, it was so baggy I had a lot of room to play with, right?

Big mistake.

Instead of the sweater getting smaller all the way around, it only shrank up. I pulled it out of the washing machine and realized I was holding a doll sweater. Panicking, I managed to stretch it back out somewhat while it was still wet. But now I had the most expensive crop top I’ve ever owned. How could this go so wrong, when my first attempt came out almost perfect? When I thought about how much money I had spent on this fabric, it nearly brought me to tears.

There is a lesson here that not all fabrics are created equal and the same pattern can behave very differently with a different fabric type. The main issue is that there was no way I would be able to make a test version with fabric that expensive, so it is always going to be a challenge to know how to prevent this going forward. I guess with experience you can start to know the little differences in the fabric you work with. I am not in a hurry to sew with any merino wool in the near future.

I also learned about shrinkage – this time it is about laundry. Trying to make a garment just a little smaller can cause it to shrink up like a frightened turtle. Even though this isn’t the top I envisioned to take me back to the glacial lakes of the Alps, it is still wearable.

This is definitely not a Take Two success story. However, my “take one” has now become one of my favorite winter sweaters in my wardrobe, so I guess it’s not all bad. As for this attempt, the neckline is still too wide and also isn’t as straight as my wearable muslin. Despite this, I did manage to get rid of some of the bagginess and sleeve issues. It’s still a very pretty color. And it still does remind me of Switzerland.

Zurich, Switzerland
September 2019

Take Two for 2022: My little brown clone

My serger is broken.

My plaid jeans project ran into a bit of a snag where I realized I did not shorten the back and front legs equally when adjusting for my height. This created a weird twist effect with the legs and I had to pull it all apart to diagnose exactly what had happened. As I was re-finishing up the crotch seam for the 2nd time, one of my serger needles broke. Then it happened again. I decided to abandon this project temporarily while I still had some needles left As I began sewing up my next project, a pair of lounge pants in a plum bamboo knit, I broke 2 more needles. With the last serger needle in the machine, I decided to quit both of these projects until I could take my machine into the shop, which of course closed two minutes before that final needle snapped.

With my first completely free Sunday in over a month, I was incredibly depressed I couldn’t spend it sewing. Everything that is cut right now depends on that serger. I guess it will force me to cut out a blouse I’ve been meaning to start on.

Even though I wasn’t able to do it for February, I’m still determined to write something twice a month. Luckily there are some projects I had been working on earlier this year that I can share.

Pattern: Rowan by Megan Nielsen

While this shirt was not exactly a re-make of another garment, it was actually an attempt to replace something from my wardrobe that was previously purchased. I have this brown knit mock turtleneck shirt with 3/4 sleeves that I absolutely love. It has to be at least 12 years old and it’s starting to show it’s age. The neck shape isn’t what it used to be and the color is bit more muted. It’s still a big staple in my wardrobe that goes with many things so when I found some brown knit in my stash, I figured I could make a newer version that could be a replacement. I tend to hold on to garments a bit too long, but maybe this new version could help me let go of such a treasured shirt.

This old shirt…somewhat faded but still has some life in it?

I decided on the Rowan shirt from Megan Nielsen. This ended up being a very fast sew, back when my serger was actually working. This is the same fabric I used to make my test leggings from this year, so I got some great use out of it, wherever it came from.

New shirt on the right. Seeing them side by side, you can see the new version is a bit brighter than the original
This new version is definitely more form-fitting, which I think is a good thing

I really like how this came out and it should work for what I made it for: a standalone shirt that works for fall and winter as well as a shirt to wear under some of my favorite sweaters. Nothing too fancy or complicated here – there is some knit interfacing to stabilize the neck and twin-stitching on the bottom hem, but just plain old zig-zag stitching on the sleeve hems. Great pattern – I’m thinking Megan Nielsen may be my new favorite pattern company at the moment.

This is on theme for the year, since I am still replicating and improving on clothes I already have. This is something I hope to do more of in the future as well. What has been your experience with replicating clothing you had previously bought?

Take Two for 2022: The problem with pants pt. 2

It’s been a busy couple of weeks, after a pretty dead and uneventful January. I’ve also been running more now that I have some actual racing goals and motivation. Which is good, since the one pair of pants I’ve been able to finish since my last blog post (part 1) are my Sewaholic Pacific leggings. This was a second test run and I have to say, I like this pattern. These did not come out perfect, but I think they will be wearable enough to take them out on a run. I also did not make the same mistakes with the waistband from part 1, so some lessons learned!

Pinning the gusset to the first leg, these lines really help you know where to sew

I was a lot more comfortable with the gusset portion of the pants. I again followed along on the tutorial on the Sewaholic website. I’m still having trouble on knowing where to clip on the inseam. The photos and explanation just didn’t seem to make any sense to me. I clipped something, not sure it was in the right place. After I sewed the gusset to the first leg, I finished the seams with my serger. This was not in the tutorial, so I was nervous about attempting it, but it worked out really well. I ended up being able to finish the rest of the seams in the same fashion. I then decided to topstitch around the gusset seam, on the right side, hoping it would flatten things out and make it stronger overall.

Still confused on where to clip, I can’t seem to make sense of the directions, but at least it seems to lay somewhat flat
Finishing the seam with my serger – I was nervous but this method seemed to work out really well
Topstitching around the gusset…the jury is still out on this as well
Continue reading “Take Two for 2022: The problem with pants pt. 2”

Take Two for 2022: The problem with pants pt. 1

Patterns:

  • Sewaholic Pacific Leggings
  • Closet Core Ginger Jeans

Few things seem more complicated to me than sewing up a decent pair of pants. I’ve attempted dress pants, casual pants and leggings but I’ve never really successfully made a pair of pants I’ve liked enough to wear all the time. The exception to this is of course pajama pants, but as soon as any complication is thrown into the process, the results are not great. The main issue that comes up is usually fit, as I tend to make things bigger than I need. In some cases I’ve actually lost weight during the process of making them, and they end up just not being quite right.

Project 1: Working out workout pants

I’m in the middle of a couple projects right now, forcing myself to get this pants thing right. The less complicated project of the two is a pair of exercise leggings. I’ve attempted this before which had okay results, but I never really wear any of the ones I’ve made. On my first attempt, I successfully added a back zippered pocket to a pair of Papercut Patterns Ooh La Leggings. It worked but it was never ideal, as the back panel was not well suited for it and my stuff tended to really float around back there. The main issue with these pants was actually the fabric, which didn’t really have much two-way stretch. It was a soft cotton-knit, but unlike what I usually wear when I run or work out. My 2nd version also had its issues with the fabric not being that opaque, so I was always a bit self-conscious wearing them.

These are nice, and I like the pattern, they just don’t quite look like workout pants.

I tried this again with a different pattern, Fehr Trade’s Duathlon pants, which were specifically designed for running and exercising. I really liked this pattern and it was honestly very easy to follow. I used actual spandex this time and they looked like real running pants. I put them on and…they were too loose. I got so scared these would be too small that I didn’t even think of the fact that they are supposed to be smaller than normal because they need to stretch onto your body. Then with all the running I was doing, I lost even more weight and these began to just hang on my body. I can still work out in them, but I don’t feel too comfortable wearing them running and I think baggy spandex just looks too silly.

running pants - final
These are even baggier now than when I first wore them. Definitely my fault, not a pattern fail.

This time it will be different, I swear! The first part is picking a pattern that is the exact design of what I want. This time around I am making Sewaholic’s Pacific Leggings. I love this pattern company as they make patterns specifically for pear-shaped people (like me). This pattern had a version with the back zipper pocket that I’ve come to rely on when I am running. I wouldn’t have to figure out how to add one later. Perfect! And there were options for color blocking. Fun! And it has a gusset. Yes! Or…wait a minute, what?! Okay this was a new one on me which brought all that pants anxiety back. A test pair would be needed before I cut into that new yogawear fabric I bought, to make sure I know what I am doing.

The back pocket looks really nice on this and was not complicated at all.
Continue reading “Take Two for 2022: The problem with pants pt. 1”

Take Two for 2022: The crisscross tunic

Pattern: Butterick B5954

Over the last few years, I’ve not been great at keeping up with this blog. At the start of each year, I have all these intentions for how I am going to start writing again through all my projects, but it always seems tp fall off very quickly. In fact there are dozens of projects I completed in 2020 and 2021 that I have not written about at all.

All that aside, I had a good idea for my blog this year and I really want to stick to it. As we head into another seemingly challenging year, it feels like many of us are in need of a do-over. As my wardrobe expands, I myself have been looking at my past projects and noticing how I could have done better if I had the experience I have now. Therefore for this year, I’d like to focus my sewing around the remake. A take two for 2022.

My goal is to post at least 2 times a month – hopefully more. It definitely helps to reflect after a project is done before diving headfirst in the next project. Maybe this year I can focus just on the writing and not about trying to have that perfect picture or narrative.

My first project of the year had me re-visiting a pattern from one of my earliest days of sewing. I made this top from Butterick (shown below), which I actually still love, back in 2014. This was before I owned a serger, which means it still has all raw edges on the inside that I didn’t bother to finish. I know no one can see the inside, but I know it’s there and it’s not up to my current standards for garment making. The shirt has held up pretty well despite it’s age, but it was made before I understood the basic concepts about working with knits, such as using a zig-zag stitch or how to hem stretchy material.

I got the idea to try this one again when I recently saw someone wearing a similar style shirt. I wondered if this style was back in fashion or at least showing up at some clothing store. This seemed like the right time to try out this pattern again, with hopefully a more professional look.

Continue reading “Take Two for 2022: The crisscross tunic”