2018 Pant

The 2018 pant: Starting off a difficult year

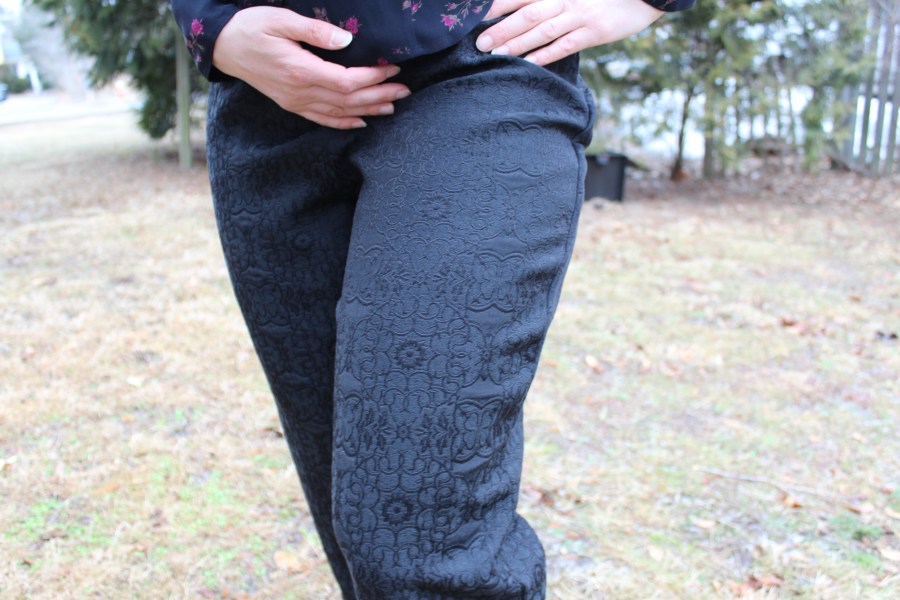
Pattern: New Look 6058 view DNew Look 6058

It’s always nerve-wracking to finally cut into that fabric that you bought a few years ago and you love so much. I knew when I bought the black textured fabric used for this project that I wanted to make some fancy pants with it, ones that could be worn on a night on the town. I even had a name for them – the New Year’s Eve pant, because it reminded me of an outfit I wore a long time ago on New Year’s Eve. Unfortunately, I didn’t go out on the town on New Year’s Eve and I also didn’t finish these in time to wear them until well into February. So instead, these have been dubbed the 2018 pants. A still-hopeful name for pants that I at least finished within the year, right?

Unfortunately this year is not what I thought it would be personally. After starting a new job last fall, I thought finally my career was finally taking off after a slow start and some difficulty. But sometimes these things don’t work out, even when you try your hardest at something. At the start of this year I found myself exactly where I didn’t want to be – struggling to find another job. Some years have so many positive memories that you can’t help but look back and smile. This will not be one of those years. However, it’s okay as I feel I will be a stronger person for it in the end.

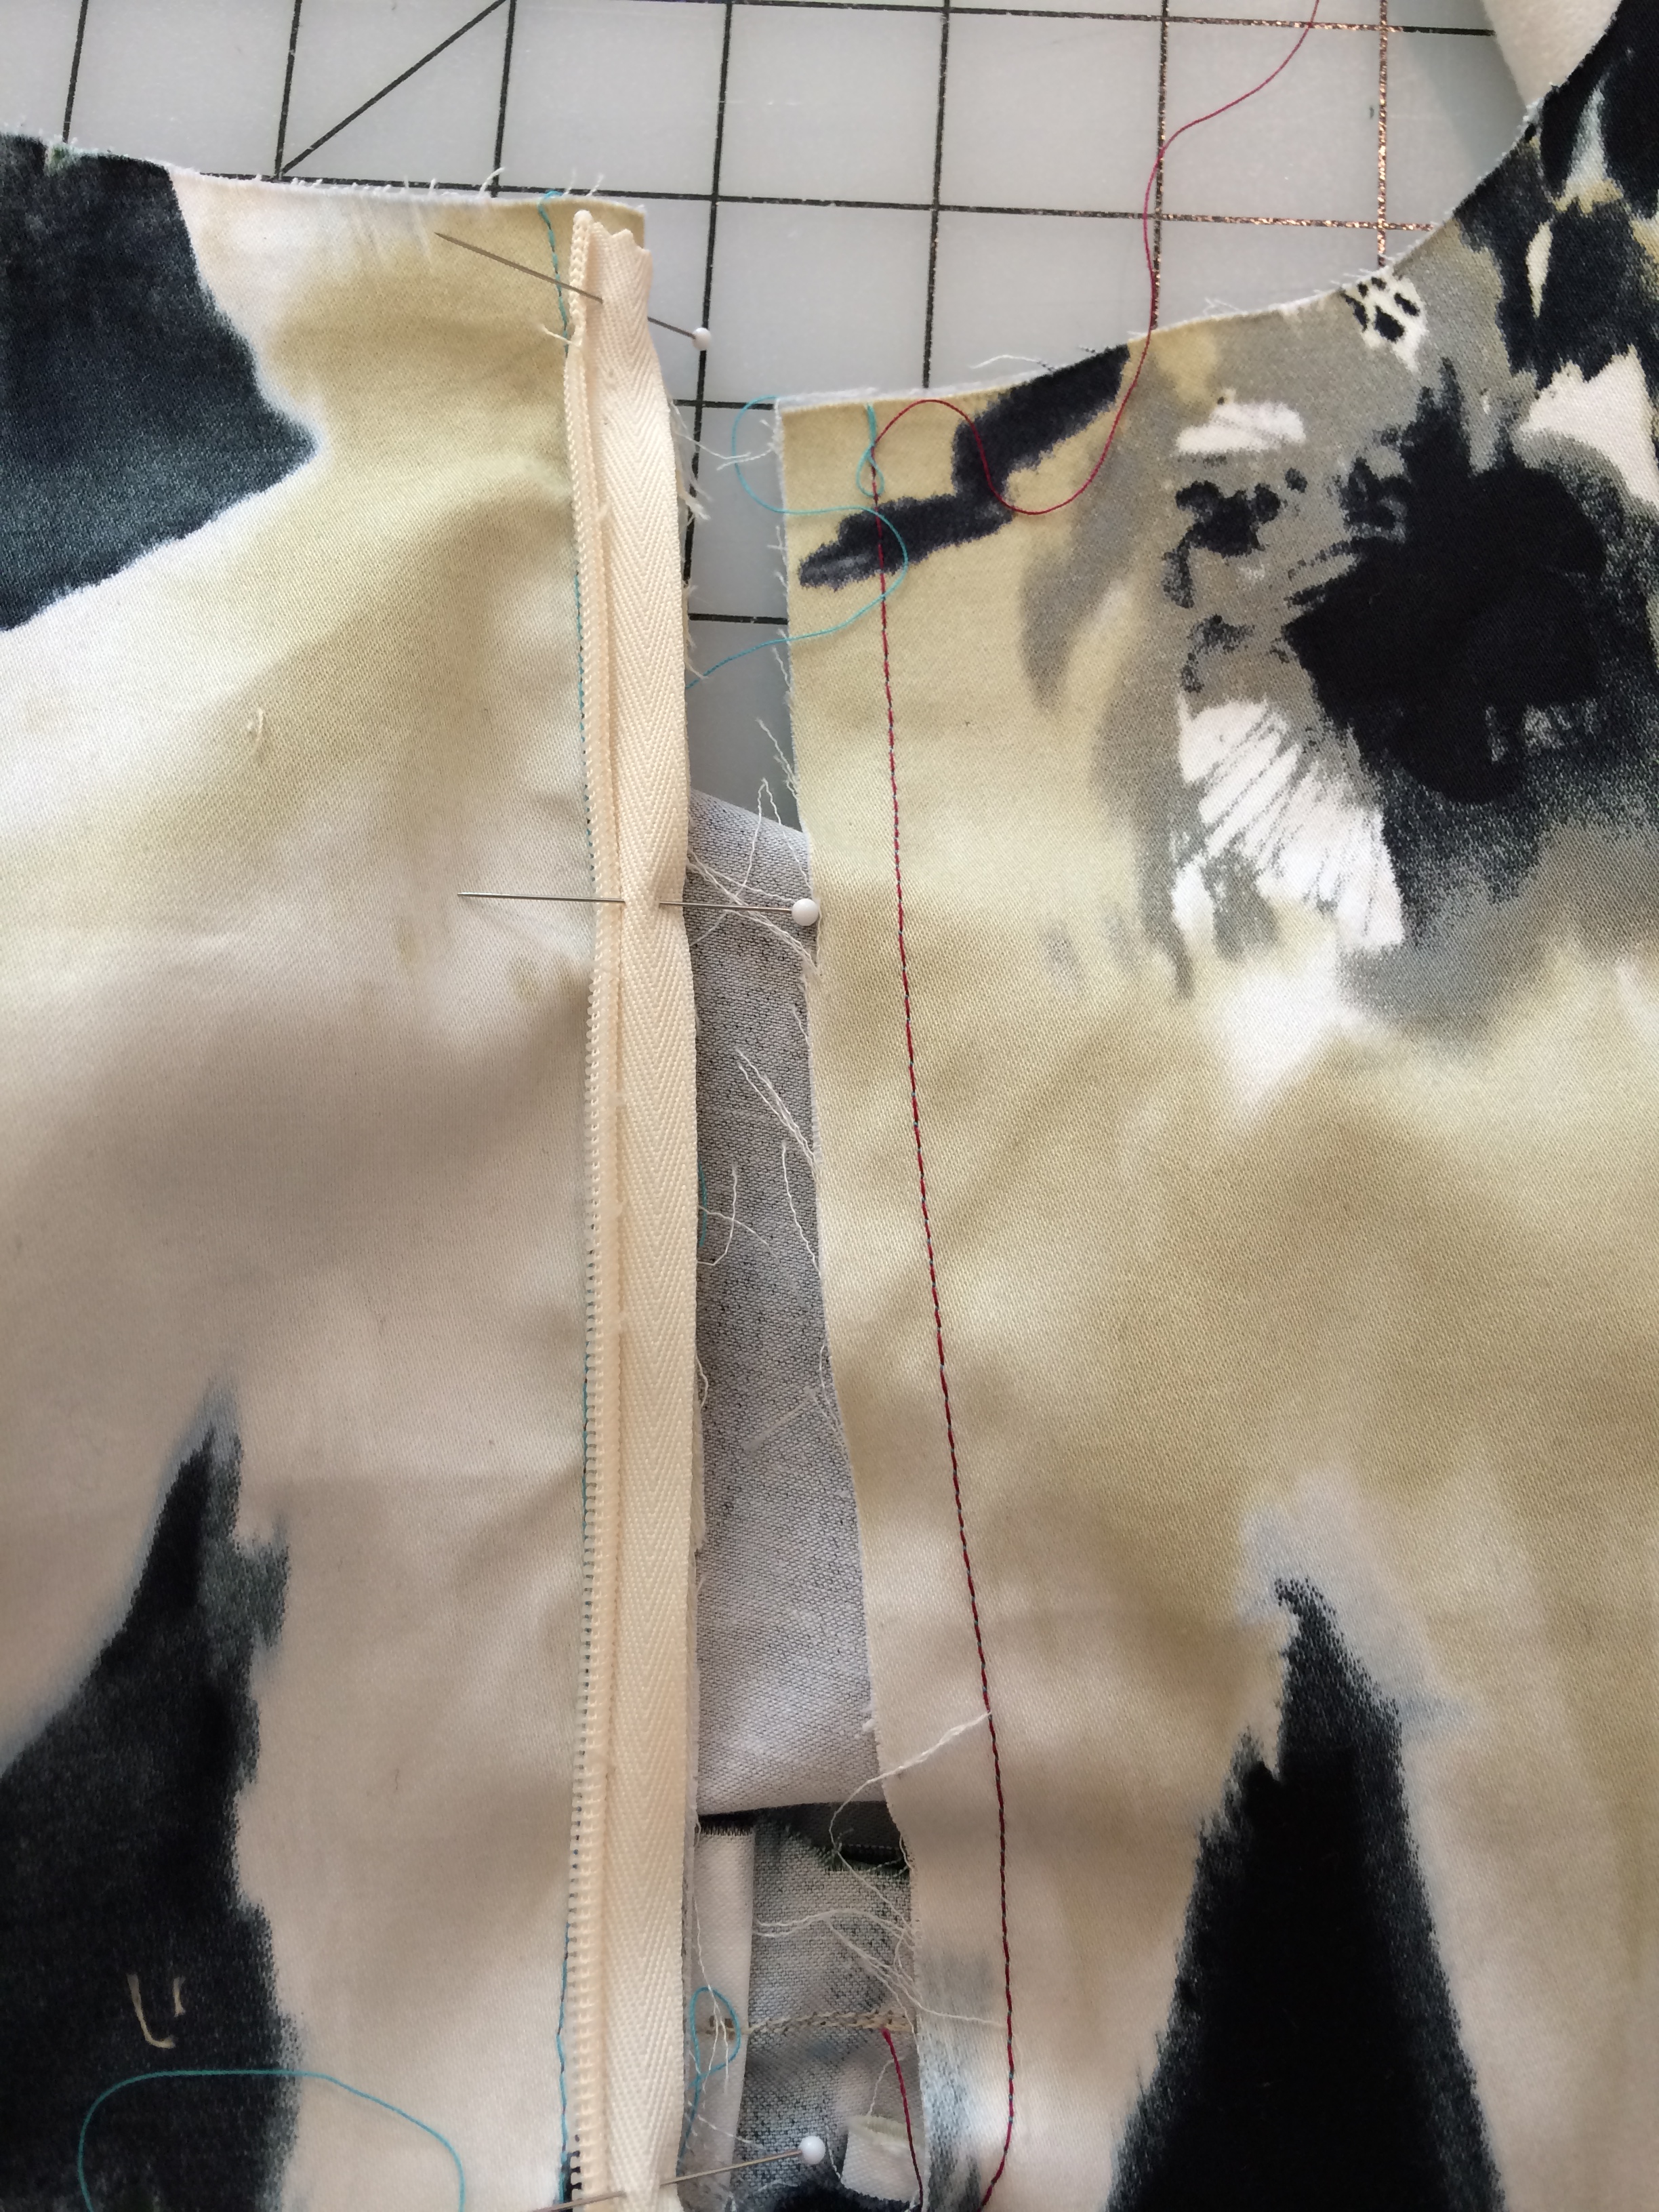
These pants gave me almost as much anxiety as my newly realized unemployment. Fitting pants is quite difficult with my body type and I knew that I needed to make a muslin to feel things out. I took my measurements and first made sure to adjust the crotch, which tends to hang really low on pants’ patterns for some reason. When I sewed the legs up, I realized these pants were really huge on me and even with the zipper seam allowance it was not going to work. Part of the problem was also that Continue reading “The 2018 pant: Starting off a difficult year”

The Dress-for-Wedding Challenge: Part 3

Pattern: Vogue Patterns American Designer, Kay Unger New York #V1353….continued from part 2 and part 1 Phew!  It’s finally done.  Actually, I do still need to buy a belt, but all the sewing is finished! Where we left off...okay I put the invisible zipper in.  For those who don’t know, this is what an invisble zipper looks like.  The teeth are not exposed on the outside, like a regular zipper, so the material is sewed around the front of the zipper tape. Invisible zipper

Invisible zipper foot
Plastic invisible zipper foot – a great alternative to buying a whole new foot

It really wasn’t that complicated, but there were a few minor beginner hiccups that I will share.  I watched this video, which described the whole process perfectly.  I didn’t have a proper invisible zipper foot, so I just used the cheap plastic foot pieces you get at the fabric store and it worked just fine.  Pinning the zipperI also wasn’t going to take any chances screwing this one up, so I made a bright colored basting stitch where the zipper was going to go, and pinned one side as the video instructed me.  After I sewed the first side, it seemed right, but I had trouble zipping it up.  It seemed twisted.  Thinking I did the whole thing wrong, I un-did all the stitches and tried to figure out what the issue was.  I couldn’t see what I was doing wrong, so I attempted stitching it again.  It seemed right, until I tried zipping it up for the second time.  I finally figured it out – the bottom of the zipper had just flipped to the inside, so it only looked like I pinned it wrong.  Ooops!  Oh well, I know for next time. After sewing both sides, the zipper flipped in with the material and indeed became invisible within the back seam.  But all of a sudden I couldn’t zip the whole thing up to the top.  This puzzled me for a bit, but after some examination found that I had just sewed one section too close to the teeth and the zipper was getting stuck.  Minor fix – all set! Invisible zipper finished I think it just needs a press so that the material is a little flatter around the zipper, but otherwise you can barely see it.  Major learning: it is extremely important to sew as straight and close to the teeth as possible.  This is where that plastic foot comes in handy since it actually has a groove that allows the foot to glide easily over the zipper teeth, keeping everything straight and tidy. This dress has a full lining in it, which attached at the neckline.  The pattern also had me cut out a hem facing, which was to be sewn to the bottom of the dress.  As I completed this step, Continue reading “The Dress-for-Wedding Challenge: Part 3”