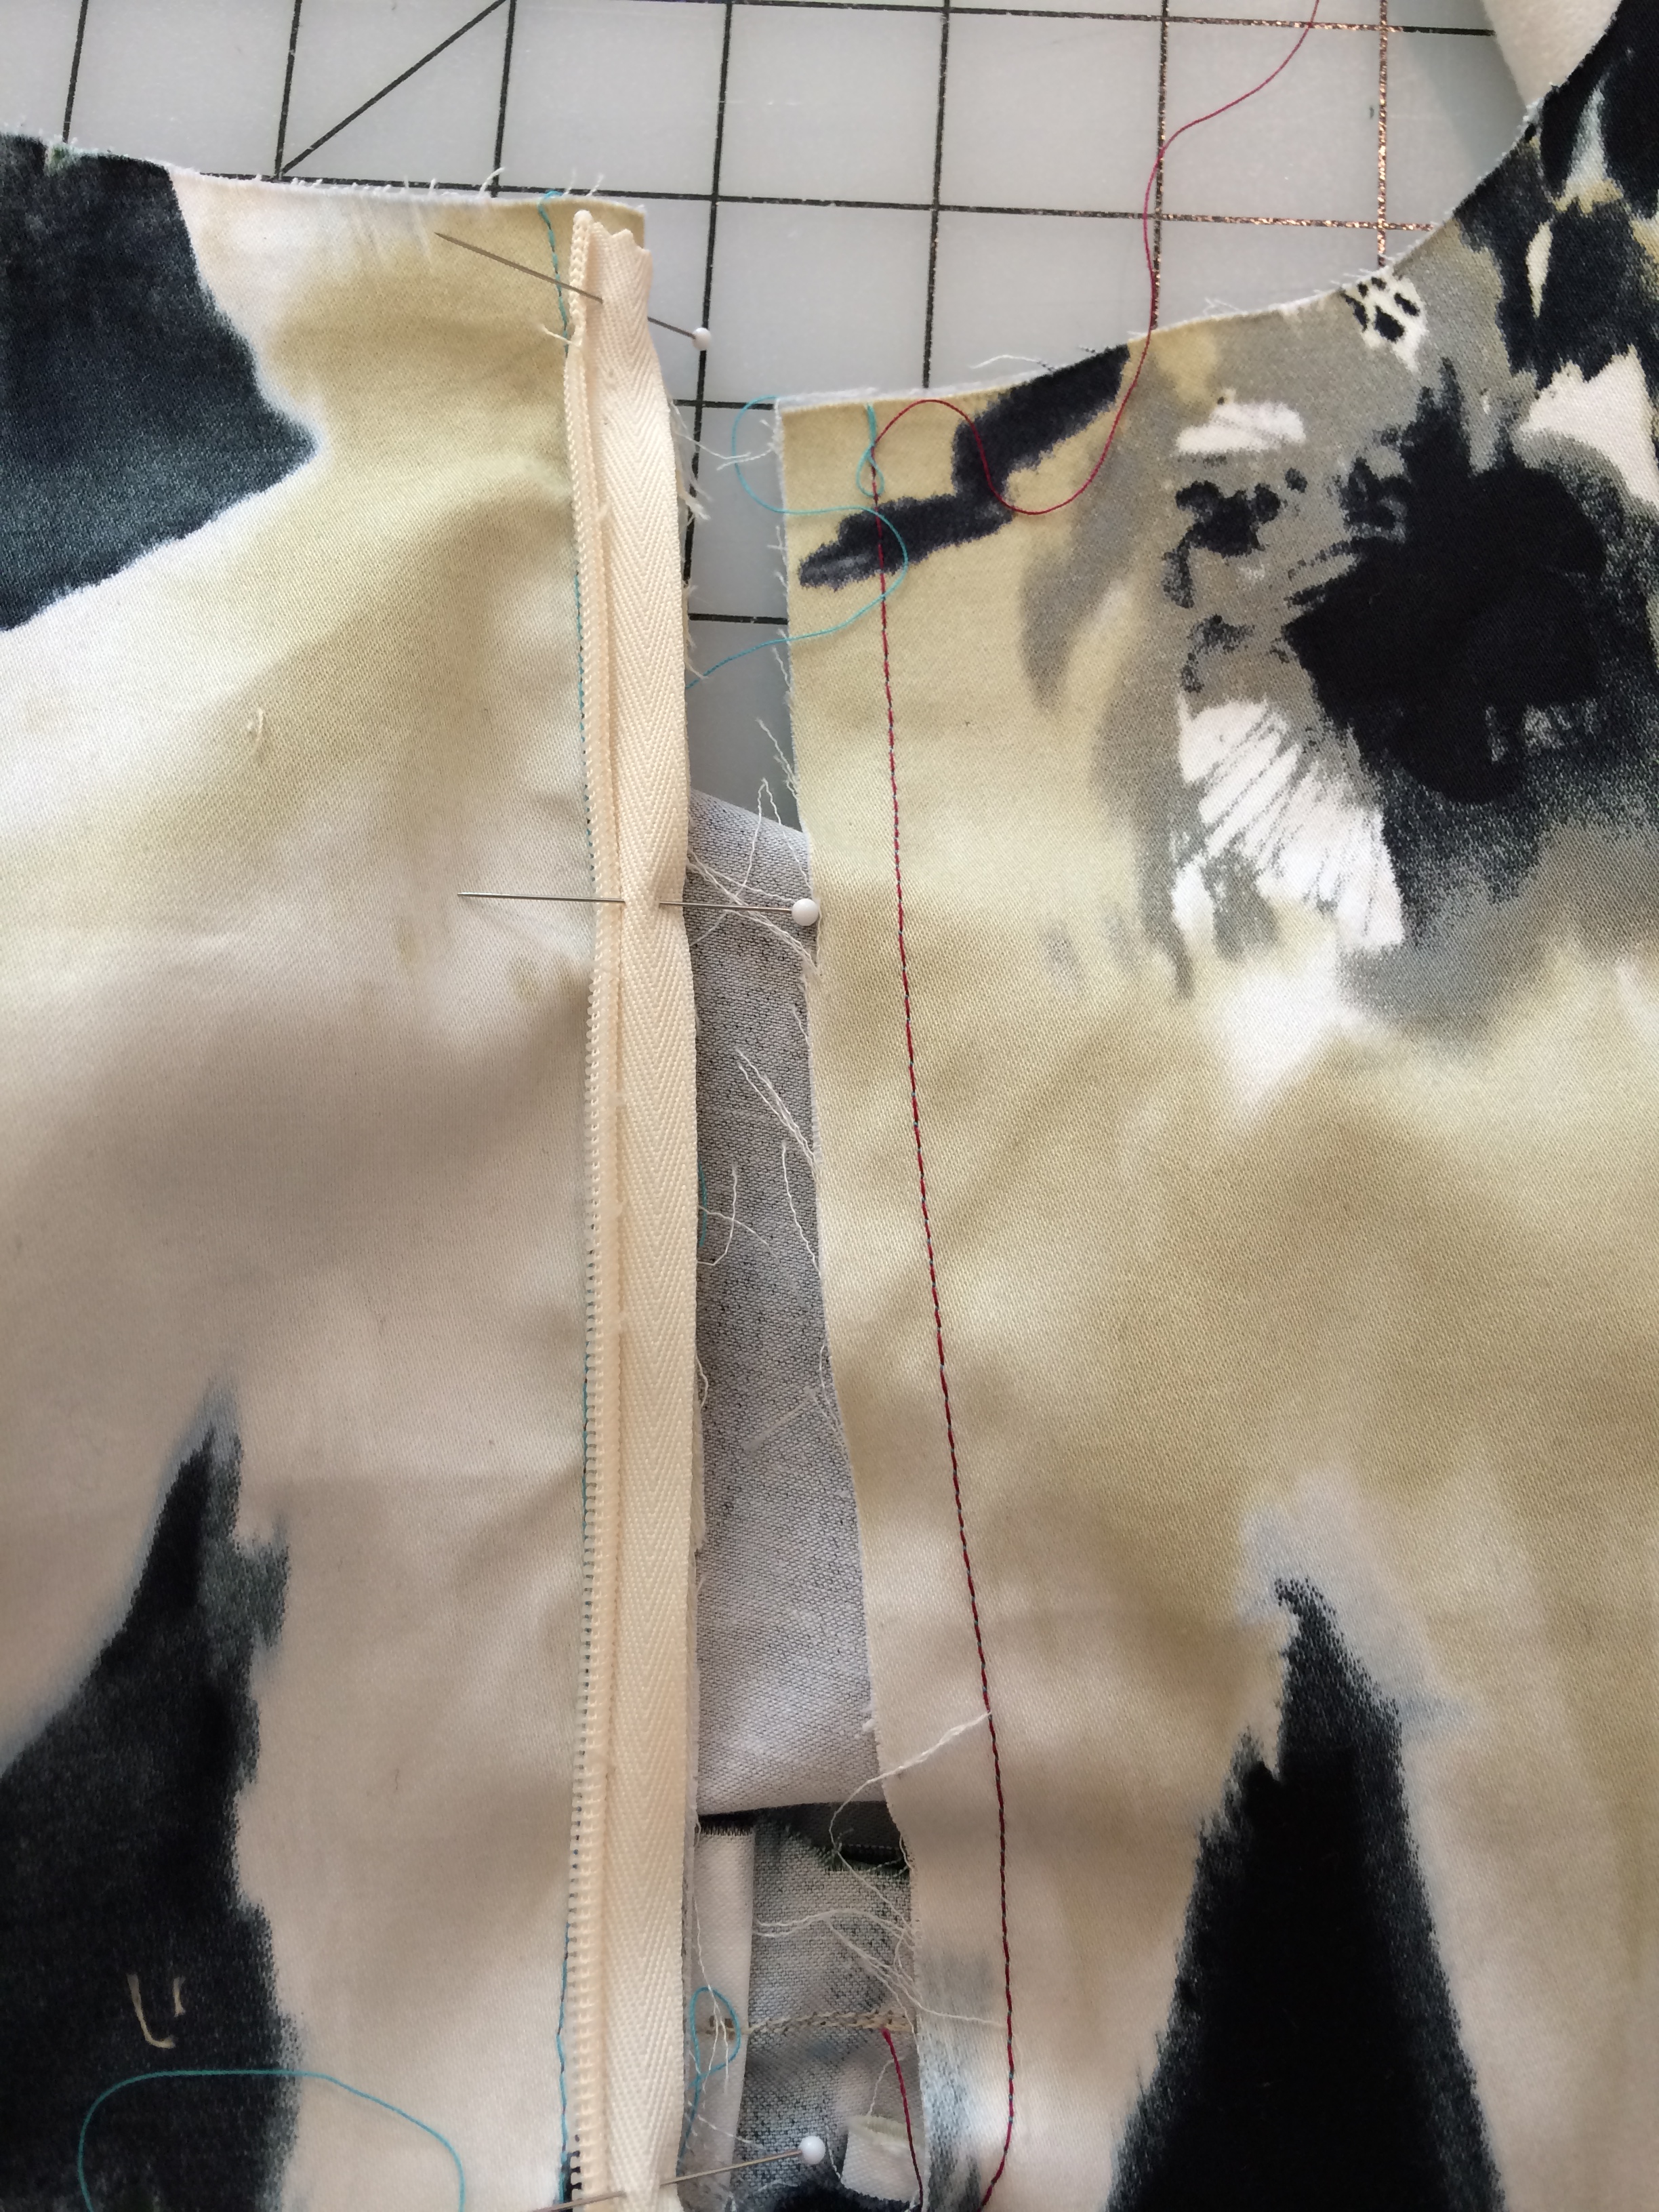
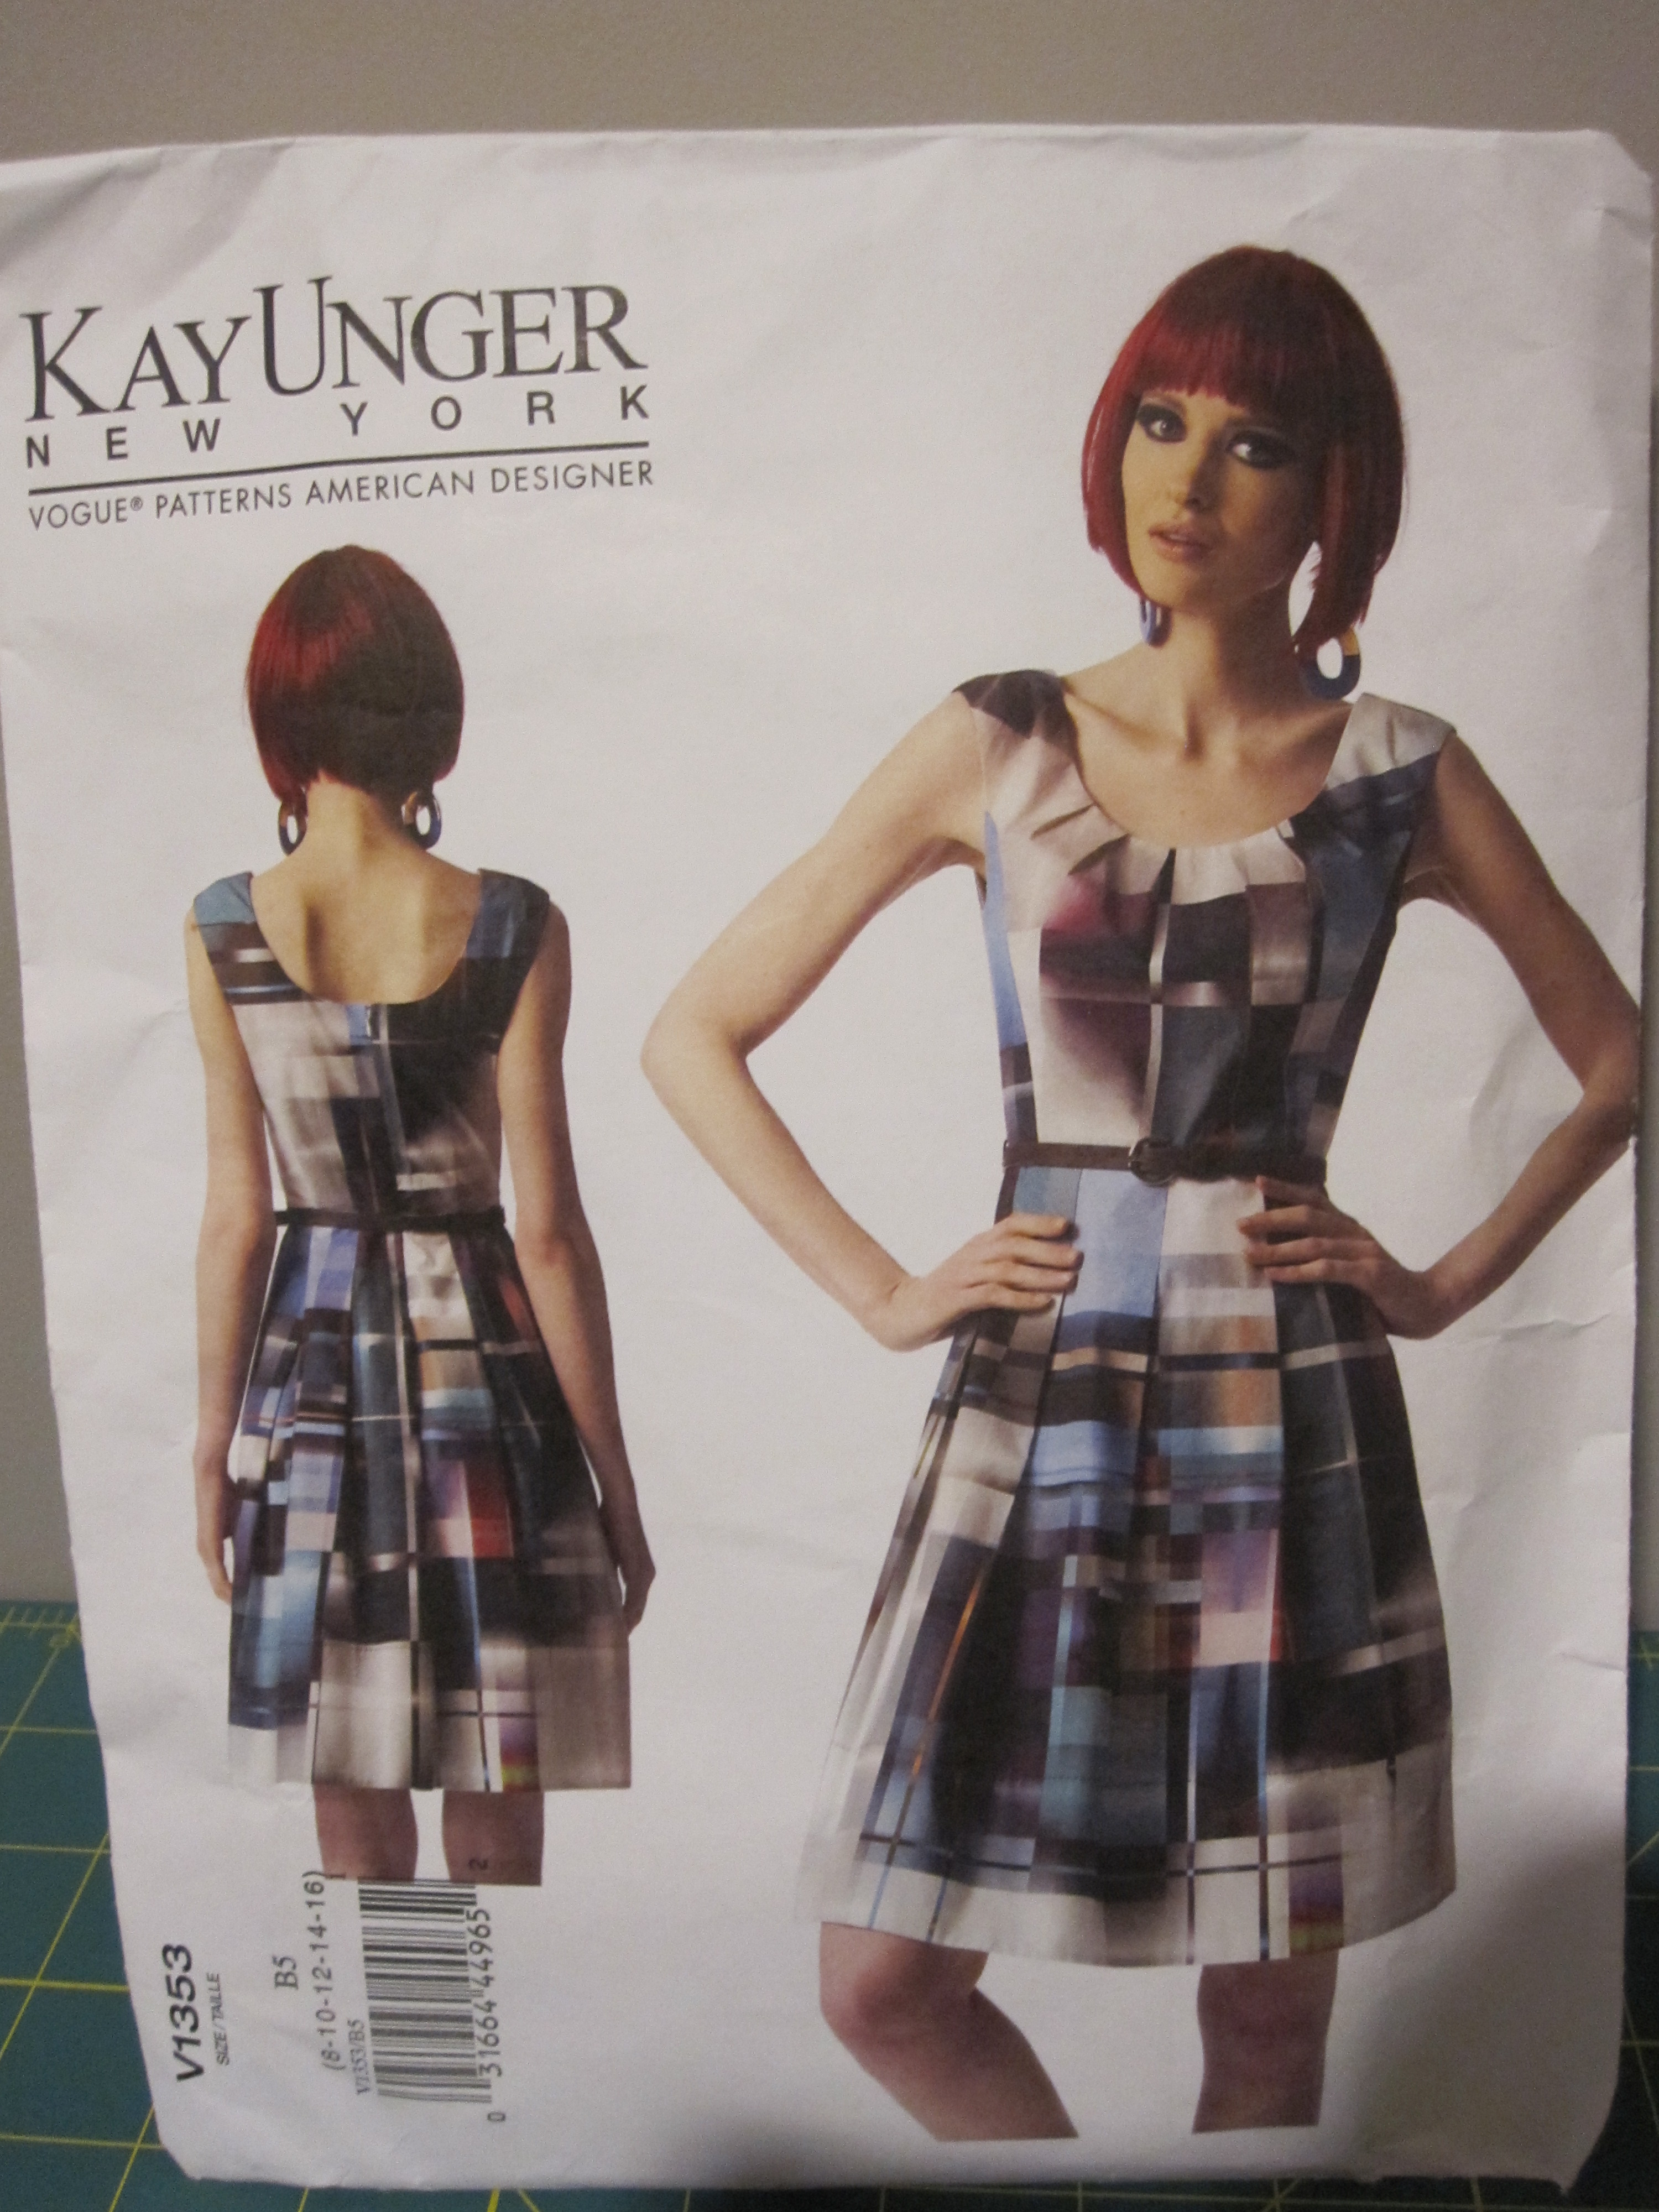
Pattern: Vogue Patterns American Designer, Kay Unger New York #V1353….continued from part 3, part 2 and part 1
I thought it might be nice, since half my blog is about this one dress, to post a picture of the final dress in action. Here is the dress I wore to my friend’s wedding over the July 4th holiday:

A few days before the wedding, I added the thread belt loops and a fabulous gold belt from TJ Maxx ($9.99).

The wedding was wonderful – everyone had a great time. I was so happy to see my friends take this next step in their relationship. I also couldn’t believe that I got a few compliments about my dress, from people I didn’t know and who didn’t know I made the dress. It gave me a great ego boost – and I was ready to dance up a storm at the reception (not pictured).
 One final picture, then I swear I will never speak of this dress again! Haha! But seriously, I would use this pattern again, I especially liked how the bodice fit and I didn’t need to make too many adjustments on the skirt. It would be interesting to see it made with a different print, so if anyone out there attempts this dress, let me know!