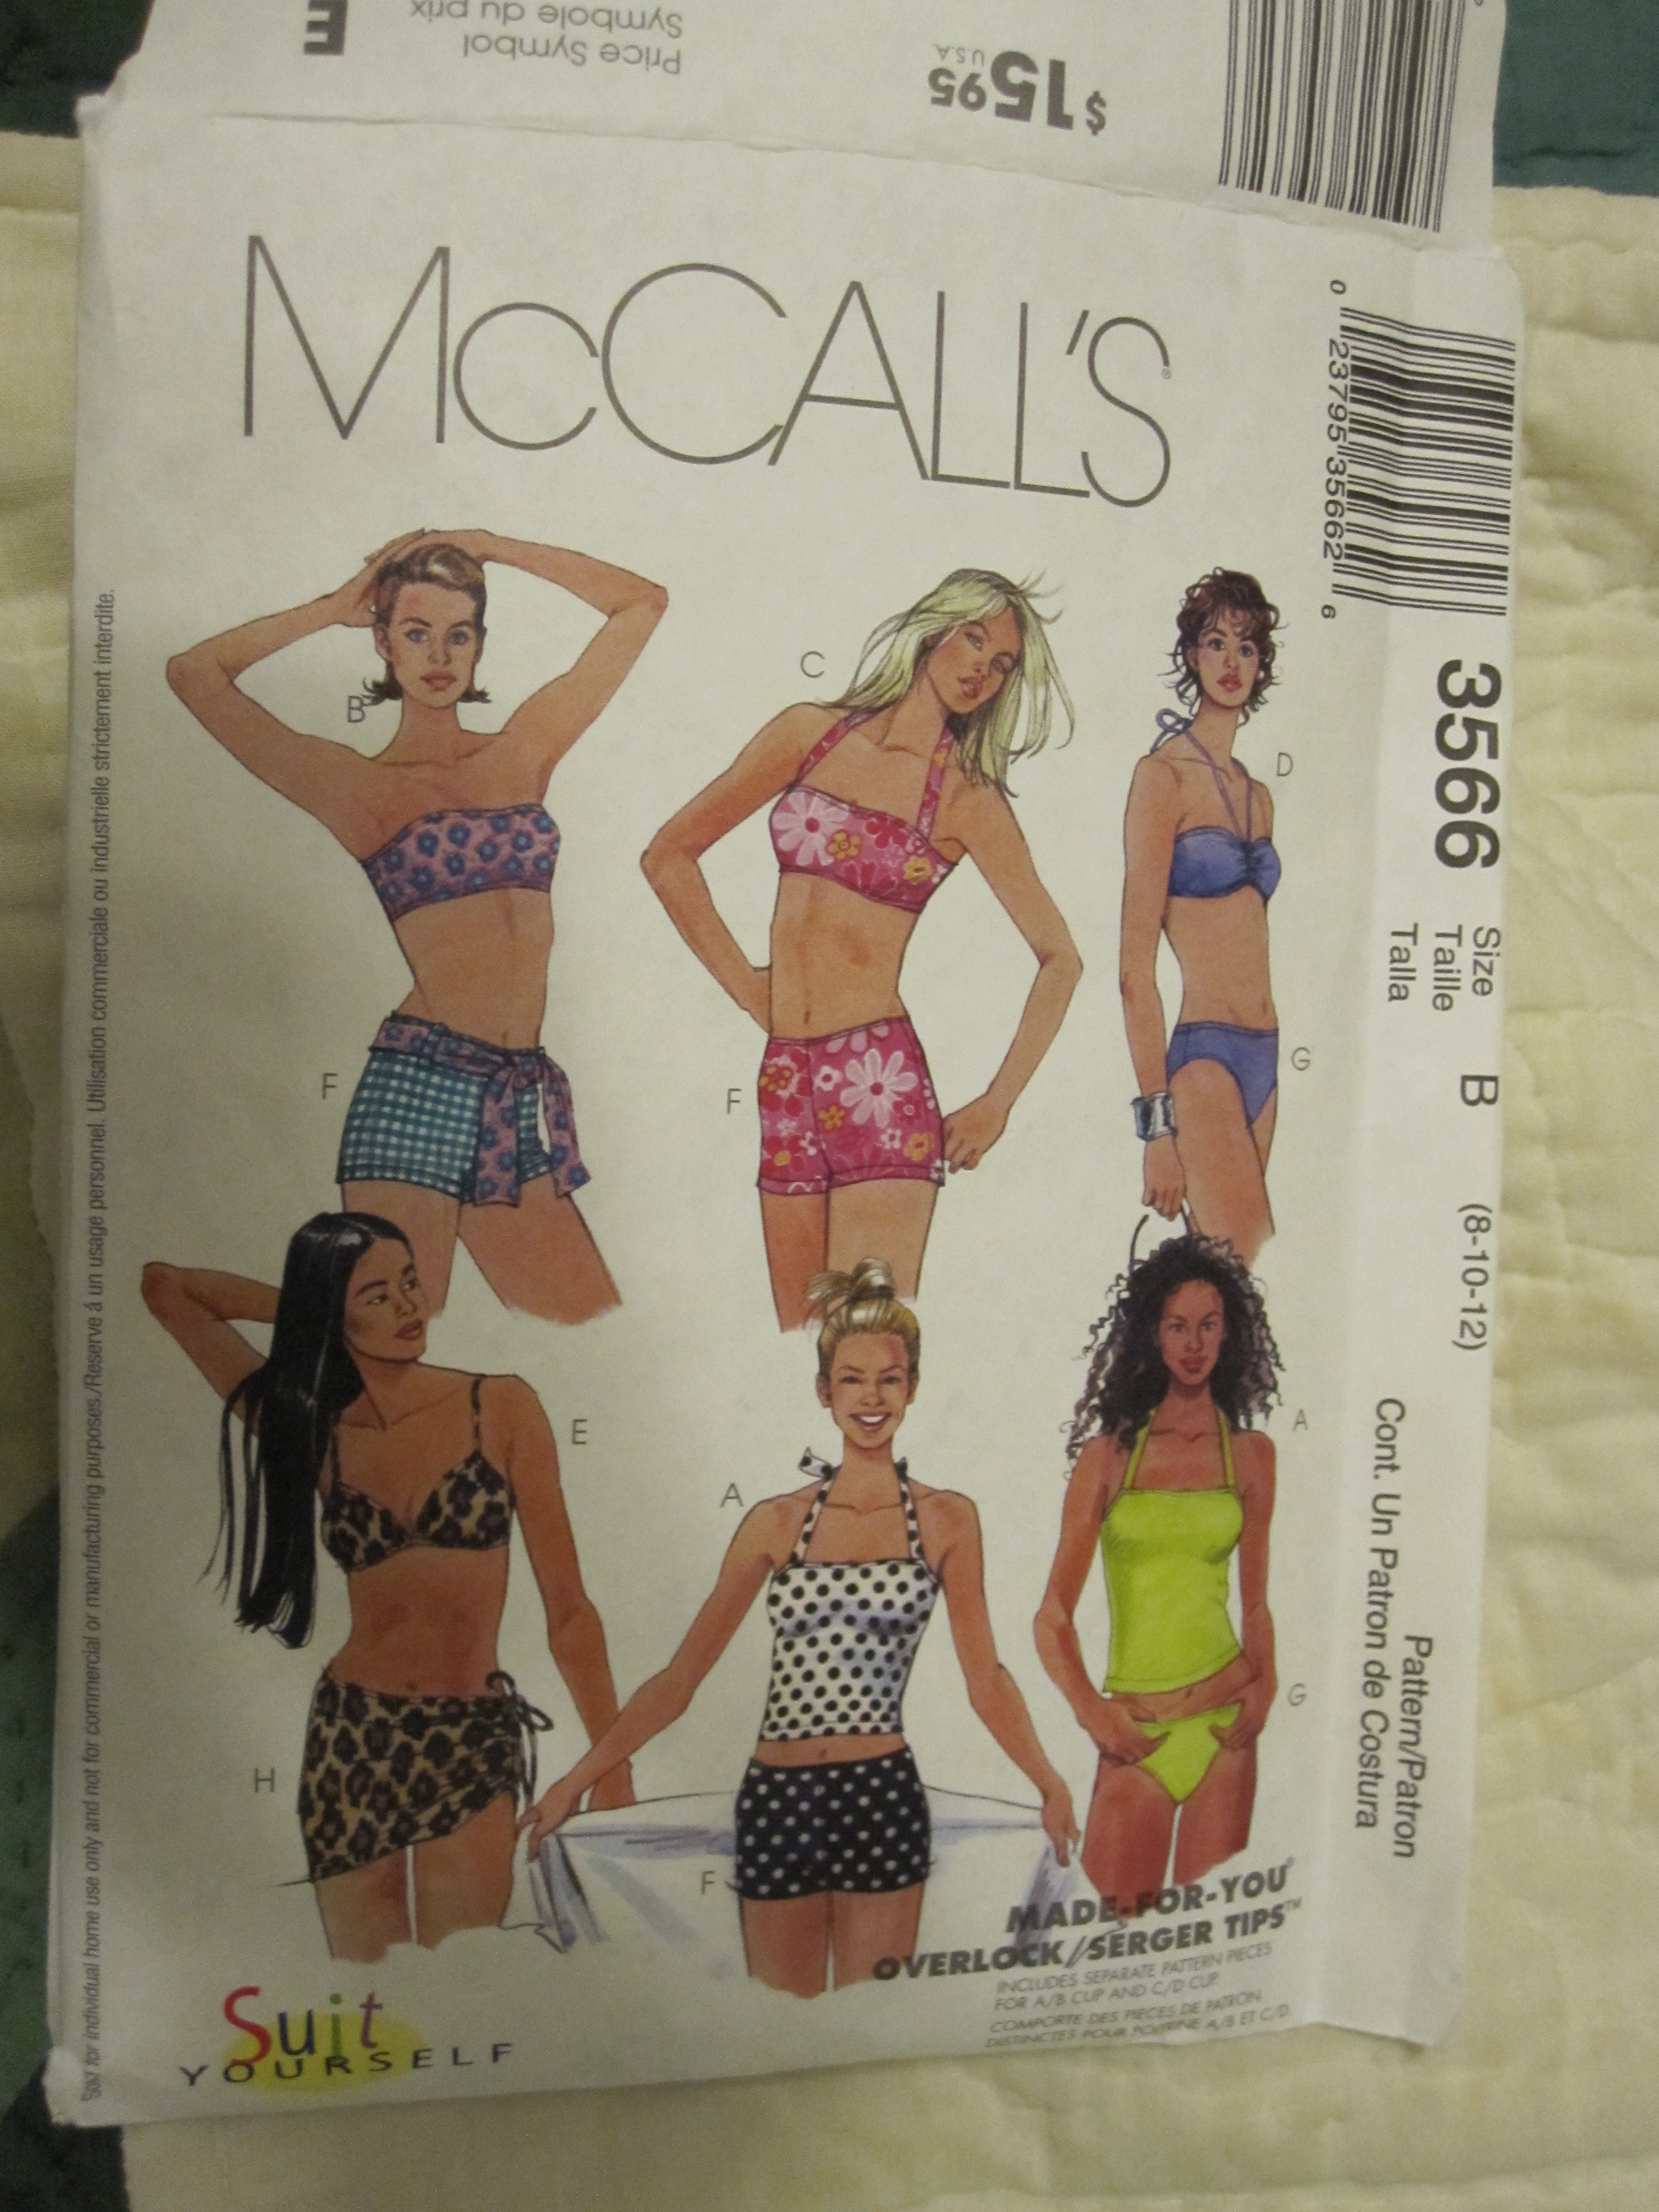
Pattern: McCalls 3566
Nothing says summer like outdoor BBQs, Mungo Jerry, and new swimsuits! I have plans to make two, and I even cut out two separate suits, but I only had time to make one this past weekend. What I love is that you don’t need a lot of material to make a bikini, so I got these less-than-a-yard “scraps” at Fabric Place Basement in Natick, MA. The pattern is out-of-print I believe, but I had a hard time finding one that I liked. It’s from the late 90’s, but I think the suits featured here are still in fashion. I decided to make top C and bottom G.
I want to start off by saying I felt like I was cheating a bit, because I actually used my mom’s brand new electronic sewing machine – “Mega-Weapon.” (Yes this is my name for the machine, my mother would never call her machine Mega-Weapon). She had recommended I use a stretch stitch for these, and since I didn’t have time to figure it out on my machine, she told me to use hers. This thing is insane – you change stitches with the touch of a button and it cuts, pulls in the bobbin, and does the back stitch all automatically as well. I don’t know, it was cool to use it, but I think I actually prefer doing some of these things manually if you can believe it. Maybe not the back stitch part, but I like having the control instead of trying to find a button. Plus I thought the bobbin process was actually more confusing. But who knows – maybe I will change my mind some day. I did like the stretch stitch that I used.


This pattern is great if you know what you are doing. Personally, I thought the directions could be a little clearer, especially for the part explaining how to fit the elastic to the suit. What I did like was they had elastic guides in the pattern itself. Not only does it help you cut the right length, but it also has marks for the elastic so that you can match it with the side seams. I marked these right on the elastic, since it would be hidden within the seam. It’s important to match the markings up, especially on the bottoms, in order to avoid uneven stretching in the elastic.
Stretching the elastic around while sewing was the most challenging part of this project. I was happy that I got through it without any bunching of the material, however my zig-zag stitches were not perfect. After I zig-zagged the elastic, I folded the material tightly around the elastic towards the inside to complete the seam. This is definitely not the most attractive seam on the inside and I could look into ways to create a more finished look. On the outside, it looks fine. Oh, and I am happy to report I got proper bathing suit lining for this which I used for the top and the crotch.
Key Learning: Buy more thread
I had to play a bit of “beat the clock” with this one. I really need to learn to buy new thread when I have a new project. Maybe because I didn’t use a lot of material, I thought I wouldn’t need that much thread? Honestly, I think the stretch stitch uses a bit more than a normal stitch, which was probably part of it. I had to wind another bobbin after I made the top. As it’s winding, I notice my spool looking a bit bare. Oh my! I quickly stopped and looked at the bobbin and it wasn’t looking too full either. I figure I could set it aside for the top stitching and use a similar color for the elastic and side seams. I switched the thread, then switched back so the top-stitching would be all the same color.
I started with the waist. So far so good. Then the first leg…uh oh. Now, I’m sweating. But I got through it. One more leg left. No turning back now – that stretch stitch would be impossible to take out, especially with lycra.

I proceed with the second leg, watching the spool the whole time. I had to change the bobbin to the other color (luckily they were close). That spool was looking pretty empty. I look down and I have just one small section left so I kept with the top-stitch. Now I have about an inch left as I watch the last bit of thread fly off the spool. Oh no, I’m not going to make it. But I do. Just as I close up the final stitch I see the thread hanging out next to the foot. Phew! That was close – too close! Need to be more careful next time.
Whitey McWhite-body
Ugh, I really need to get to the beach this summer. I tried taking many shots of myself in this bathing suit and I am just way too pale. Plus, let’s face it – swimsuit pics are tough. But I will put a mini version of the only photo that was acceptable to me. Just ignore that there is a bed in front of me, I have my reasons for this.
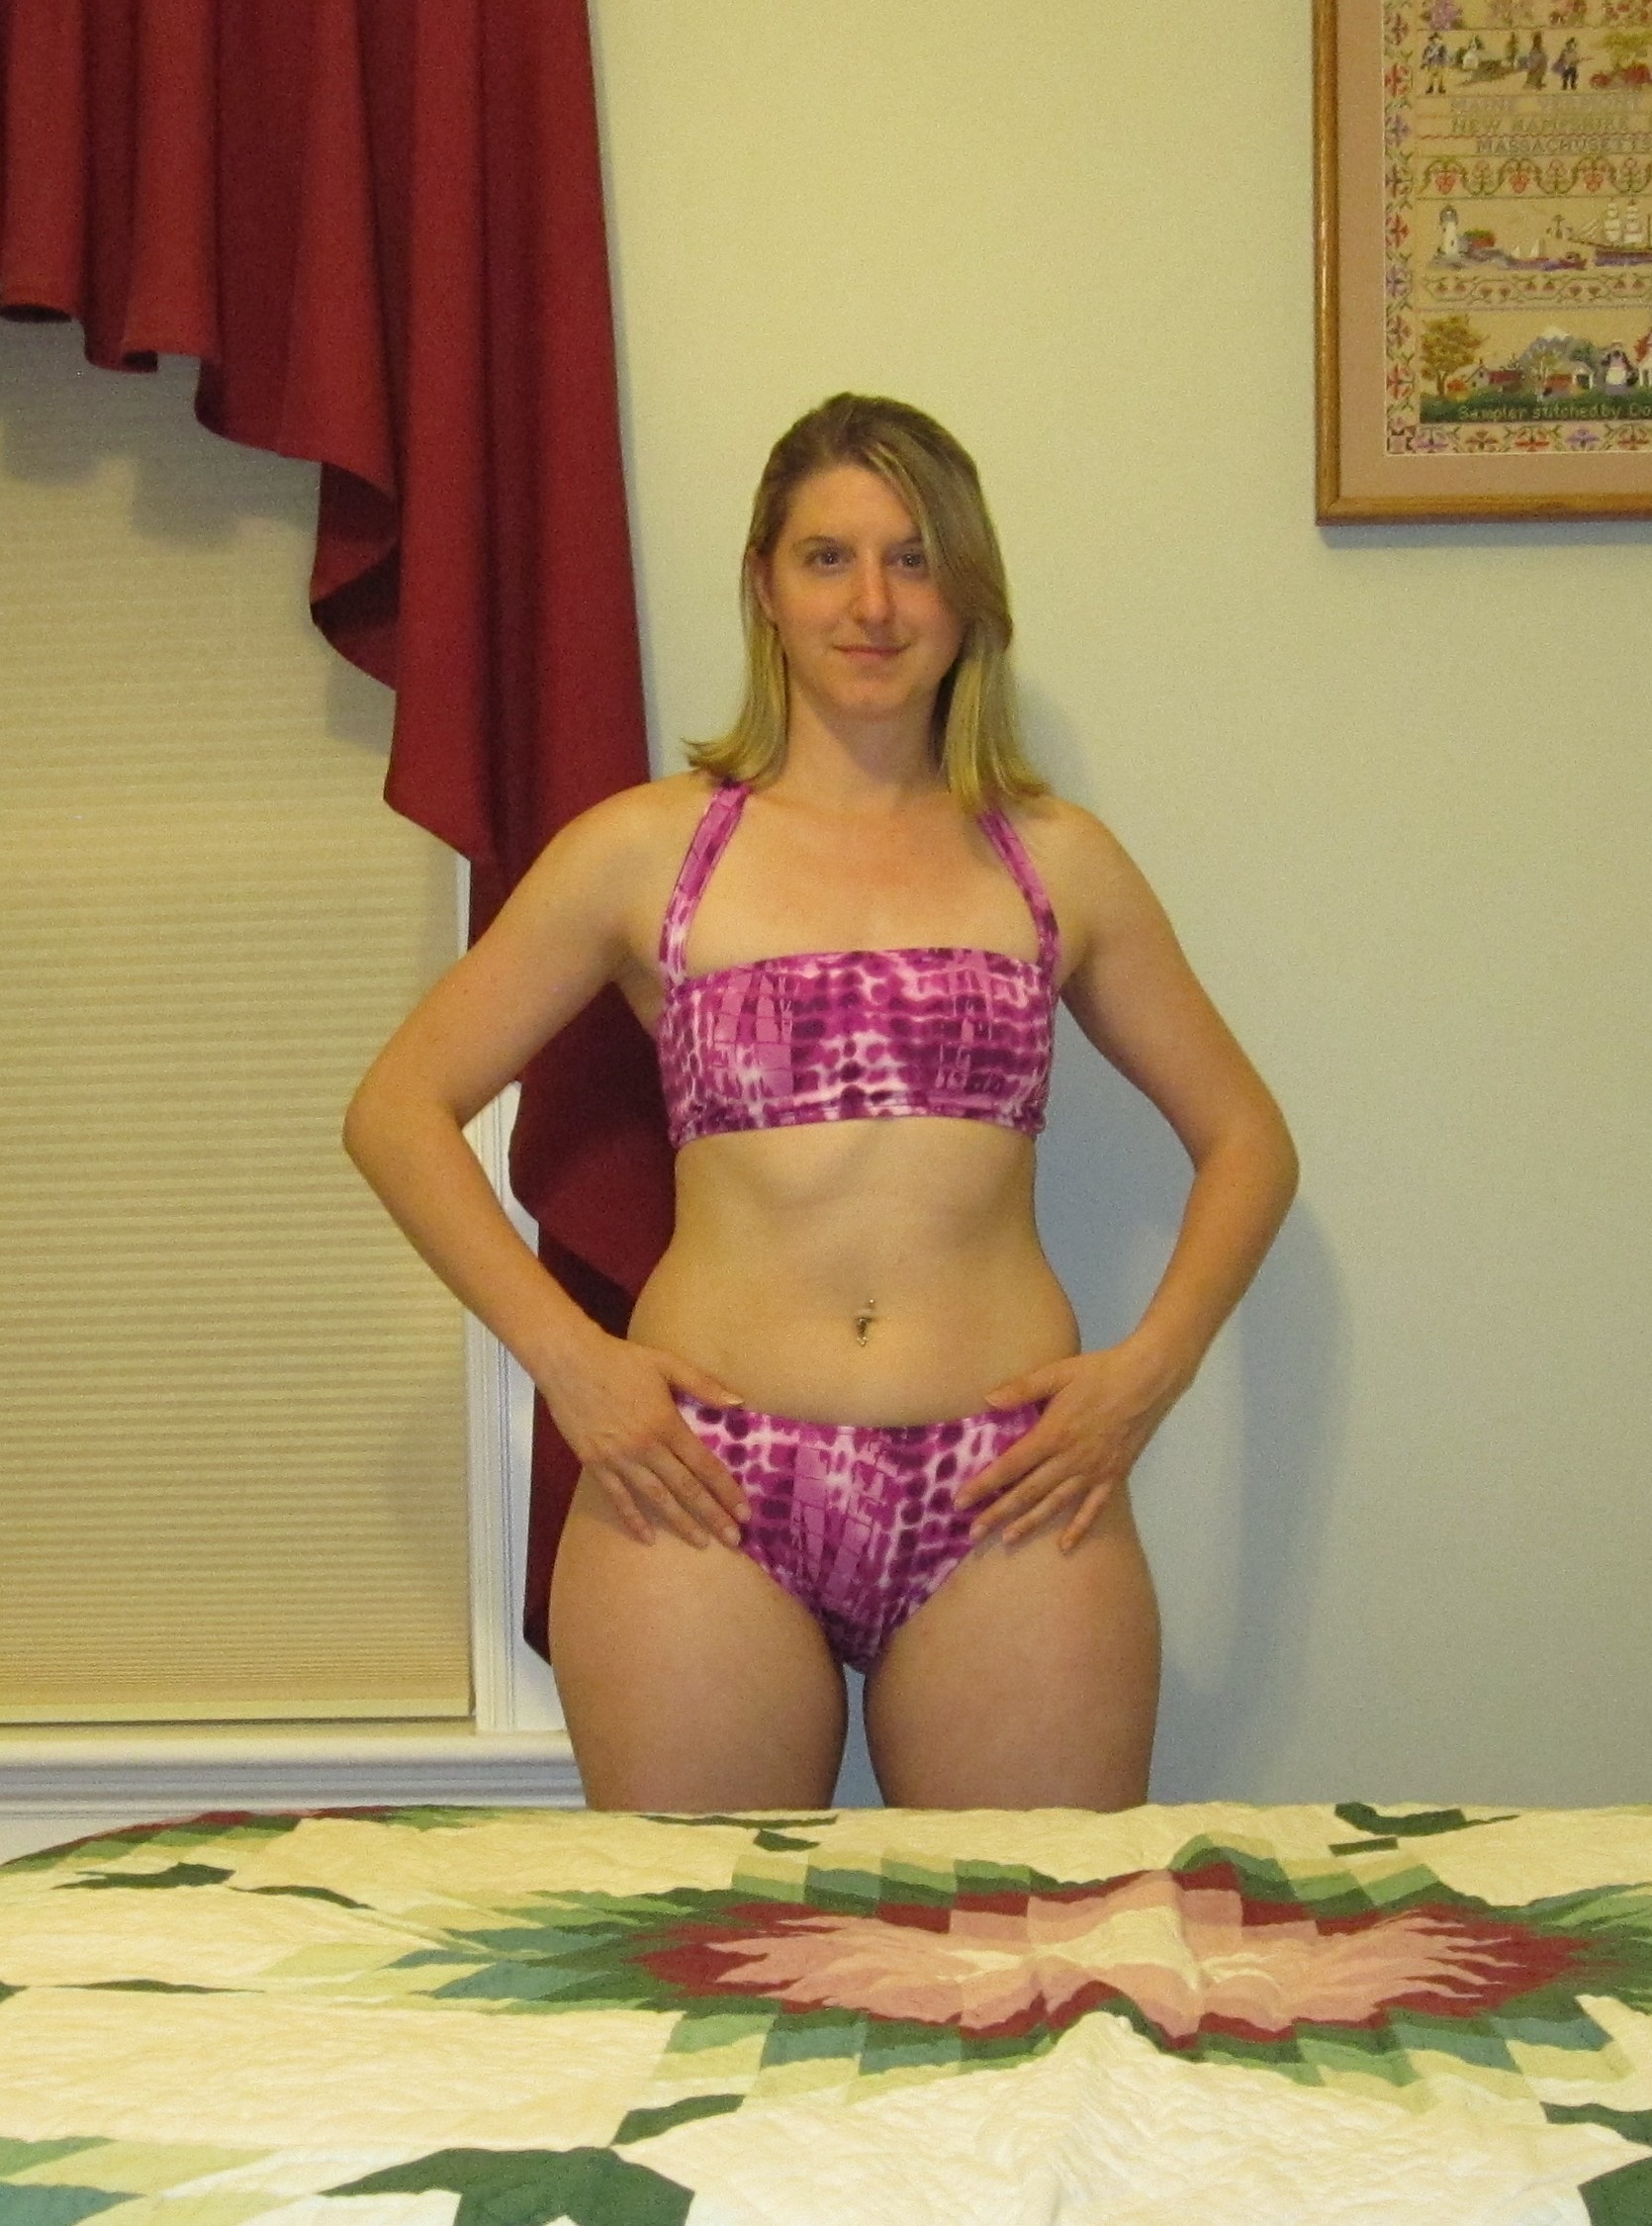
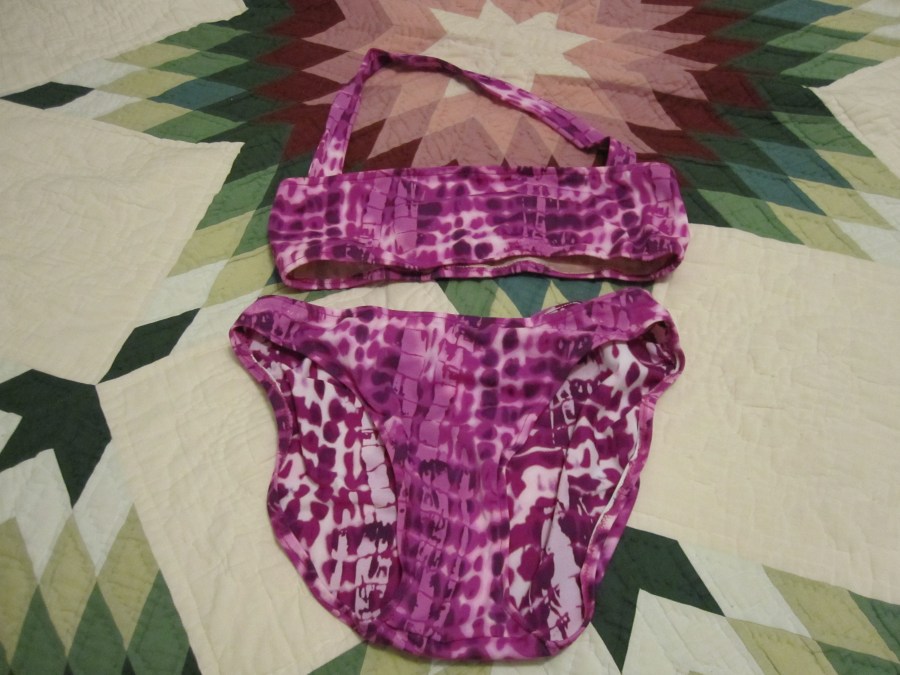
Here is the final result of my swimsuit – overall I am happy with the results. Plus I adjusted the pattern for the bottoms so that it covers my lovely lady lumps so well. I now have a bathing suit that gives me excellent coverage in the back, which was always a challenge with mass-produced suits. You will just have to use your imagination on that one – I was not brave enough to take that picture.


Pingback: The big v-string underwear project | Threading Lightly
Pingback: One Suit, Two Cups | Threading Lightly
Your suit looks great! Looking at my RTW suits, folding over the elastic to the inside is pretty much standard, it’s just they make a prettier stitch with a coverstitch whereas I use zigzagging instead. No big deal and everything I’ve made holds up well in the pool for swimming laps, my primary concern.
LikeLike
Looks great! I love the elastic guides too. I don’t know what I would do without them. Oh yes… I have been known to sew a whole seam only to find out the bobbin was empty! I guess I just drive it too fast?
LikeLike
Haha! I do that all the time with the bobbin. I can’t believe what a close call this was with the actual spool! I’m glad I was diligent about the elastic guides, I think it helped me get it right the first time. Sometimes I feel I need a third hand to keep the darn thing straight and flat!
LikeLike
I agree!
LikeLike