Just Keep Sewing…

Well it feels like ages since I’ve been in blogworld.  I’ve missed writing, reading other blogs, and discovering new ideas and project inspirations.   So much has been happening the last couple months, but the biggest change was that I moved!  After a brief but necessary time living at my parent’s house, I finally moved into my own apartment.  It is a bit of an adjustment and the unpacking process takes a lot of my time, but I’m starting to feel back to normal again.  And despite everything that has been going on, I have kept up on my sewing…somewhat.

While I’ve been away from the blog, there were a few projects I completed that I didn’t have time to write about.  The first was a top from this retro pattern:

Sailor Pants

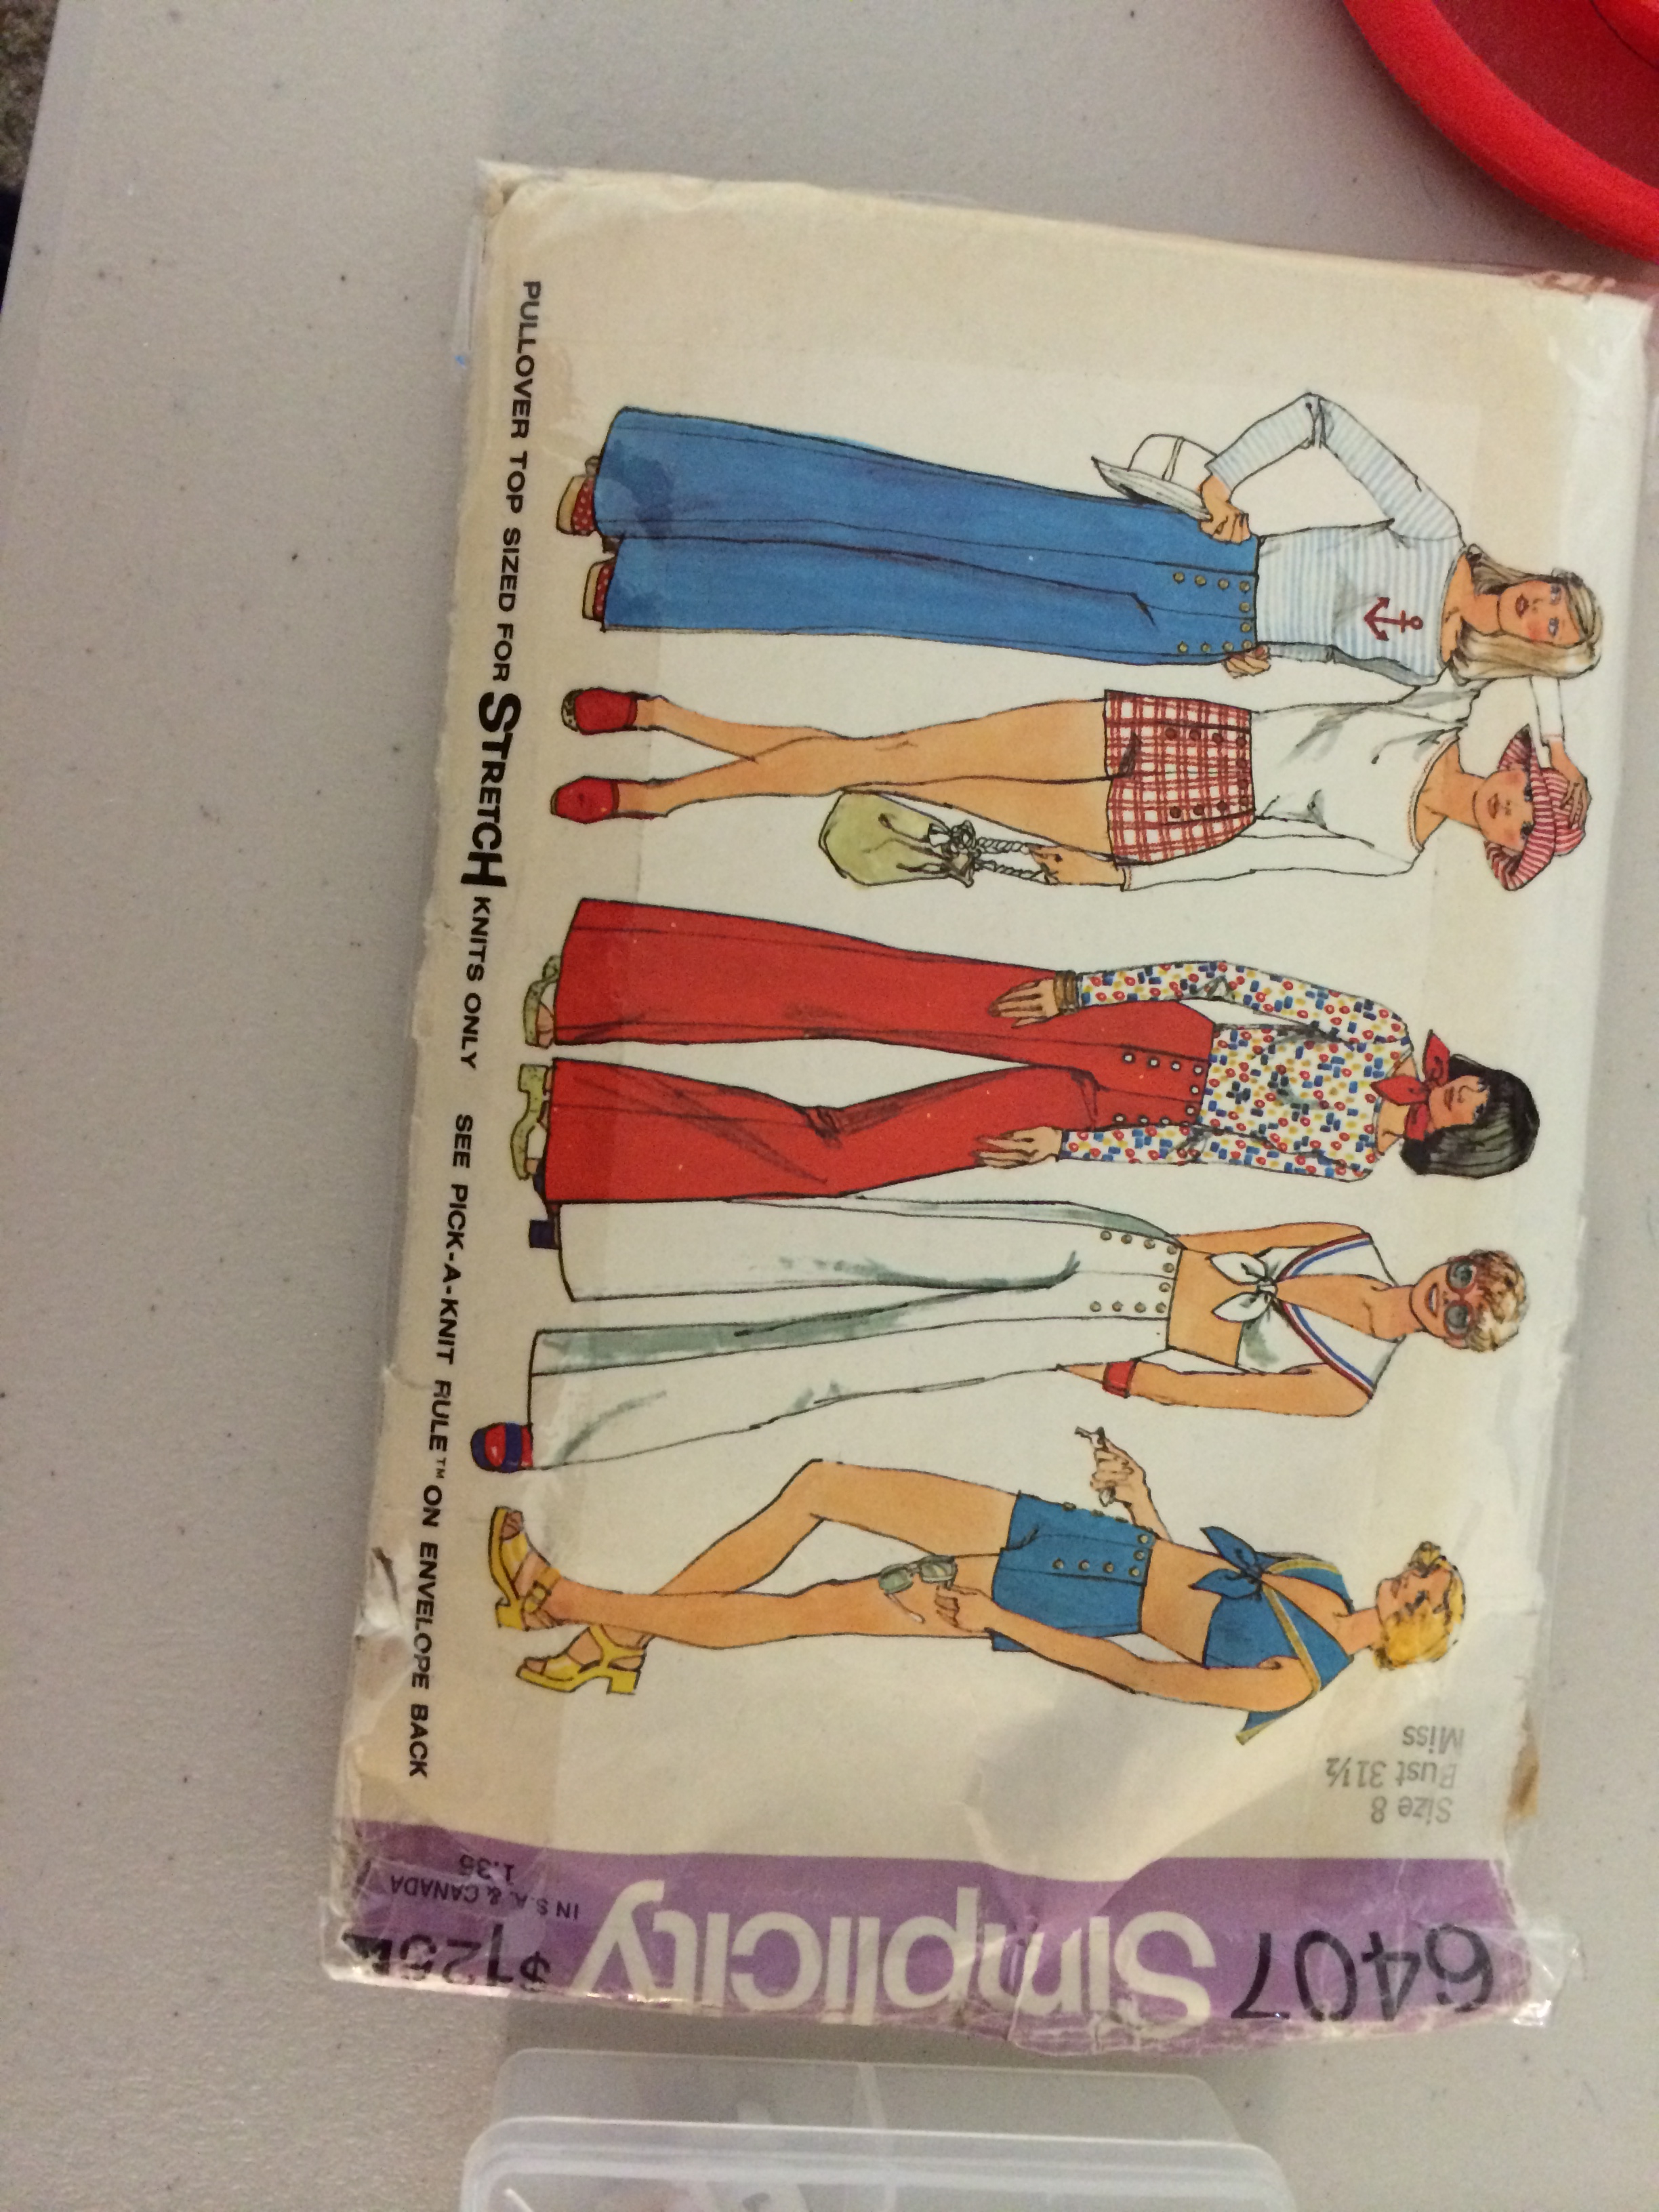
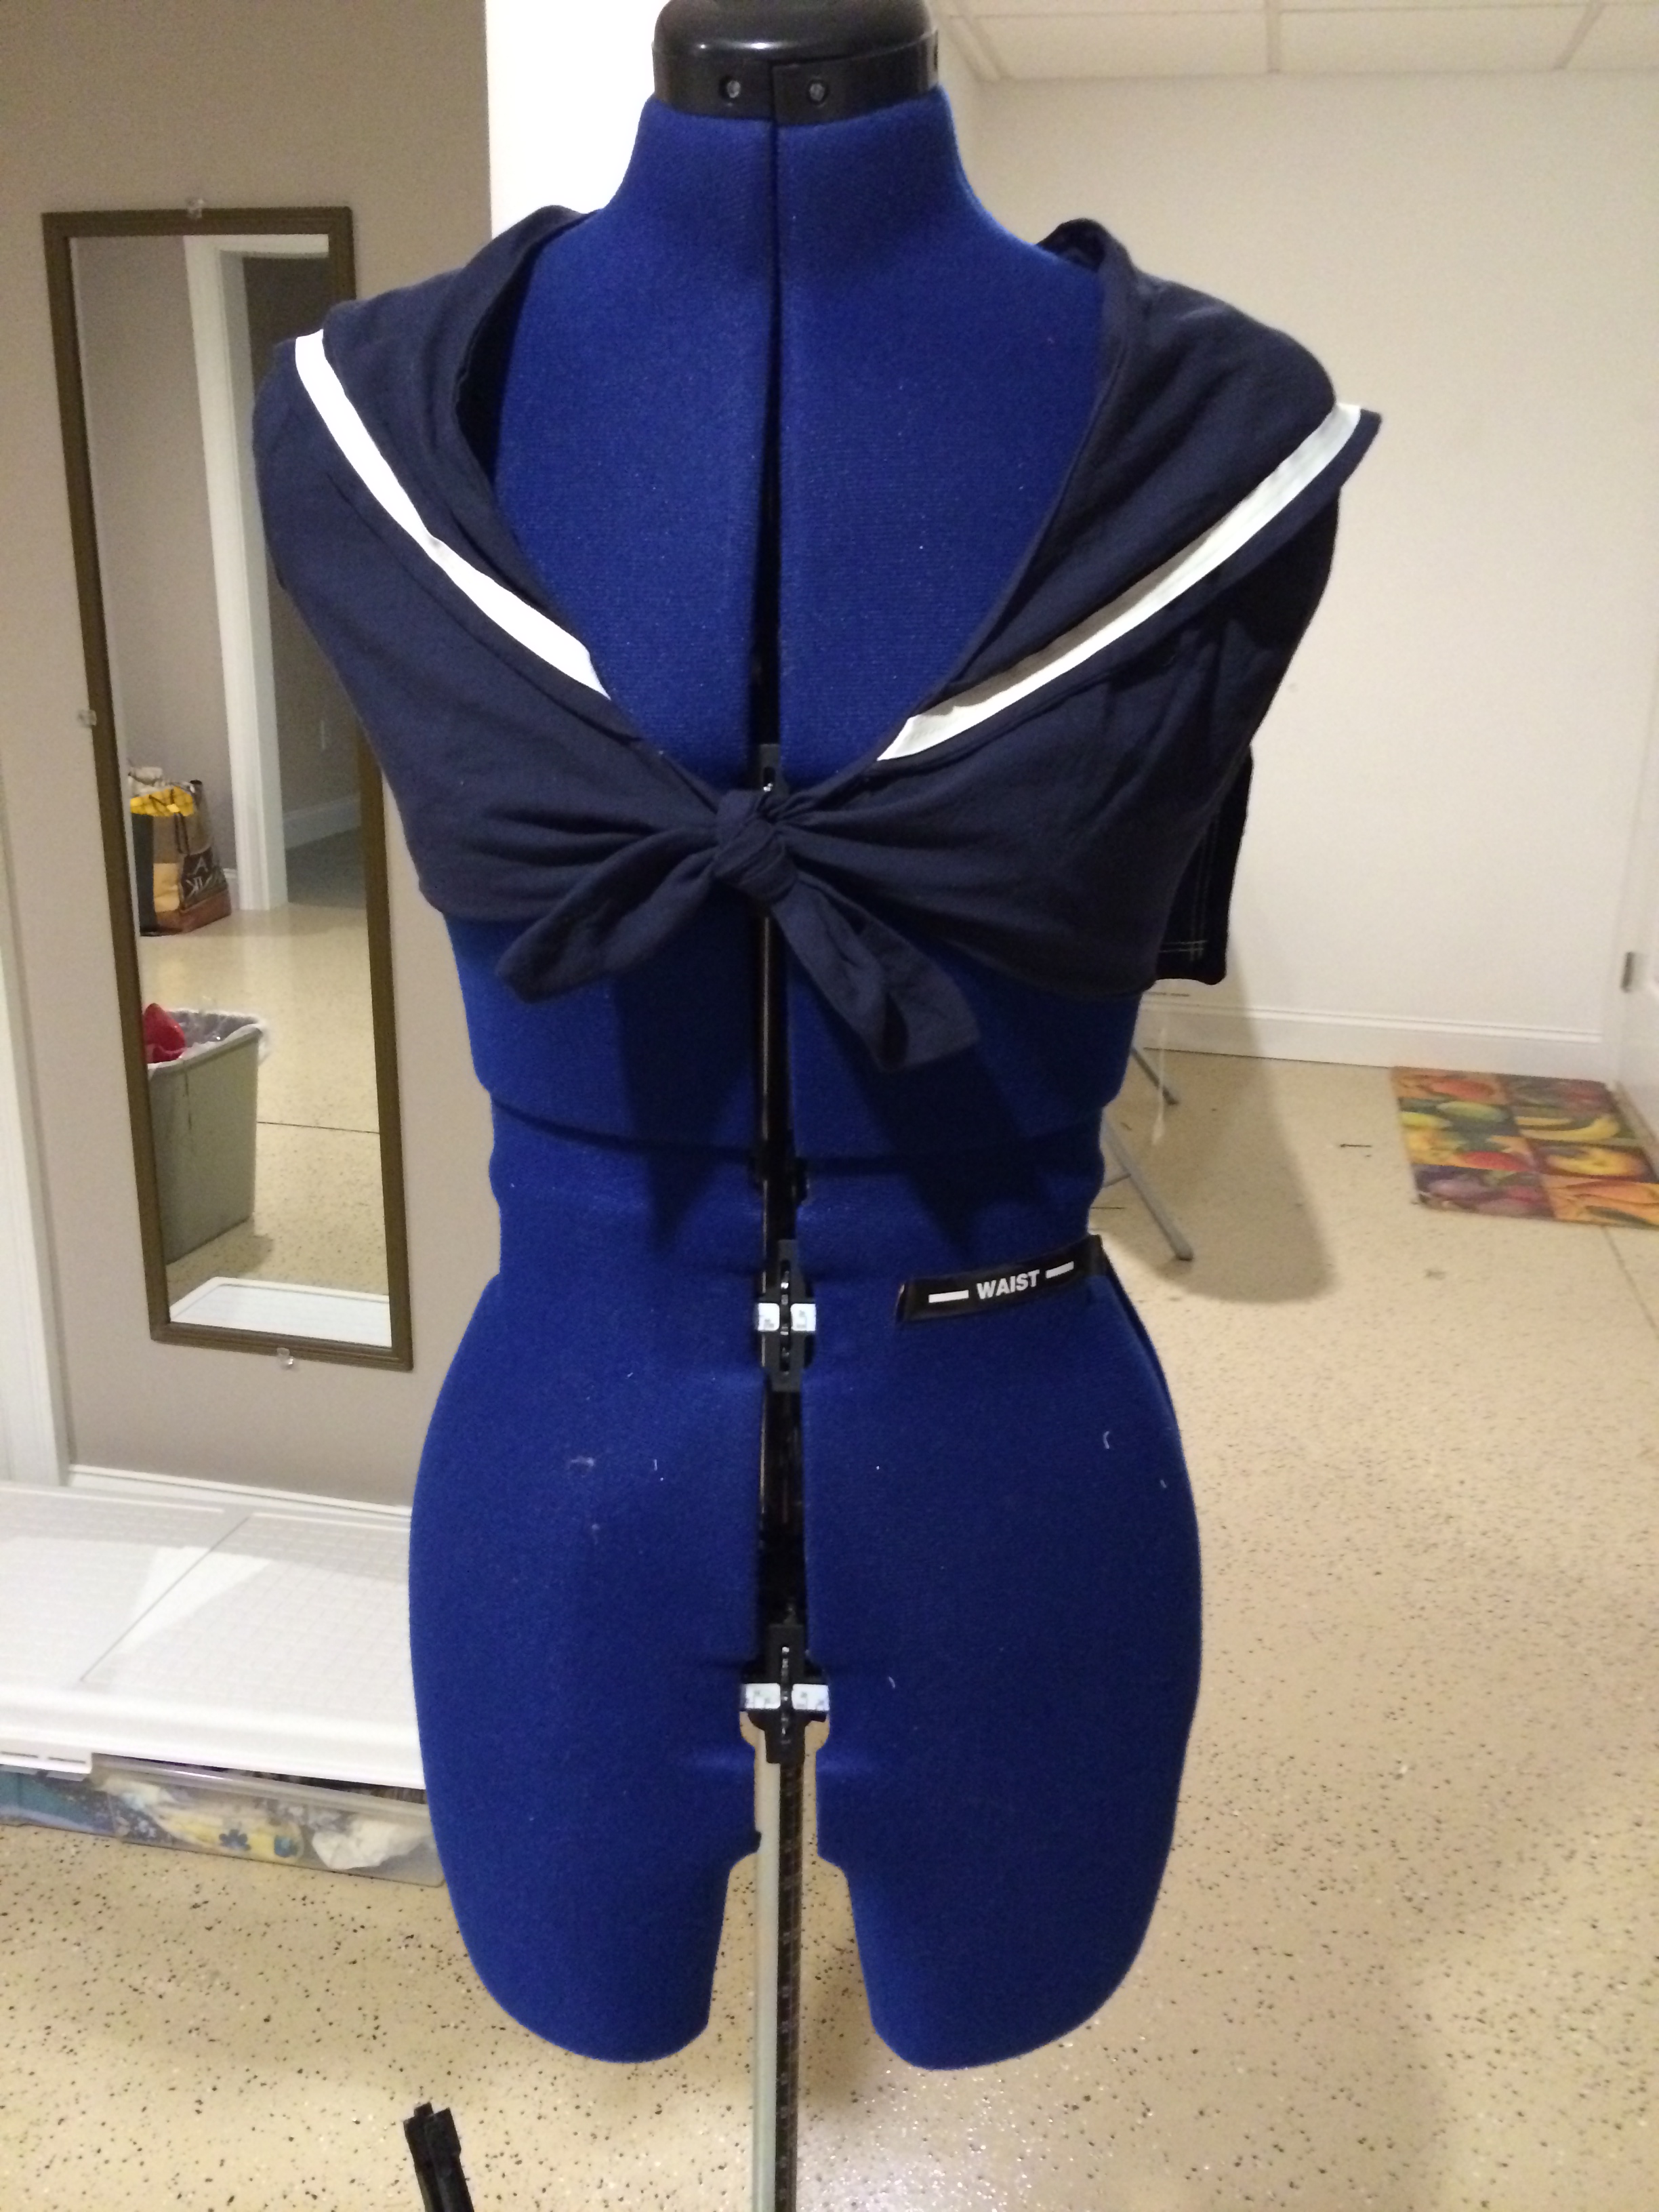
I bought this pattern because I have an obsession with those navy-style pants.  Someday I am going to make a pair.  I showed this to my sister and she asked “Ooh!  Can you make me that little sailor top for my birthday?!”  She may have been half-joking, but I accepted the challenge.

Crop Top


This pattern calls for something called “braid” for the trim, which I had a hard time figuring out what that was.  After an exhaustive Google search I wondered if it’s even called that any more.  My sister and I went to the fabric store to see what we could use for the the trim on the back flap.  Finally, she picked out some white ribbon so we could make a type of navy design.  I think it actually came out pretty good:

Navy crop top back


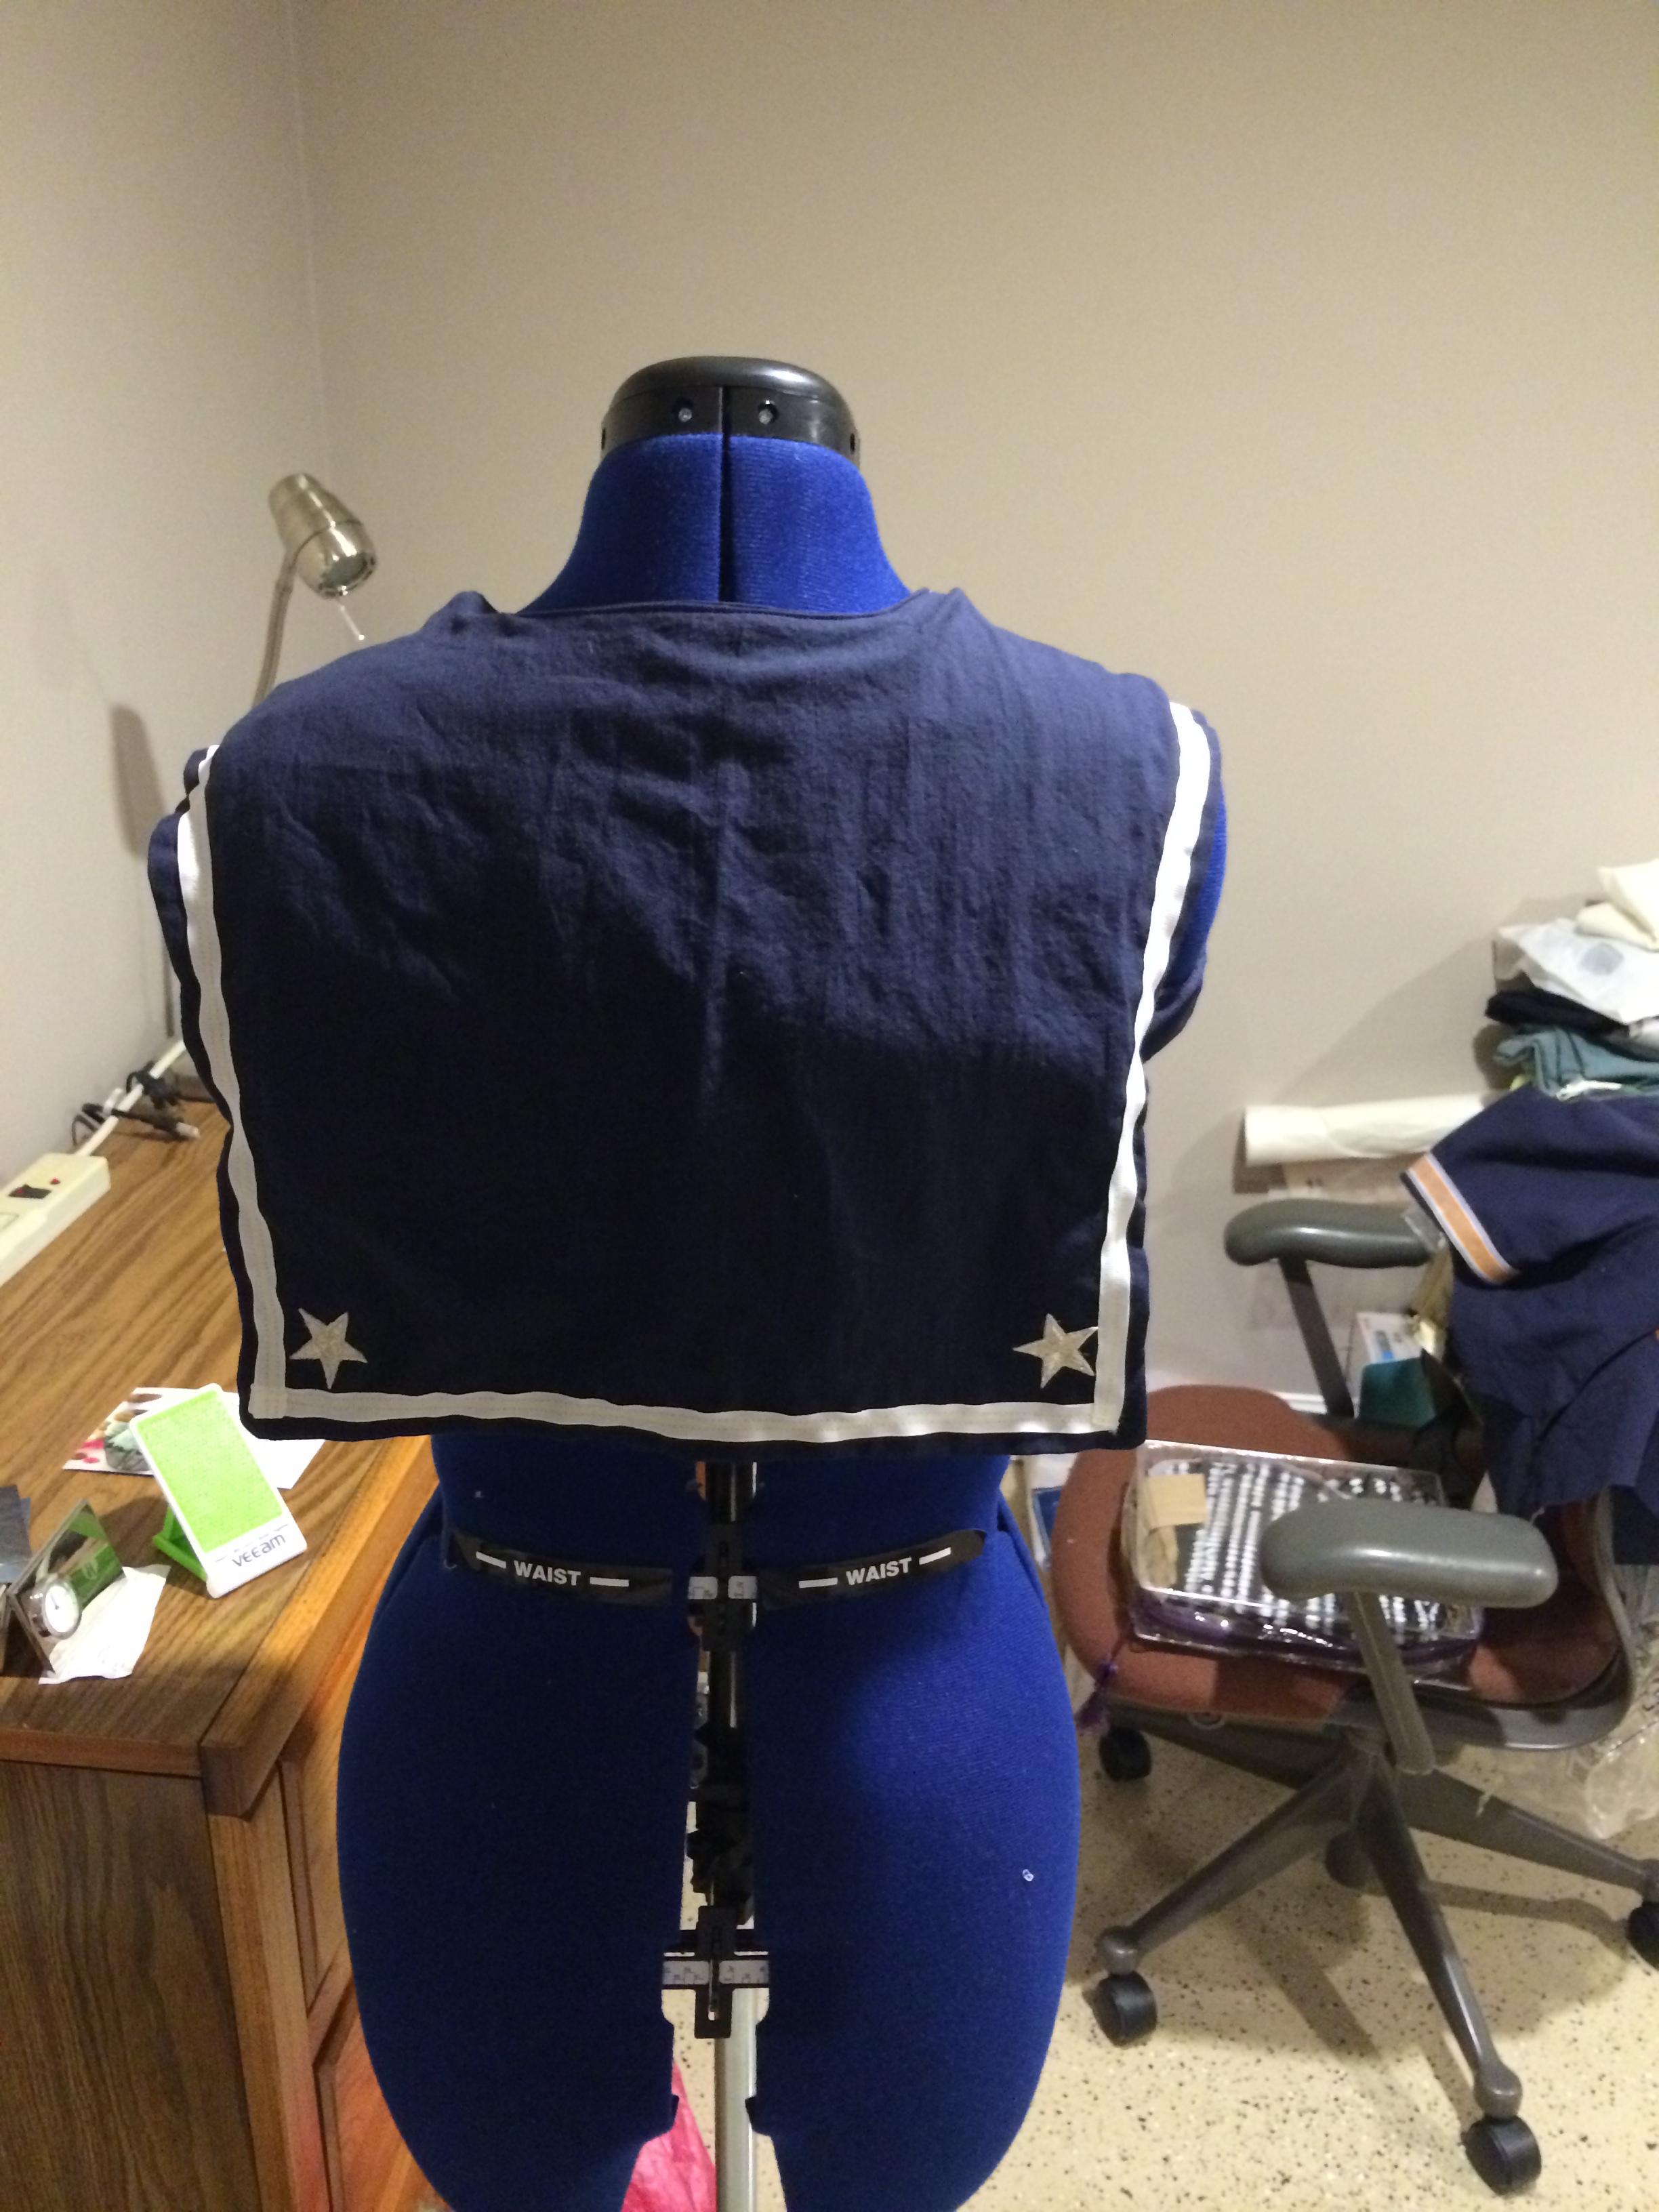
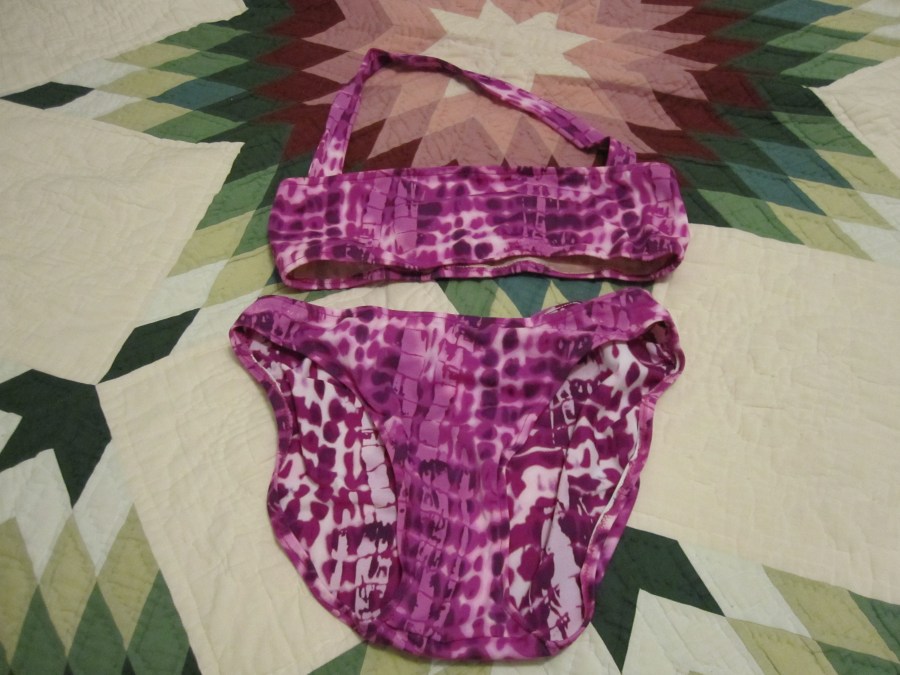
But, wow!  It is a tiny top.  I won’t post the picture of me wearing this, as it is a bit revealing.  So here is another shot of Madame Booty wearing it:

Navy crop top front Continue reading “Just Keep Sewing…”

Okay…I did it…

Pattern: Simplicity 4127

In case you were wondering, that vague post title refers to the fact that I made a muslin, which is something I pretty much never do.  I just don’t have much patience when tackling new projects.  But, I have also noticed that being a newbie, I tend to make a lot of mistakes.  And I also notice that the second time I make something, I make less mistakes, soooo….yeah you see where this is going.

Making a muslin refers to making a “trial” garment out of some inexpensive material.  Traditionally these were made with muslin, hence the name, which is a really plain cotton fabric.  But now the term “making a muslin” is used for any fabric that may be used.  This is my understand at least, from reading many sewing blogs.  Feel free to correct me if I am wrong.

I bought a wonderful white material labeled “as seen in J Crew” at the Fabric Corner in Arlington, MA.  I bought it because it reminded me of this cute summer top I used to have when I was much younger, that showed off my midriff.  I’m not at an age where I can show that much skin, but I did want another cute summer top, so I splurged on it (it was pretty expensive) and then bought this pattern:

Simplicity 4127

My mom gave me some brown-ish printed cotton that was leftover from a quilting project.  So I got to work. Continue reading “Okay…I did it…”

Bra cups

One Suit, Two Cups

Pattern: McCalls 3566

McCalls 3566 Suit YourselfWell I thought this post would be about my issues with putting bra cups into a bathing suit for the first time, but that was actually one of the easiest parts of this pattern.  Since my first attempt at a bathing suit was so successful, I thought I would try a different style from this pattern.  I thought the triangle top would be a good one to try, but I felt it would need some cups…for shape.

Bra cups

Unfortunately, this pattern did not provide an easy adjustment to add these.  There was an option to add foam, but that is not something I have seen or could find online.  The directions called for sewing each piece of lining to each of the separate front pieces.  This was not an option since I needed to sew the cups between the material and the lining.  Sewing the two lining pieces together was a bit difficult, but I got it to work.  And with a few stitches, I secured the cups in the right spot under the lining, and being careful not to let the stitches show on the front side.  I could use that front seam to my advantage – no stitches showed and the cups were securely in place.

Now the real hard part of this suit was the straps and that darn drawstring.  I spent hours flipping those inside out.  My fingertips were completely red Continue reading “One Suit, Two Cups”

The Dress-for-Wedding Challenge: Epilogue

Pattern: Vogue Patterns American Designer, Kay Unger New York #V1353….continued from part 3part 2 and part 1

I thought it might be nice, since half my blog is about this one dress, to post a picture of the final dress in action.  Here is the dress I wore to my friend’s wedding over the July 4th holiday:

IMG_2963
Me, having a conversation with a mystery person. I cropped her at her request.

A few days before the wedding, I added the thread belt loops and a fabulous gold belt from TJ Maxx ($9.99).

Belt loop


The wedding was wonderful – everyone had a great time.  I was so happy to see my friends take this next step in their relationship. I also couldn’t believe that I got a few compliments about my dress, from people I didn’t know and who didn’t know I made the dress.  It gave me a great ego boost – and I was ready to dance up a storm at the reception (not pictured).

Dress for WeddingOne final picture, then I swear I will never speak of this dress again!  Haha!  But seriously, I would use this pattern again, I especially liked how the bodice fit and I didn’t need to make too many adjustments on the skirt.  It would be interesting to see it made with a different print, so if anyone out there attempts this dress, let me know!

IMG_2962
Seriously who is that mystery person?? I know you all want to know!


No Sweat! Workout Pants

Pattern: Papercut ooh la leggings

Ooh la leggings complete

I was inspired to make these leggings by Karen’s Sporty Summer Sewathon, and also in an attempt to get me back on track with my own exercise routine.  This past year, my active-ness has ranged from triumph – running my first half-marathon (Yay!) to disappointment – having to drop out of my second half-marathon due to injury (Boo!).  But I’m ready to put all that behind me and get back to work!  Oh look a button!

didyoumakethat

I immediately liked the Papercut  pattern, because the seams are actually quite flattering and more interesting than your normal boring leggings pattern.  In order to make these leggings into a pair of practical running pants, I knew I had to add a back pocket.  Often for races, I need a spot to hold a car key, license, and maybe even some cash.  Instead of constructing an actual pouch, I thought it might be easier to just double up the waist area and create a pouch that way, similar to another pair of running pants I already had.

Making a pouch

I cut two panels of each and serged the front and back of each separately.  I then stitched the waist pieces together, seams on the inside, and used it as one piece when attaching the legs.  I used a serger on all the seams, because, you know…knit.  I decided to use an invisible zipper for the back pocket, in order to keep that clean, legging-like look.  I cut a slit on the back panel, sewed in my invisible zipper (cut to fit), and sewed a seam Continue reading “No Sweat! Workout Pants”

In the Summertime…

Pattern: McCalls 3566Cutting out the bathing suit

Nothing says summer like outdoor BBQs, Mungo Jerry, and new swimsuits!  I have plans to make two, and I even cut out two separate suits, but I only had time to make one this past weekend.  What I love is that you don’t need a lot of material to make a bikini, so I got these less-than-a-yard “scraps” at Fabric Place Basement in Natick, MA.  The pattern is out-of-print I believe, but I had a hard time finding one that I liked.  It’s from the late 90’s, but I think the suits featured here are still in fashion.  I decided to make top C and bottom G.

McCalls 3566 Suit Yourself


I want to start off by saying I felt like I was cheating a bit, because I actually used my mom’s brand new electronic sewing machine – “Mega-Weapon.”  (Yes this is my name for the machine, my mother would never call her machine Mega-Weapon).  She had recommended I use a stretch stitch for these, and since I didn’t have time to figure it out on my machine, she told me to use hers.  This thing is insane – you change stitches with the touch of a button and it cuts, pulls in the bobbin, and does the back stitch all automatically as well.  I don’t know, it was cool to use it, but I think I actually prefer Continue reading “In the Summertime…”

The Dress-for-Wedding Challenge: Part 3

Pattern: Vogue Patterns American Designer, Kay Unger New York #V1353….continued from part 2 and part 1 Phew!  It’s finally done.  Actually, I do still need to buy a belt, but all the sewing is finished! Where we left off...okay I put the invisible zipper in.  For those who don’t know, this is what an invisble zipper looks like.  The teeth are not exposed on the outside, like a regular zipper, so the material is sewed around the front of the zipper tape. Invisible zipper

Invisible zipper foot
Plastic invisible zipper foot – a great alternative to buying a whole new foot

It really wasn’t that complicated, but there were a few minor beginner hiccups that I will share.  I watched this video, which described the whole process perfectly.  I didn’t have a proper invisible zipper foot, so I just used the cheap plastic foot pieces you get at the fabric store and it worked just fine.  Pinning the zipperI also wasn’t going to take any chances screwing this one up, so I made a bright colored basting stitch where the zipper was going to go, and pinned one side as the video instructed me.  After I sewed the first side, it seemed right, but I had trouble zipping it up.  It seemed twisted.  Thinking I did the whole thing wrong, I un-did all the stitches and tried to figure out what the issue was.  I couldn’t see what I was doing wrong, so I attempted stitching it again.  It seemed right, until I tried zipping it up for the second time.  I finally figured it out – the bottom of the zipper had just flipped to the inside, so it only looked like I pinned it wrong.  Ooops!  Oh well, I know for next time. After sewing both sides, the zipper flipped in with the material and indeed became invisible within the back seam.  But all of a sudden I couldn’t zip the whole thing up to the top.  This puzzled me for a bit, but after some examination found that I had just sewed one section too close to the teeth and the zipper was getting stuck.  Minor fix – all set! Invisible zipper finished I think it just needs a press so that the material is a little flatter around the zipper, but otherwise you can barely see it.  Major learning: it is extremely important to sew as straight and close to the teeth as possible.  This is where that plastic foot comes in handy since it actually has a groove that allows the foot to glide easily over the zipper teeth, keeping everything straight and tidy. This dress has a full lining in it, which attached at the neckline.  The pattern also had me cut out a hem facing, which was to be sewn to the bottom of the dress.  As I completed this step, Continue reading “The Dress-for-Wedding Challenge: Part 3”

The Dress-for-Wedding Challenge: Part 2

Pattern: Vogue Patterns American Designer, Kay Unger New York #V1353….continued from part 1

There is nothing like a slightly rainy holiday weekend to give you the motivation to sew!  Things have been so busy over the last couple weeks with work, random obligations, and my actual graduation from business school that I hadn’t gotten a chance to work on my new dress.  I was grateful for the 3-day weekend to get started.

But I first want to mention that my oldie New Home machine is now in semi-retirement.  I’m sad that I won’t be using it as I’ve gotten quite attached to it, quirks and all. It will be a good thing in the end because I have far less bobbin issues with my mom’s old (my new) Husqvarna machine.

New Home sewing machine

Okay back to the dress.  The pattern seems very straight forward, instead of cutting the front bodice on the fold it had me do a little flip-around thingy instead since there were really no other pieces to cut on the fold.

Bodice patternI was able to get it pretty even.

The front bodice has darts and pleats.  I hadn’t done darts in forever, so I had to try to remember how they worked.  I had to go online for a refresher video to remind me how to sew the triangles in and press them down.  Ah yes, it was all coming back to me.  They were so easy, I may start putting darts in everything now!

The pleats along the neckline were something I hadn’t done before so I watched a few online videos (like this one) and figured it out.  I had some trouble with this research because there were a lot of references to box pleats and knife pleats and I had no idea what type this was.  I still don’t actually know, but the video I found showed me a picture of a pattern that looked like mine.  Works for me!  The pattern markings Continue reading “The Dress-for-Wedding Challenge: Part 2”

The Dress-for-Wedding Challenge: Part 1

Kay Under Pattern V1353Pattern: Vogue Patterns American Designer, Kay Unger New York #V1353

I almost put the title as The Wedding Dress Challenge, but changed it because I didn’t want people to think I was getting married, or worse yet attempting to make a wedding dress!  Eeeps!  A friend of mine is getting married on 4th of July weekend and I thought it would fun to wear something of my own creation.  I may be eating my words later.  But I feel like I have enough time to complete this task.  Plus I’ve had this pattern that I’ve been dying to try and some lovely material I bought many months ago that is just itching to be used.

Dress for wedding material
I think this is cotton, and it also has a little bit of stretch to it

I know, it looks pretty complicated.  But the rating says “easy” so I have some confidence in this project.

I had hoped to do some cutting on this today, but my day just got in the way.   So check back to see my progress as I attempt my first special occasion dress.

Something Old: This pattern has been sitting in my collection for about 9 months, which is not too old, but older than other patterns I have.

Something New: It calls for an invisible zipper!  I’ve never worked with one before and it looks like I need to use a special foot for it.

Something Borrowed: Technically I am borrowing my mom’s old sewing machine (only 10 years old), since she just bought a brand new one.

Something Blue:  I think there is some navy blue in there somewhere.

I also need to get about 2 yards of lining material, Continue reading “The Dress-for-Wedding Challenge: Part 1”

Everyday I’m Serger-ing

Pattern: New Look 6816
Gray striped shirt

Yay!  My mom’s serger is out of the shop and ready to go.  So, time to sew some knits!Serger

For those of you that don’t know what a serger is, it looks like this:

A lot of the clothes that you buy are made with a serger, which makes a certain type of stitch that finishes the edge while it sews.  It was perfect for this cotton stretch knit material I bought and used to make this cute little top with kimono sleeves.

At first this looked like a top I could complete in a few hours, but I don’t have a ton of experience with knits and there were a few unforeseen challenges.

The first thing I realized was that I was going to have to match up the stripes.  The back was two separate pieces so it needed to line up, Continue reading “Everyday I’m Serger-ing”