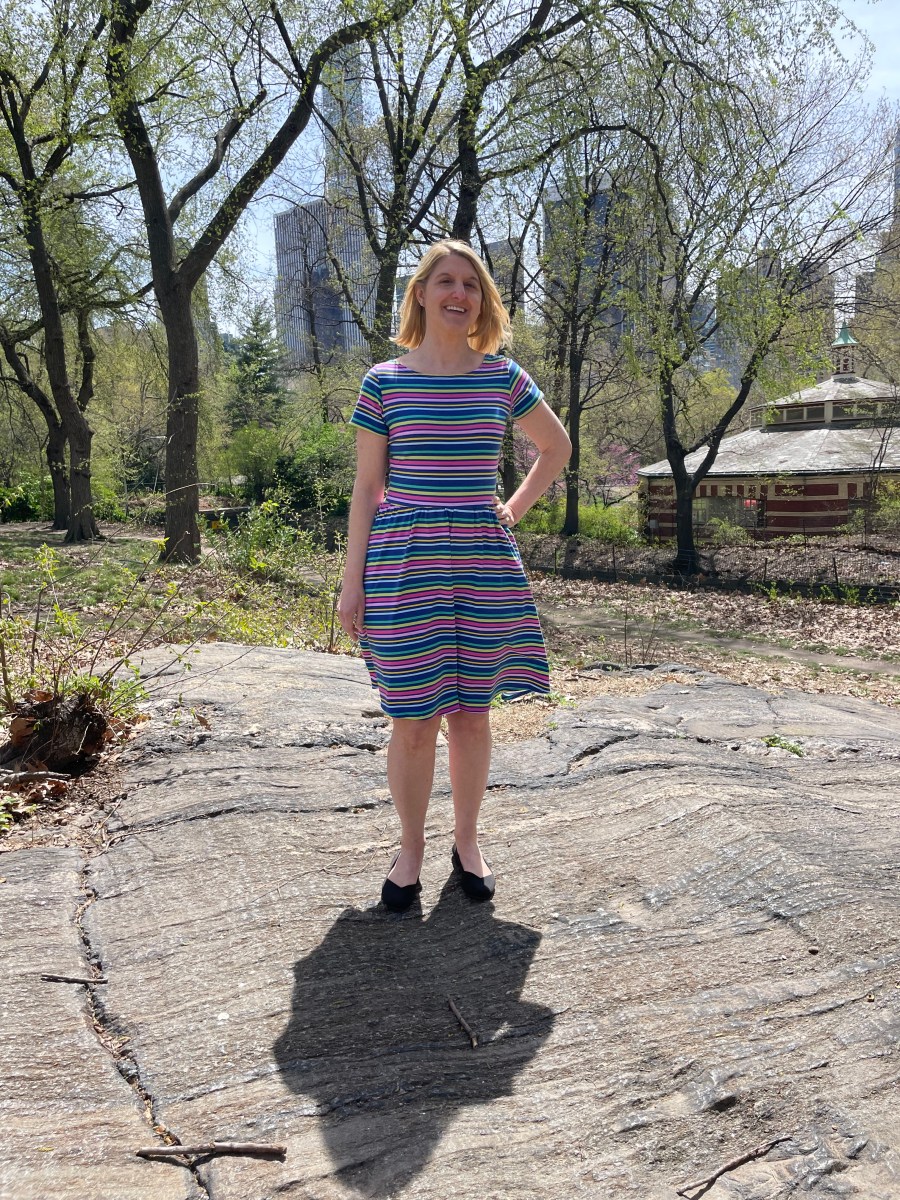
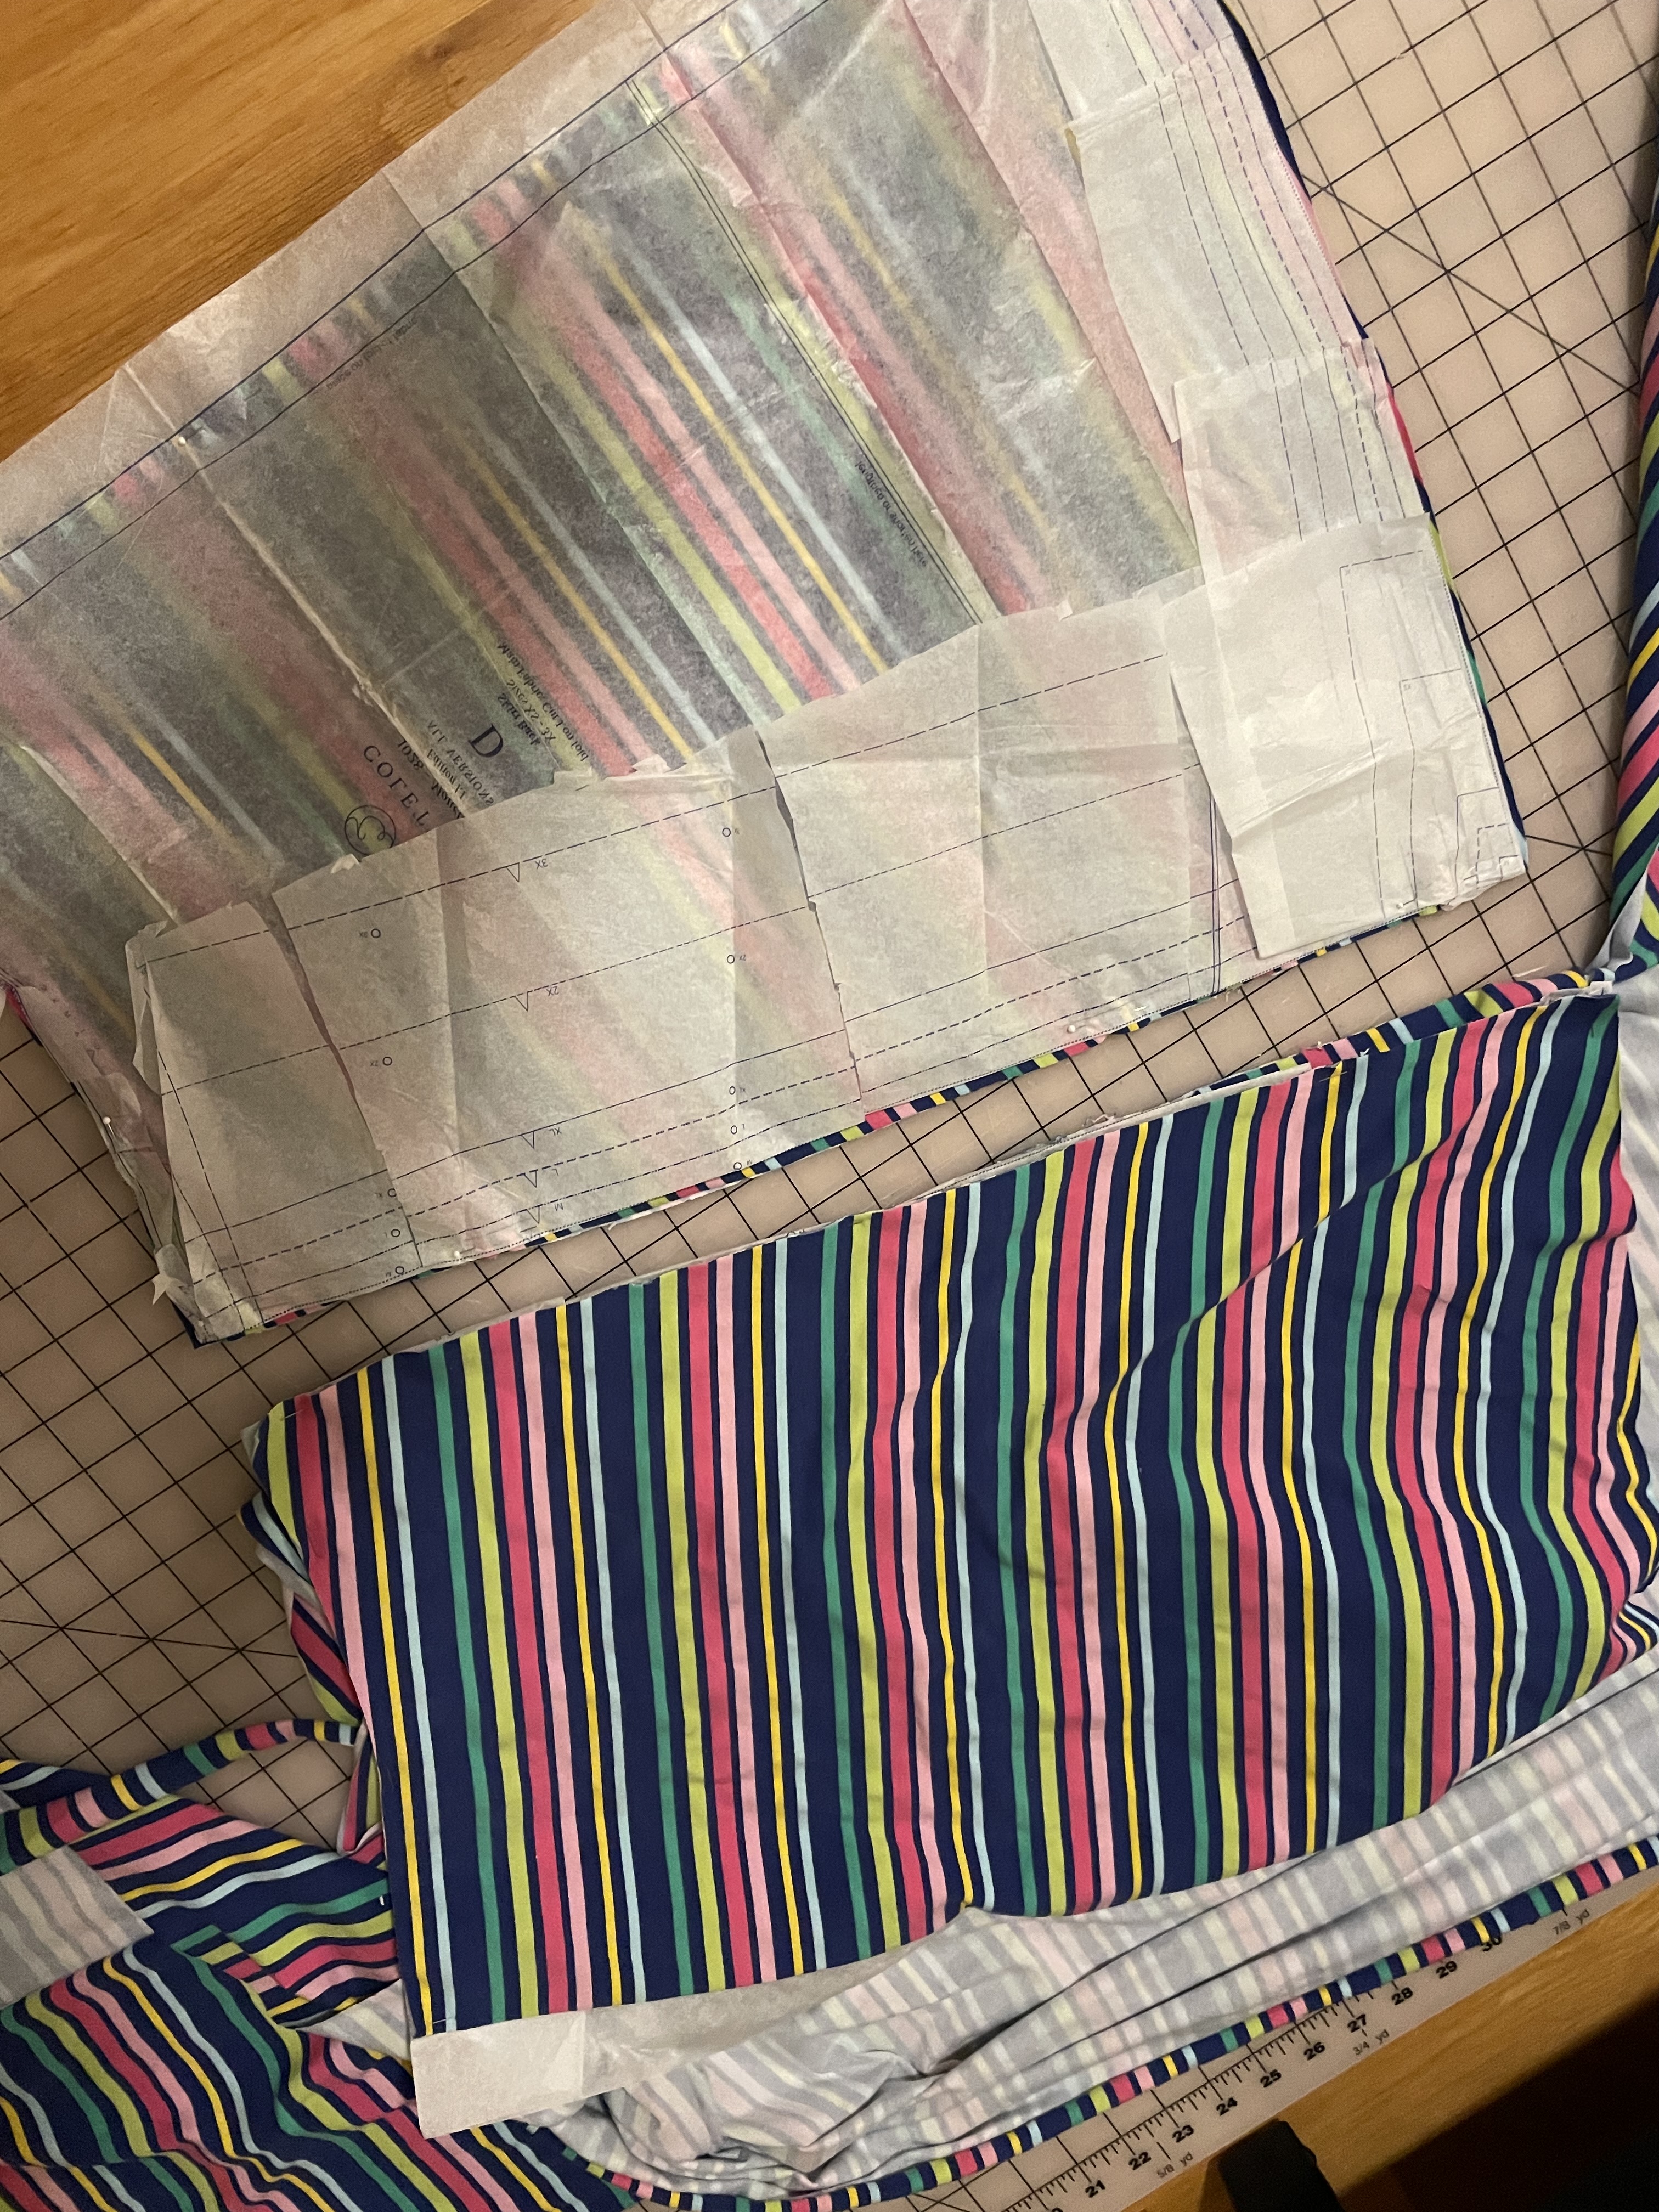
Getting free fabric doesn’t happen too often, and finding the perfect garment to make with said fabric is even more rare. I picked up this striped knit fabric at a fabric swap and I knew that as soon as I took it home, I wanted to try out a Collette Moneta with it. I remember this pattern was all the rage maybe 8 years ago, but I never got around to making one. As I sewed this one up, I wondered why I waited so long. It’s a great pattern, very simple to to follow and the dress sews up so fast. As with most outfits, the main challenge came from trying to match the stripes when cutting out the pattern. This fabric had many stripes to match up, but luckily not too many pieces to cut out.
I’m not the biggest fan of gathered skirts. I feel like sometimes they don’t look very flattering on me and can make me look bigger than I am, especially if not done right. This dress isn’t too bad, but it will never be my favorite dress because of the gathered skirt.
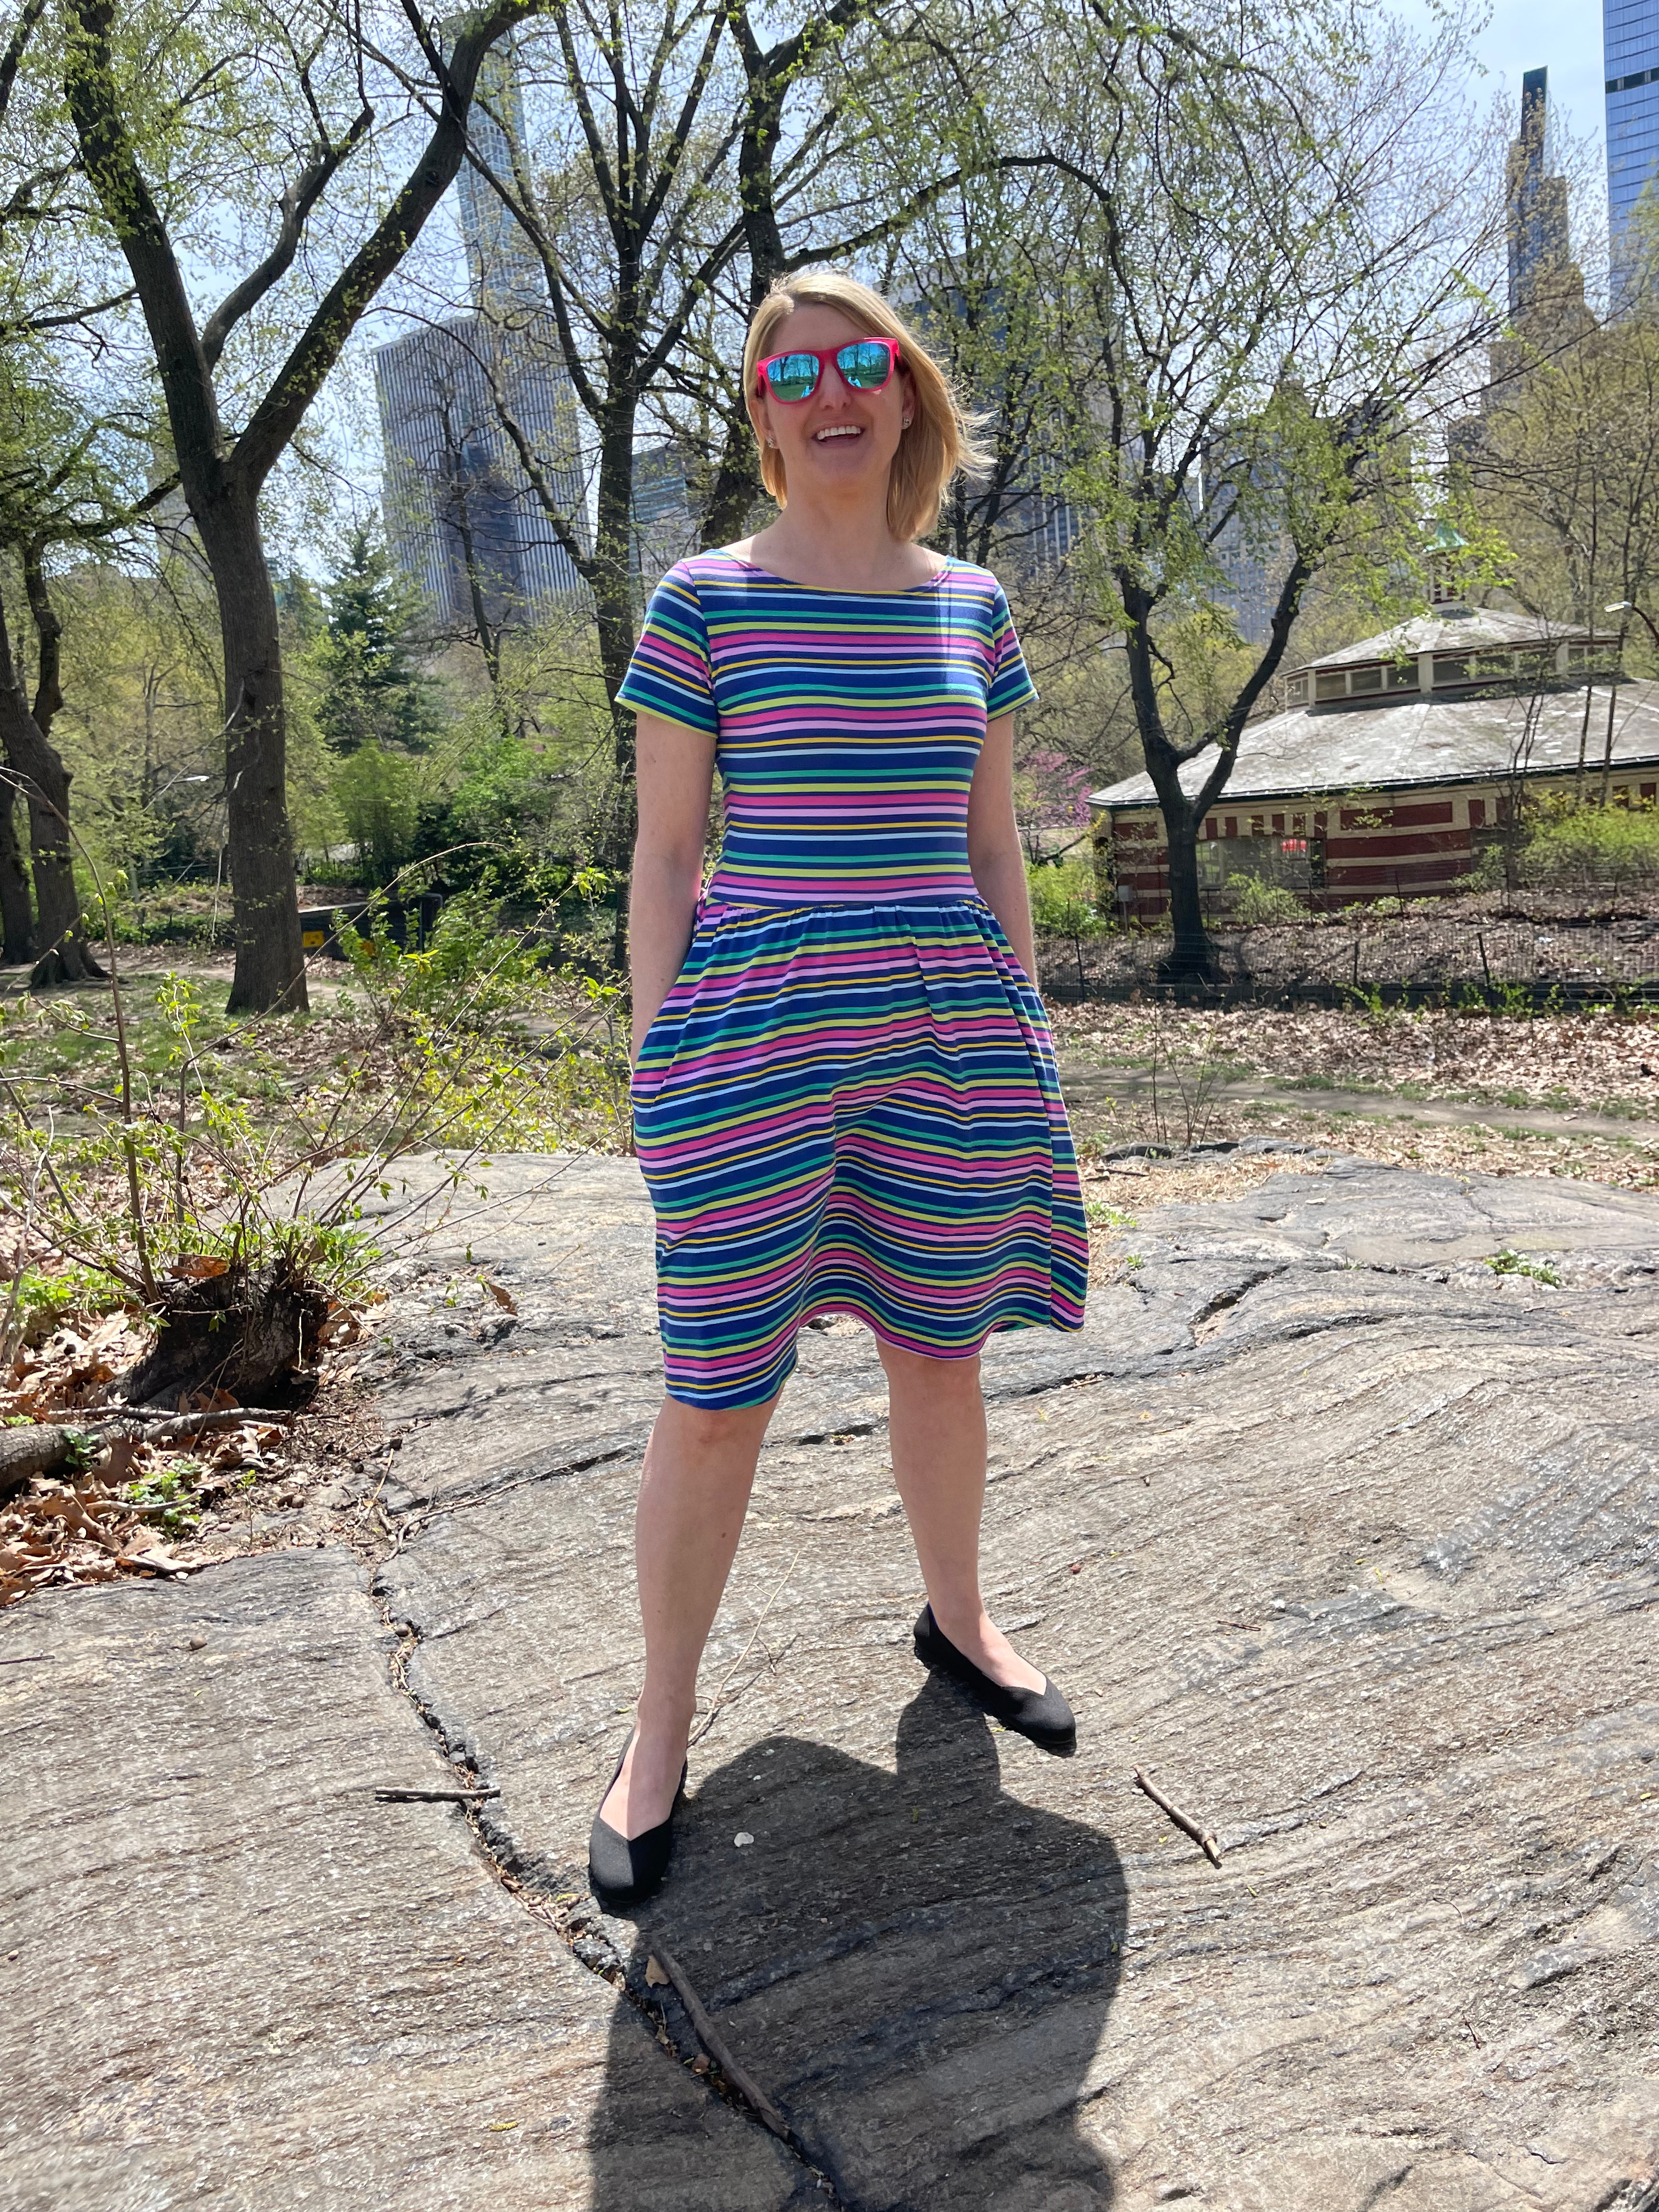
I made this dress in the dead of winter and had to wait several months before I could actually wear it, but it was worth the wait
While I love that this dress has pockets, I also felt like they added a bit of bulkiness to this hips on this. This could have to do with the type of fabric and maybe a less stiff knit would have a different look.
It was very windy in NYC where I took these photos, as I was visiting the city for the weekend
This being said, I would definitely make this dress again. It’s a great casual dress that sews up fast and looks pretty good on basically any body type. The full skirt is very easy to fit, especially with someone with larger hips like myself. I also like the way the back looks, the neckline a little lower to show a bit of skin.
A minor imperfection in the fabric in the back caused a small hole and had me wanting to throw the whole thing away. I stitched it up, so it’s slightly noticeable, but hopefully it’s not obvious to most people
I used a double needle to hem the neckline, sleeves and skirt. It always ends up being harder than I anticipate to keep the lines even all the way around. I definitely had to unpick and re-sew a few sections, but I had less issues with “tunneling” of the fabric than I usually do and I think it’s because this was such a sturdy knit.
All in all, a great new dress for the spring, and you definitely can’t beat the price!
It’s been awhile for me on this blog. I’ve clearly been busy in life, trying to keep my head above water with work and various life changes. I’ve lost touch with friends, my house is a total mess and I’m so behind on projects it’s not funny. I have done some sewing and even finished some great clothes, but every time I go to write something, I get distracted. I’m hoping to pick things back up in the new year to write about my backlog, but in the meantime I wanted to mention my one major project that was the ultimate challenge in my whole sewing life. I am talking of course, about making my own wedding dress.
Back when I was first sewing, I remember being proud of my ambitious (at the time) project of making a dress that I was going to wear to a wedding. That seemed scary enough. Making my own wedding dress? That seemed like something other sewists did, ones that are imaginative and innovative or can draft their own patterns. Ones who have a sloper ready to be used. Ones who actually know what a sloper is (still learning here). Could I, with my amateur sewing skills, actually make something I would be proud to walk down the aisle in?
Before I go into the details on the dress, I want to mention that my wedding was an elopement. Years ago, I got married and had the wedding with all the family. I bought a poofy dress that I loved and did all the traditional things. That marriage didn’t work out so for my second wedding, I knew I just didn’t have the energy (or the money) to plan a whole thing again. My husband and I decided to combine our wedding and honeymoon into one trip, to a place I’ve always wanted to go – Bora Bora in French Polynesia. I wanted to get married on a beach where I only had to worry about myself and my partner while we vowed to share our lives. An occasion like this calls for a more simple dress – or at least that is what I wanted. Something that was not too elaborate that would distract from the natural beauty around us. I found out it’s hard to find a dress that’s simple but still makes sense in wedding photos. I thought maybe if I made something, it would represent what I wanted more (however I did buy a back up dress just in case this ended up being a total disaster).
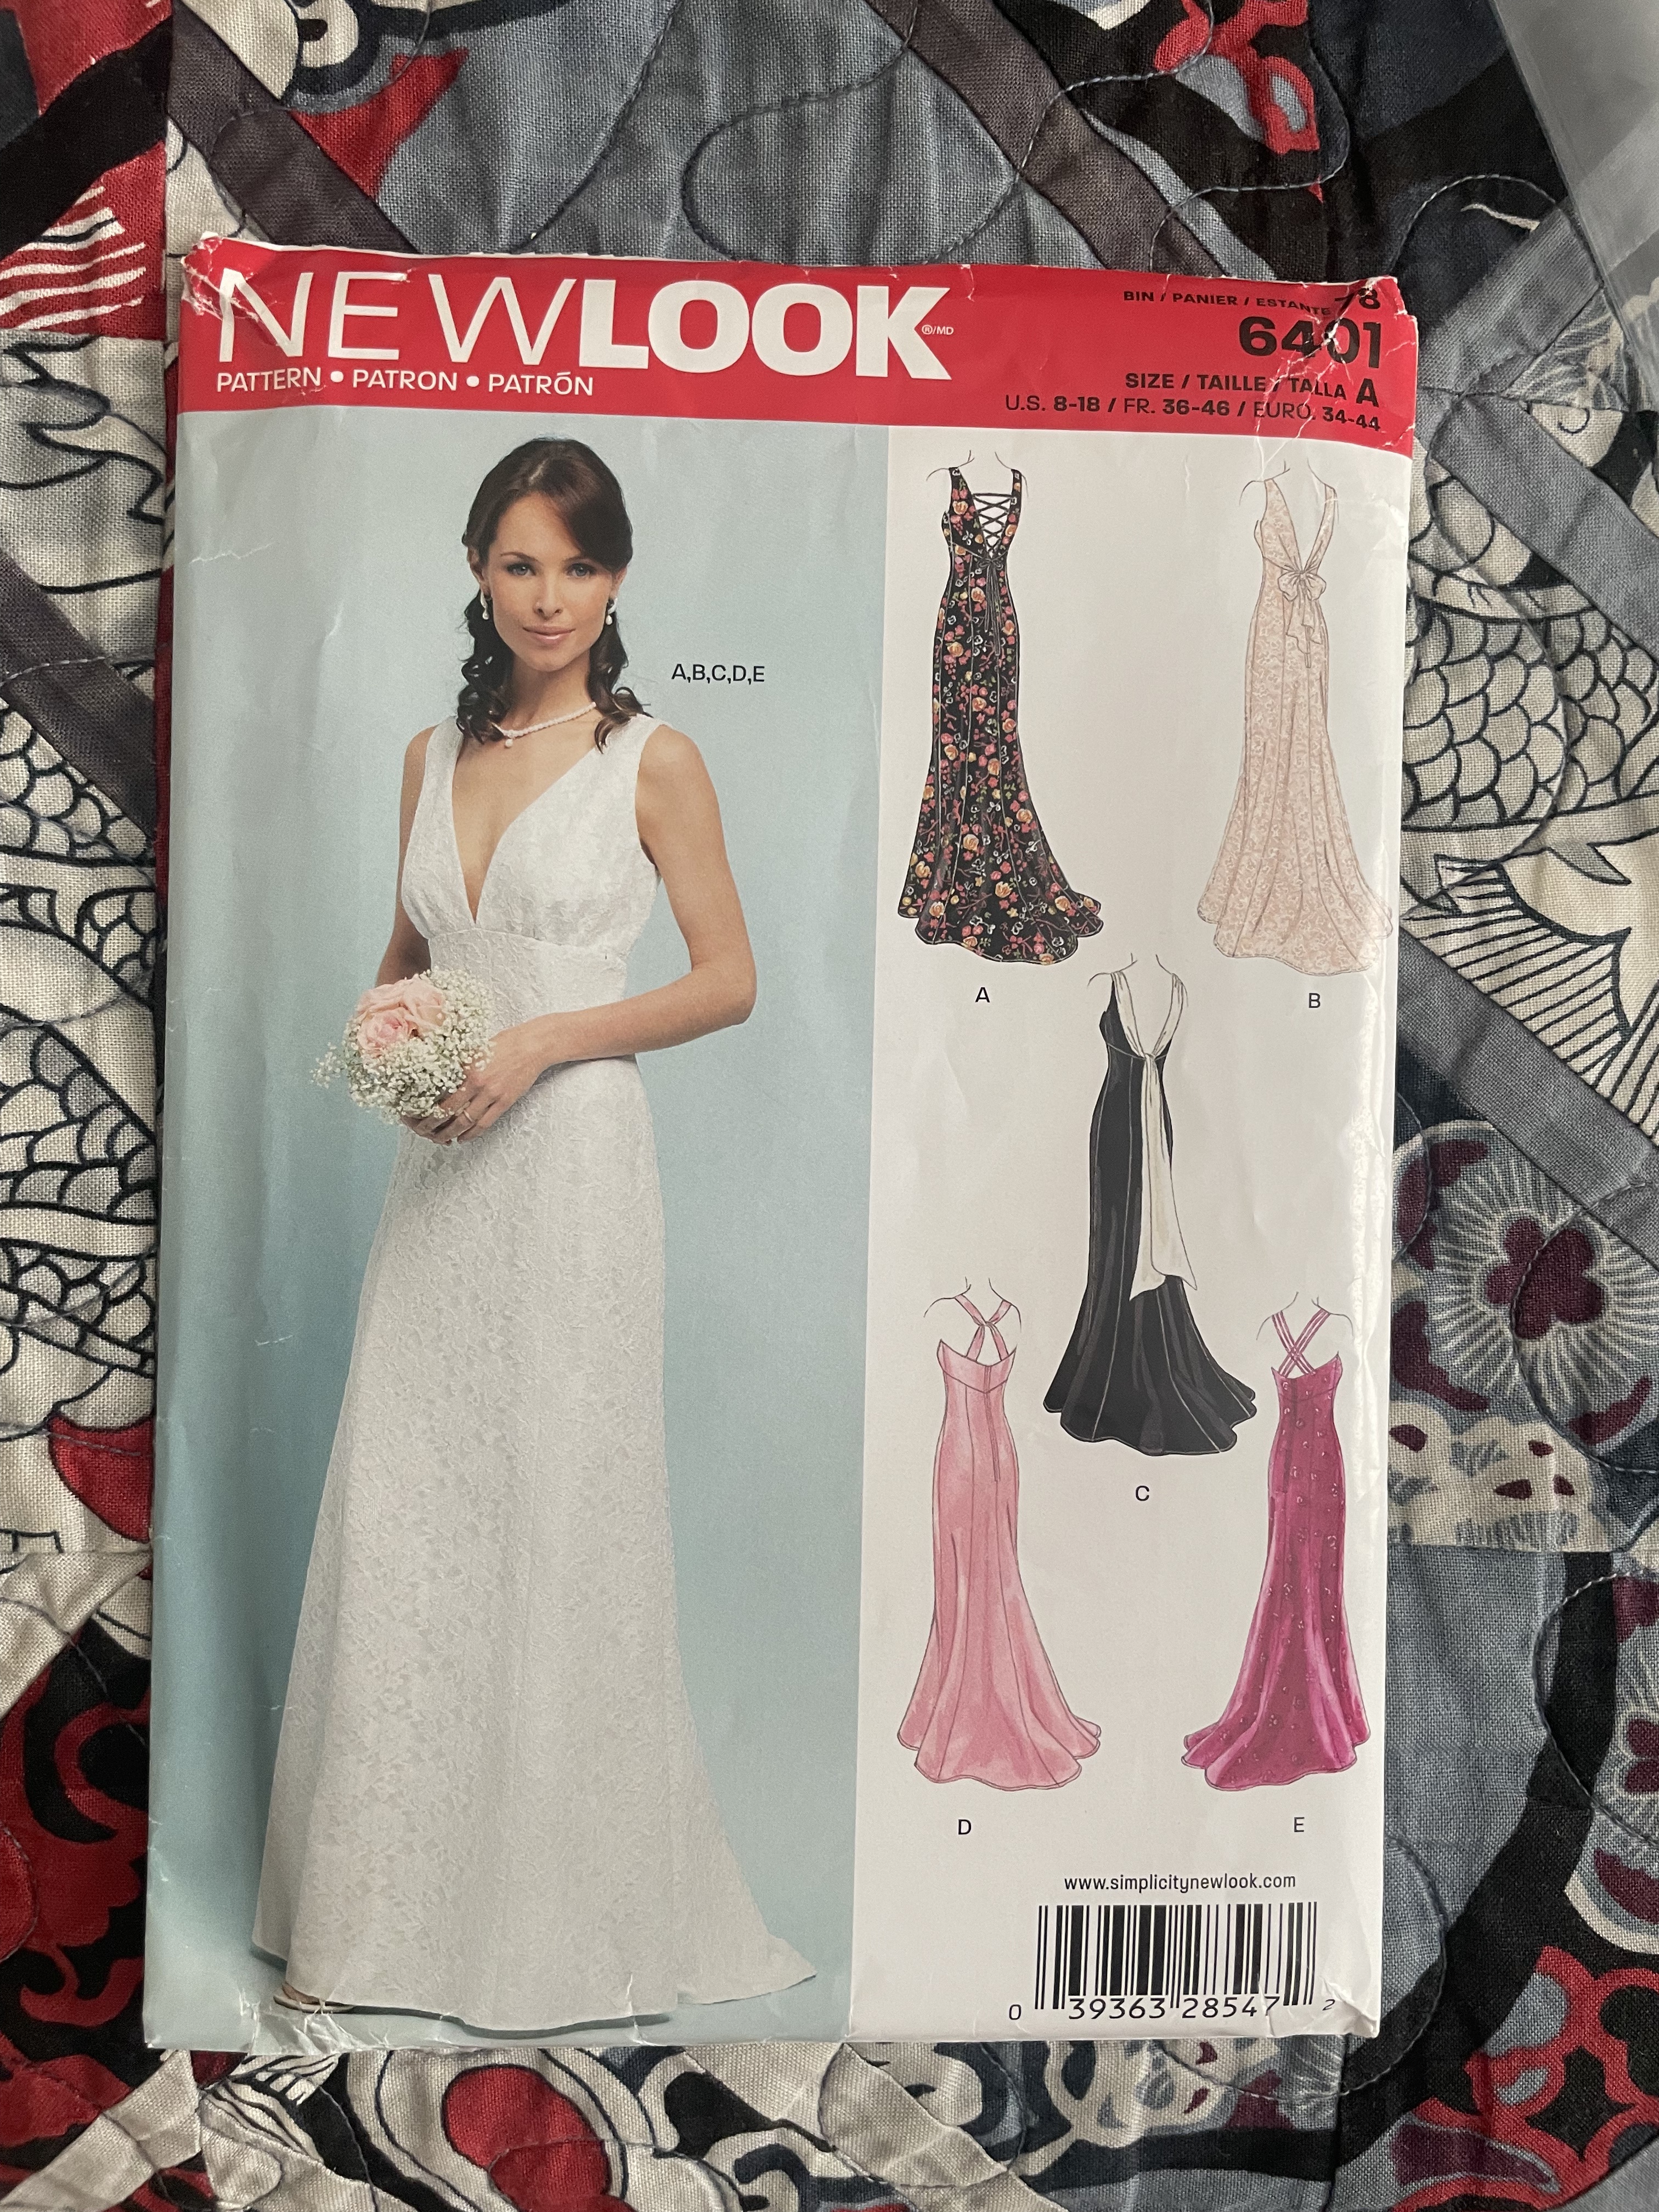
My skills may be a bit better than when I made that first dress for that wedding, but I still knew my limitations. This was too important an occasion to just go it alone, so I enlisted my mother to help me. It was great to have another person there to interpret the directions and bounce ideas off of. The first step was picking a pattern. I had a few wedding-like dress patterns in my collection and I settled on New Look 6401 (view B). I liked the simple design and since it didn’t seem to have a lot of pieces, I was hoping there was less of a chance of a screw up.
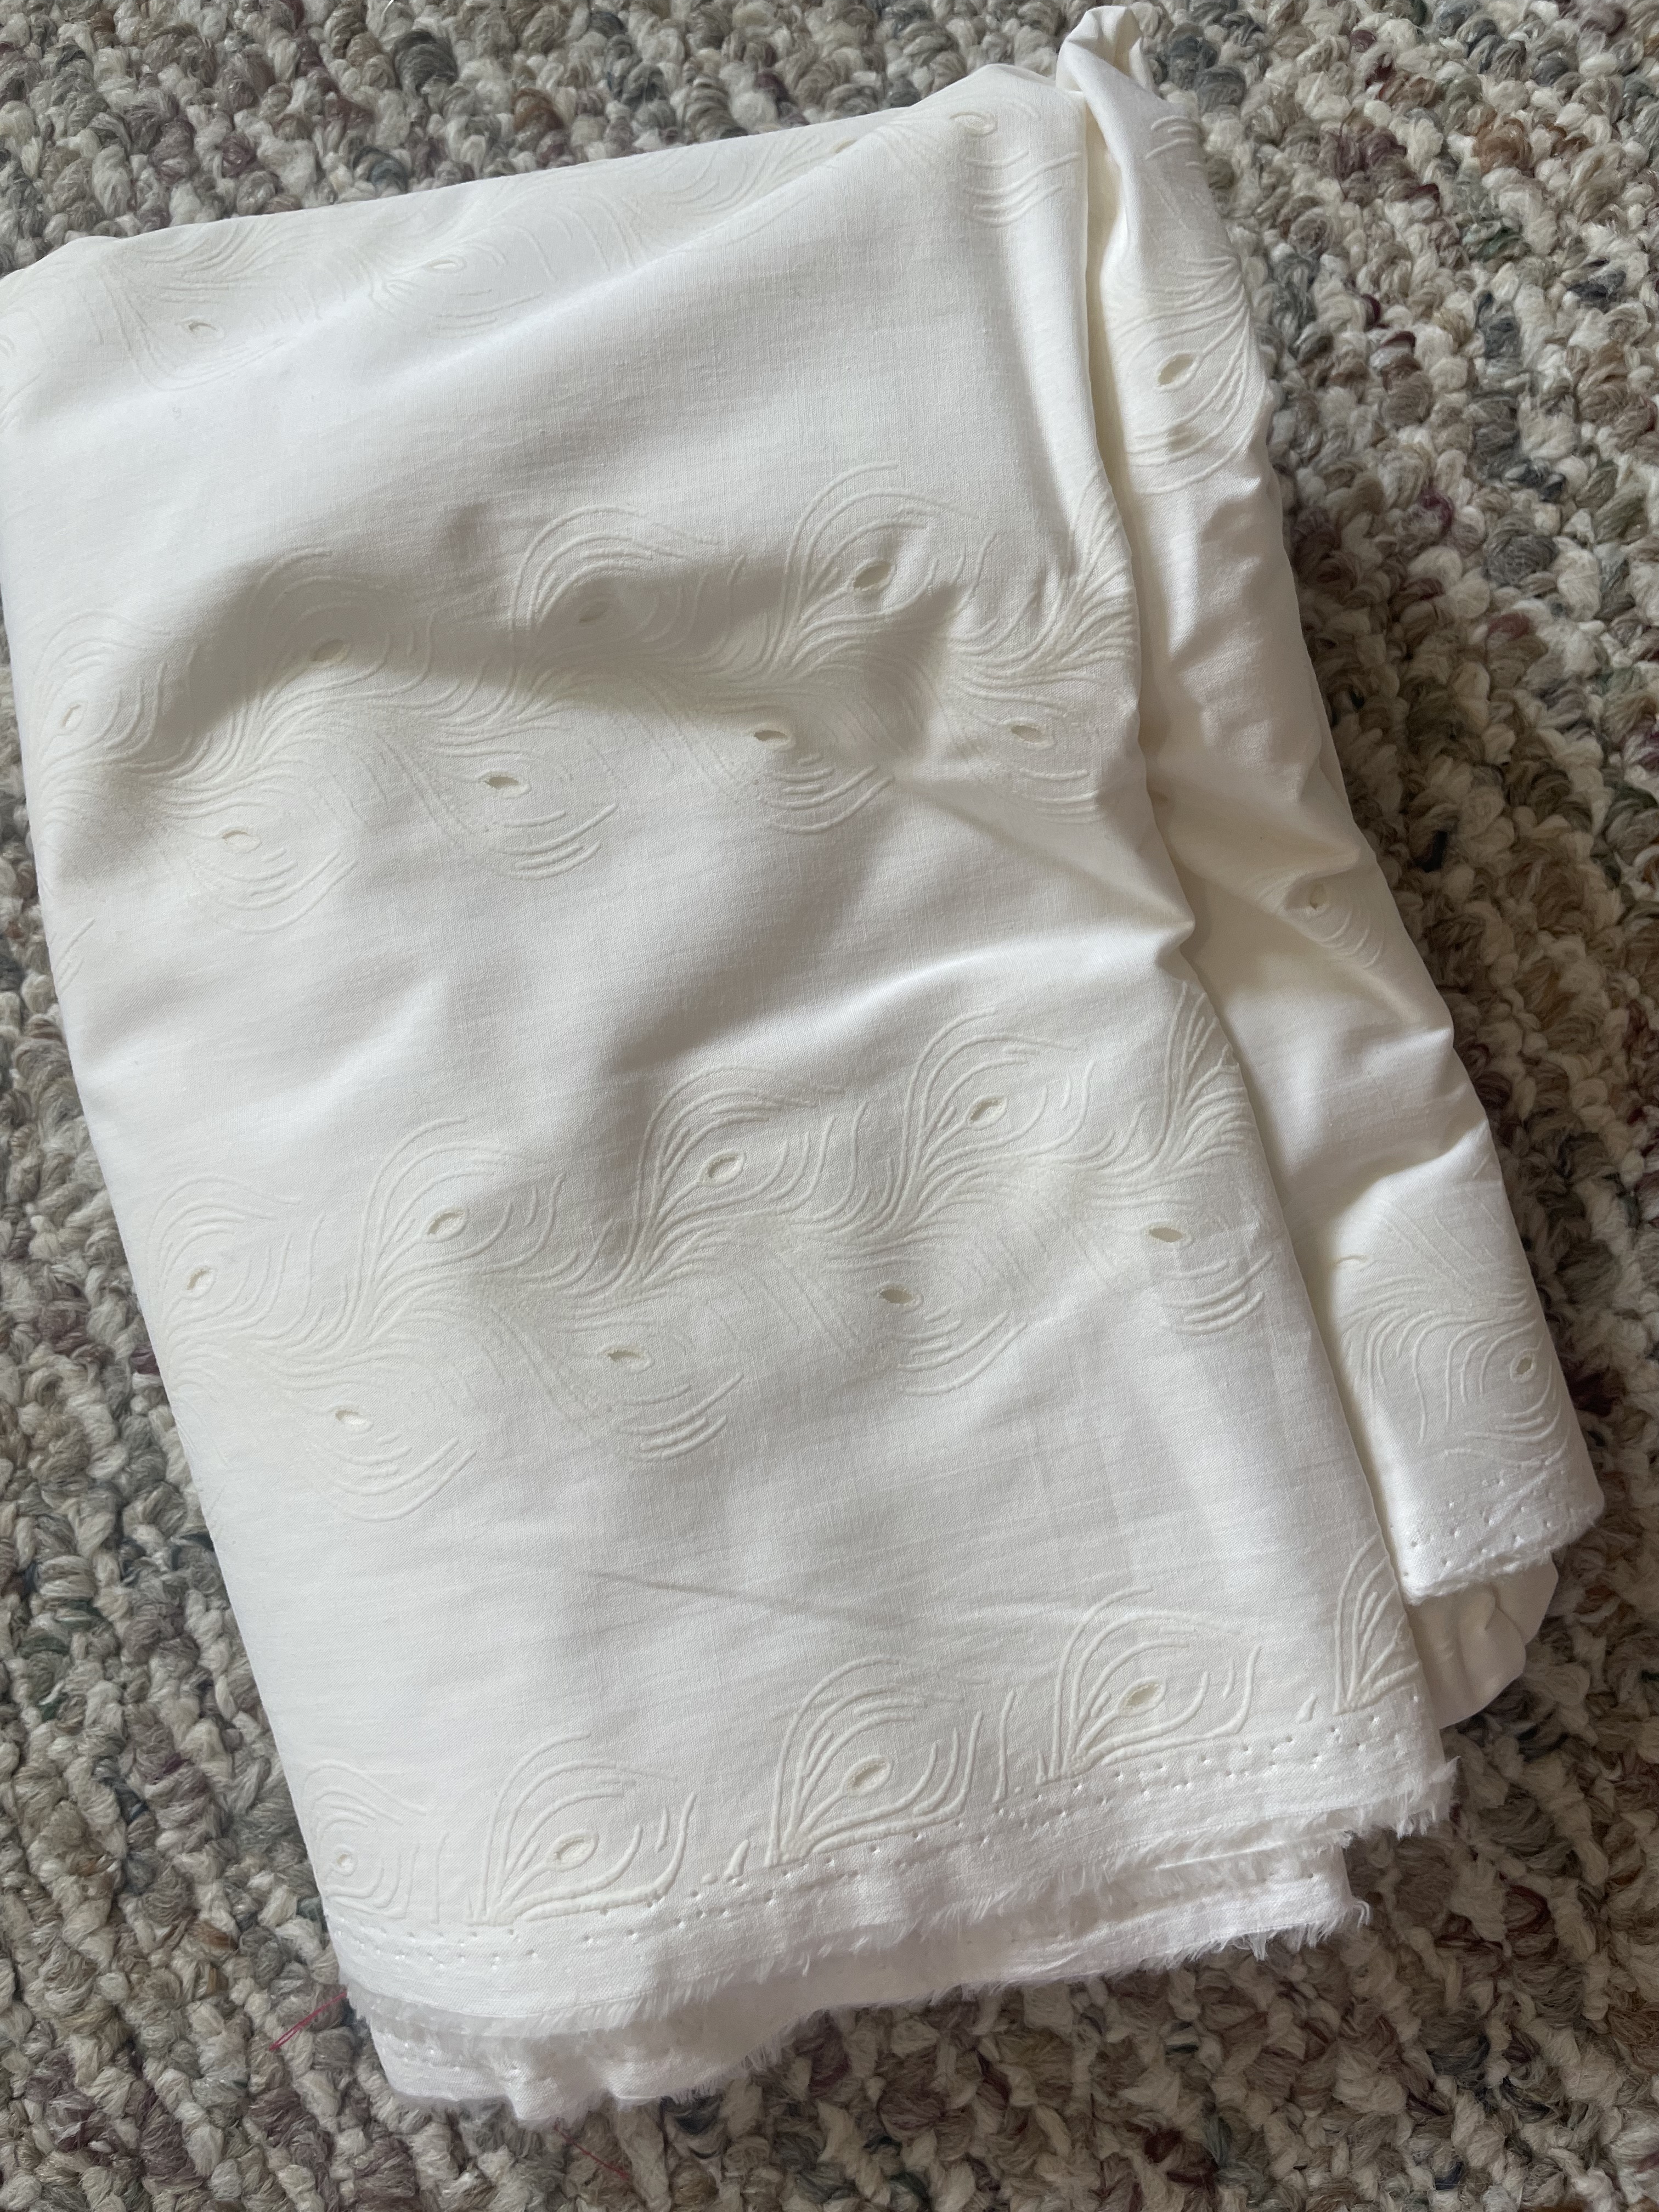
The first task was getting the right fabric. I thought maybe I’d be able to take a trip to NYC, since I wanted to actually meet the fabric in person and not just order online. Unfortunately fabric stores in New England are few and far between. I wasn’t able to get away, but luckily there is a local fabric business that is an online shop but sometimes will accommodate visitors if you make an appointment. This is Gorgeous Fabrics in Billerica, MA and it’s more than just a fabulous name. I wasn’t even sure I wanted something white, I was maybe thinking of pale yellow for the dress, but I ended up seeing something really unique that I loved. It was a cotton eyelet, but the pattern on it was different from anything I’ve seen and was told it was sort of a “peacock” print. It was an Oscar de la Renta fabric and I saw the potential right away.
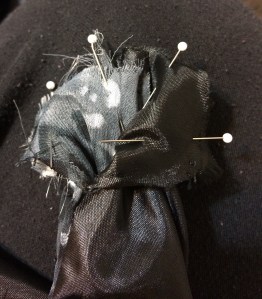
I was able to pick out the perfect fabric for the lining, which I had to admit was very breathable in the warm weather. The only thing left was to figure out what to do about the bow in the back – the cotton was not flowy enough to create the right shape. The owner showed me some sheer organza that could work beautifully, with just a narrow hem.
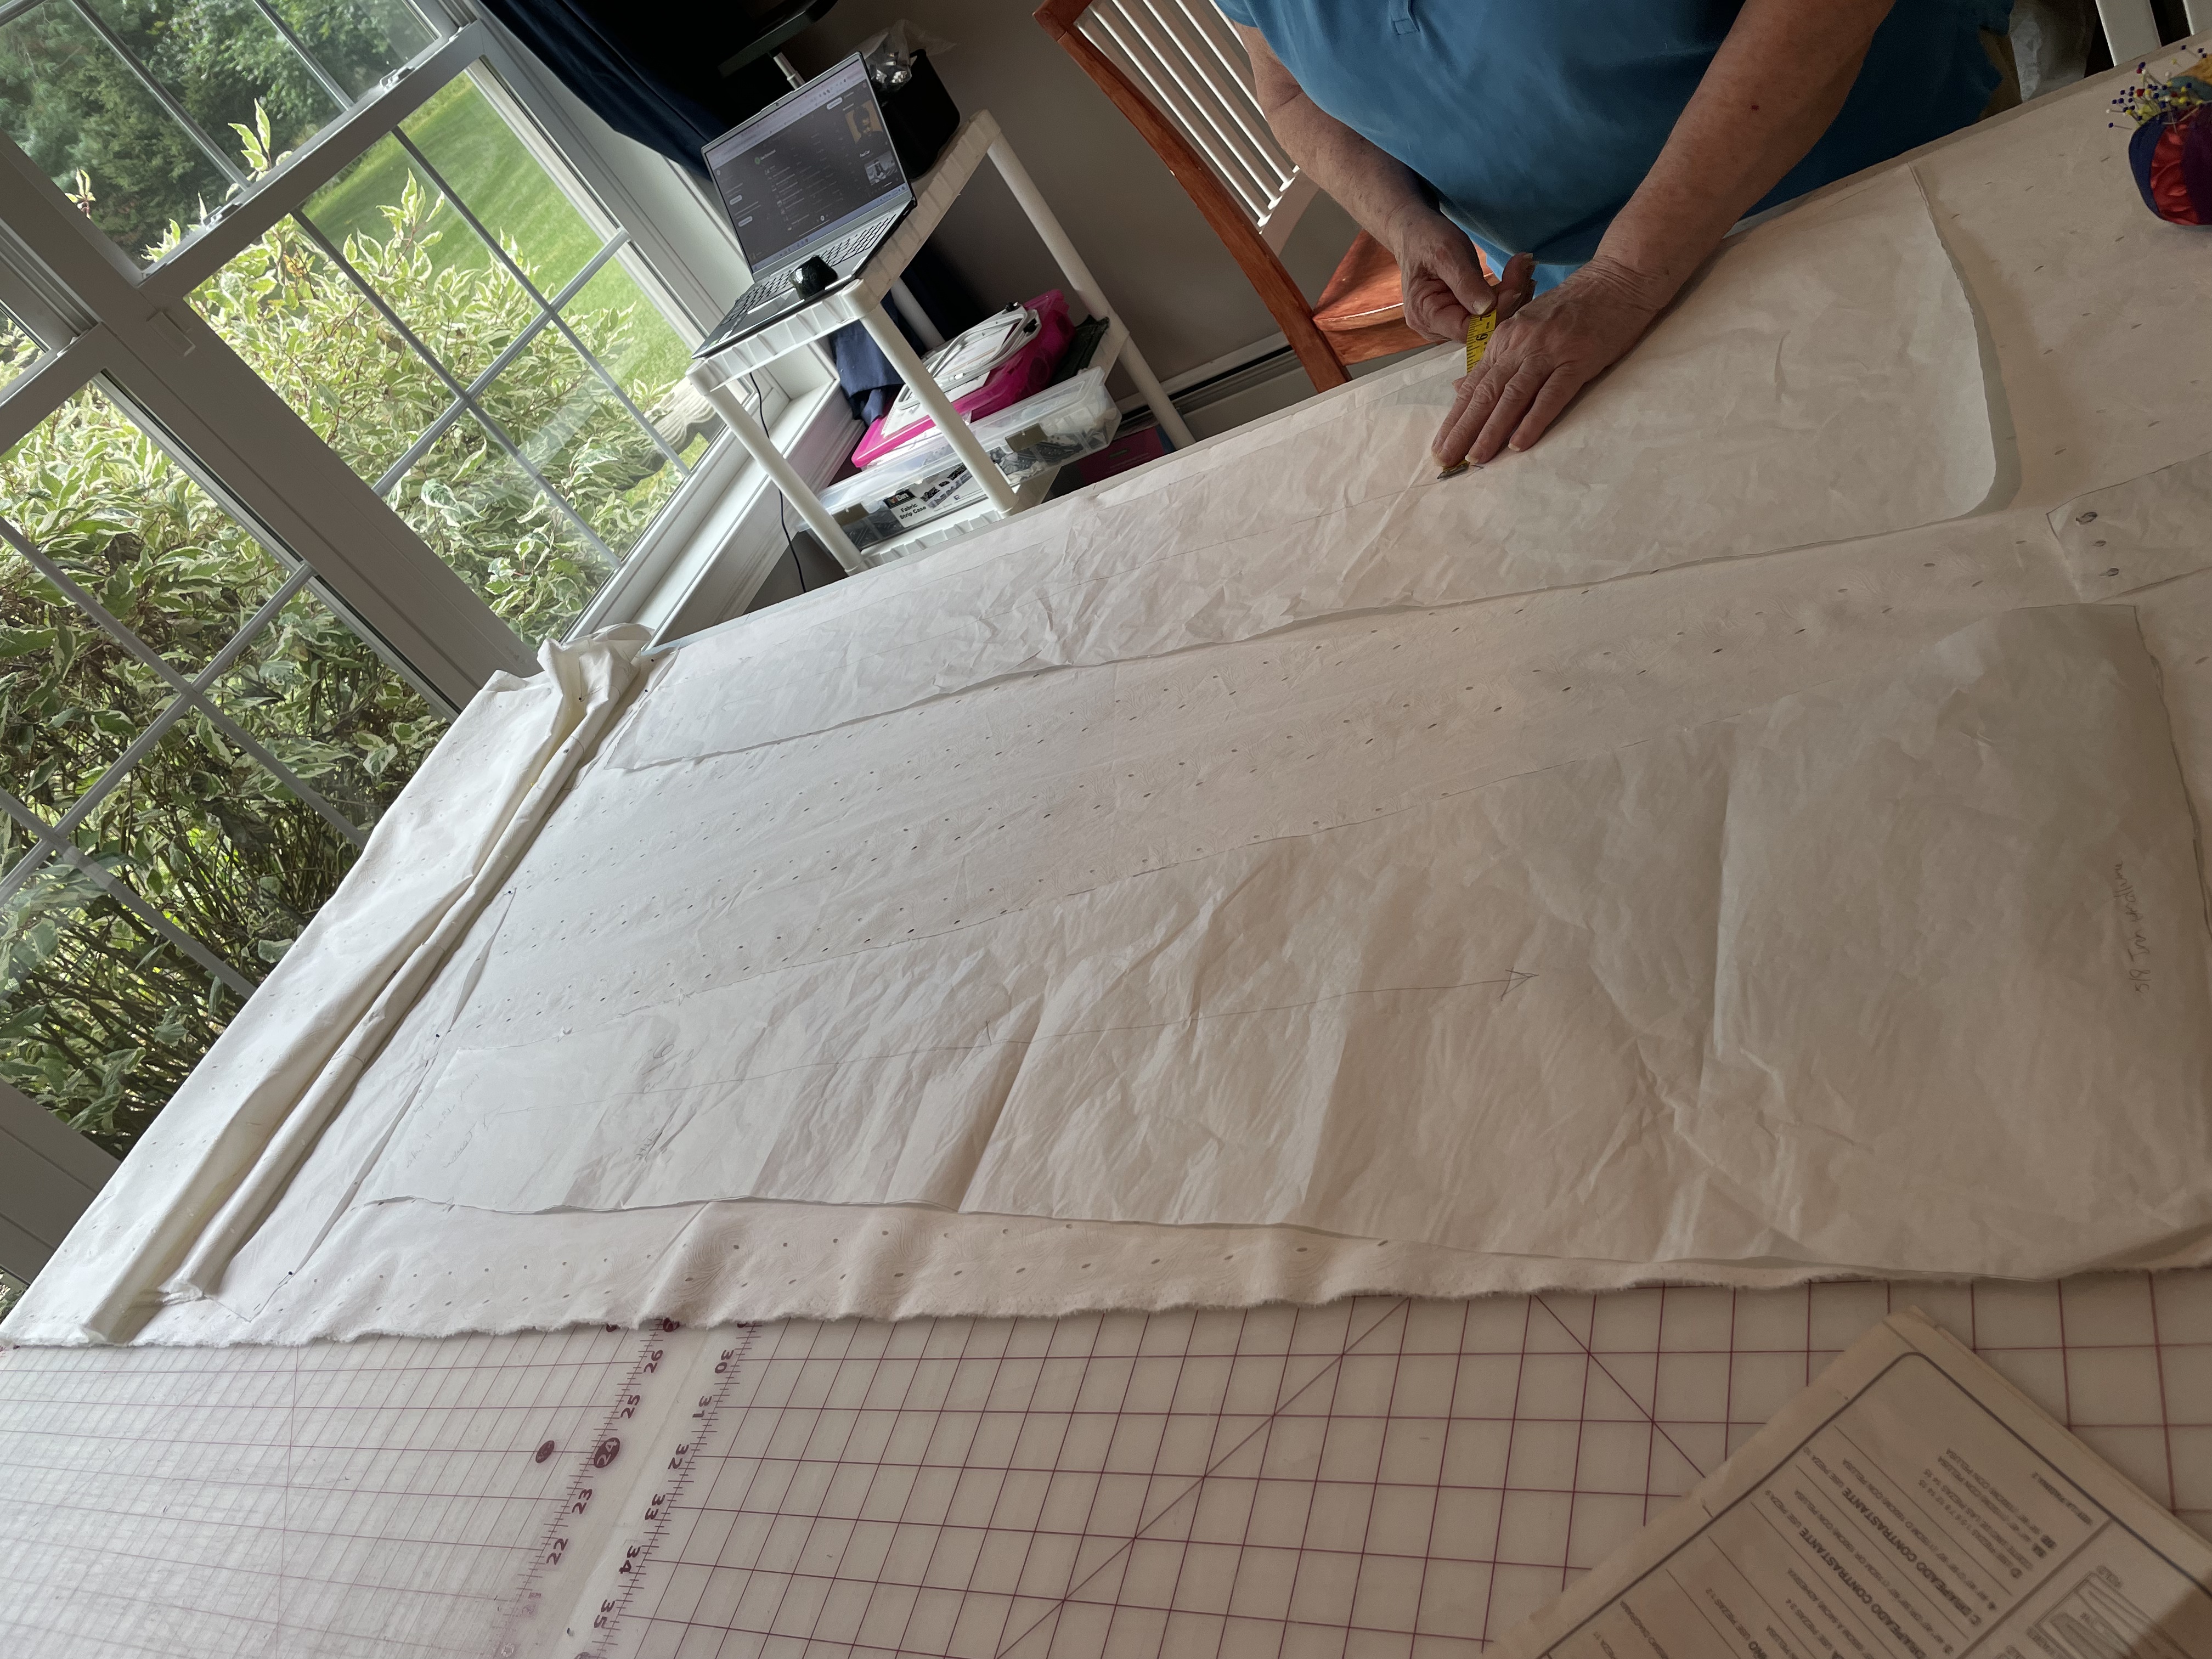
Because I wanted to be as sure as I could be, I of course made a muslin. This helped me determine the best fit, which was lucky, because it made me realize we would have to adjust the top to be a bit smaller and expand the hip section out a bit. The seam allowances were generous so I had a bit to play with, but we did measure out a half inch to make sure it wouldn’t be too snug around my lower half.
My wedding dress, in lovely muslin fabric
I also noticed how low cut the top was. A bra was pretty much out of the question, so I decided on sew-in cups. Another thing I’d have to purchase.
Working with the organza made me a bit nervous as it was so sheer. I got some good advice from the fabric store: 1) Do not pre-wash it as it will lose it’s stiffness which will make working with it impossible and 2) Hem it using Ban-Rol waistband interfacing.
I had never heard of such a product, but I guess it’s something that is used in men’s pants waistbands. Sewists have discovered it can make a pretty nice narrow hem on thin fabrics like chiffon or organza. I just needed to review a few YouTube videos and was off and running. You basically need to remove a few strands until you get the hem size you want, then sew it to the edge, roll the hem and sew it again. Then the whole thing can just be torn out and suddenly you have a pretty straight narrow hem.
Now that I had the bow section ready, I could put together the final dress. Cutting into this beautiful fabric gave me anxiety, but my mom was there to make sure I did everything correctly.
The issue I have with dress patterns from New Look is the directions are not always very clear. It took a few tries to figure out the bodice correctly, but luckily all this was worked out with the muslin. I think what threw me off was this was the first dress I’ve made that didn’t have a completely sewn together bodice. In this case, the bodice was in two pieces, the left and right. Each side would be sewn to the skirt piece separately.
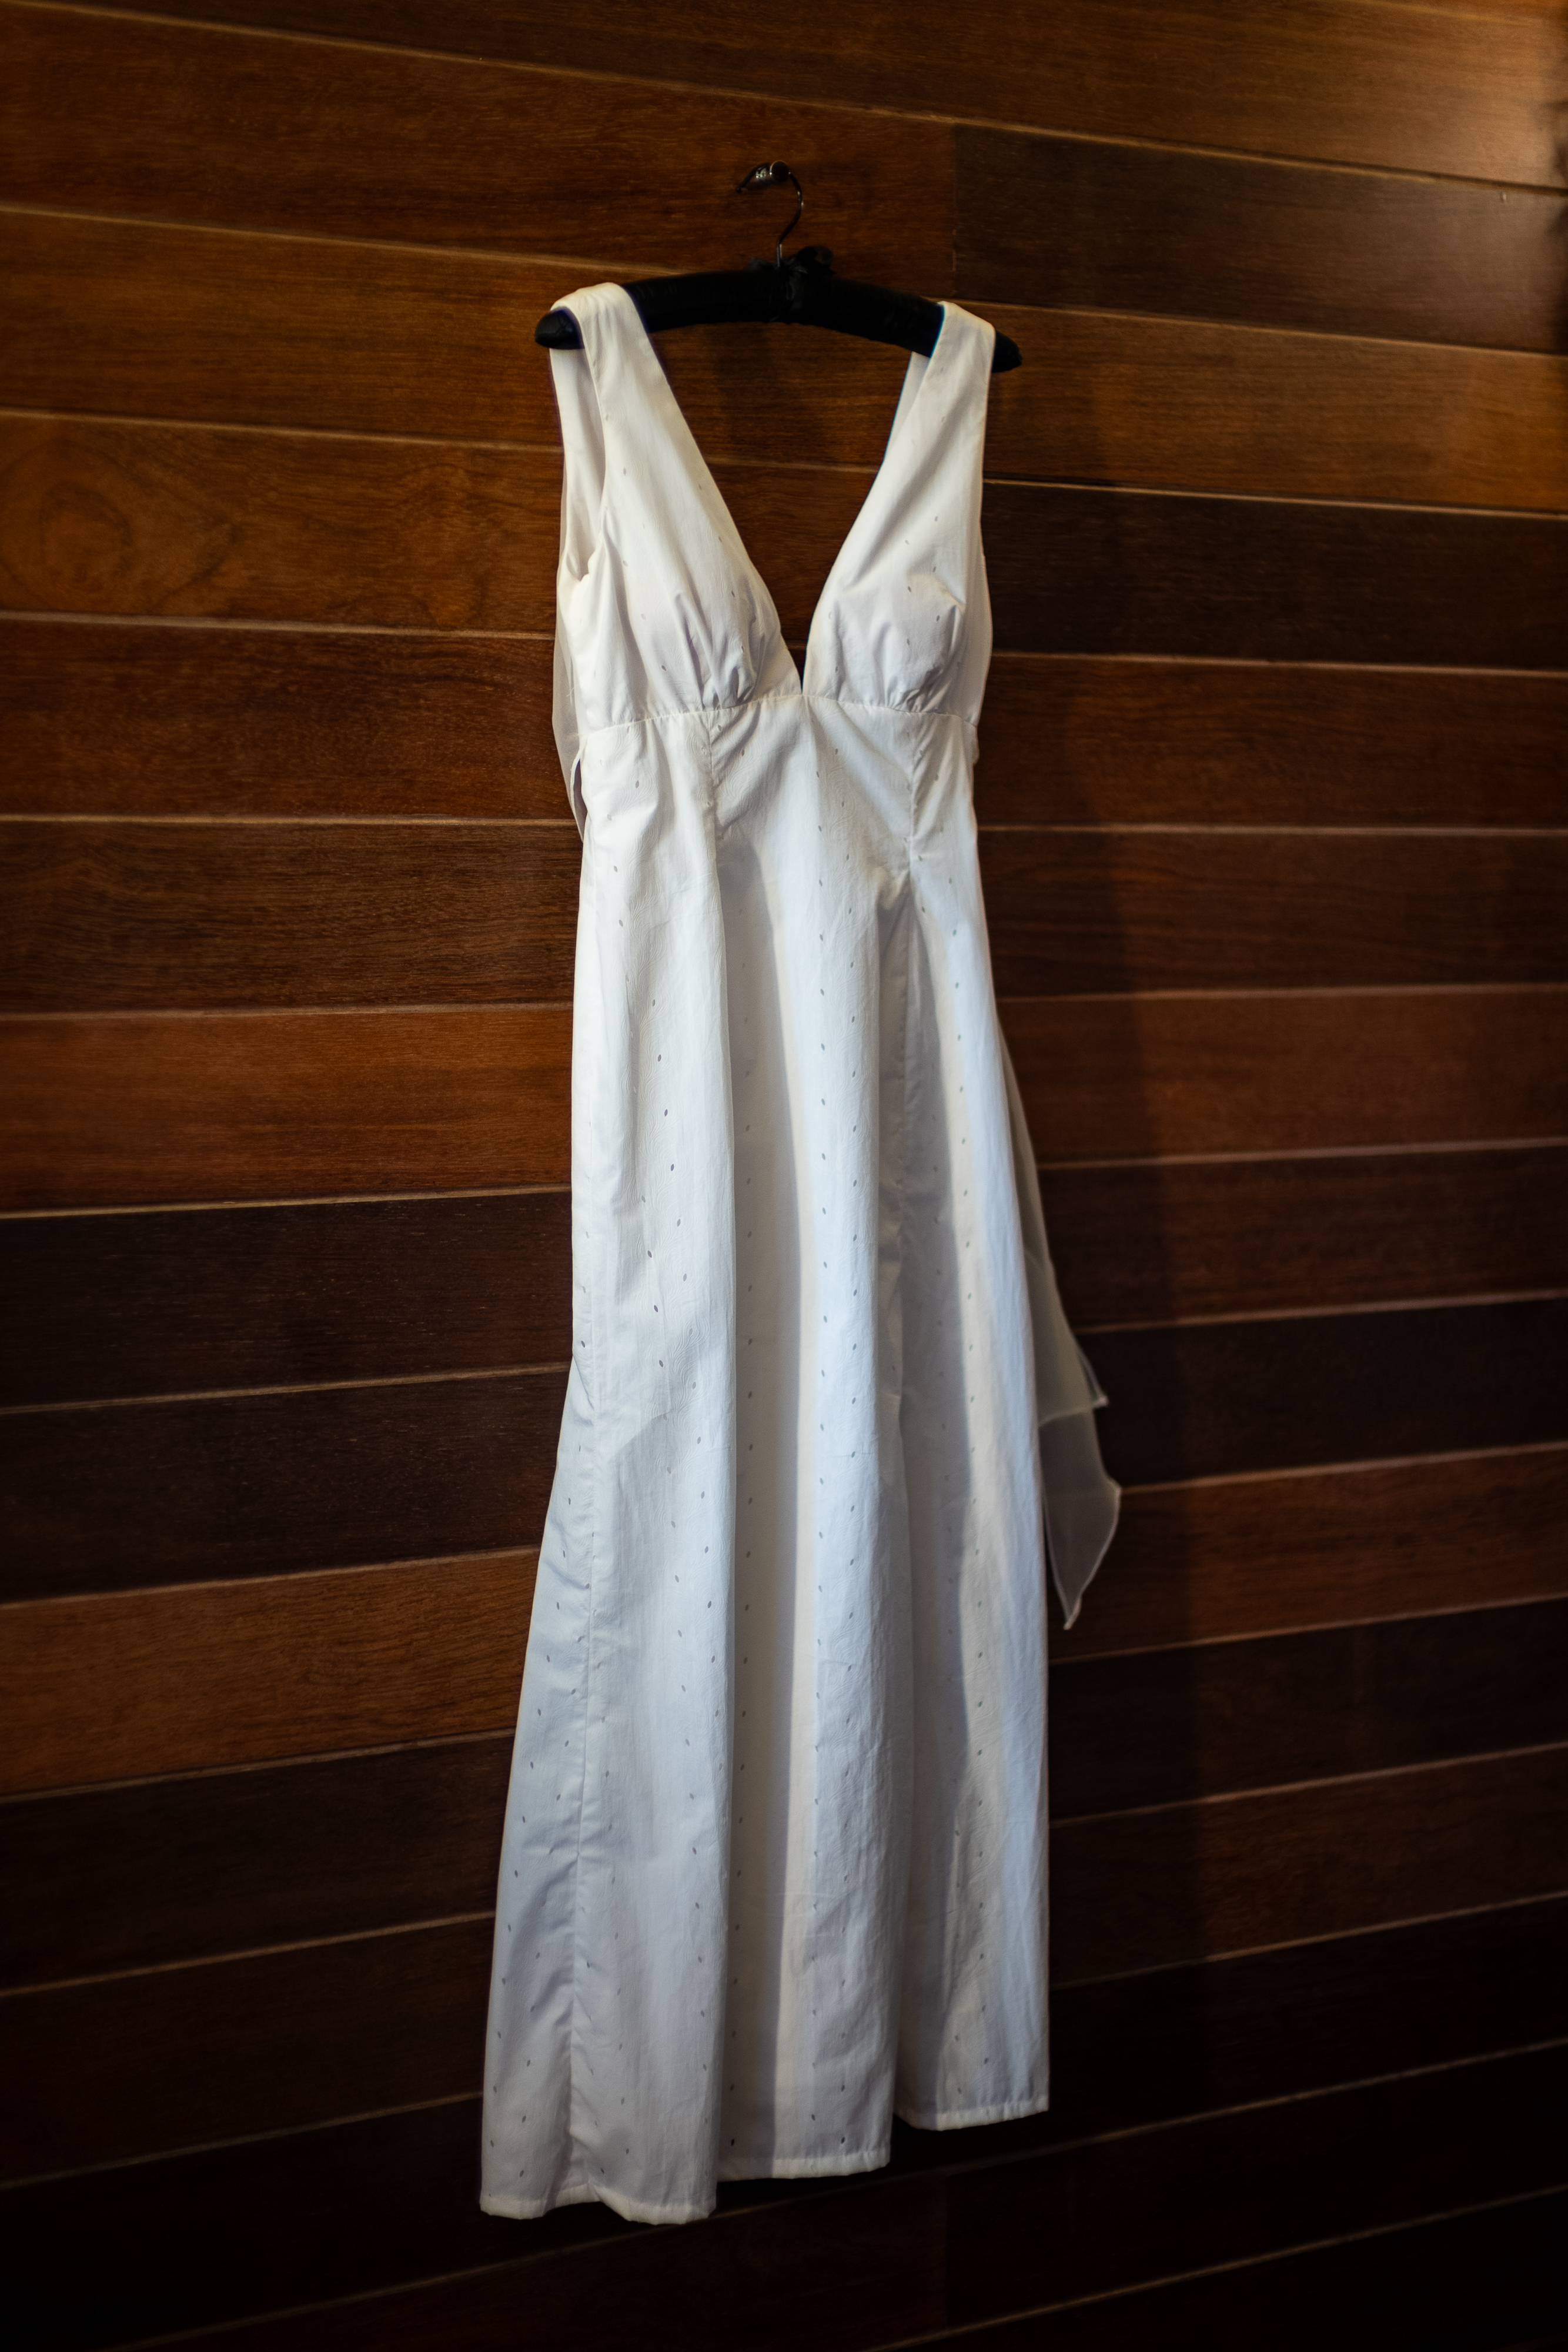
I added no real embellishments, as I said I wanted a pretty simple dress. I did find a hook and eye that had a small rhinestone, which you could just barely see if you were staring at the back. The bow with the organza came out great, however we did have to tack it more at the back than the pattern intended, in order for it to lay flat when tied together.
It may not have been the wedding dress of the year, but I am extremely proud of my accomplishment. I never in a million years thought that I could make a wedding dress that I would want to show off in photos. I couldn’t be happier with the results.
The wedding itself was perfect. The Four Seasons in Bora Bora really know how to make a day like this special and our wonderful photographer and videographer we hired through the hotel captured the day perfectly, as seen below. Although part of me missed having my family around, it was nice to just be able to focus on each other, as we started our journey together as husband and wife.
This coming year, I hope to share more of my sewing adventures, as well as my other adventures. They may not all be as exciting as a destination wedding in French Polynesia, but joy comes in all forms.
This spring, my sewing took a back seat to other, non-fiber related projects. That Larkin bomber jacket was really hanging over my head as the weather got warmer and warmer. The need for outerwear was gone, but I was determined to finish it this year and not put it off for the fall. I did eventually finish the coat. I like the result, but there was a slight issue with the zipper. I will go into that another time, as I don’t have any photos of this jacket as of yet.
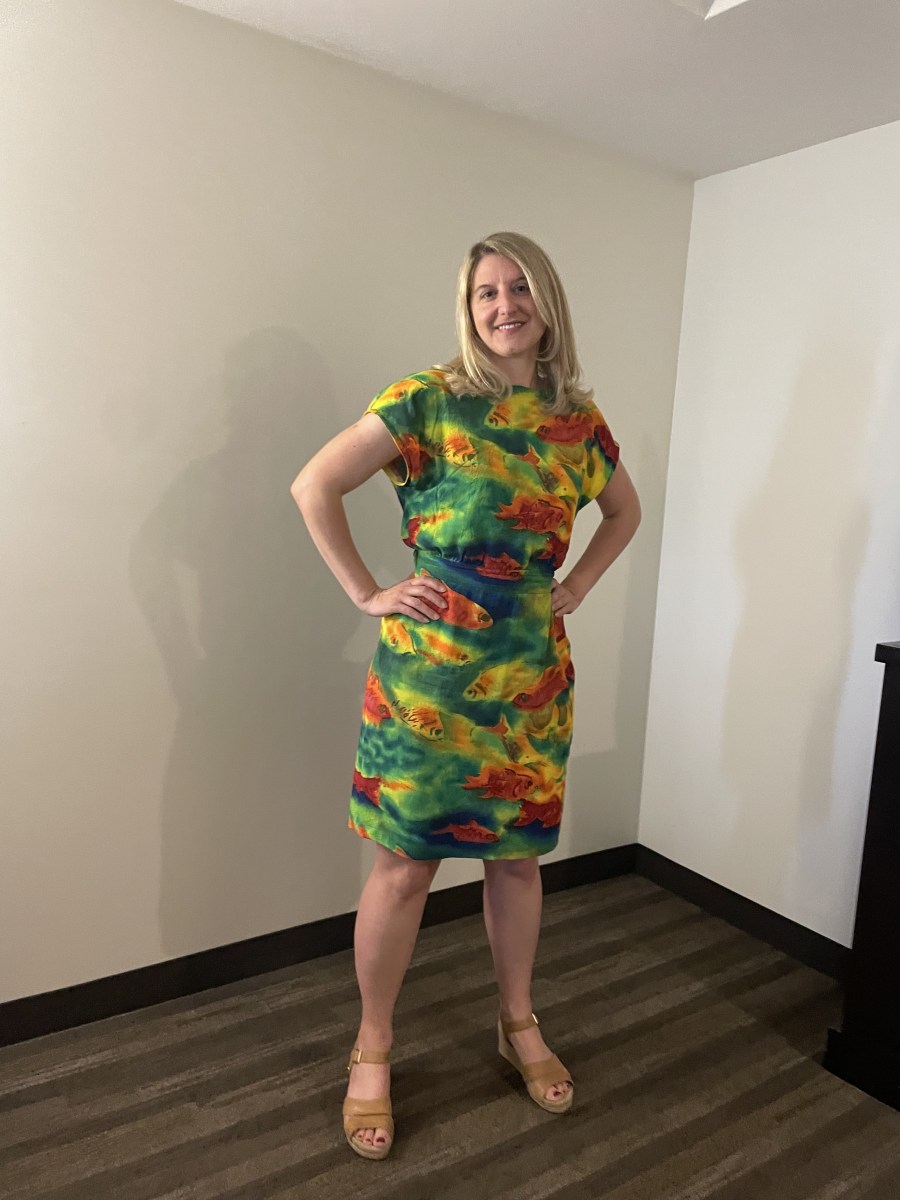
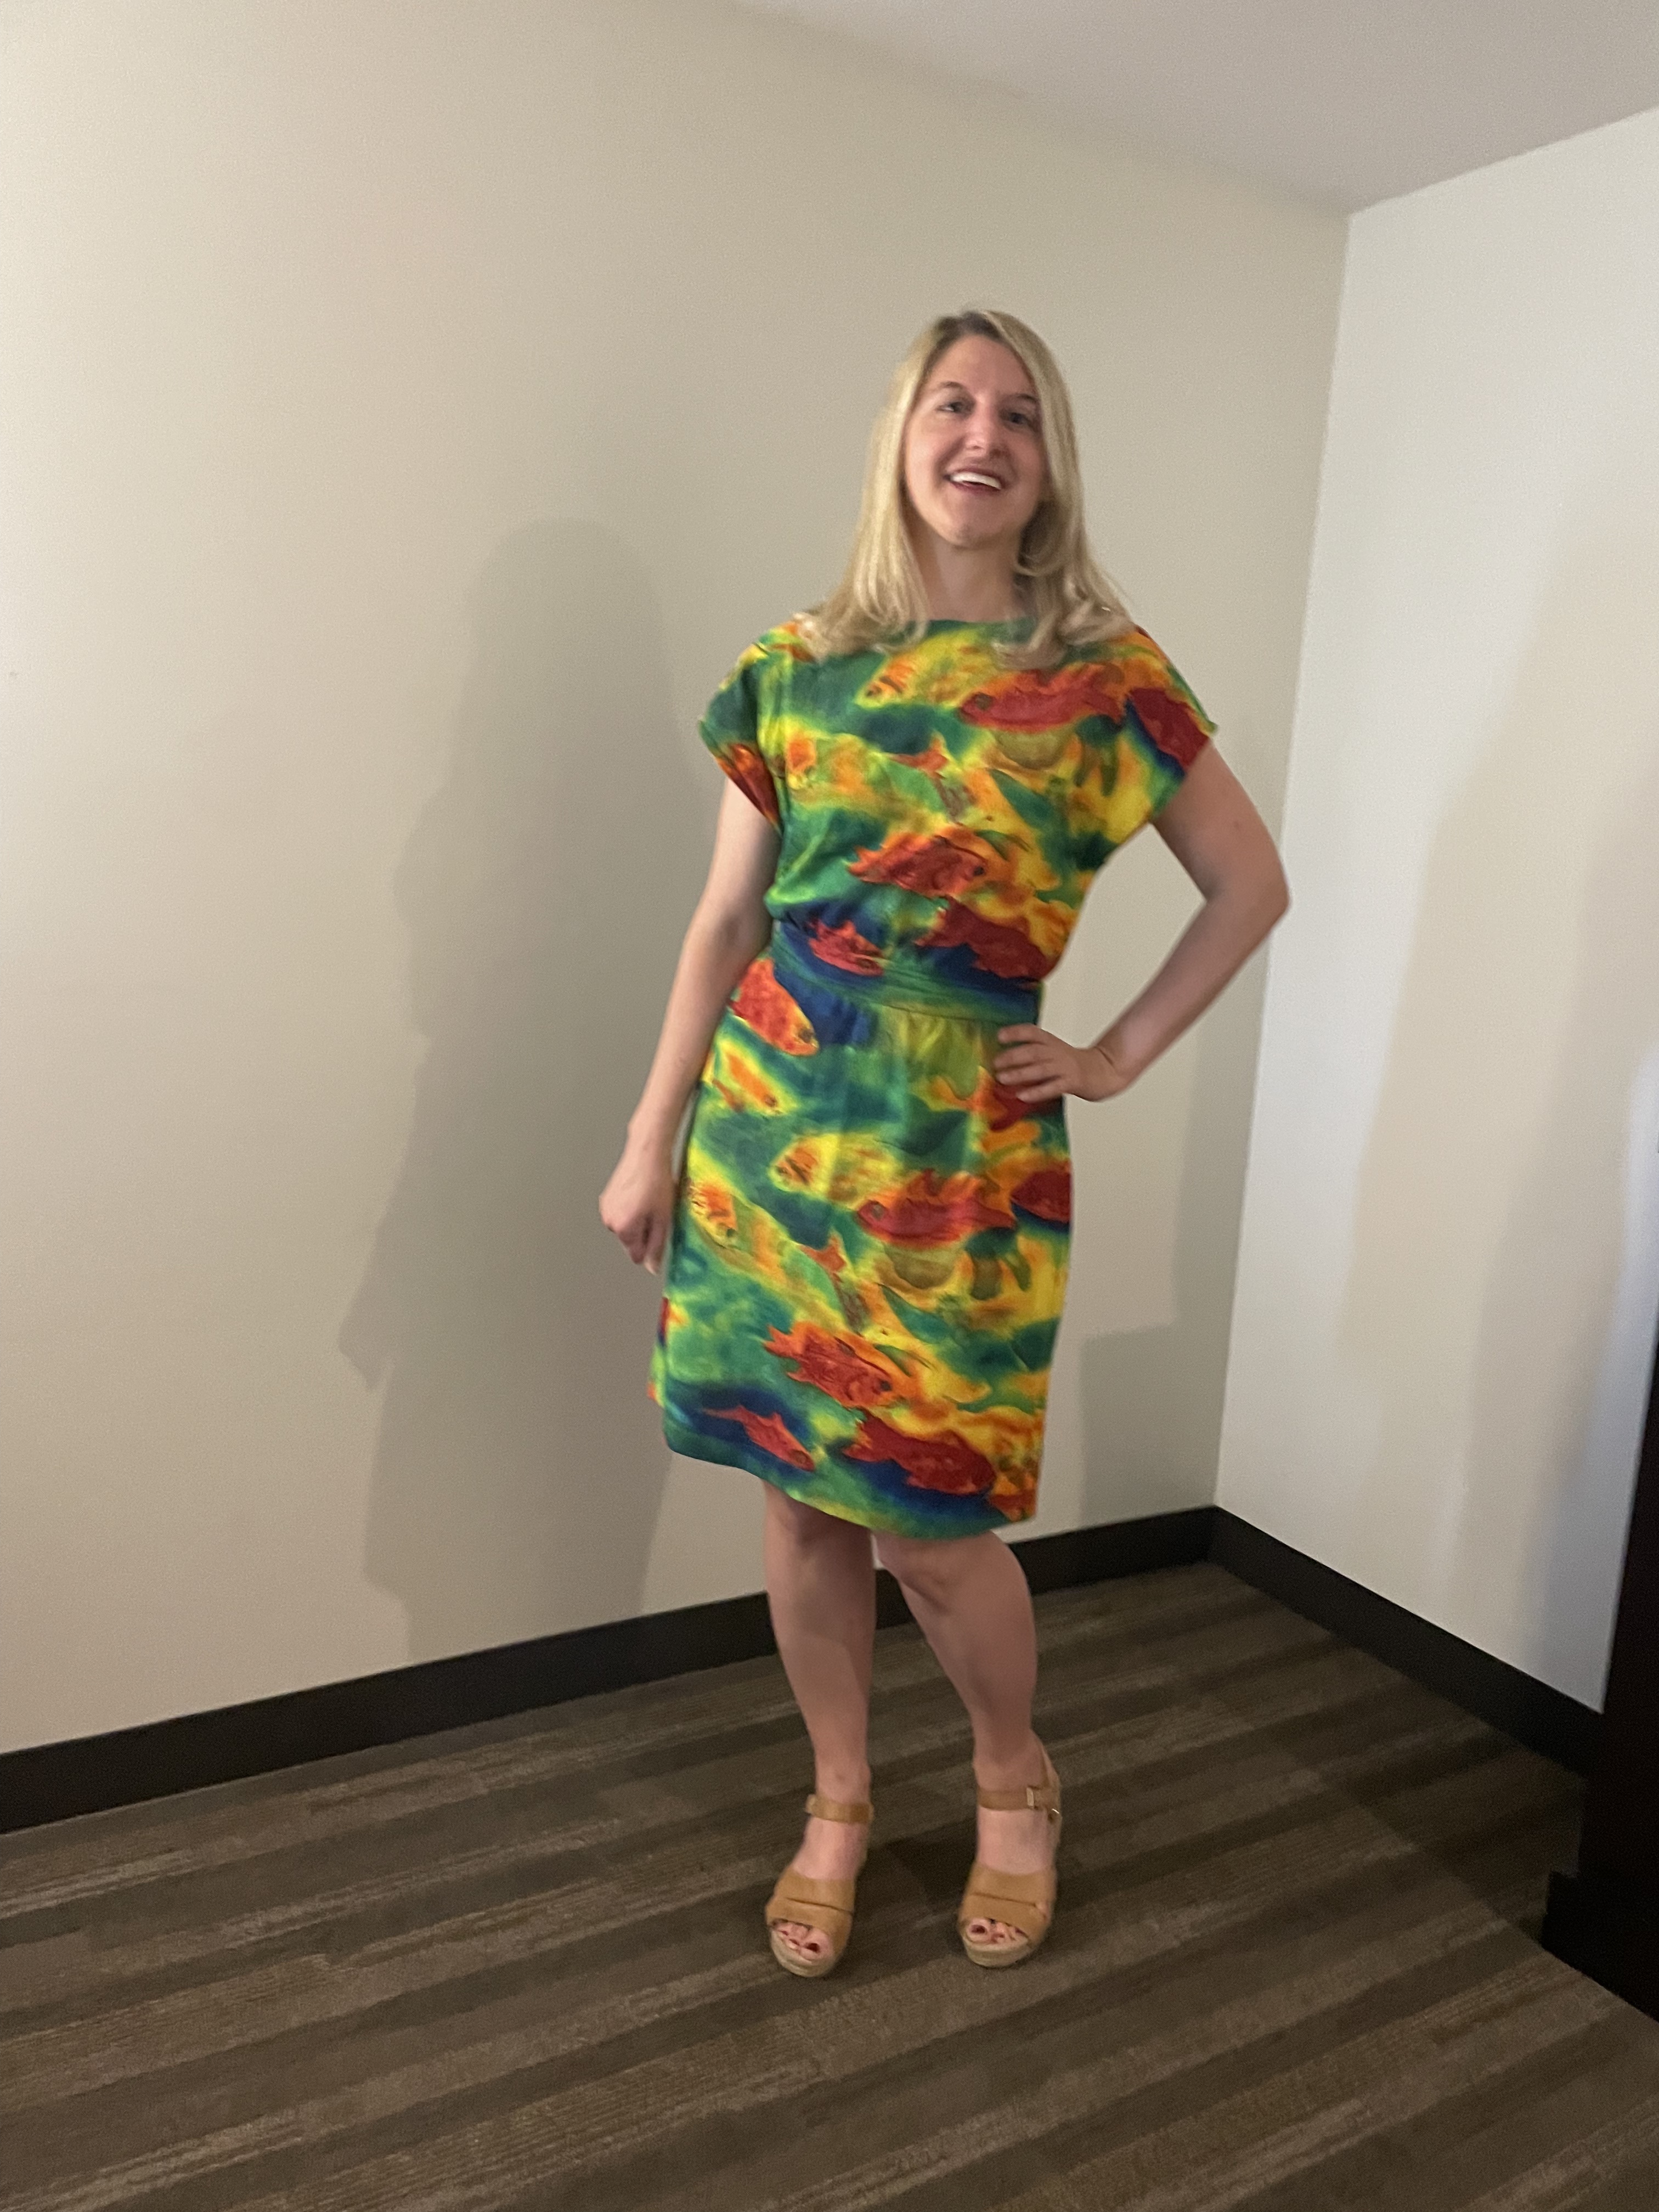
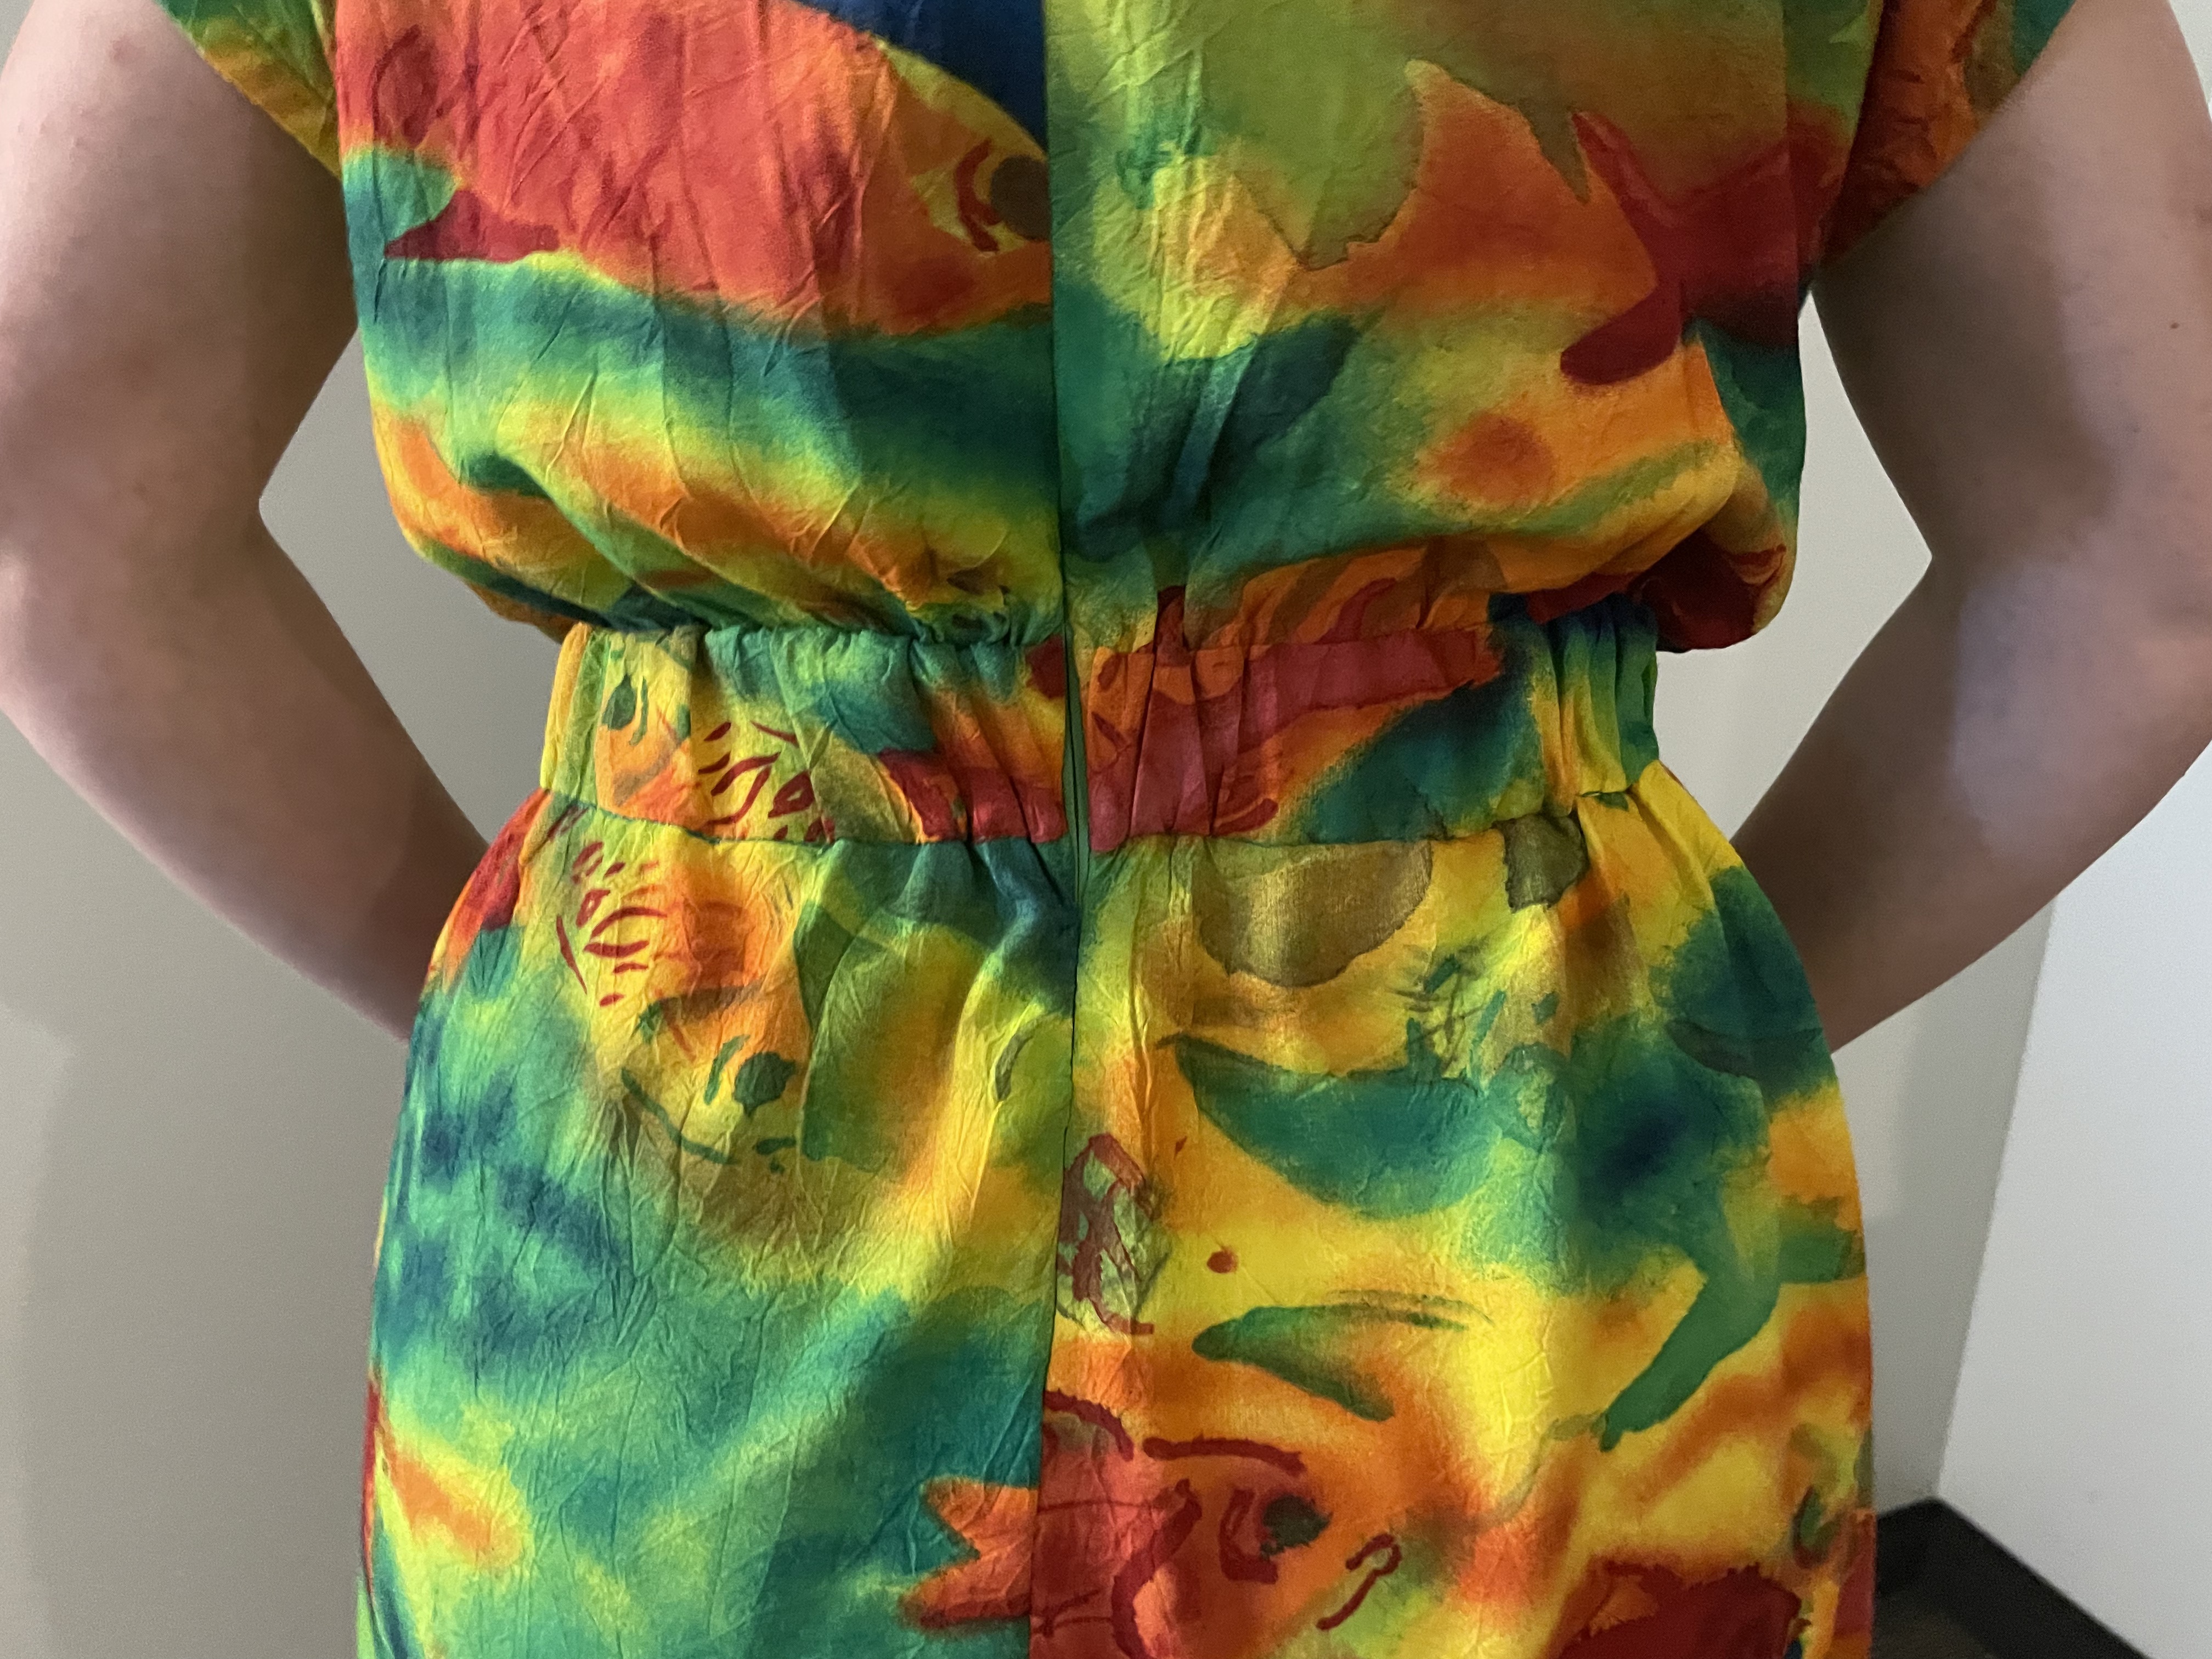
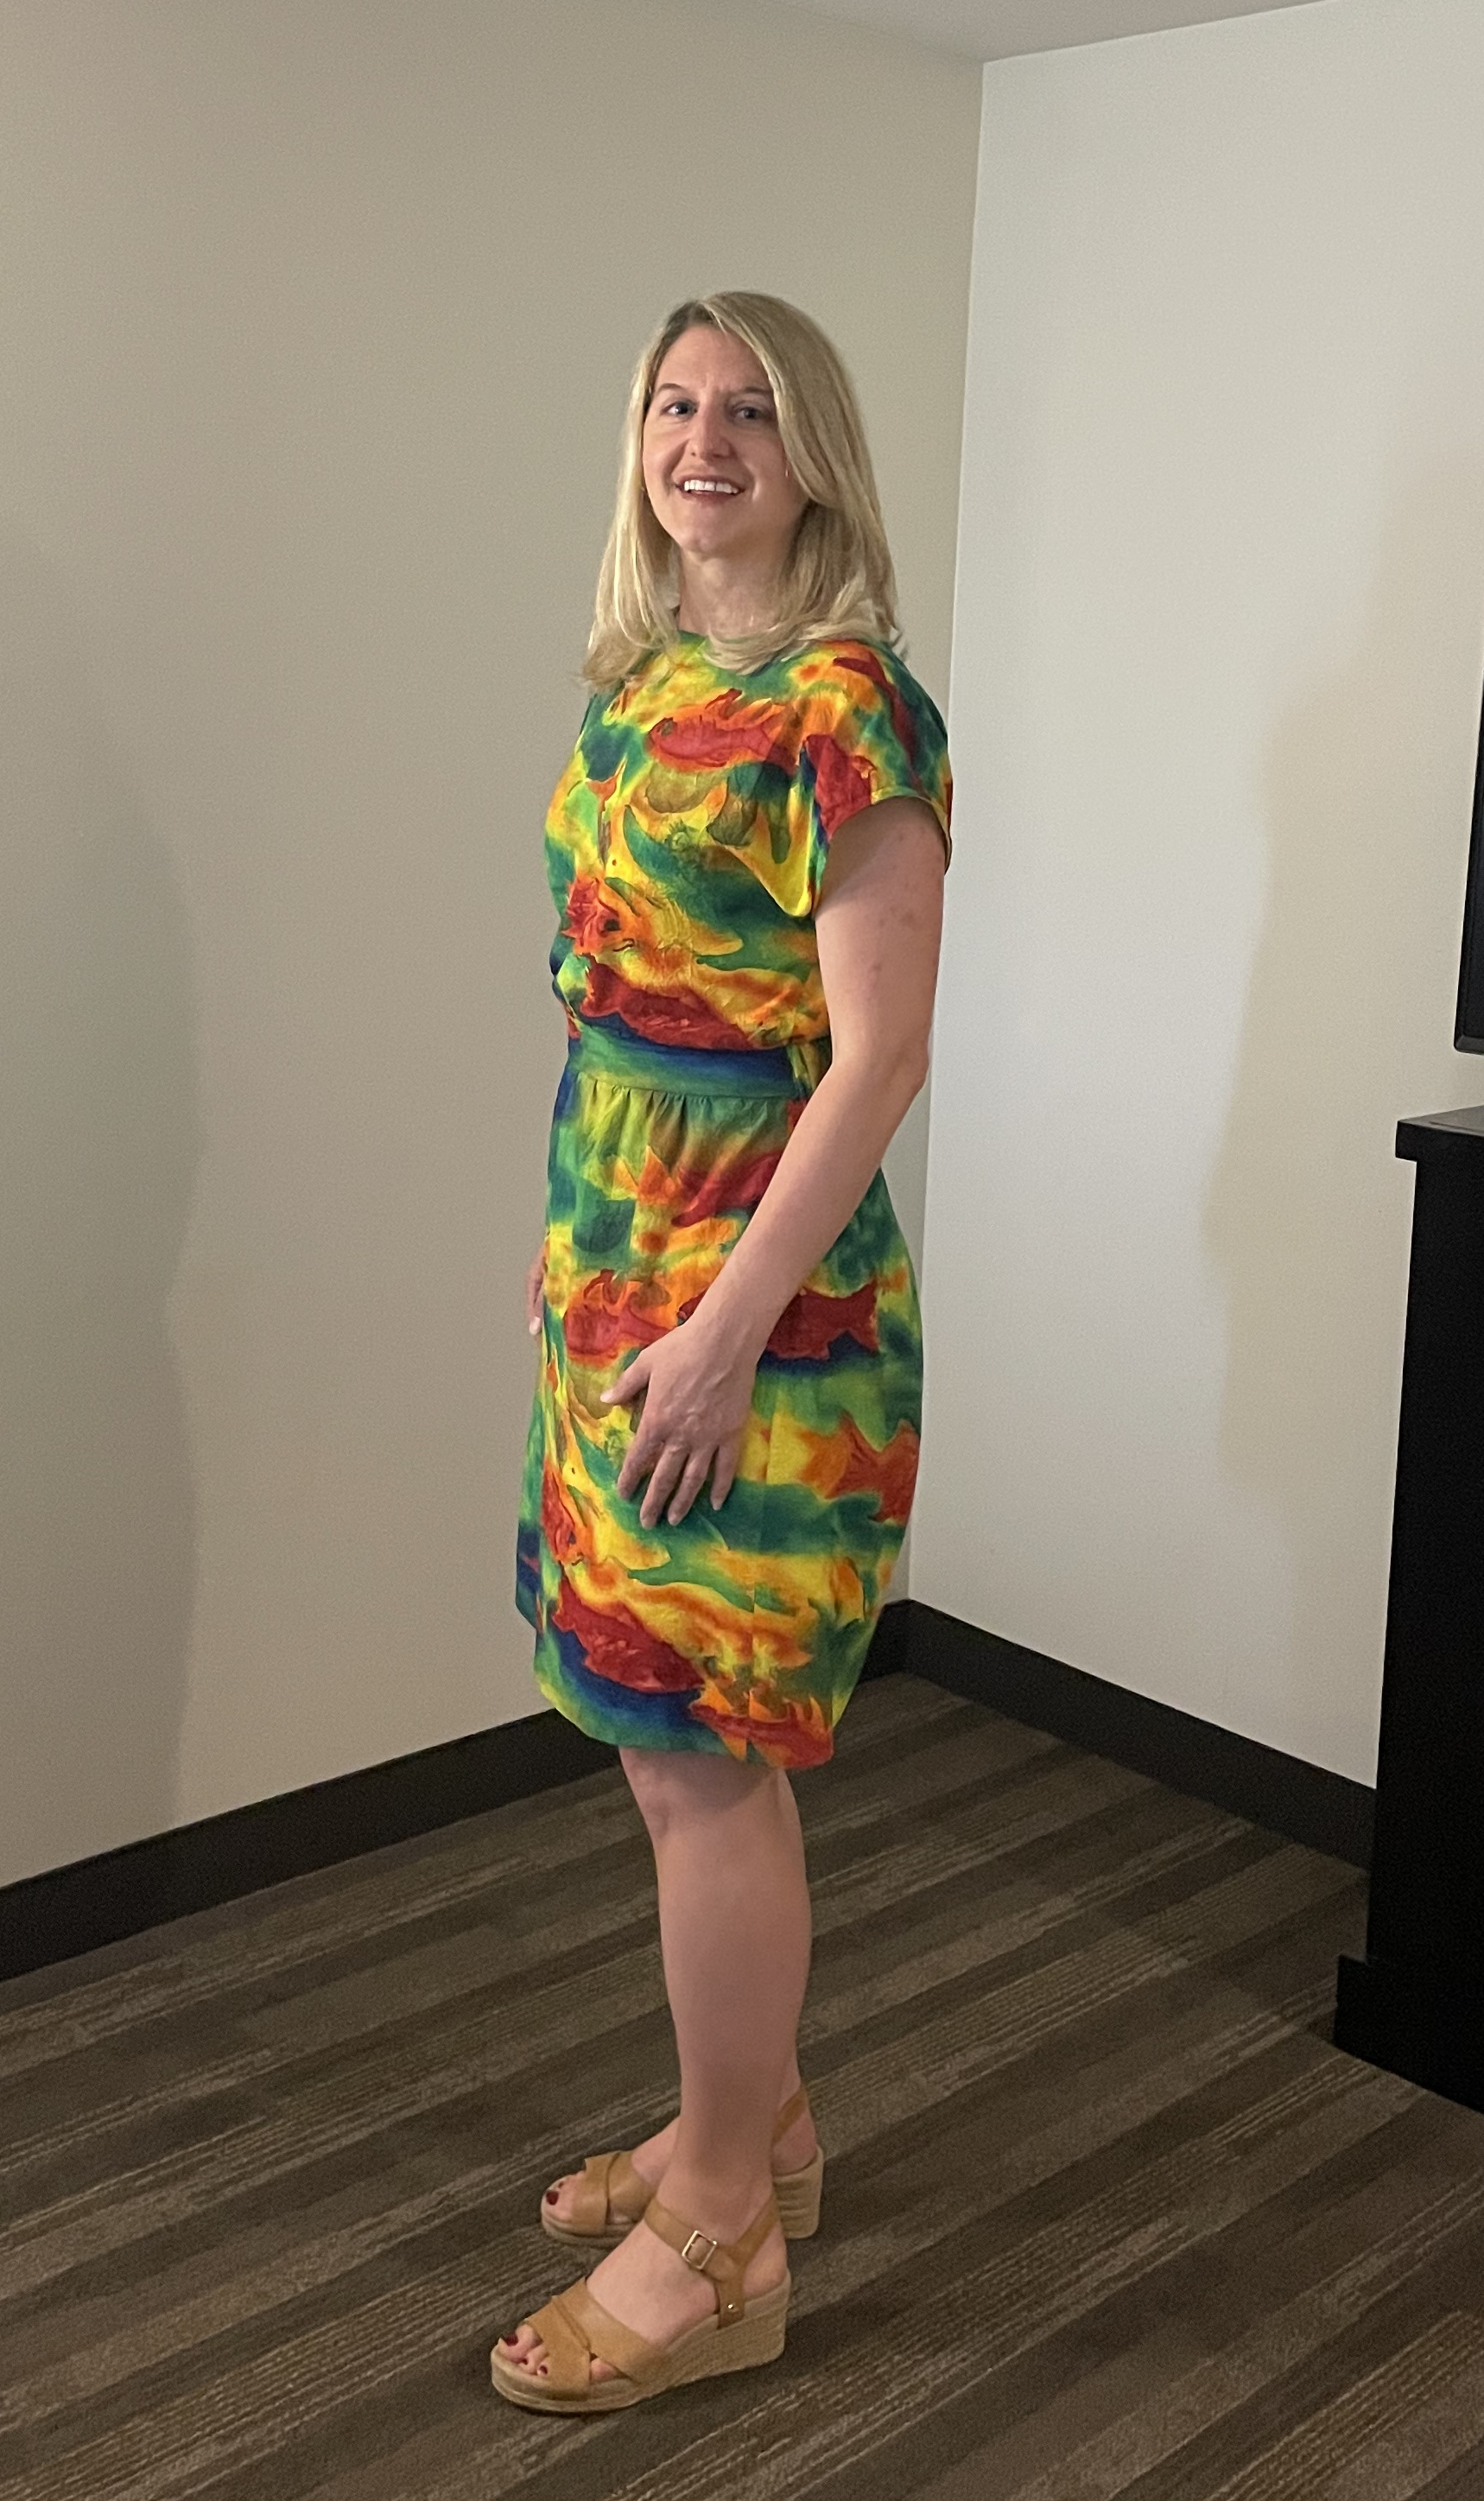
This month, I was also able to quickly complete a dress for the summer, just in time for my future father-in-law’s birthday party. I had bought some colorful fabric when I was down in Key West in 2019 and I knew I wanted to make some sort of vacation dress with it. The store was called The Seam Shoppe and it was a cute little fabric store that had some great tropical themed prints. I failed to remember that this fabric wasn’t just colorful, but there was a big “fish” theme in the print. Oh well, it’s still very pretty and I love the feel of it. I decided on the Veronica Dress from Seamwork as I liked the simplicity of the style. The skirt ended up being perfect on it, but the top may be a bit too big. The fabric is probably rayon, so the dress will still feel nice and cool in tropical weather, but I’m wondering if I should have gone for a more strappy top. I still think this dress is a success and it fits pretty nice.
There is some elastic in the back, that gives it a nice shape. Matching some of the panels on this was pretty challenging, so it mostly matches in the front and sides, but the back is pretty mismatched. There wasn’t anything too crazy about this pattern, although I did find a video on YouTube that gave step by step instructions which I found helpful. The pattern directions didn’t have the best explanation for finishing the seams or installing the zipper, so the video was a great resource to follow along with to make sure I was doing everything correctly. The most confusing part was actually sewing in the neck facing, as these instructions were very confusing and the drawings didn’t really help too much. You have to sew the facing to the zipper tape at the top and then fold the sew allowances in when you sew the facing on at the top so that when everything is flipped out, it will be a clean seam.
I was terrified I was interpreting this wrong, and it took a few extra minutes of trying to figure out how it would work before I was able to sit down and sew this. Luckily I didn’t end up having to unpick anything and I got this stitching correct, but I was pretty anxious at this part. This sew-along was a life-saver, especially since Seamwork didn’t seem to have one on their website.
I finished the dress just in time for the birthday party and was able to show it off and try it out before I took it on a real vacation. I think this one will be coming with me to French Polynesia this fall.
Summer sewing is in full effect right now, as I just finished nice floral tank top for the season and I’m currently working on a retro-style romper! No real summer travel for me this year as I’m saving up for my destination wedding/honeymoon. I’m thinking maybe this summer I should focus on sewing up fabrics I’ve gotten on past travels, like this Key West fabric. It’s a good goal anyway!
I had a rather unfortunate day today, trying to figure out pocket welts on the Seamwork’s Larkin Bomber jacket. This is a time sensitive project, since I’m trying to get this done before winter is over, so losing a whole day with no progress really depressed me. For the first welt, I got confused at where I was supposed to stitch because the directions and drawings were not clear to me. Then the second side, I figured out what I did wrong, but somehow, it still ended up a puckered mess. I cut out all new welts and jacket fronts (and pockets) to start all over, but all I could do was draw the markings on the fabric. Maybe it’s for the best I take a break and take my time next time.
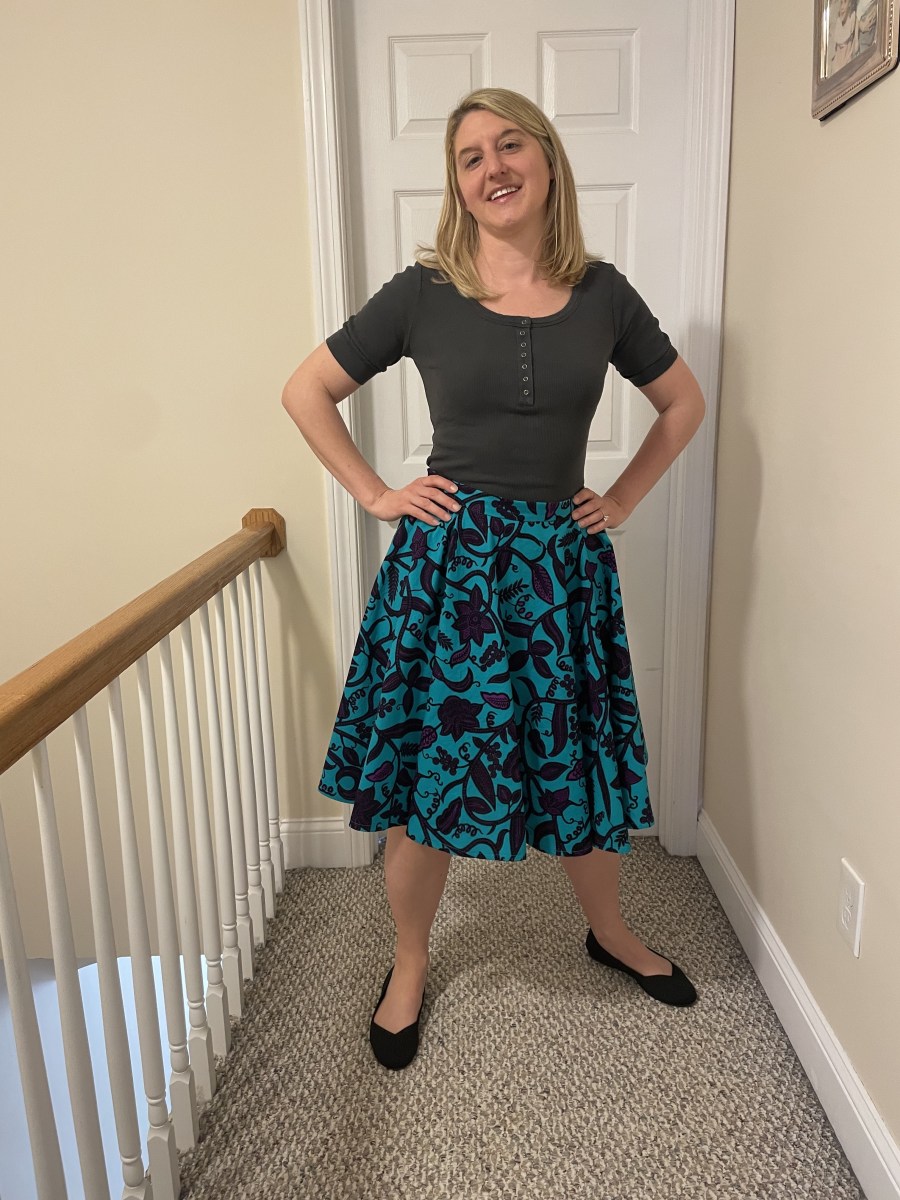
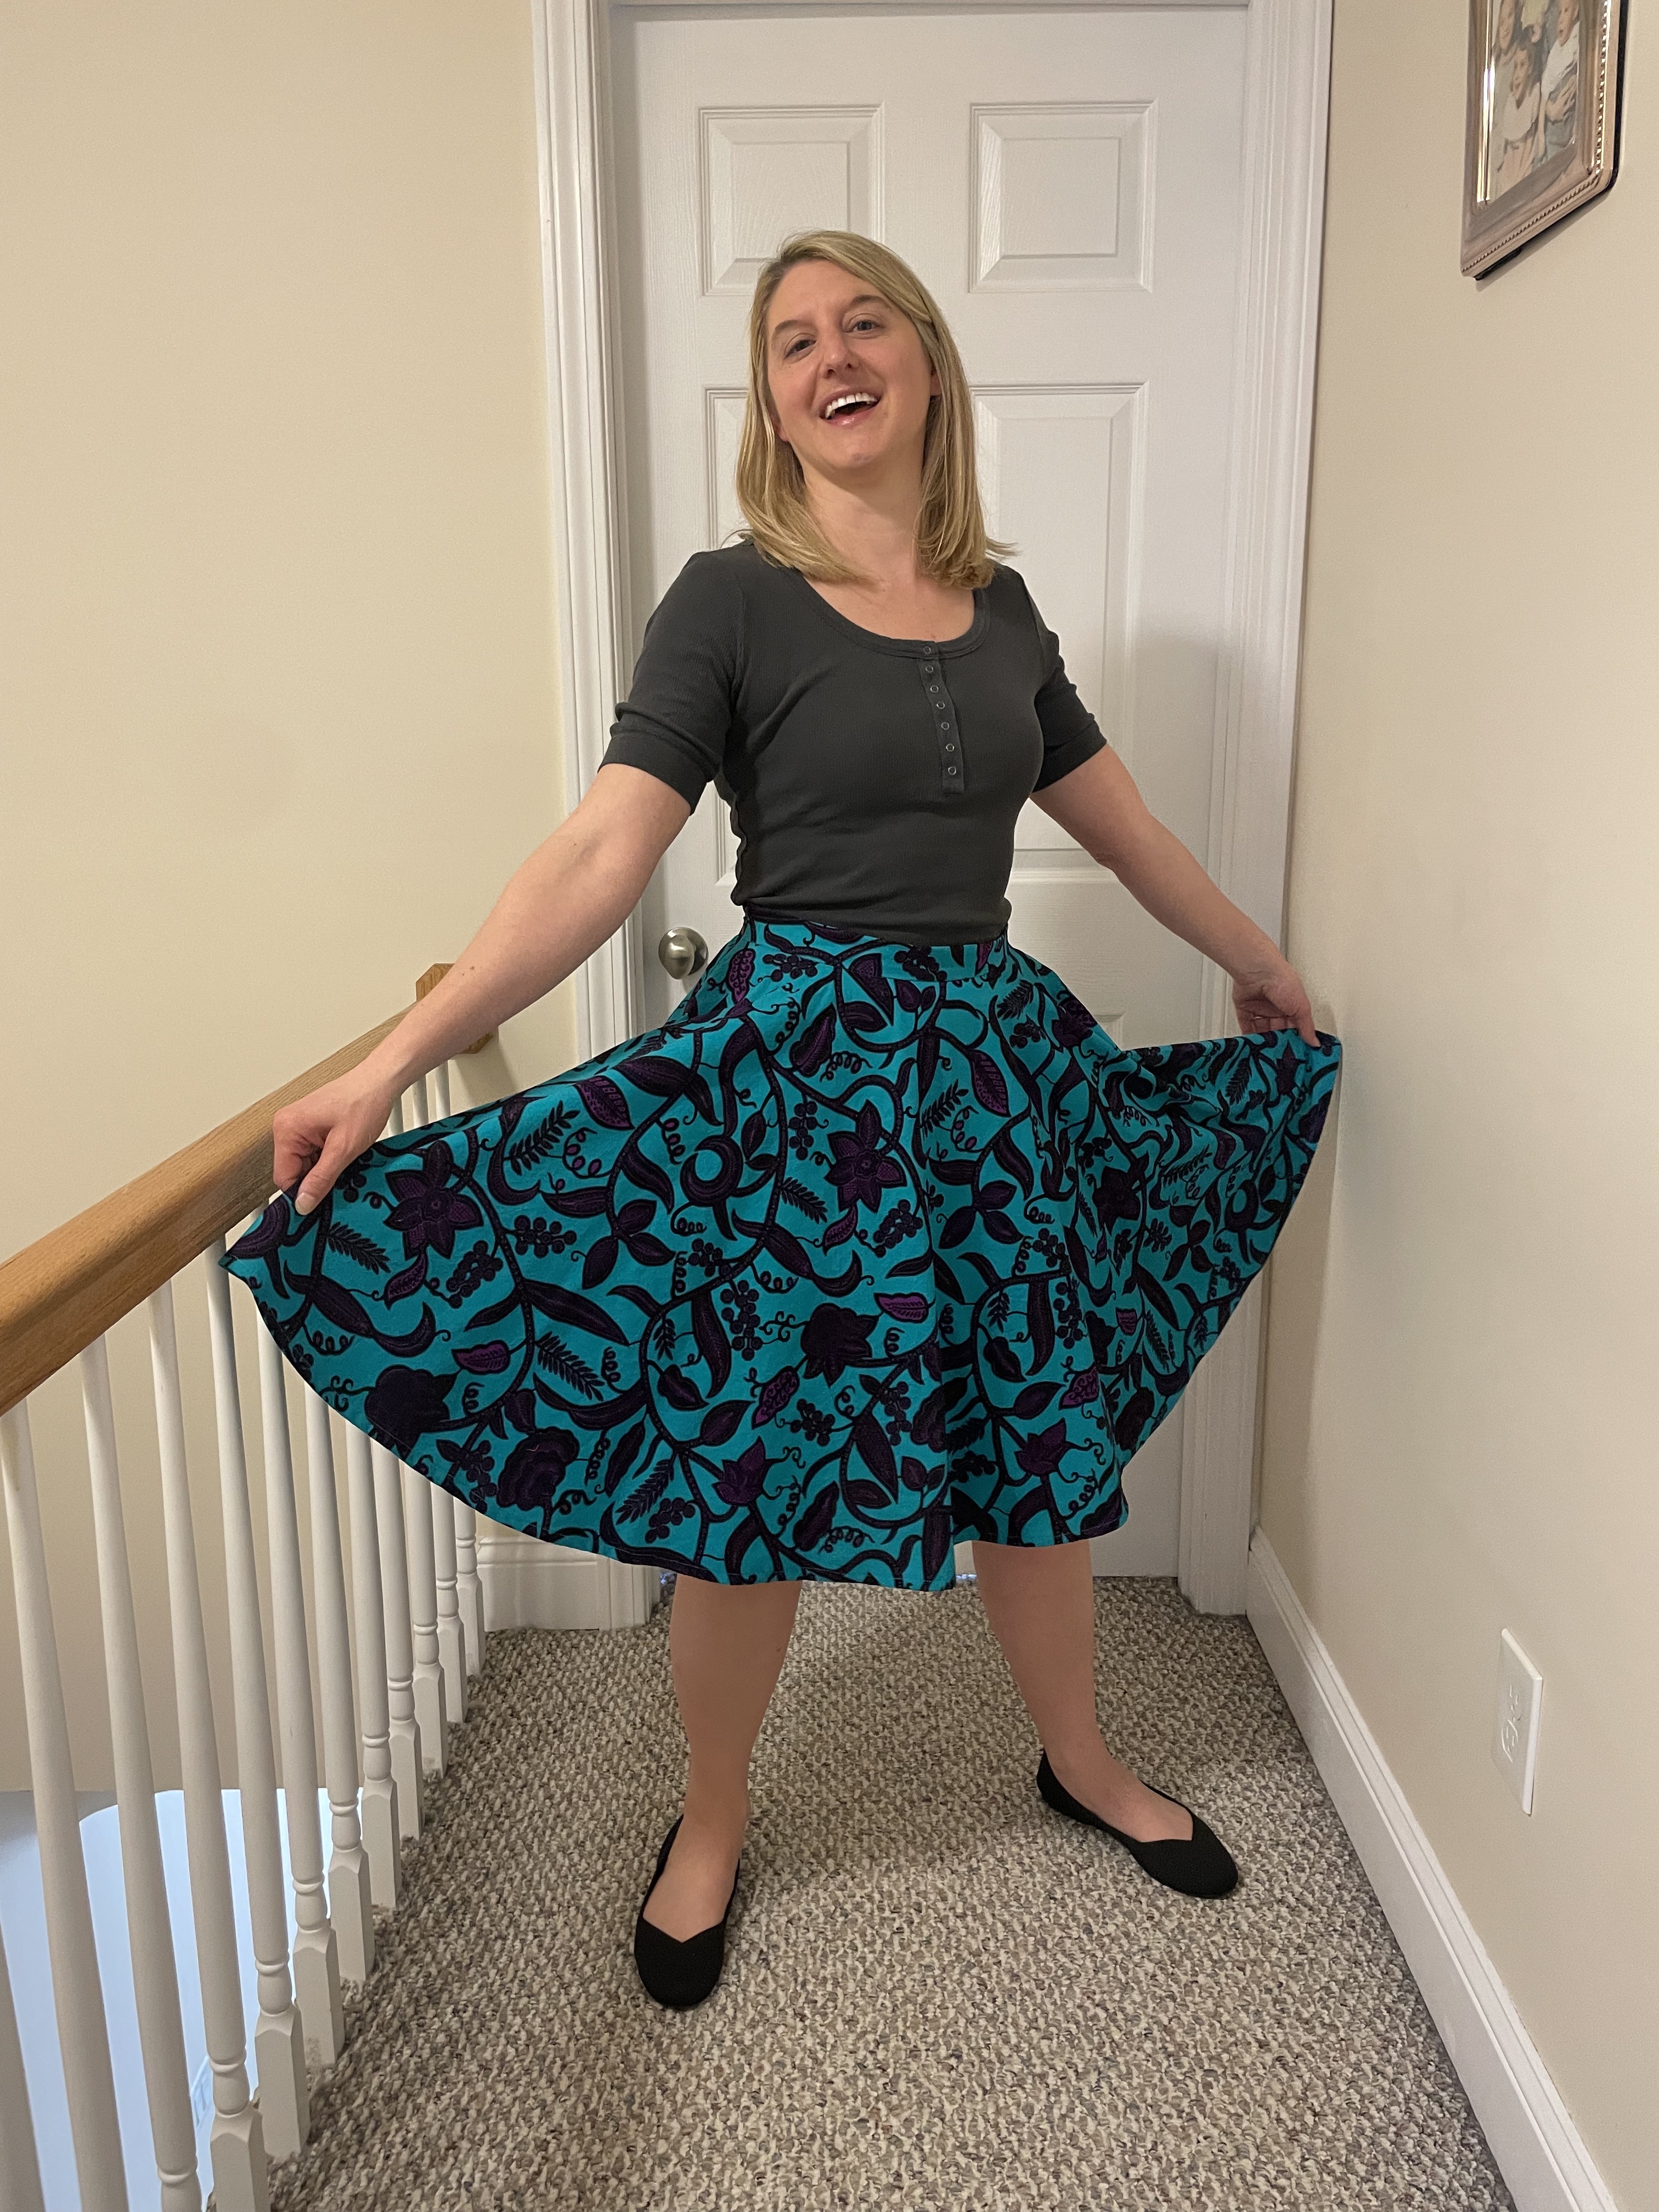
I have had some success lately with other items I’m sewing, so maybe I can’t be too hard on myself. My favorite is this new circle skirt I made from the Veronika pattern from Meghan Nielsen. The fabric is Dutch wax print I got from this small fabric store in Lowell, Massachusetts. The color is really something and I am hoping the weather gets a little warmer so I can wear this outside before spring. I have never made a circle skirt before, mainly because I never seem to have enough fabric. This pattern was very easy to put together, but the pieces are quite large, so laying it out on the fabric took some time. I was worried about hemming such a circular piece, but it ended up being easier than I thought. I think this is mainly because the fabric is so easy to work with and pressed so nicely.
Circle skirts are pretty flattering, so I’m really excited to wear this. Some of my other winter projects have already gotten some wear.
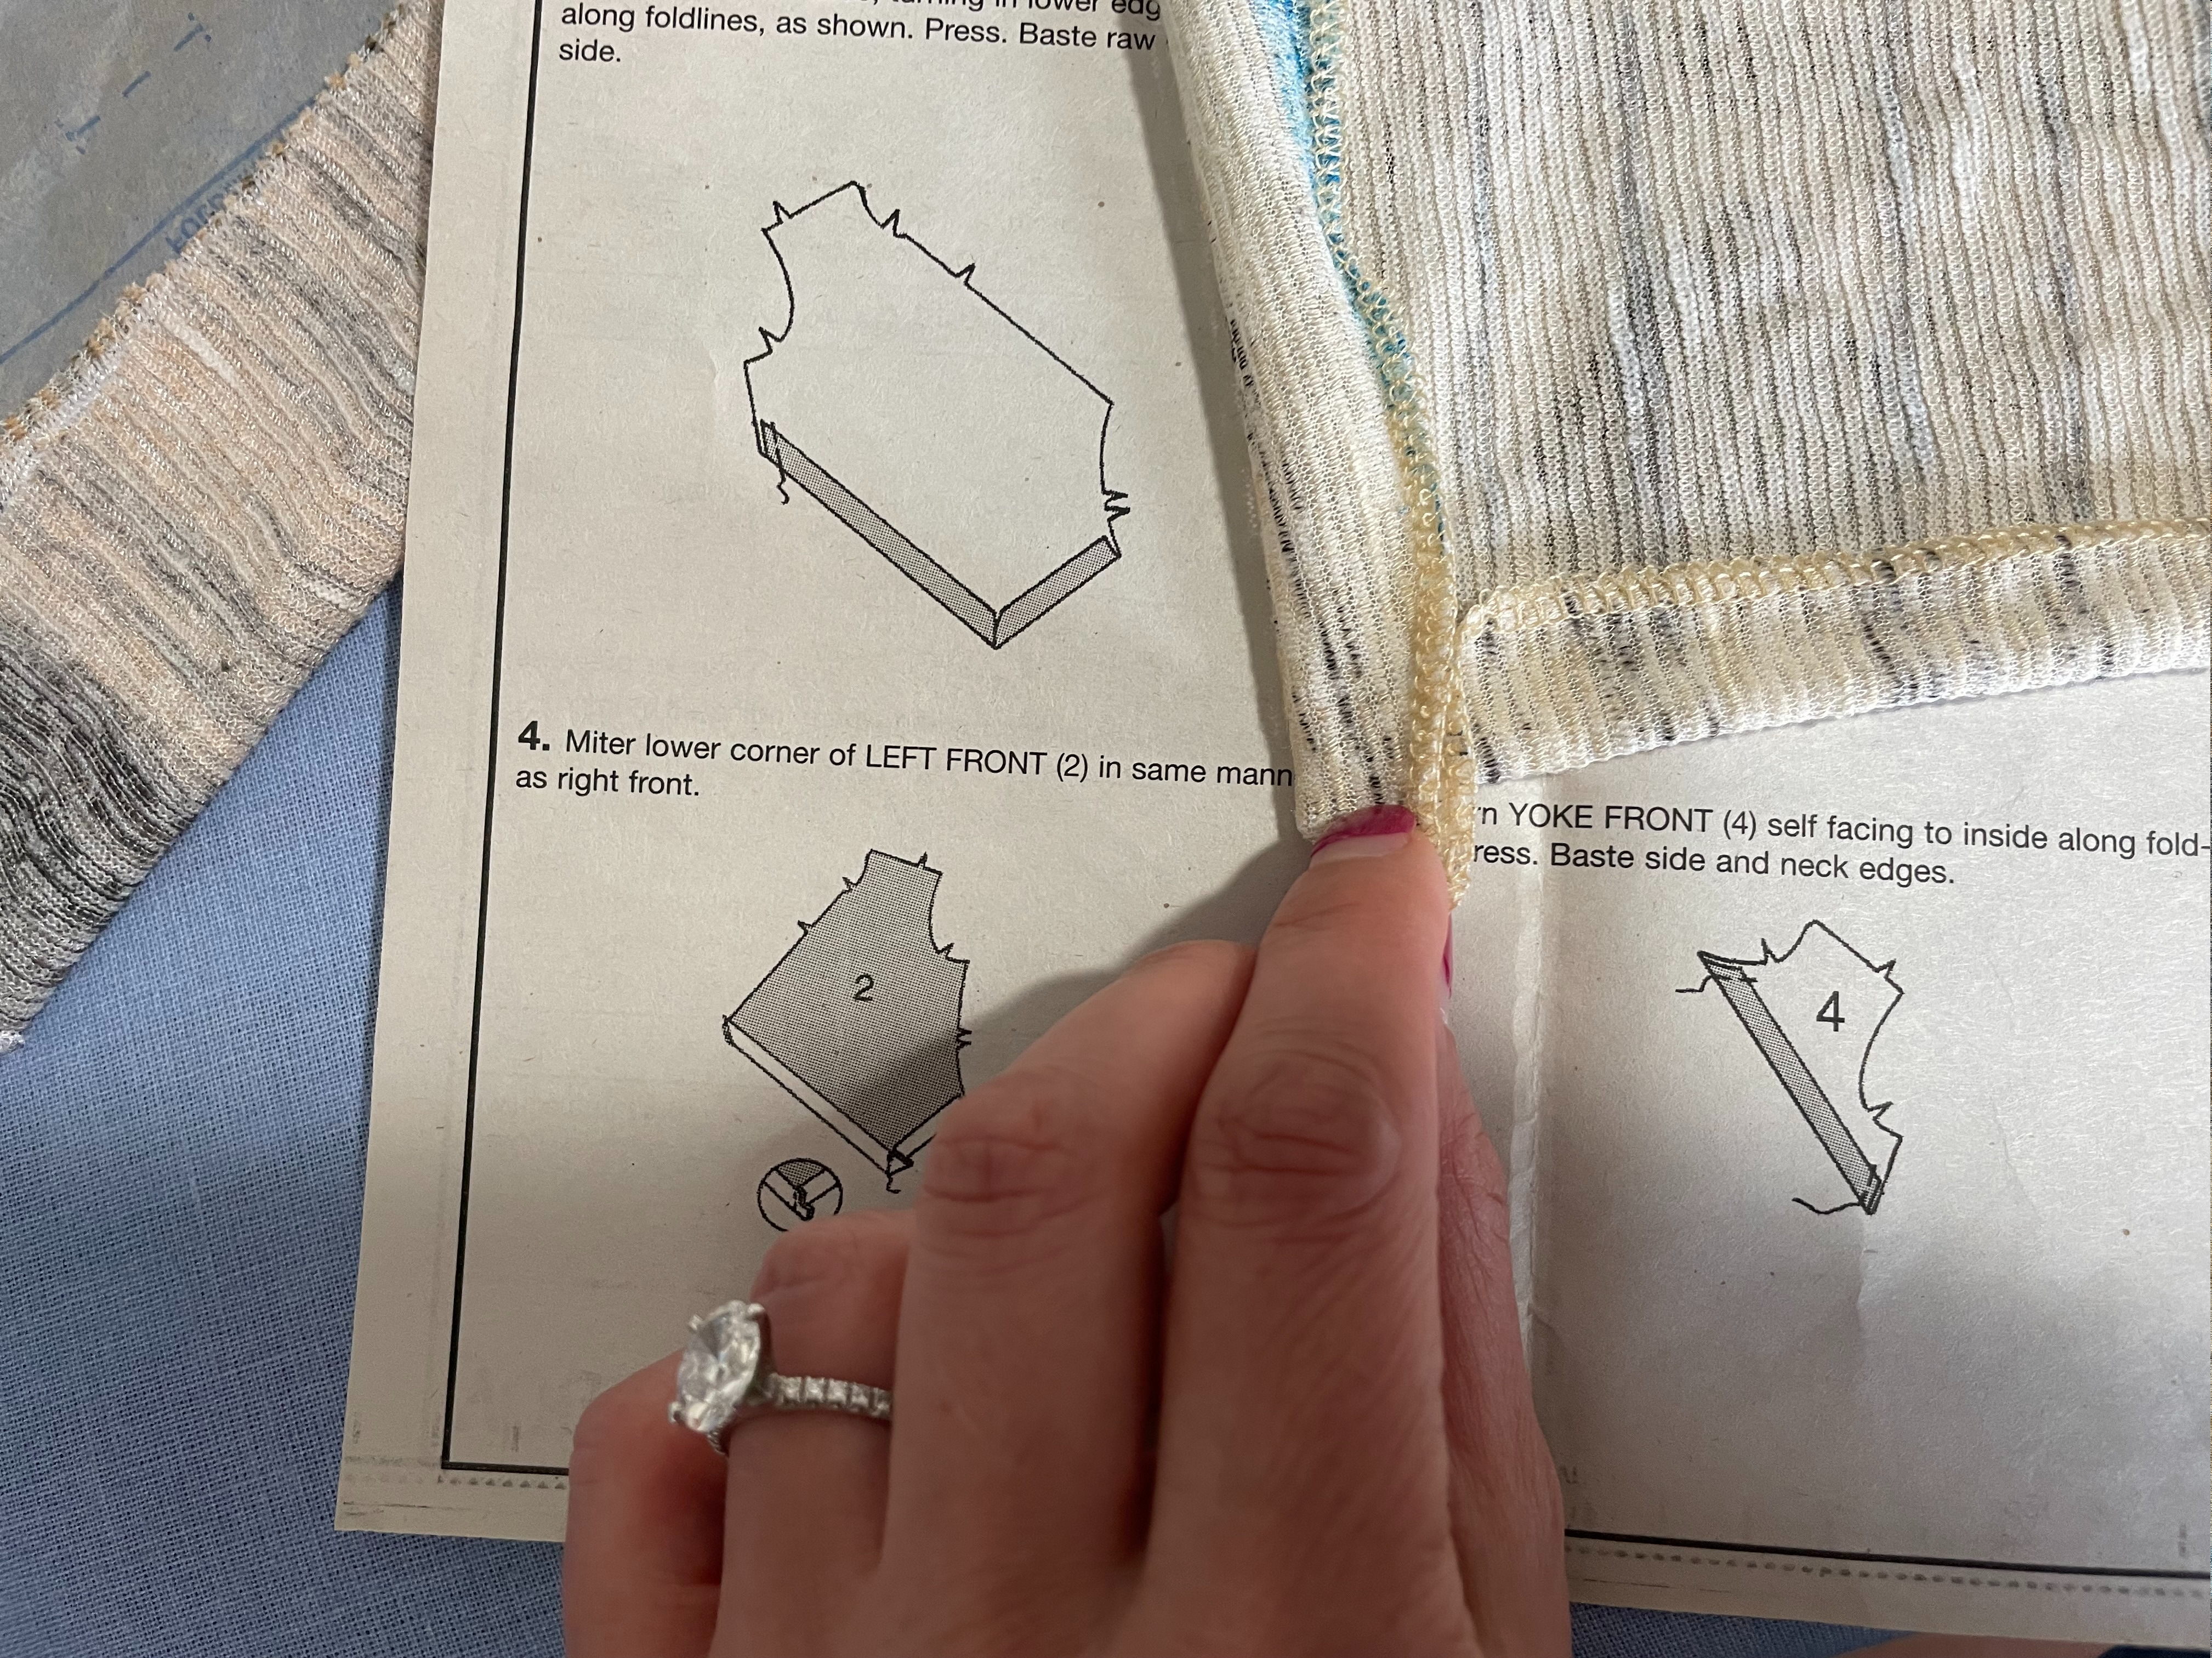
One is this buttoned shirt from Vogue # 9227 (view A). I made view B a while back and I was excited to revisit the pattern. The fabric is a little sheer, so I do worry about the durability, but I do think it looks nice. I like the way the stripes fall and the buttons on the top are really cute.
Even though I put interfacing in the collar, it’s still a bit flimsy with this delicate fabric.
I think I prefer the collar not buttoned up. It falls a lot better.
Not much to say on this one, it sewed up pretty fast. It was interesting sewing up the hem because of the mitered corners I had to create for the front pieces. The directions were pretty clear on where to stitch to get this clean look.
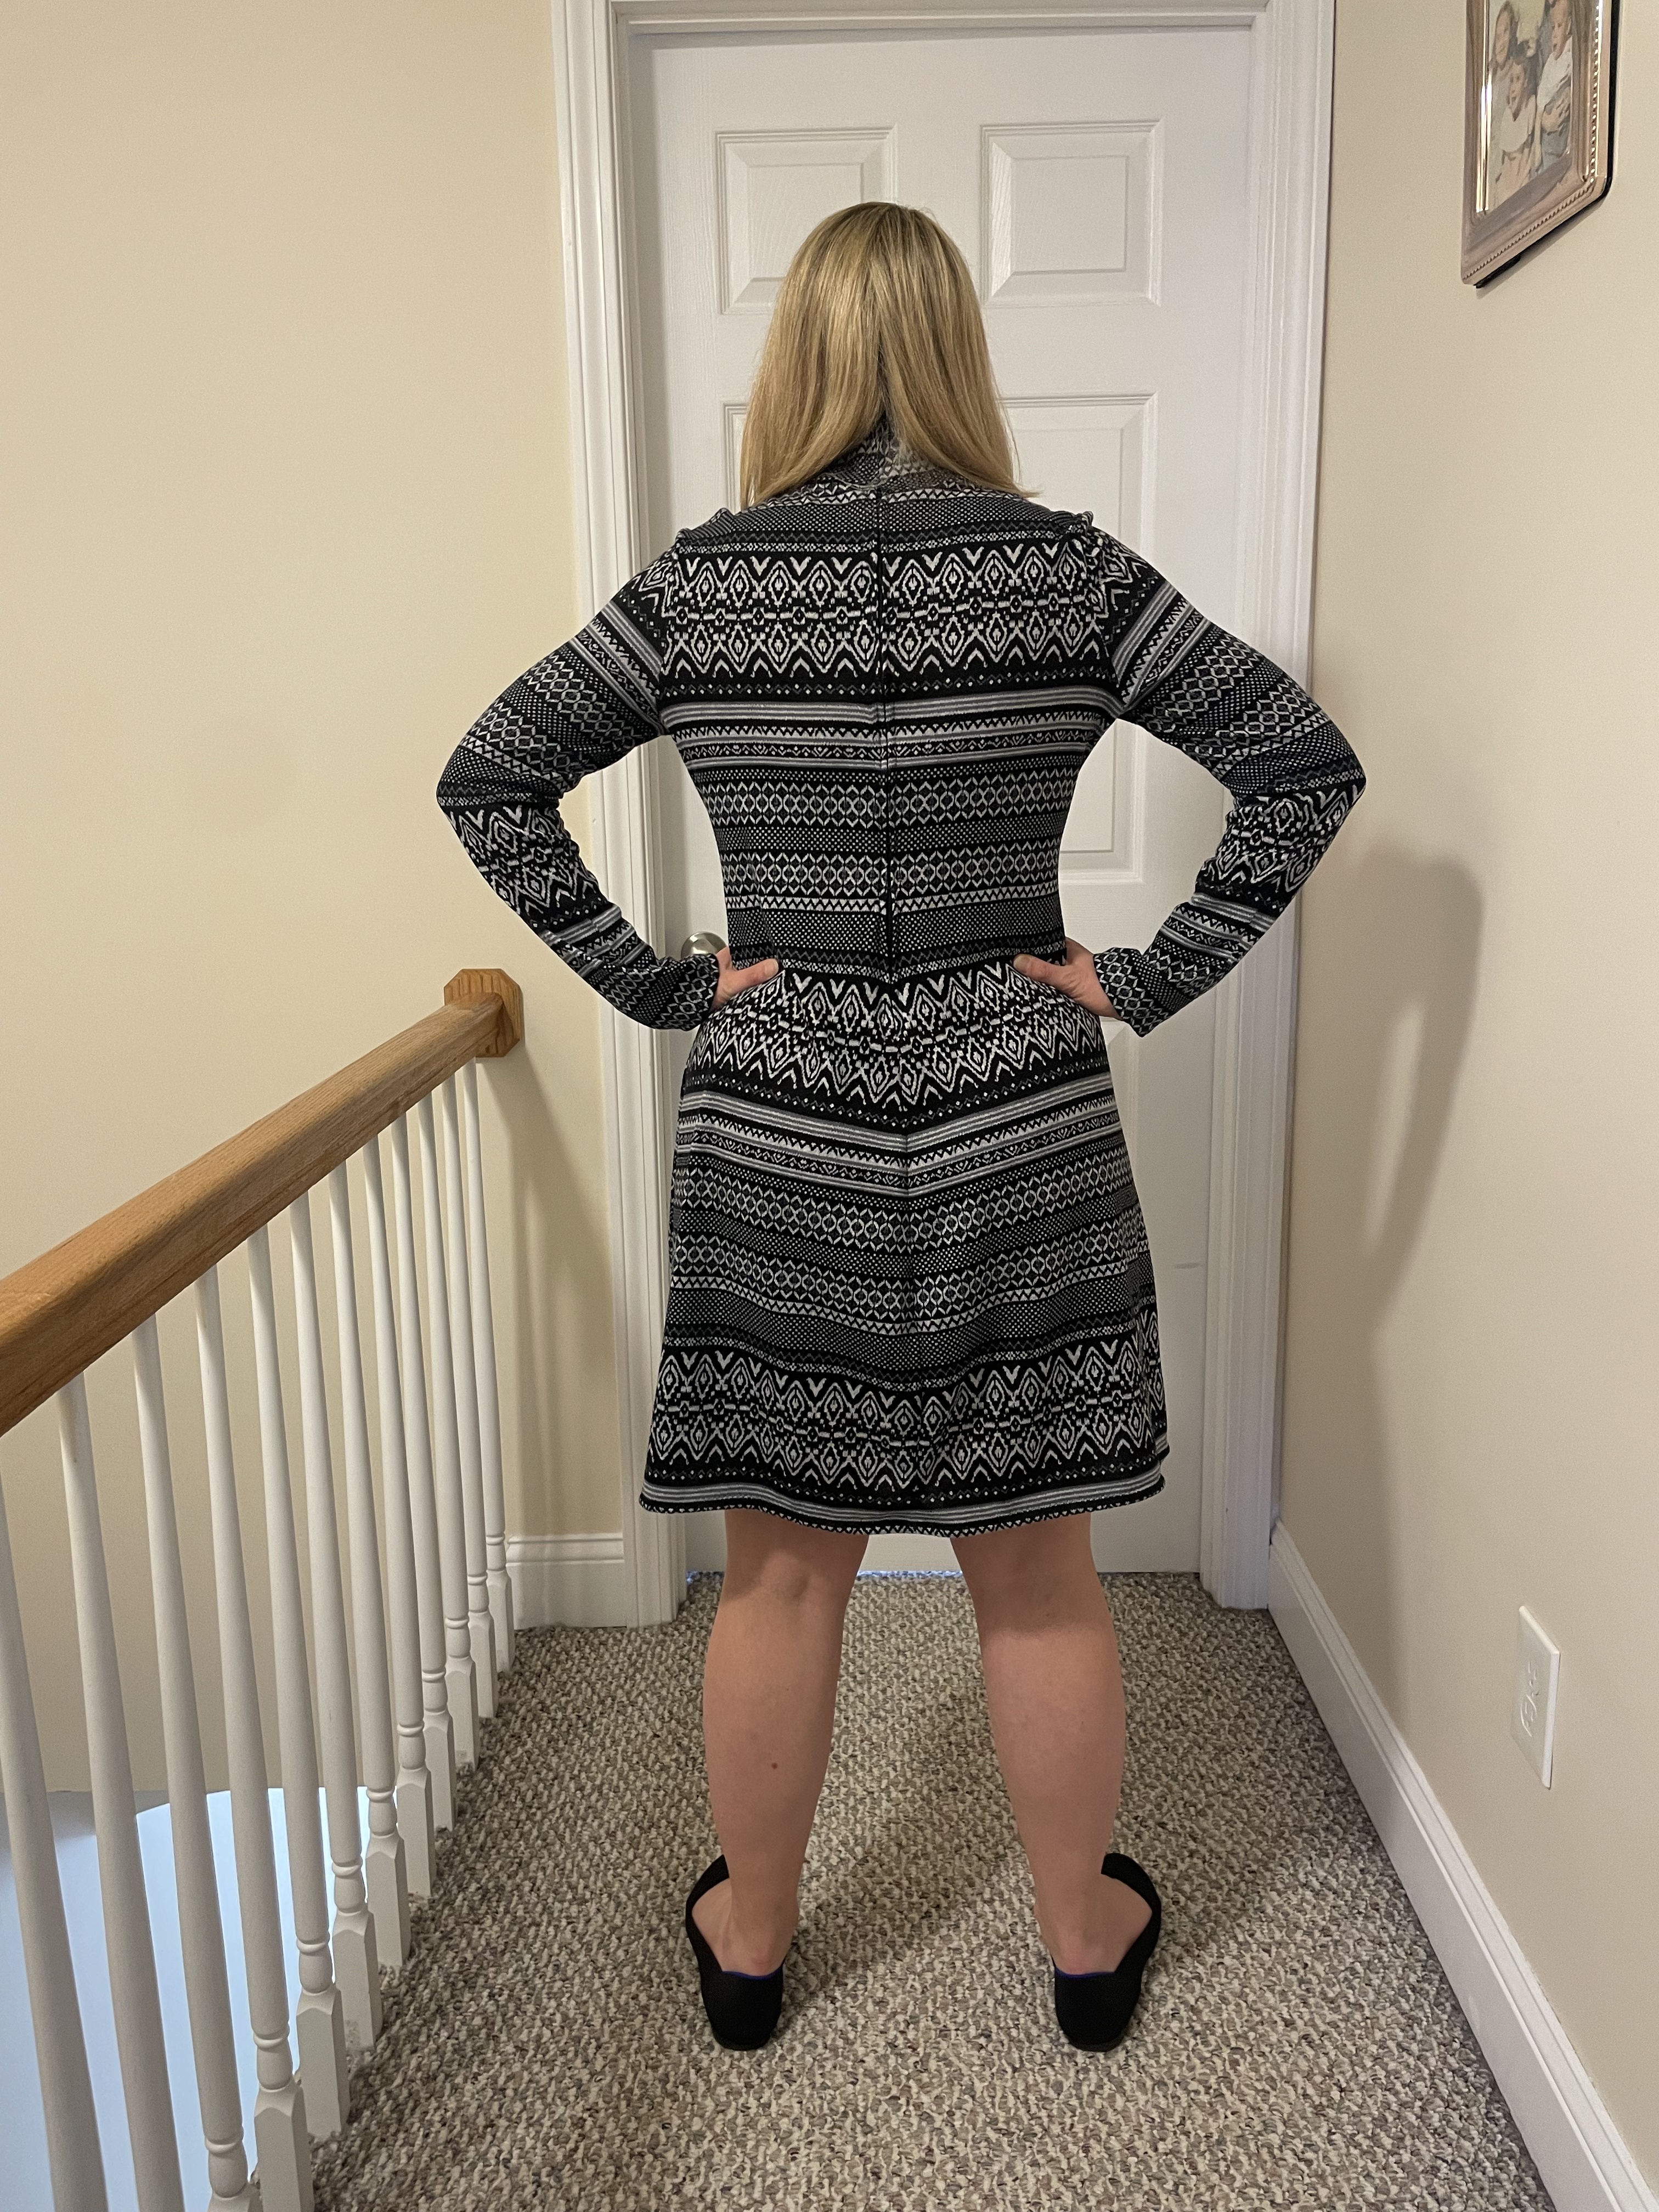
Another winter wardrobe piece that I got to show off at the office was this sweater dress from a vintage Butterick pattern, #5985. Getting the zipper right was some trial and error, but it was not too much trouble. I was also shocked to find out that the jumpers from this pattern were nowhere to be found. Maybe it was made known to me, when I bought it, I can’t remember (the note on the front is mine after finding out). I’m not sure where I got this pattern, I think at a flea market so I can’t really complain. The dress I made is actually the garment underneath the jumper pictured in view B. Even though I was disappointed I couldn’t make the jumper, this pattern did work well for a regular sweater dress.
This dress is so comfortable and definitely warm enough for these cold windy days we’ve been experiencing. I probably need to get a belt for this one, to give it a little more shape. But I also like it as it is. I’m mostly impressed by how well I was able to match the fabric on the sides back and even the sleeves.
It’s good to remind myself that I am able to complete some wearable pieces. Today was so disheartening when I couldn’t get to a good place on my jacket, but I’m hoping once I can figure out the secret to these welts, it will all just fall into place. I’m thankful for the ability to try again…and for extra fabric.
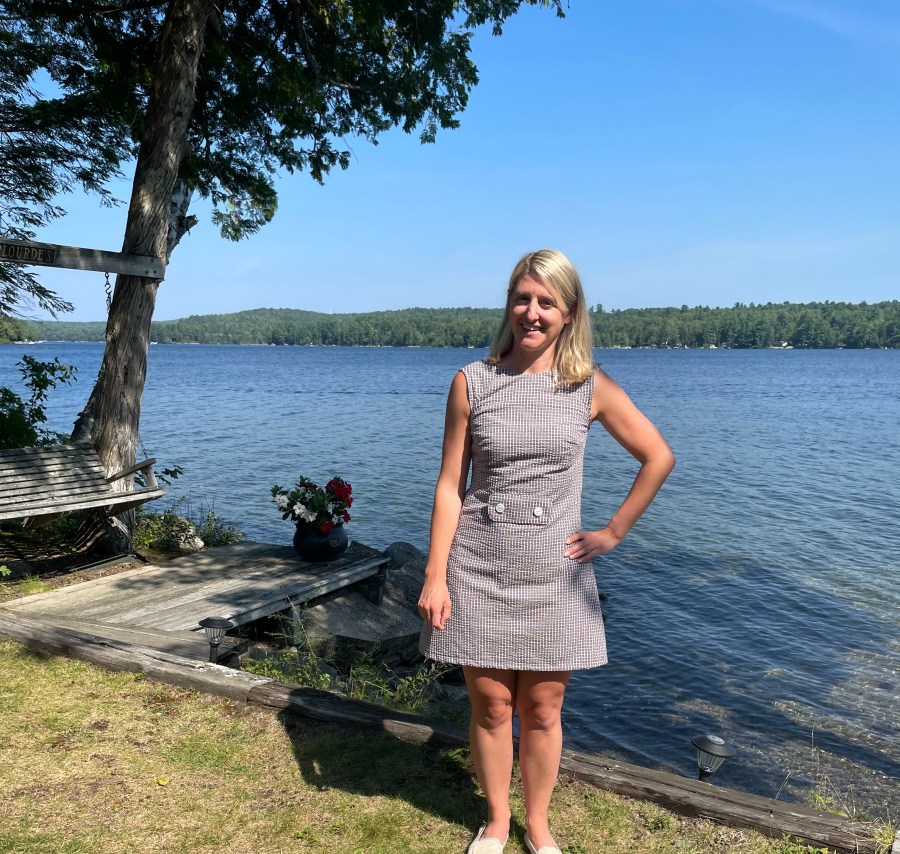
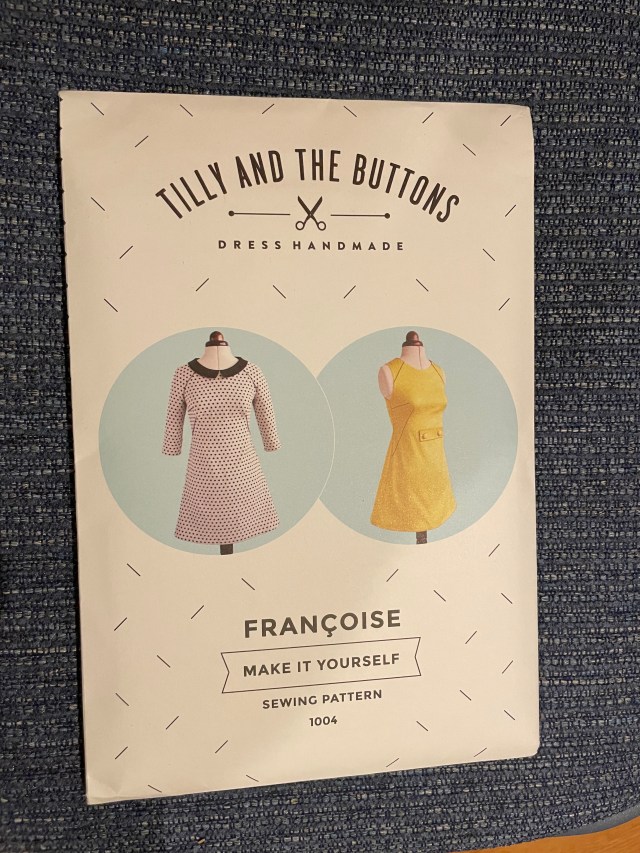
I was going to start this month off writing about this great new skirt I made, but it ended up being not-so-great. I think actually it will end up as a “take two” entry, when I get around to re-making it. These last three weeks, I’ve been super busy with summer stuff and marathon training stuff, that I have not had much time for sewing. But I did want to at least showcase another win I had fairly recently, making the Francois dress from Tilly and the Buttons. I loved this pattern, and it was so well-made that I ended up getting this dress right on the first try, which is pretty amazing. It’s also a relief because I bought this fabric specifically to make a dress like this, so it’s always a gamble to go right into it.
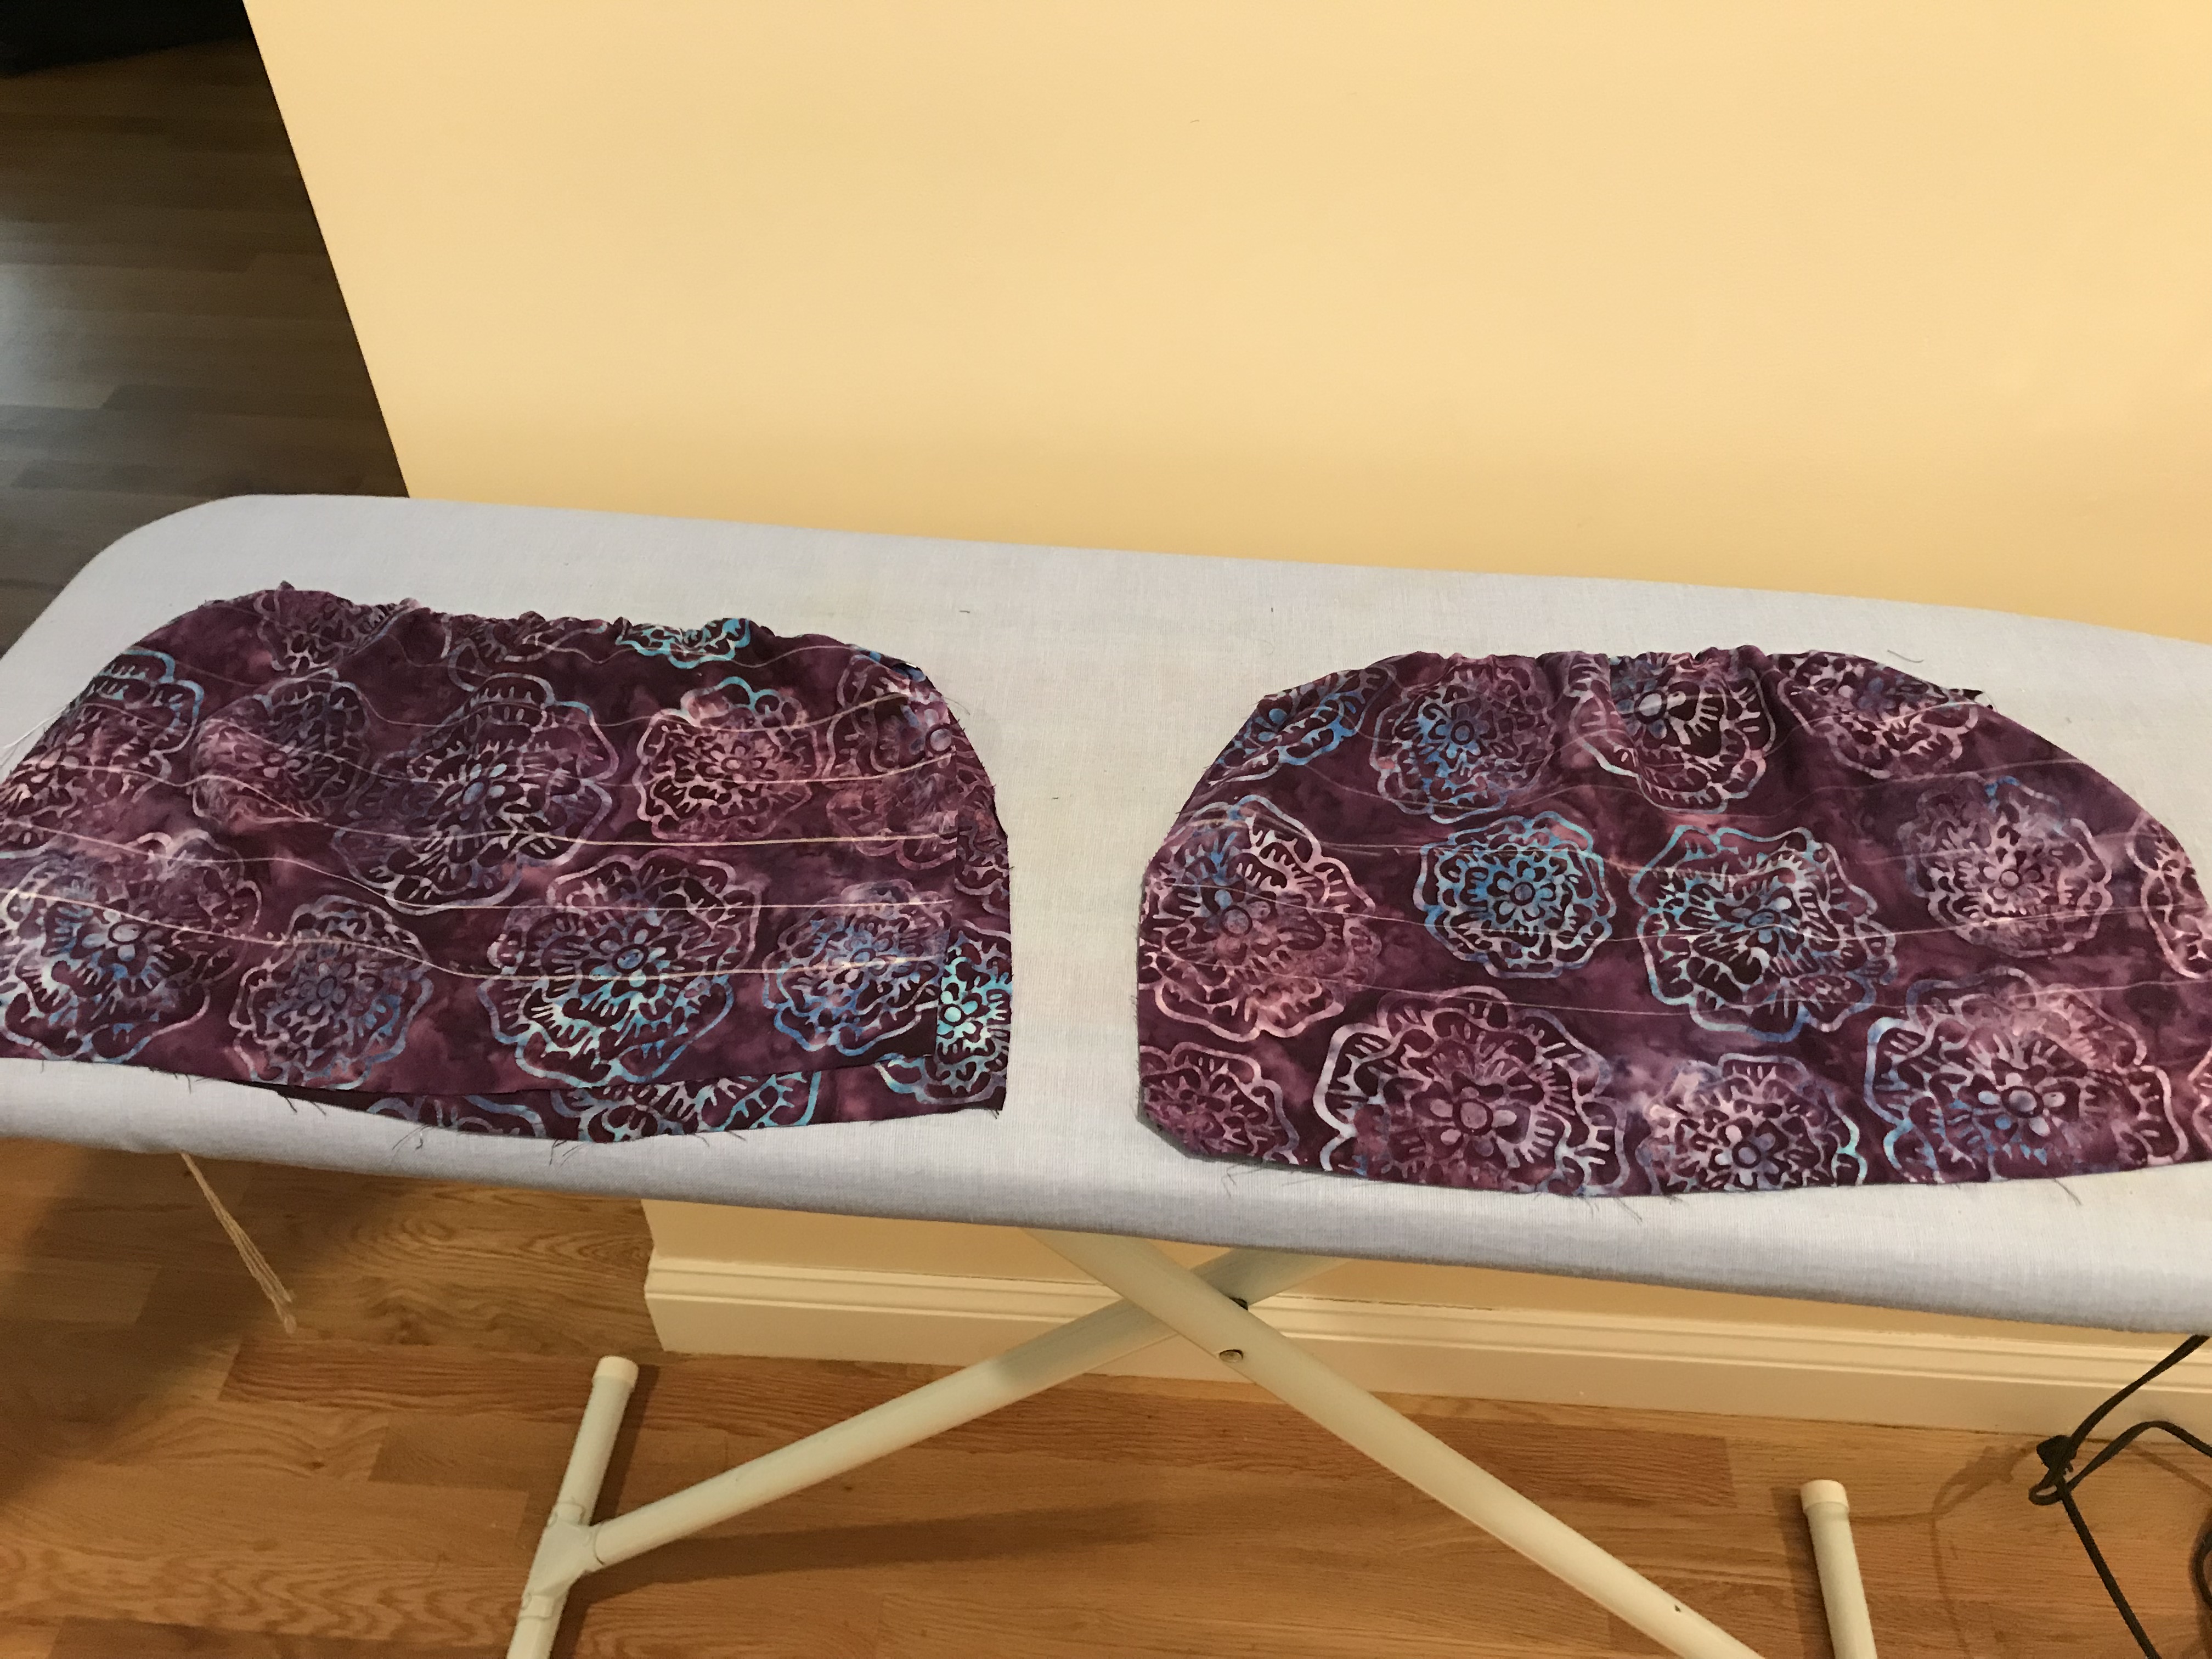
When I bought the brown seersucker, I knew I wanted to make a dress with it – something good for summer and fall workdays. This was before I knew I would be working 90% from home, but I was still determined to see this vision through. I wanted to fully line the dress because the fabric, being that crinkly texture, would not be the best against the skin. For some reason, I thought this pattern was going to be perfect because it was a lined dress. When I finally got started on it, I realized it was not lined at all. I decided to put a lining in anyways, which skipped any need for a facing. I made another dress with the cotton lining and then sewed it in at the neck. I slip-stitched the lining to the invisible zipper in the back and used the bias tape on the arm holes as directed in the pattern, which held everything in place.
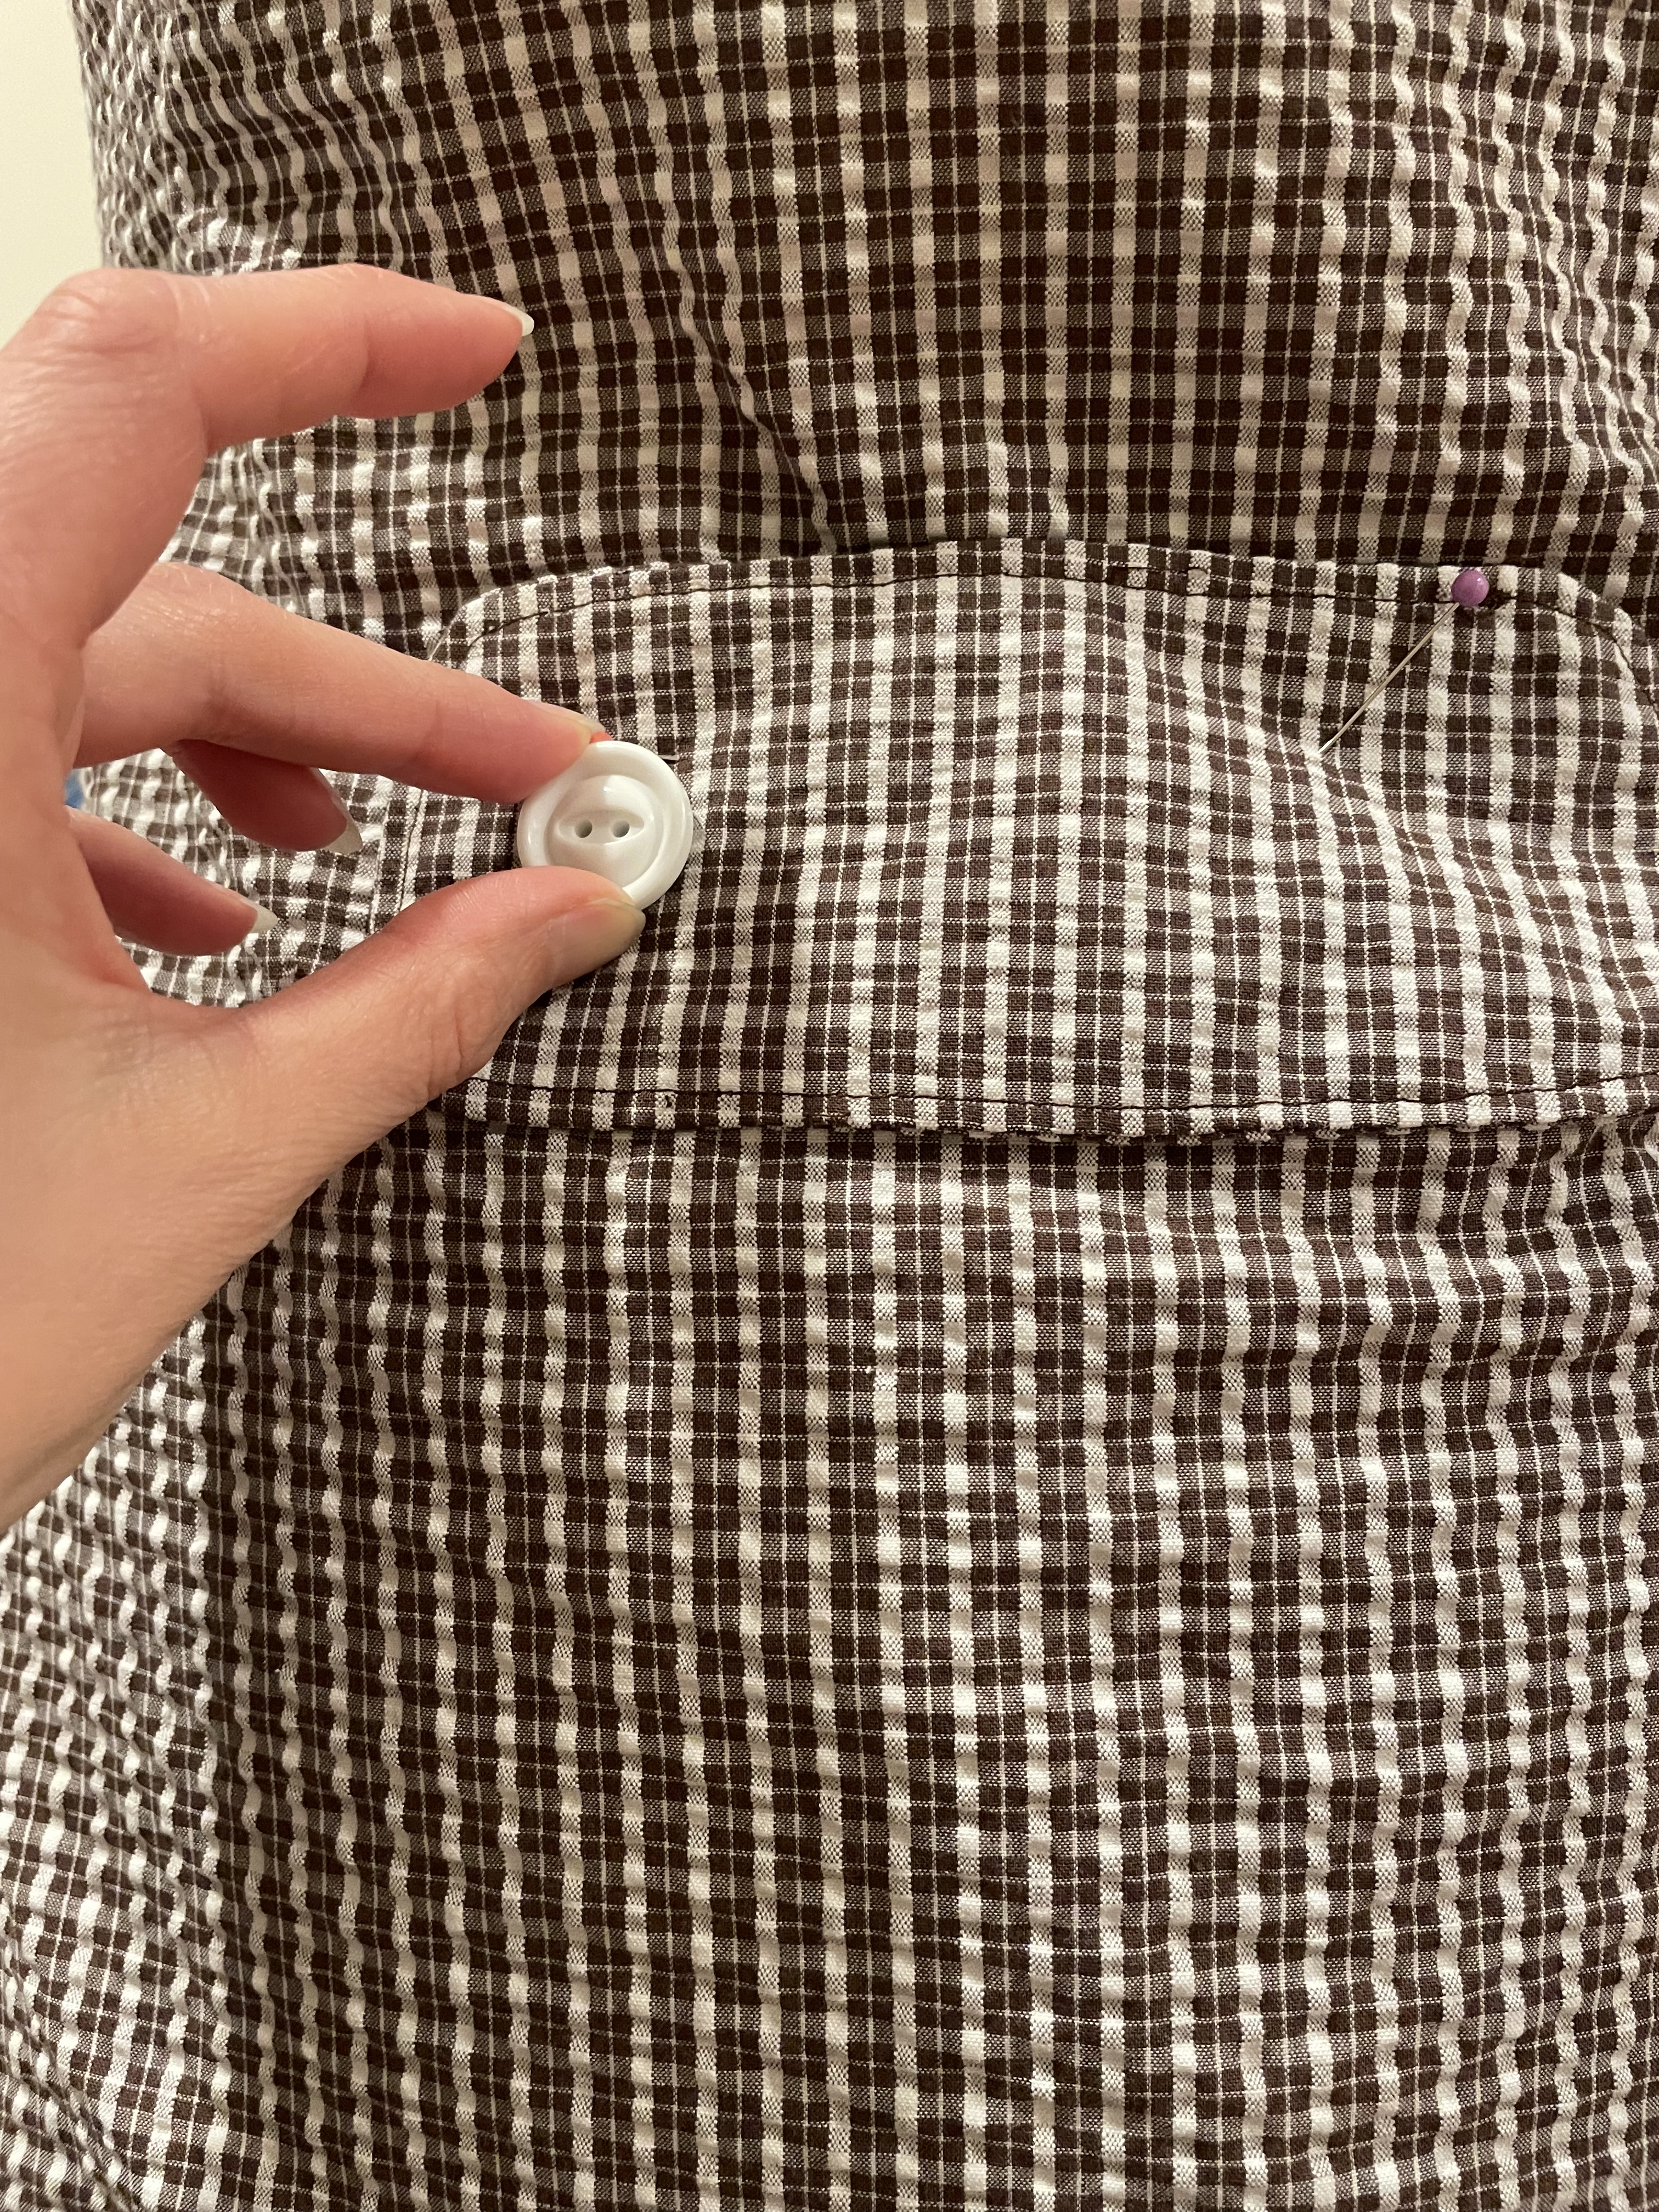
The result looks great and I think it’s one of my better made dresses for sure. Even the fit came out great – I was real lucky with this one. I even found the perfect buttons to go with the style I was looking for.
After I finished this, I thought to myself, “hey maybe I’m getting pretty good at this sewing thing!” I should have known my luck would eventually end. I’ve had so many hits lately, it was about time for a miss – well I’ll save that for another day. In the meantime, I will bask in the glory of fall-colored seersucker and a slight a-line shape. It’s enough to (almost) get me back to the office!
Let me start out by saying that this experiment had started over the summer, when I somehow didn’t realize I had cut out a child’s dress as my bathing suit coverup. I guess I should have noticed the pattern is called Burda Young, but the picture of adults on the front really threw me off. Burda patterns have always confused me – it’s like they make the directions difficult on purpose so that you get more of a sense of accomplishment. It doesn’t help me out – I’ve never been able to fully figure out one of these patterns.
Despite not realizing what I was cutting out, the dress actually didn’t turn out too bad. And I was able to figure out how to create the shirring effect on the fabric from a simple Internet search. The most important thing to do is hand wind the bobbin with the elastic thread. The top stitch uses regular thread, but you need to loosen the tension on the machine and use a large stitch size. I was a little scared with changing the tension since I was told to never touch it as it may be really hard getting it back to where it should be.
In order to make sure the shirring lines were all the same distance apart, I measured and chalked the sewing lines. Then after the front & back were sewn together, I was able to sew all the way around the top, causing the fabric to shrink inward. I made sure the tie the ends since it seemed more stable than back-stitching with the elastic.
I could tell after I put the top together that it was not the right size. I was also thrown off by the sizes on the pattern as they were confusing as well. Of course I should have known by measuring and putting the top against me, but it was hard to tell how much extra material I Continue reading “Seasonally Inappropriate: A shirred experiment”→
When I look at some of my projects from last year…
I do! It may be a mini-obsession. I do have some non-plaid projects in the works, but for now….
This dress has been sitting as a draft in blog forever. I wanted to share this on The Monthly Stitch and even bumped it up in my project queue because the July theme was all about plaid. I rushed through all the hot sticky weather to try to finish this dress in time to post on the site and then…the blind hem stitch on my machine wasn’t working. On July 28th.
Yeah I know I could have just hemmed it by hand, but I really wanted to try out a new technique. And that was more important than trying to force a project into a theme. It’s all about my learnings as a sewist, right? (Back me up on this one) So in the corner this dress went while I worked on other stuff, involving other non-blind hems. I decided to pick this back up when my machine was properly repaired. Welp, at least I can also get that button-hole stitch fixed too.
The search for the perfect pattern to match an idea in your head is a challenging one. But sometimes it really works out!
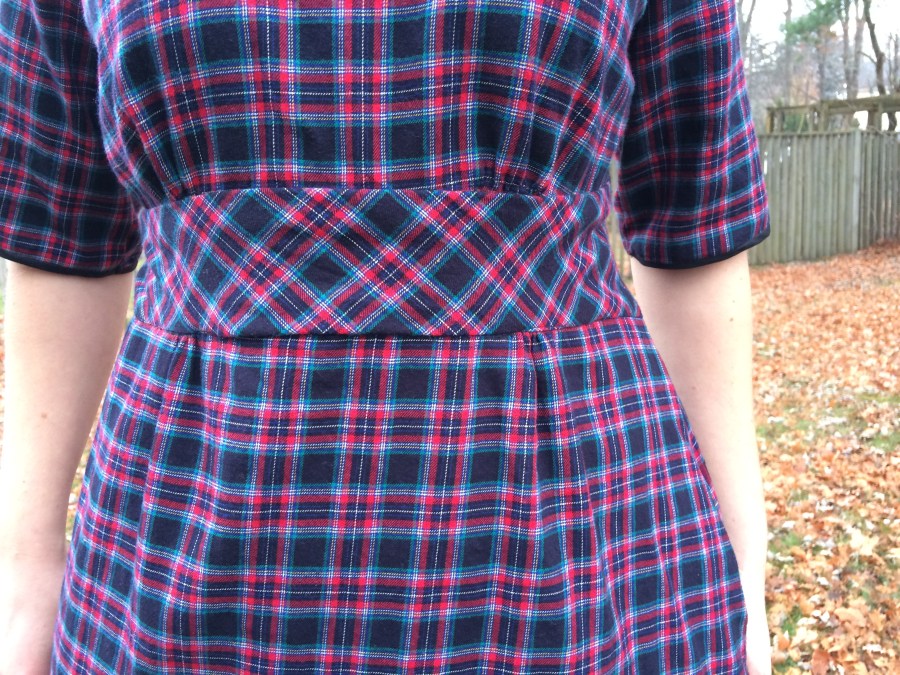
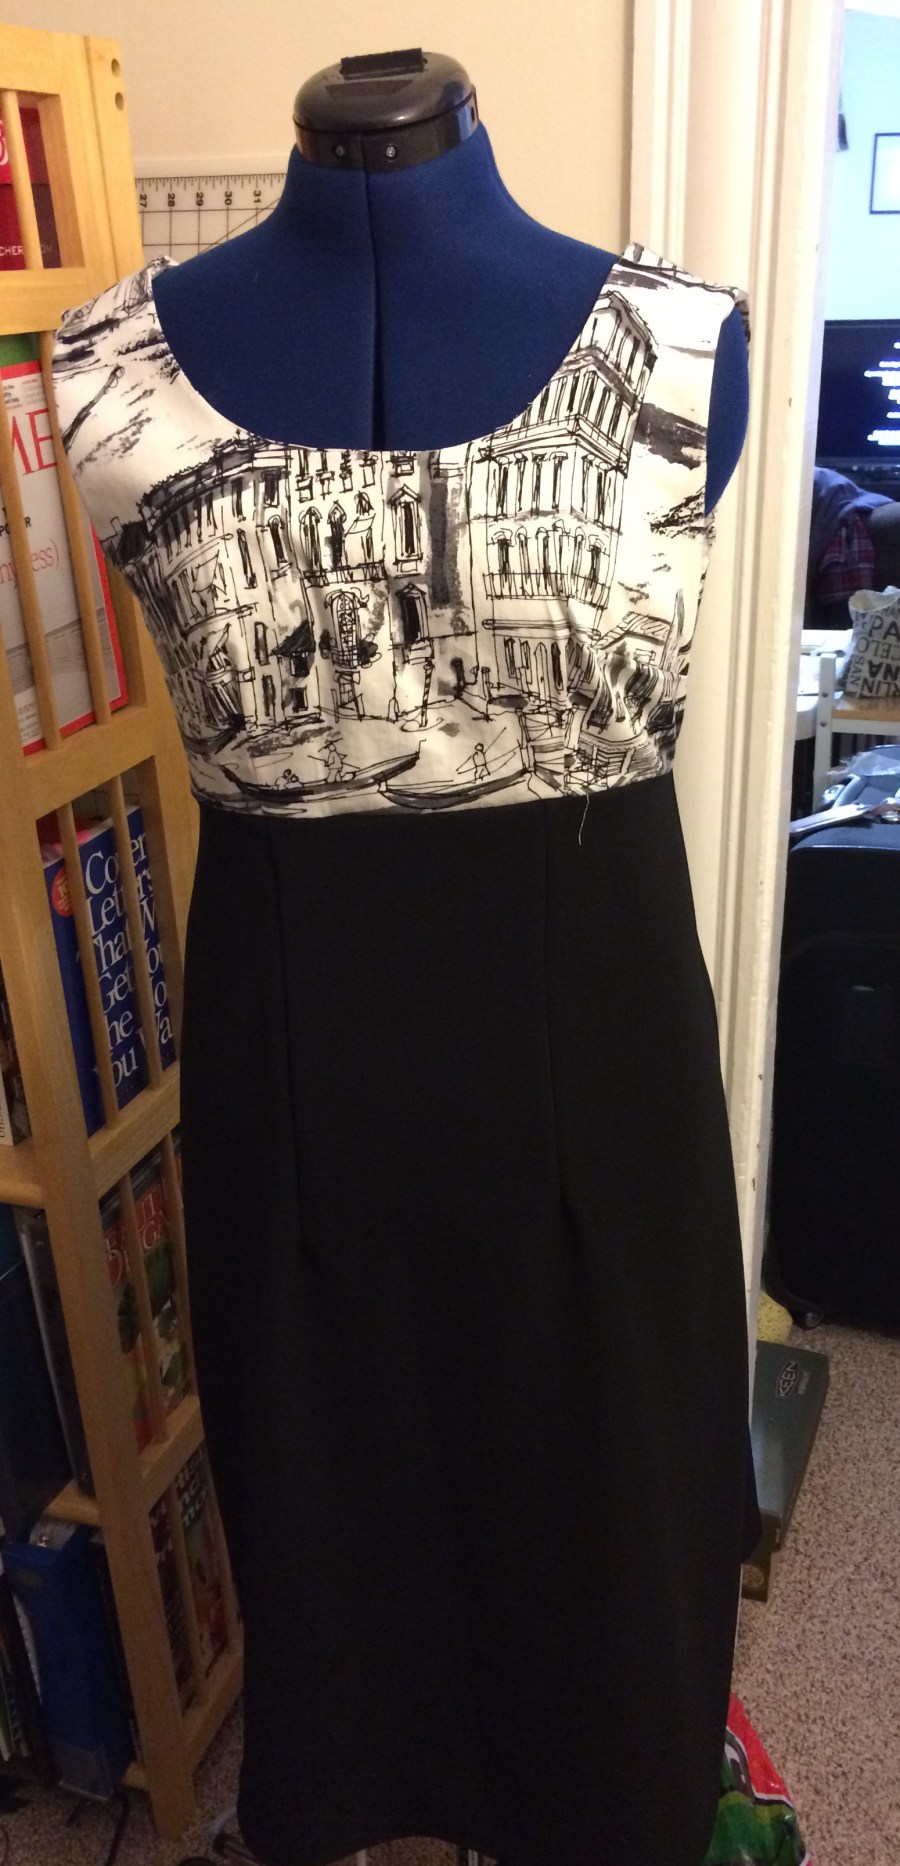
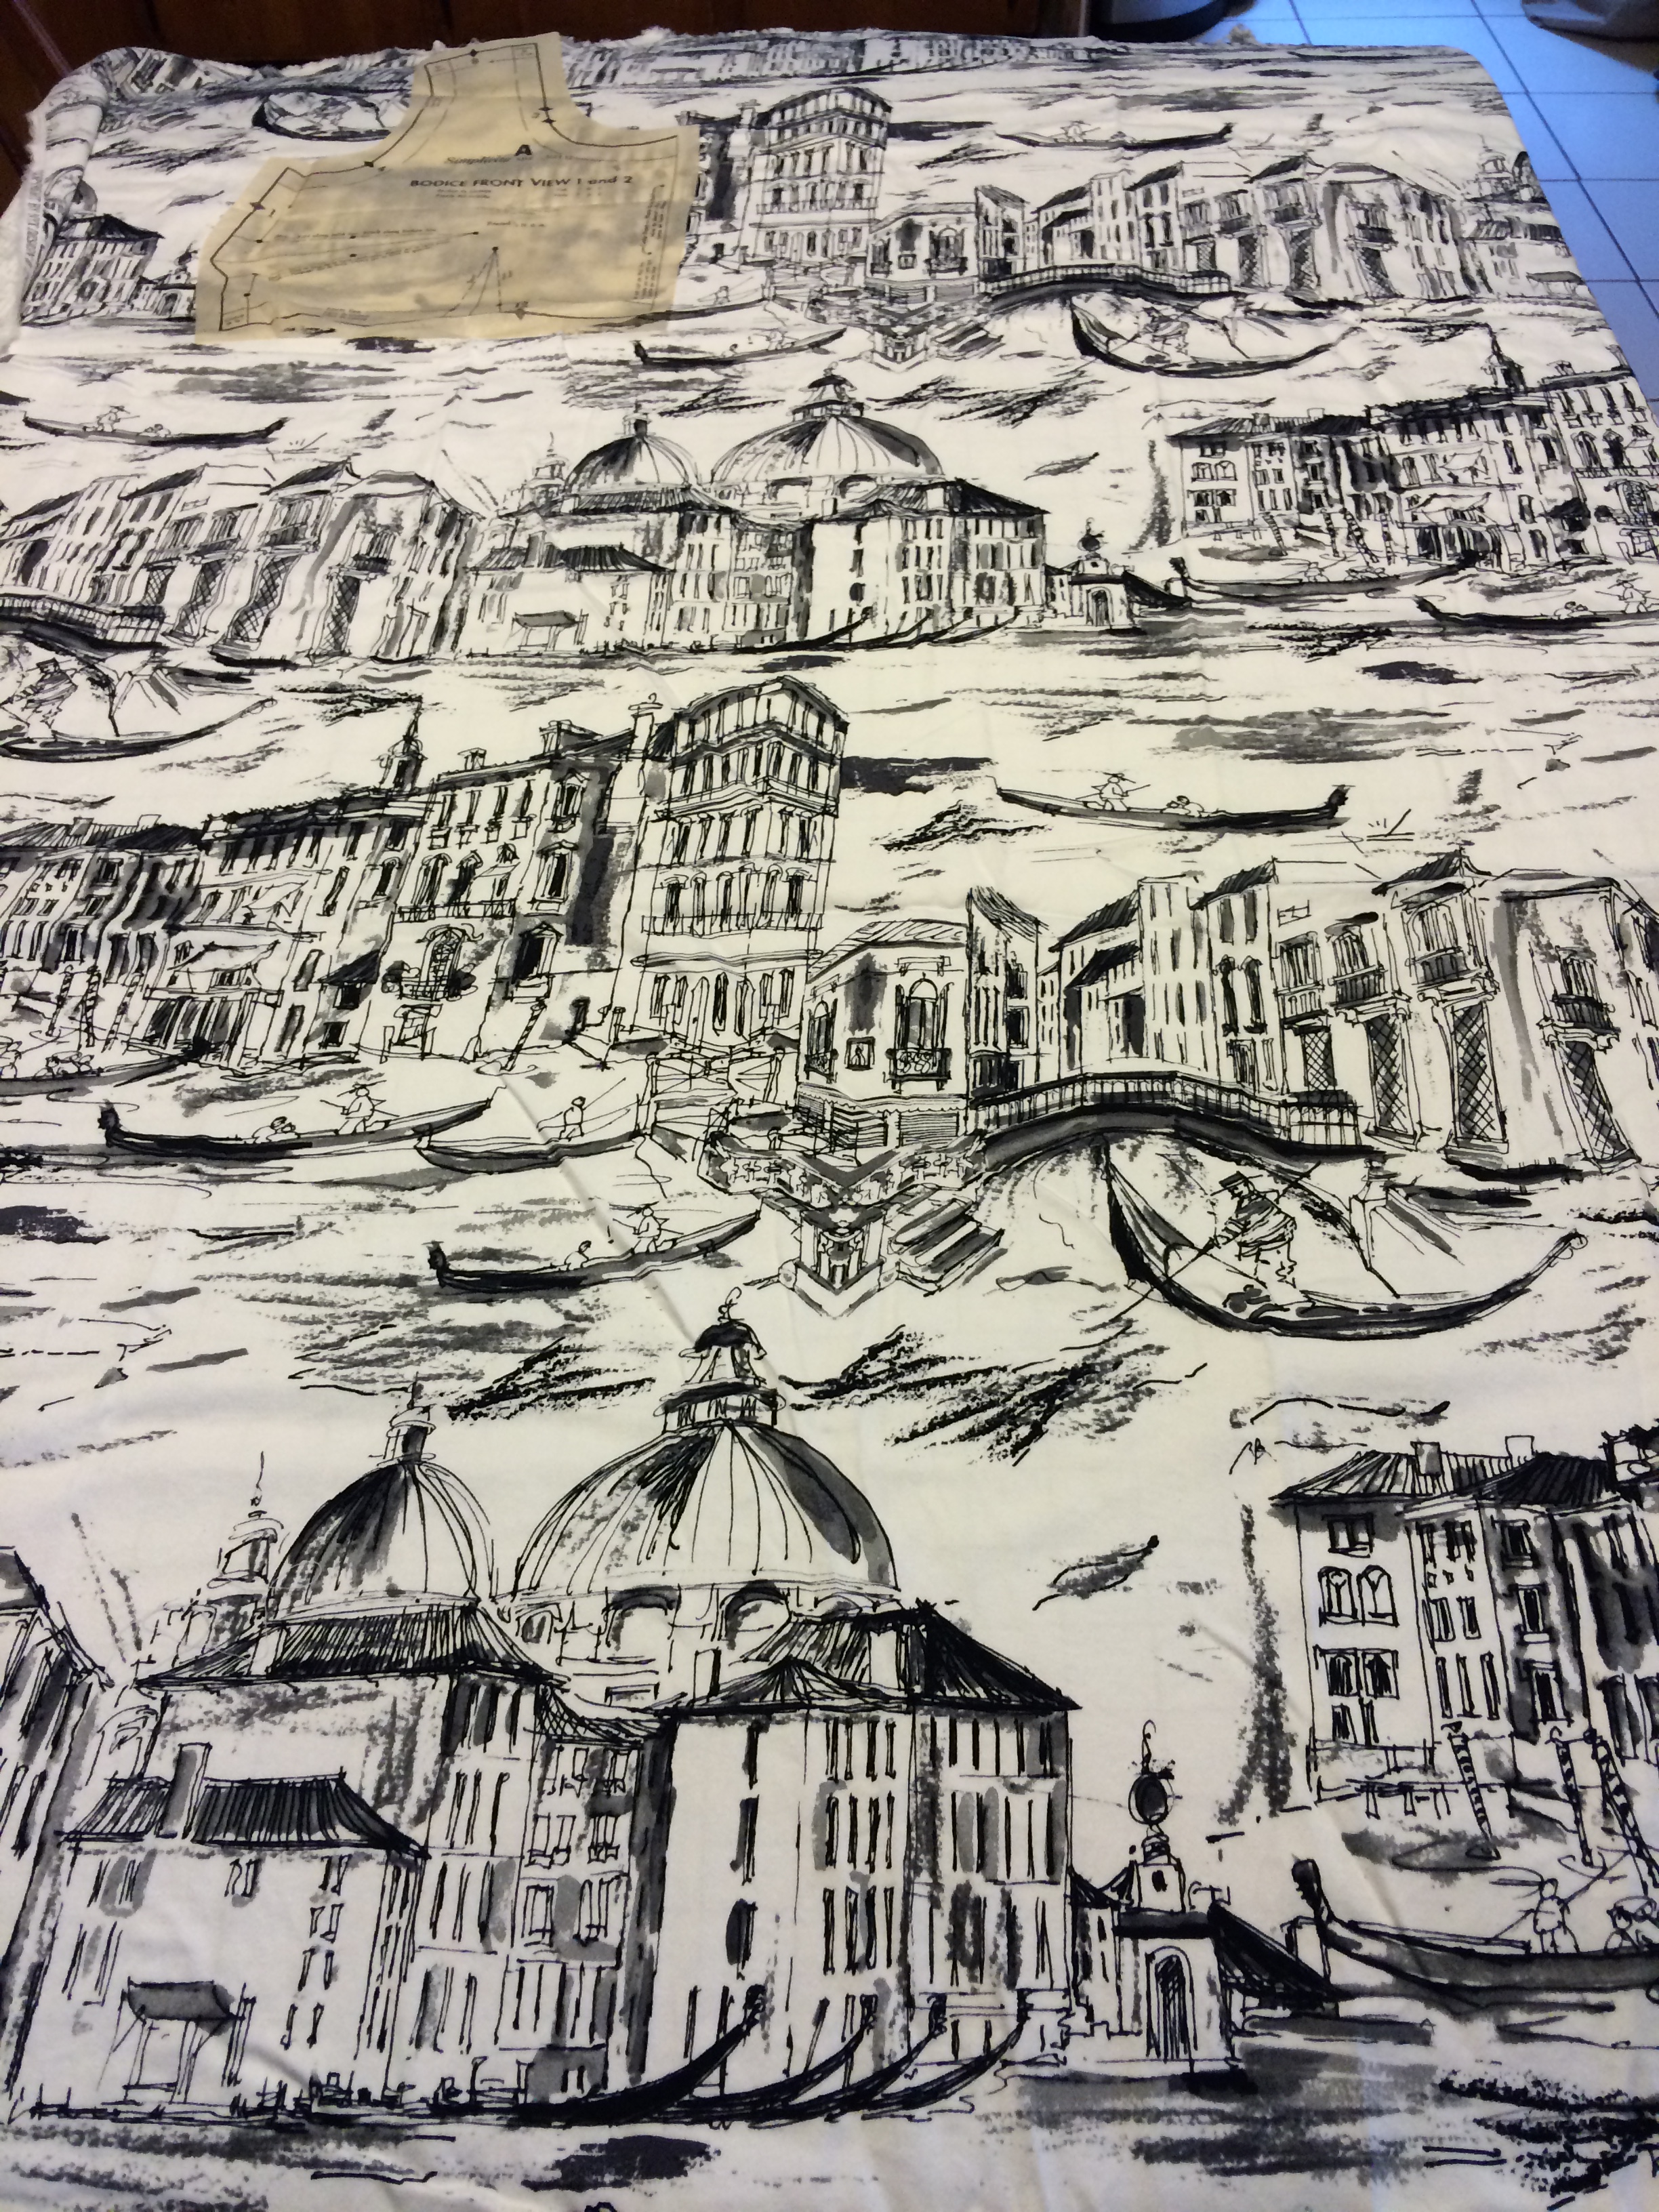
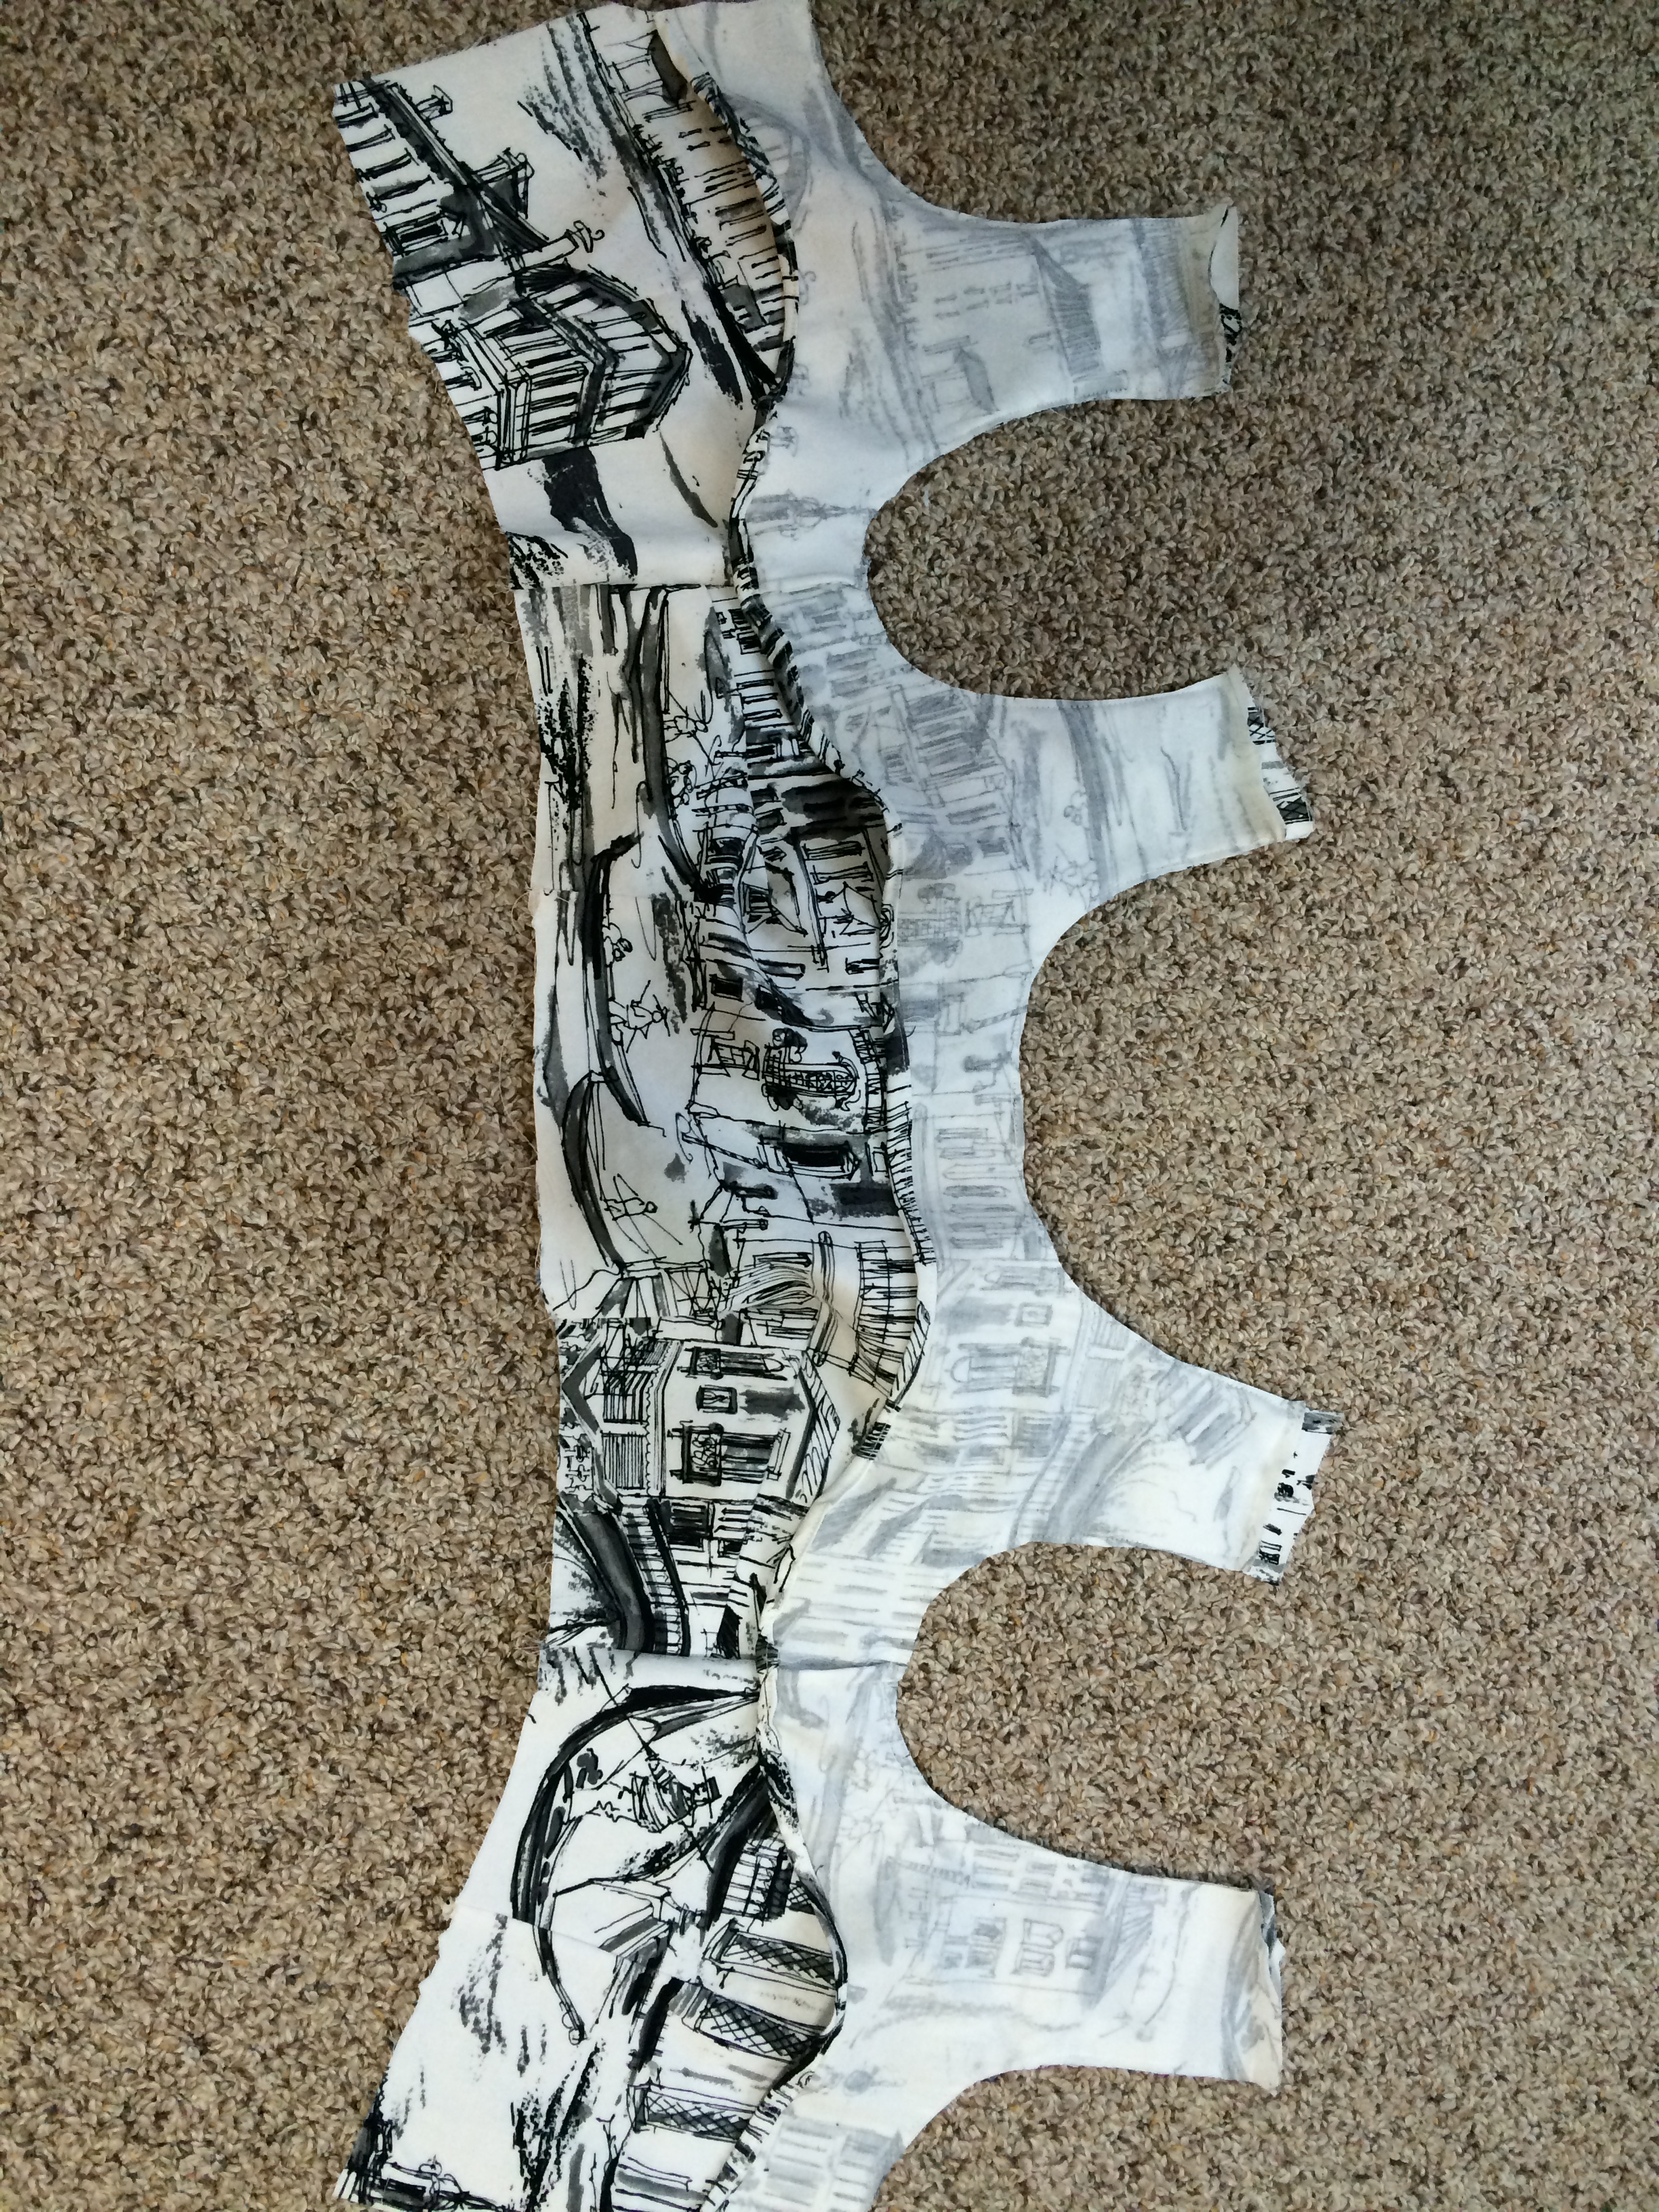
I found this printed fabric by accident in the back room of one of my favorite fabric stores, Sewfisticated Fabrics. It’s actually really nice quality cotton with a tiny bit of stretch to it. The print looks like the canals of Venice, Italy. Really cool find, so I had to buy some, even if I wasn’t exactly sure what it would be.
Somewhere I got the idea it would look good as the top of a dress, with the bottom being just plain black. I also figured it should probably have an empire waist – so the search began for a pattern I could use for this vision.
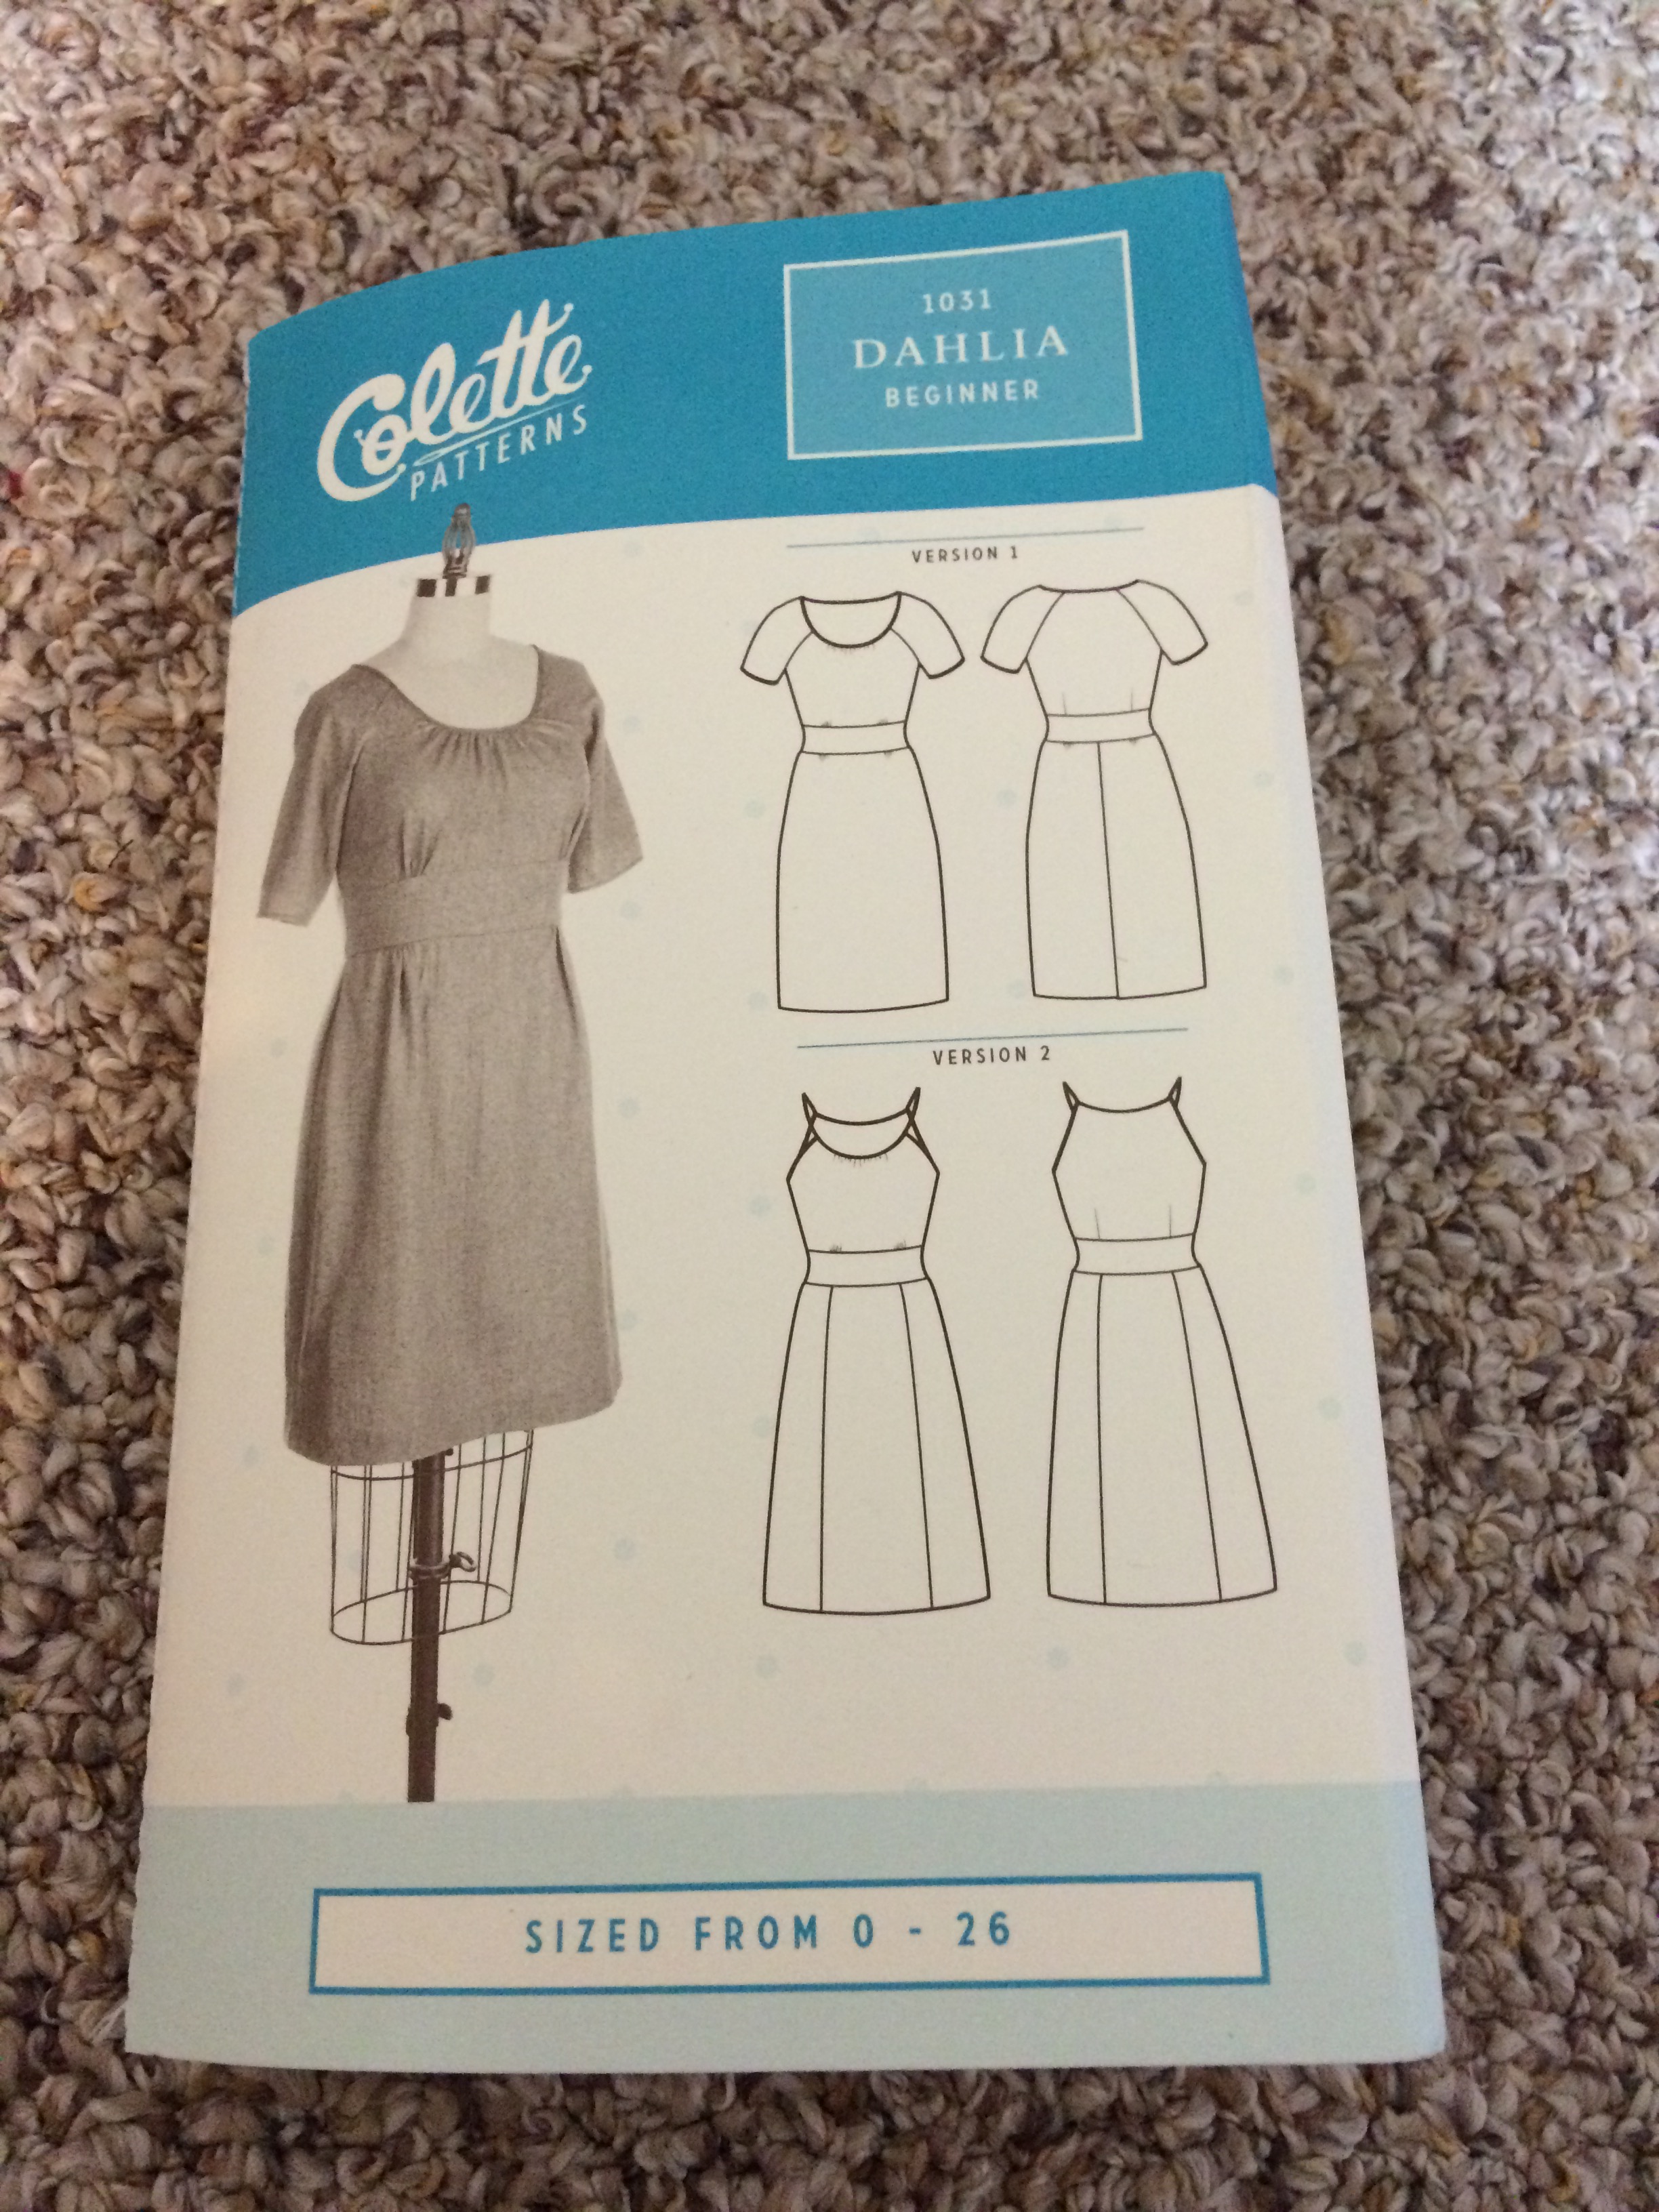
I started to look at some vintage patterns, because I couldn’t really find many modern patterns of the dress style I was looking for. I settled on this Simplicity pattern because the picture had a similar look to what I was going for. For the black skirt, I bought fabric that would dress up the look, but I’m not exactly sure what it is – some sort of polyester. It’s a little on the thick side, so I knew I was going to have to use a serger so the seams didn’t appear too bulky.
Most of the vintage dress patterns I have used have been really easy to construct, and this one was no different. For the bodice, it requires you to cut out a facing, which finishes the top and armholes without a lining. When you cut out the facing and sew it all together, it is one long piece like so:
Then you sew it to the bodice with right sides together so it can be flipped to the inside:
This is before you flip the facing to the inside. The raw edge is pressed and sewed as well.
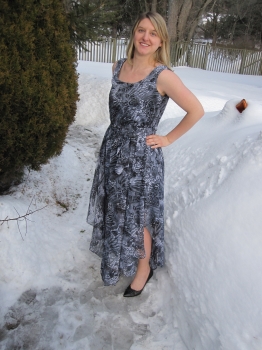
I live in New England. This winter has been murder with the snow – more so than usual. February was one big white blur and everywhere you turned, snow banks were piling up higher and higher. Houses were buried, mailboxes were lost and ice dams were creeping onto many a roof. People have grown a little colder as well – sick of shoveling the stuff, driving in the stuff and seeing the stuff. The waste management company for my town actually hurled my recycling bin on top of a giant snow bank where I could barely climb to reach it. I just left it up there for four weeks. I love snow, but even I realize it has been a little much this year. I decided, as the icy winds blew outside, to make this sheer dress even though I knew it would be a while before I could actually wear it.
I finally got around to using the birthday material my mom got me, seen in this post. This was the first time I have worked with material so thin and sheer, but I knew french seams were the way to go. They work so well on this type of material, plus I’ve been striving to make my garments look more professional, inside and out.
The Tale of Two Bodices
When I saw the picture on the envelope, I had a feeling the bodice on this might be a bit too big. I generally have this problem anyway, having such small shoulders. And look at that model – it looks like the top is just falling off her. So I cut out a smaller size, which still seemed to match my measurements. After I sewed up the finished seams and stitched in the lining, I tried it on. It was so tight under my armpits, it started to leave welts. The straps couldn’t even rest on my shoulders straight. I was going to try to adjust and let out the seams on the arm holes, but I realized that I still had a lot of the fabric left – plenty more for a new bodice. I was even able to squeak out a new lining, although that was a close call. Looks are definitely deceiving with this one – the top is not as loose as it looks.
Pinning it Down
This pattern was mostly easy to follow. It has an elastic waist, so you have to create a casing and do the whole thread-the-elastic-through-the-hole thingy. But no zipper!! Getting the dress on and off is also surprisingly easy despite having no zipper, although figuring which was front or back took some thought (sewing a tag in would be a good idea).
Pattern: Vogue Patterns American Designer, Kay Unger New York #V1353….continued from part 3, part 2 and part 1
I thought it might be nice, since half my blog is about this one dress, to post a picture of the final dress in action. Here is the dress I wore to my friend’s wedding over the July 4th holiday:
Me, having a conversation with a mystery person. I cropped her at her request.
A few days before the wedding, I added the thread belt loops and a fabulous gold belt from TJ Maxx ($9.99).
The wedding was wonderful – everyone had a great time. I was so happy to see my friends take this next step in their relationship. I also couldn’t believe that I got a few compliments about my dress, from people I didn’t know and who didn’t know I made the dress. It gave me a great ego boost – and I was ready to dance up a storm at the reception (not pictured).
One final picture, then I swear I will never speak of this dress again! Haha! But seriously, I would use this pattern again, I especially liked how the bodice fit and I didn’t need to make too many adjustments on the skirt. It would be interesting to see it made with a different print, so if anyone out there attempts this dress, let me know!
Seriously who is that mystery person?? I know you all want to know!