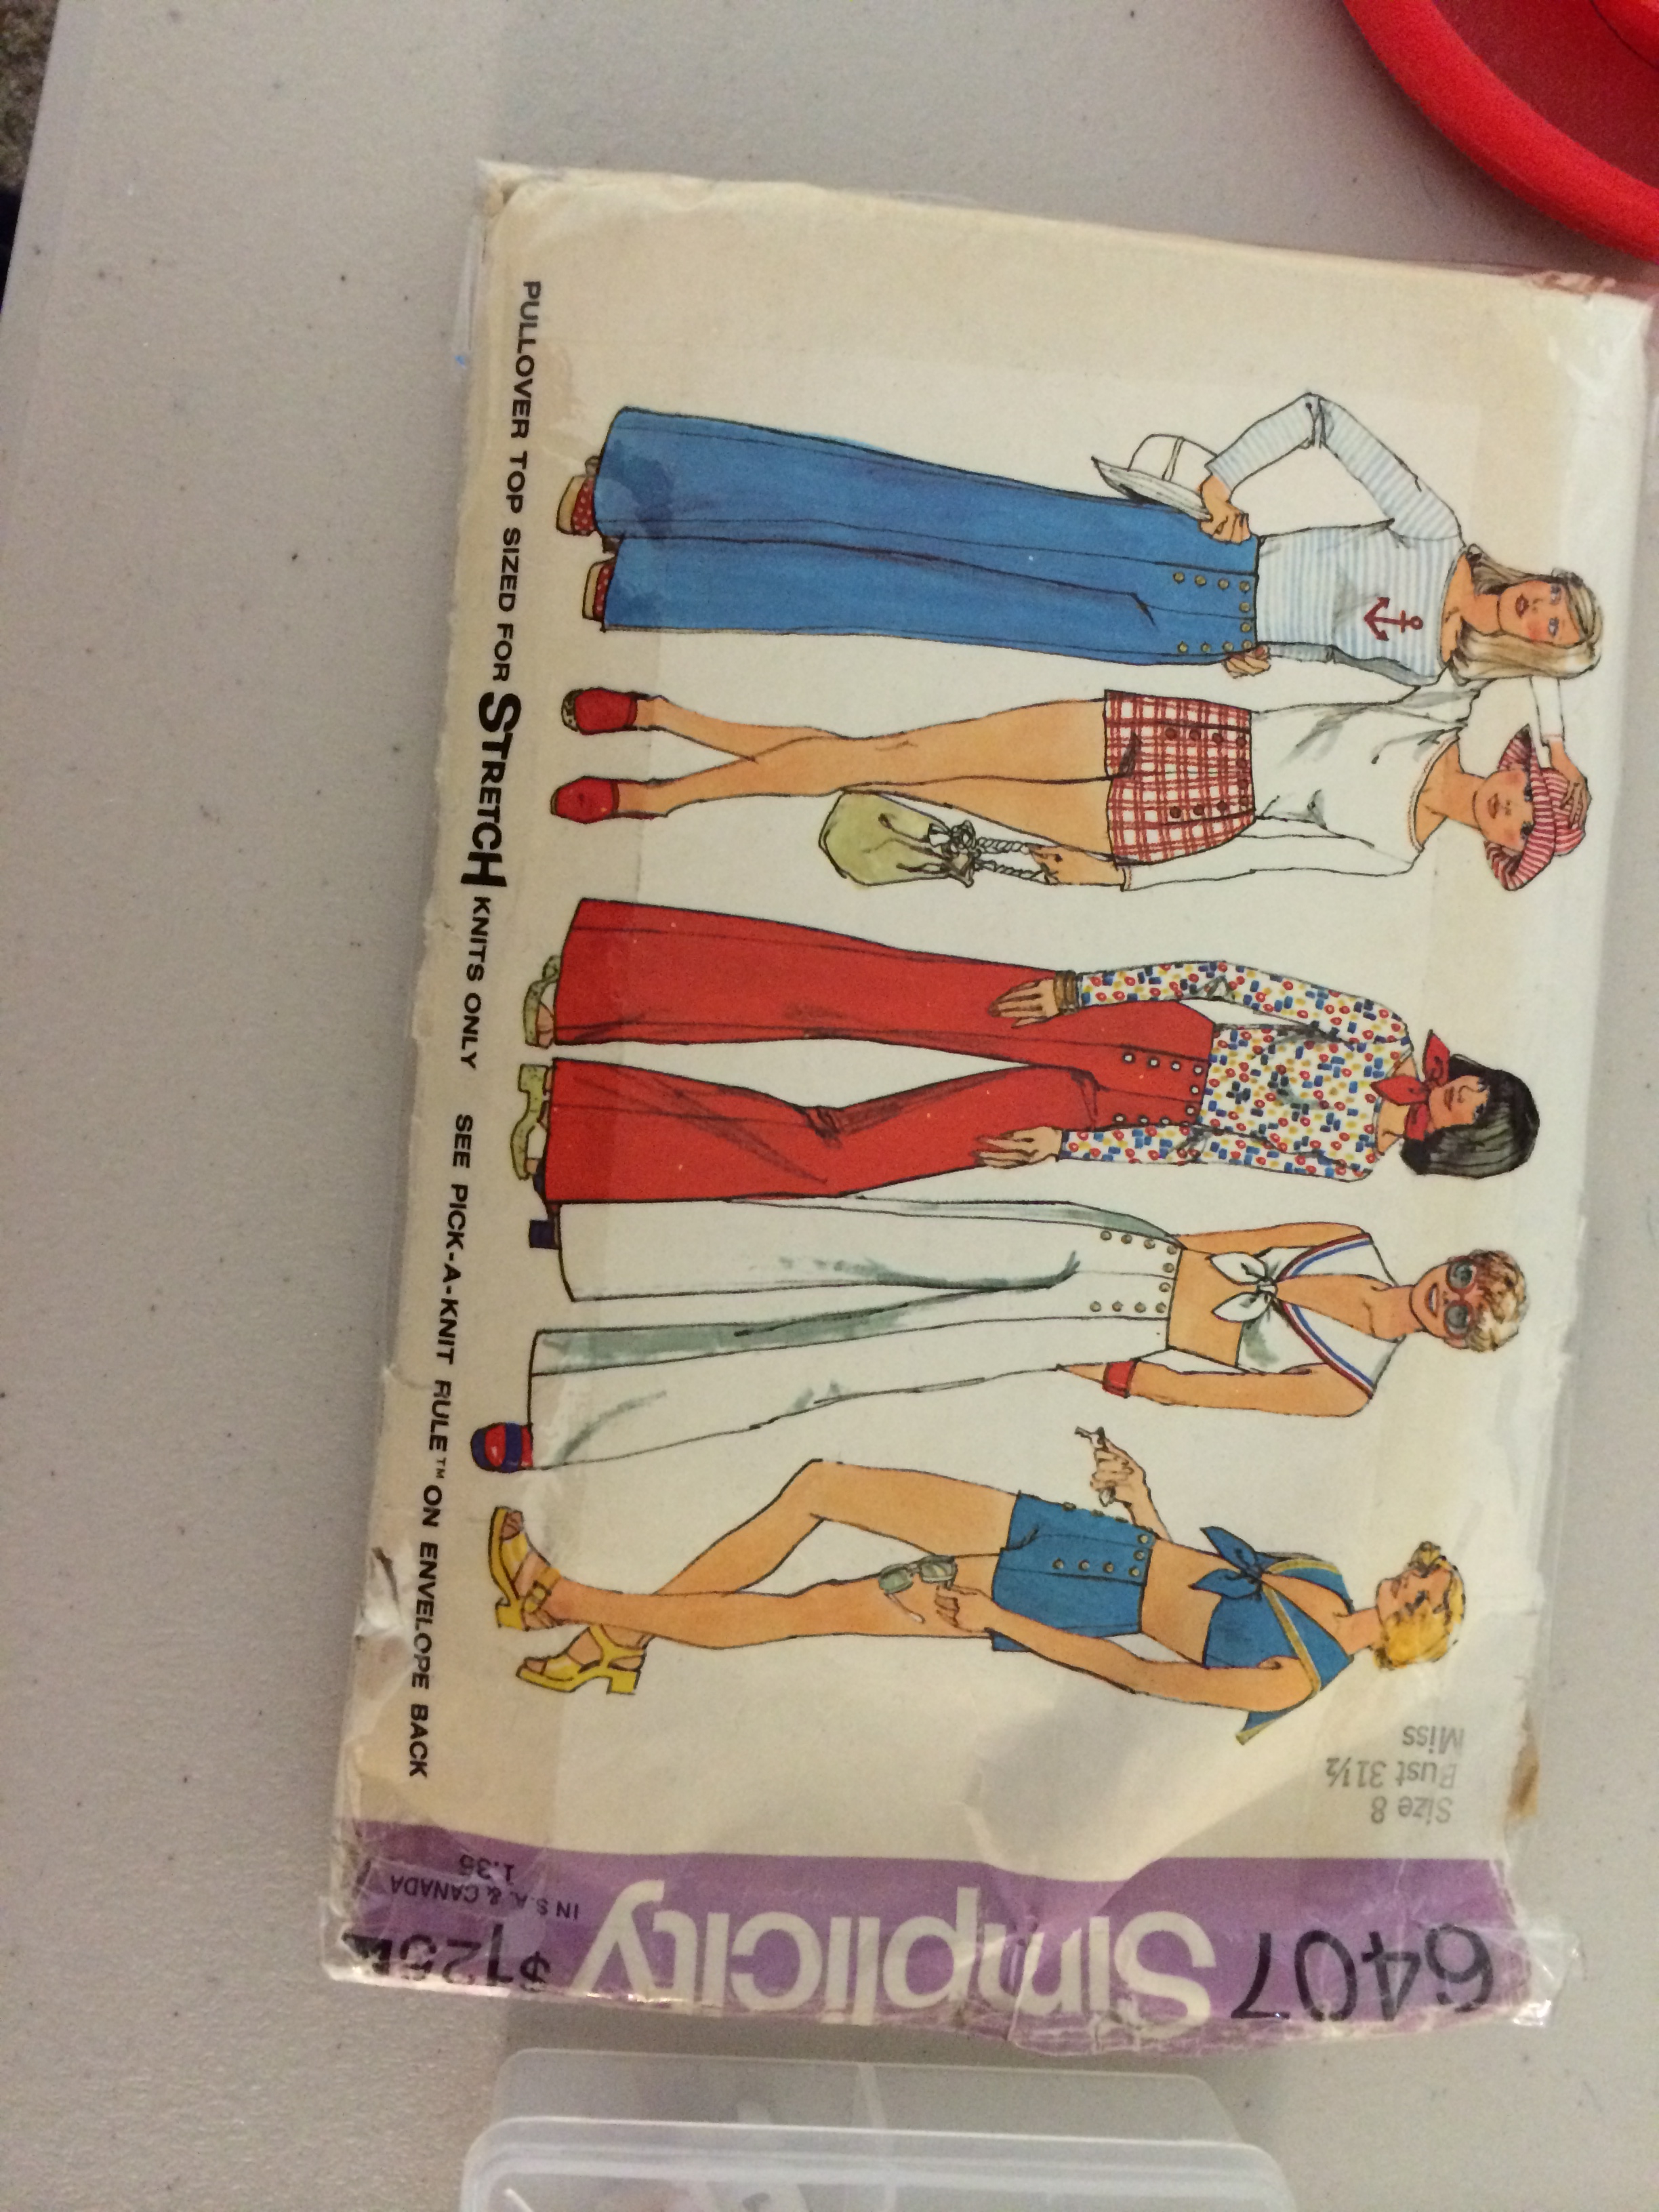
Pattern: Simplicity 4127
 It’s pretty bad when your summer projects don’t get finished until the fall. It’s even worse when they leak into the wintertime as well. Okay, so I am running a little behind on my projects. But I wanted to finish this top, since I had already made the muslin (see blog post) and I didn’t want to forget all the knowledge I gained. Especially since this was the most expensive material I have bought to date. But of course it’s white, and you know what they say about wearing white…seasonably I mean. Not the virgin thing.
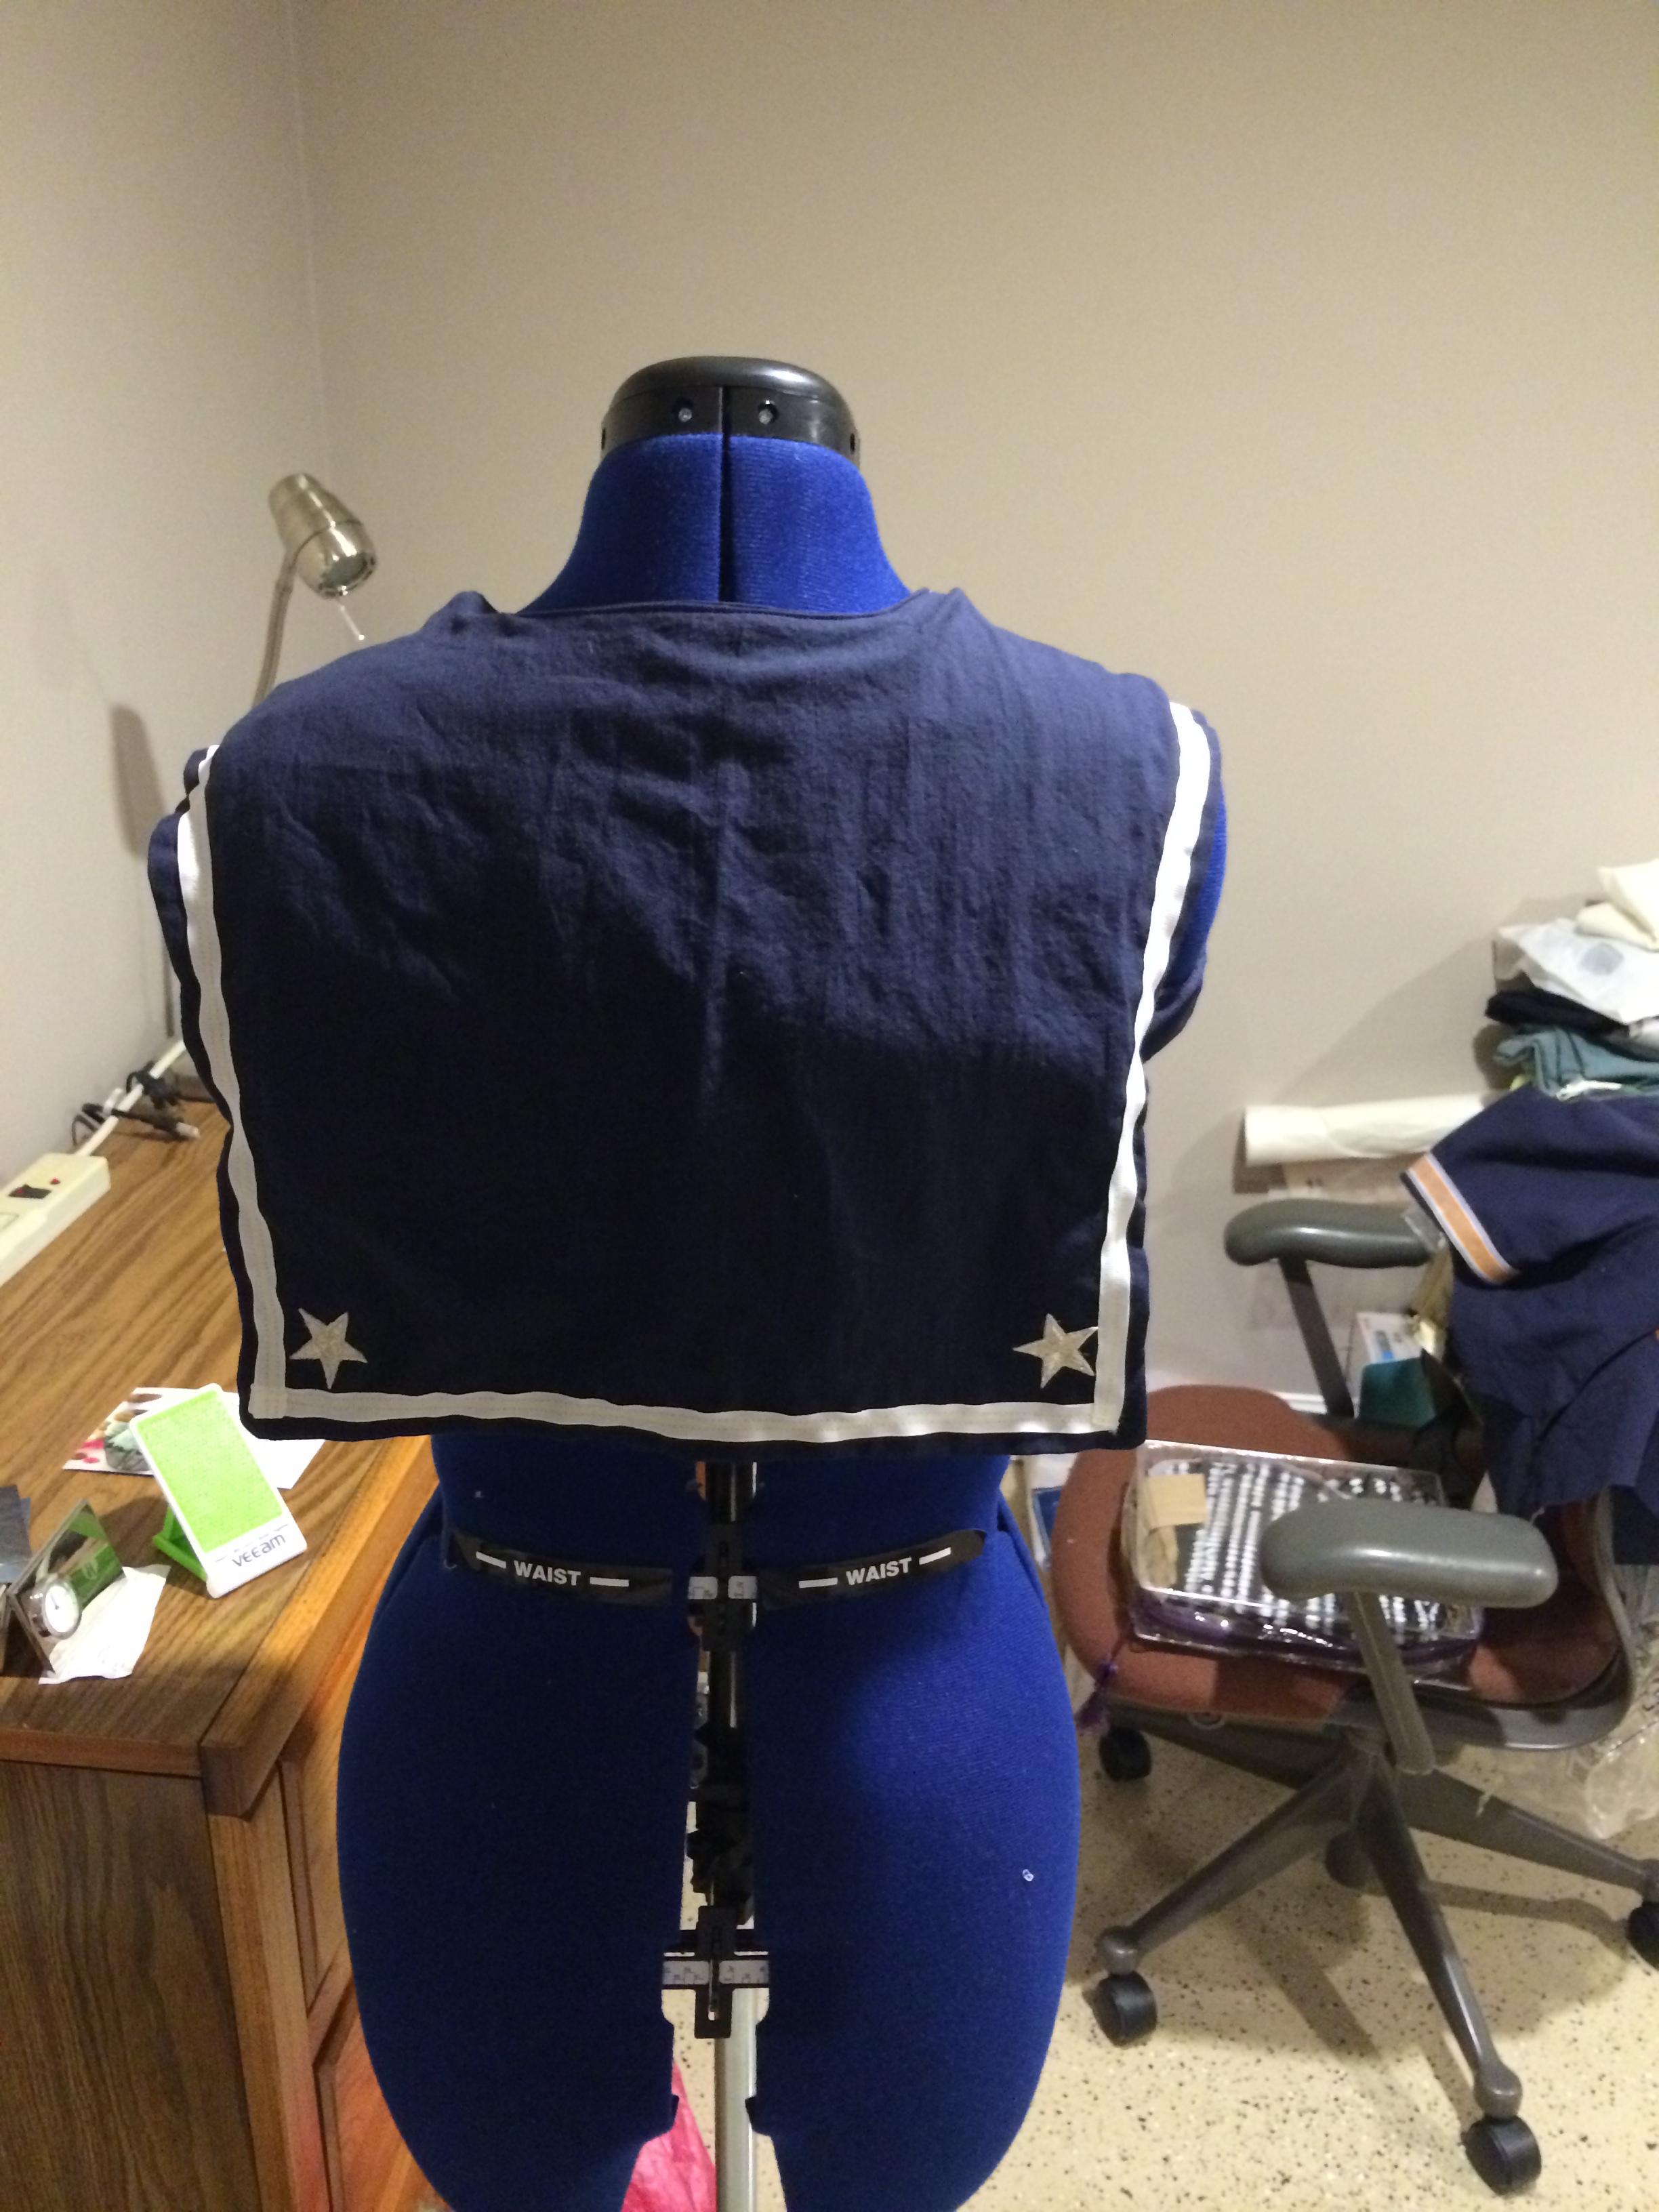
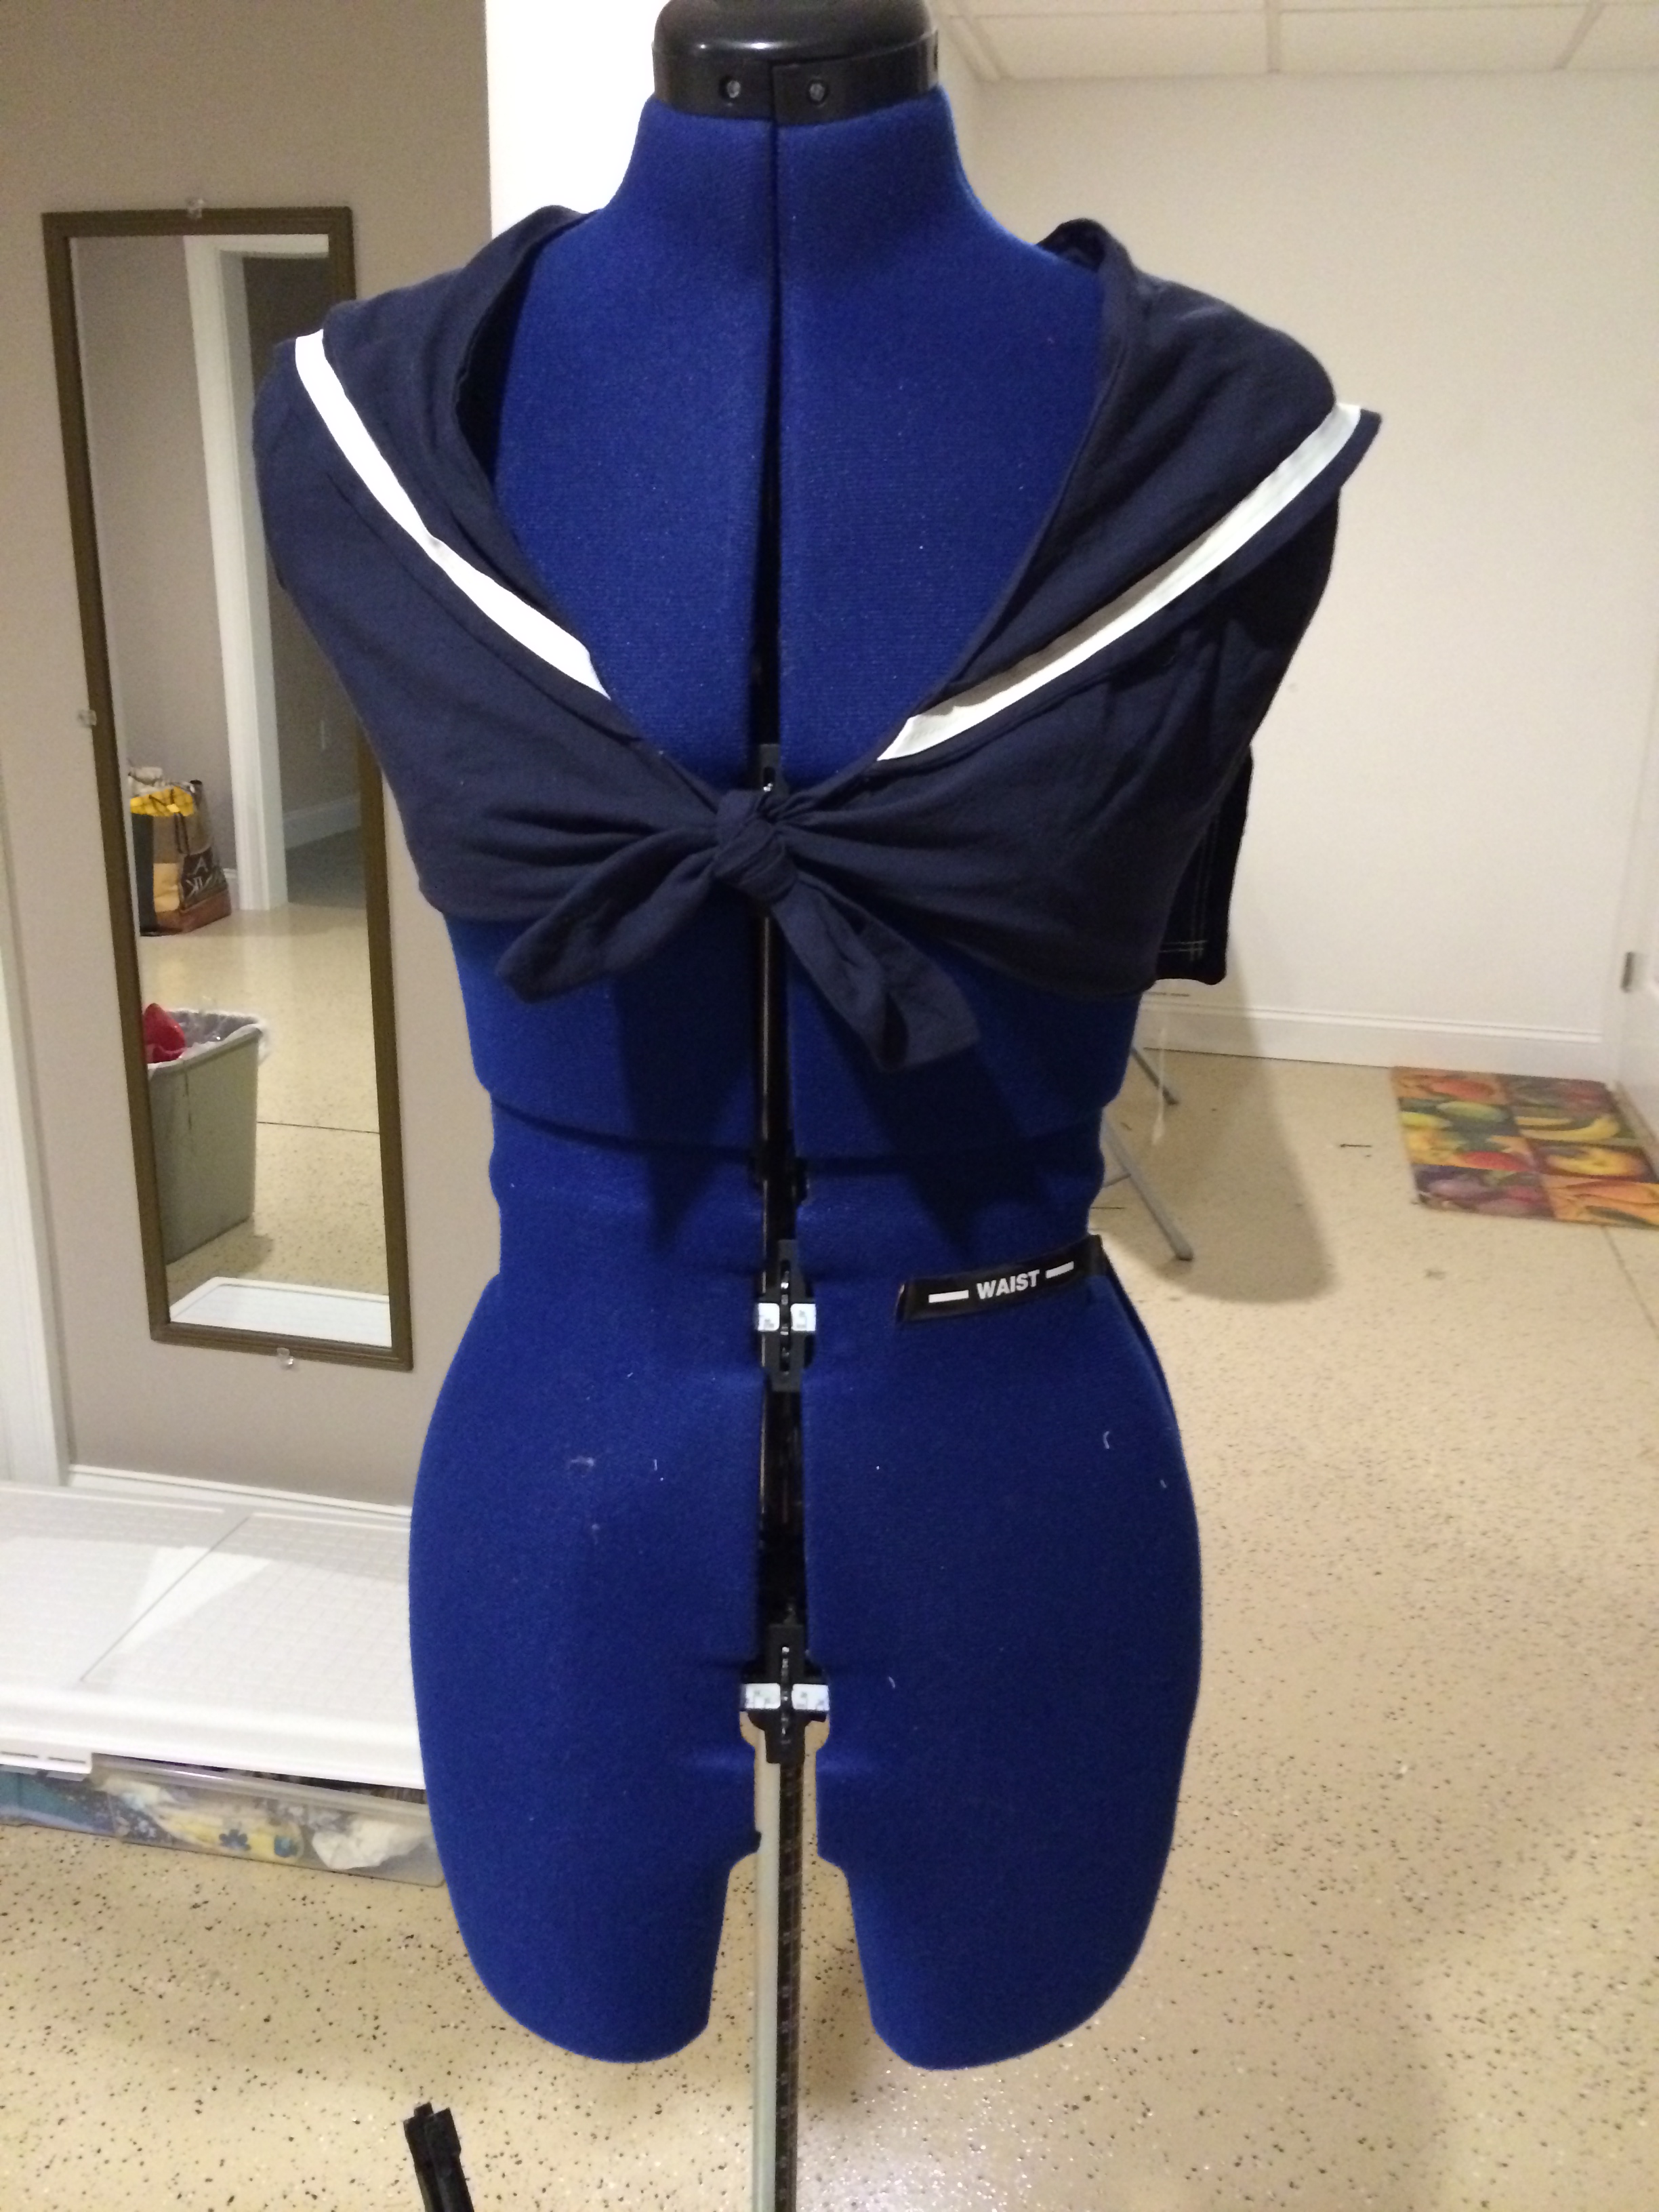
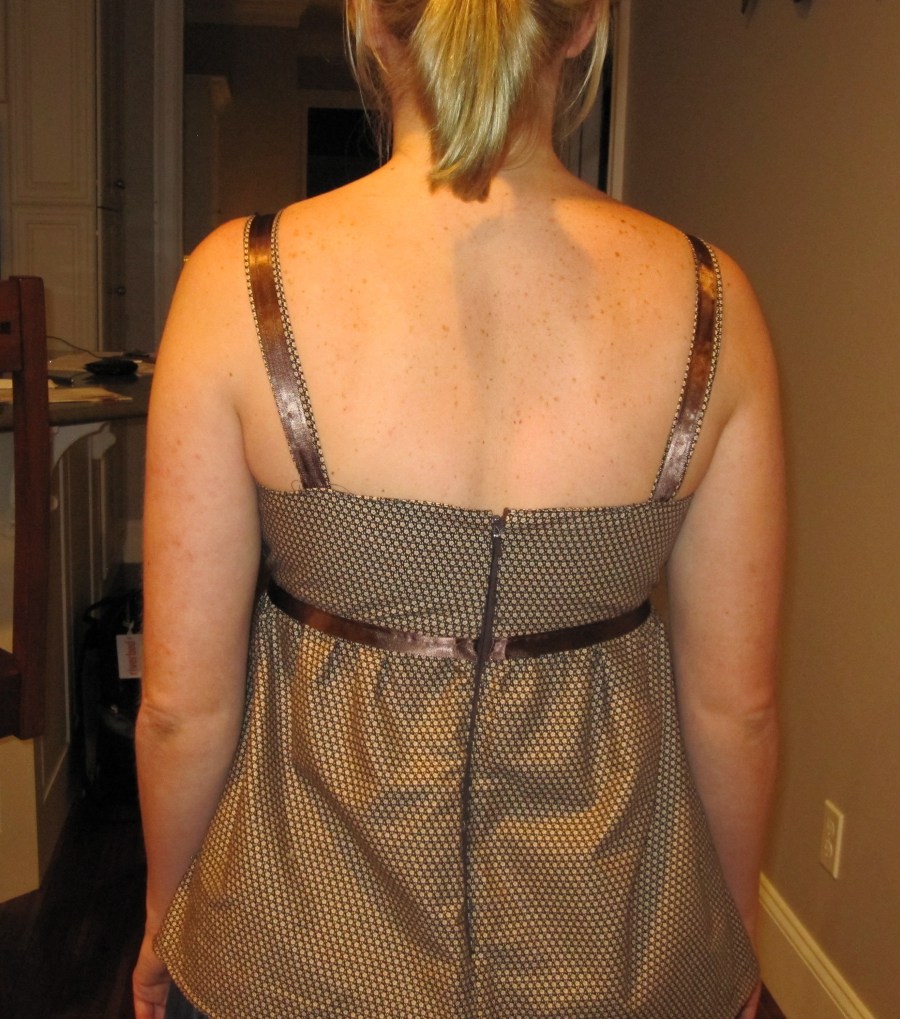
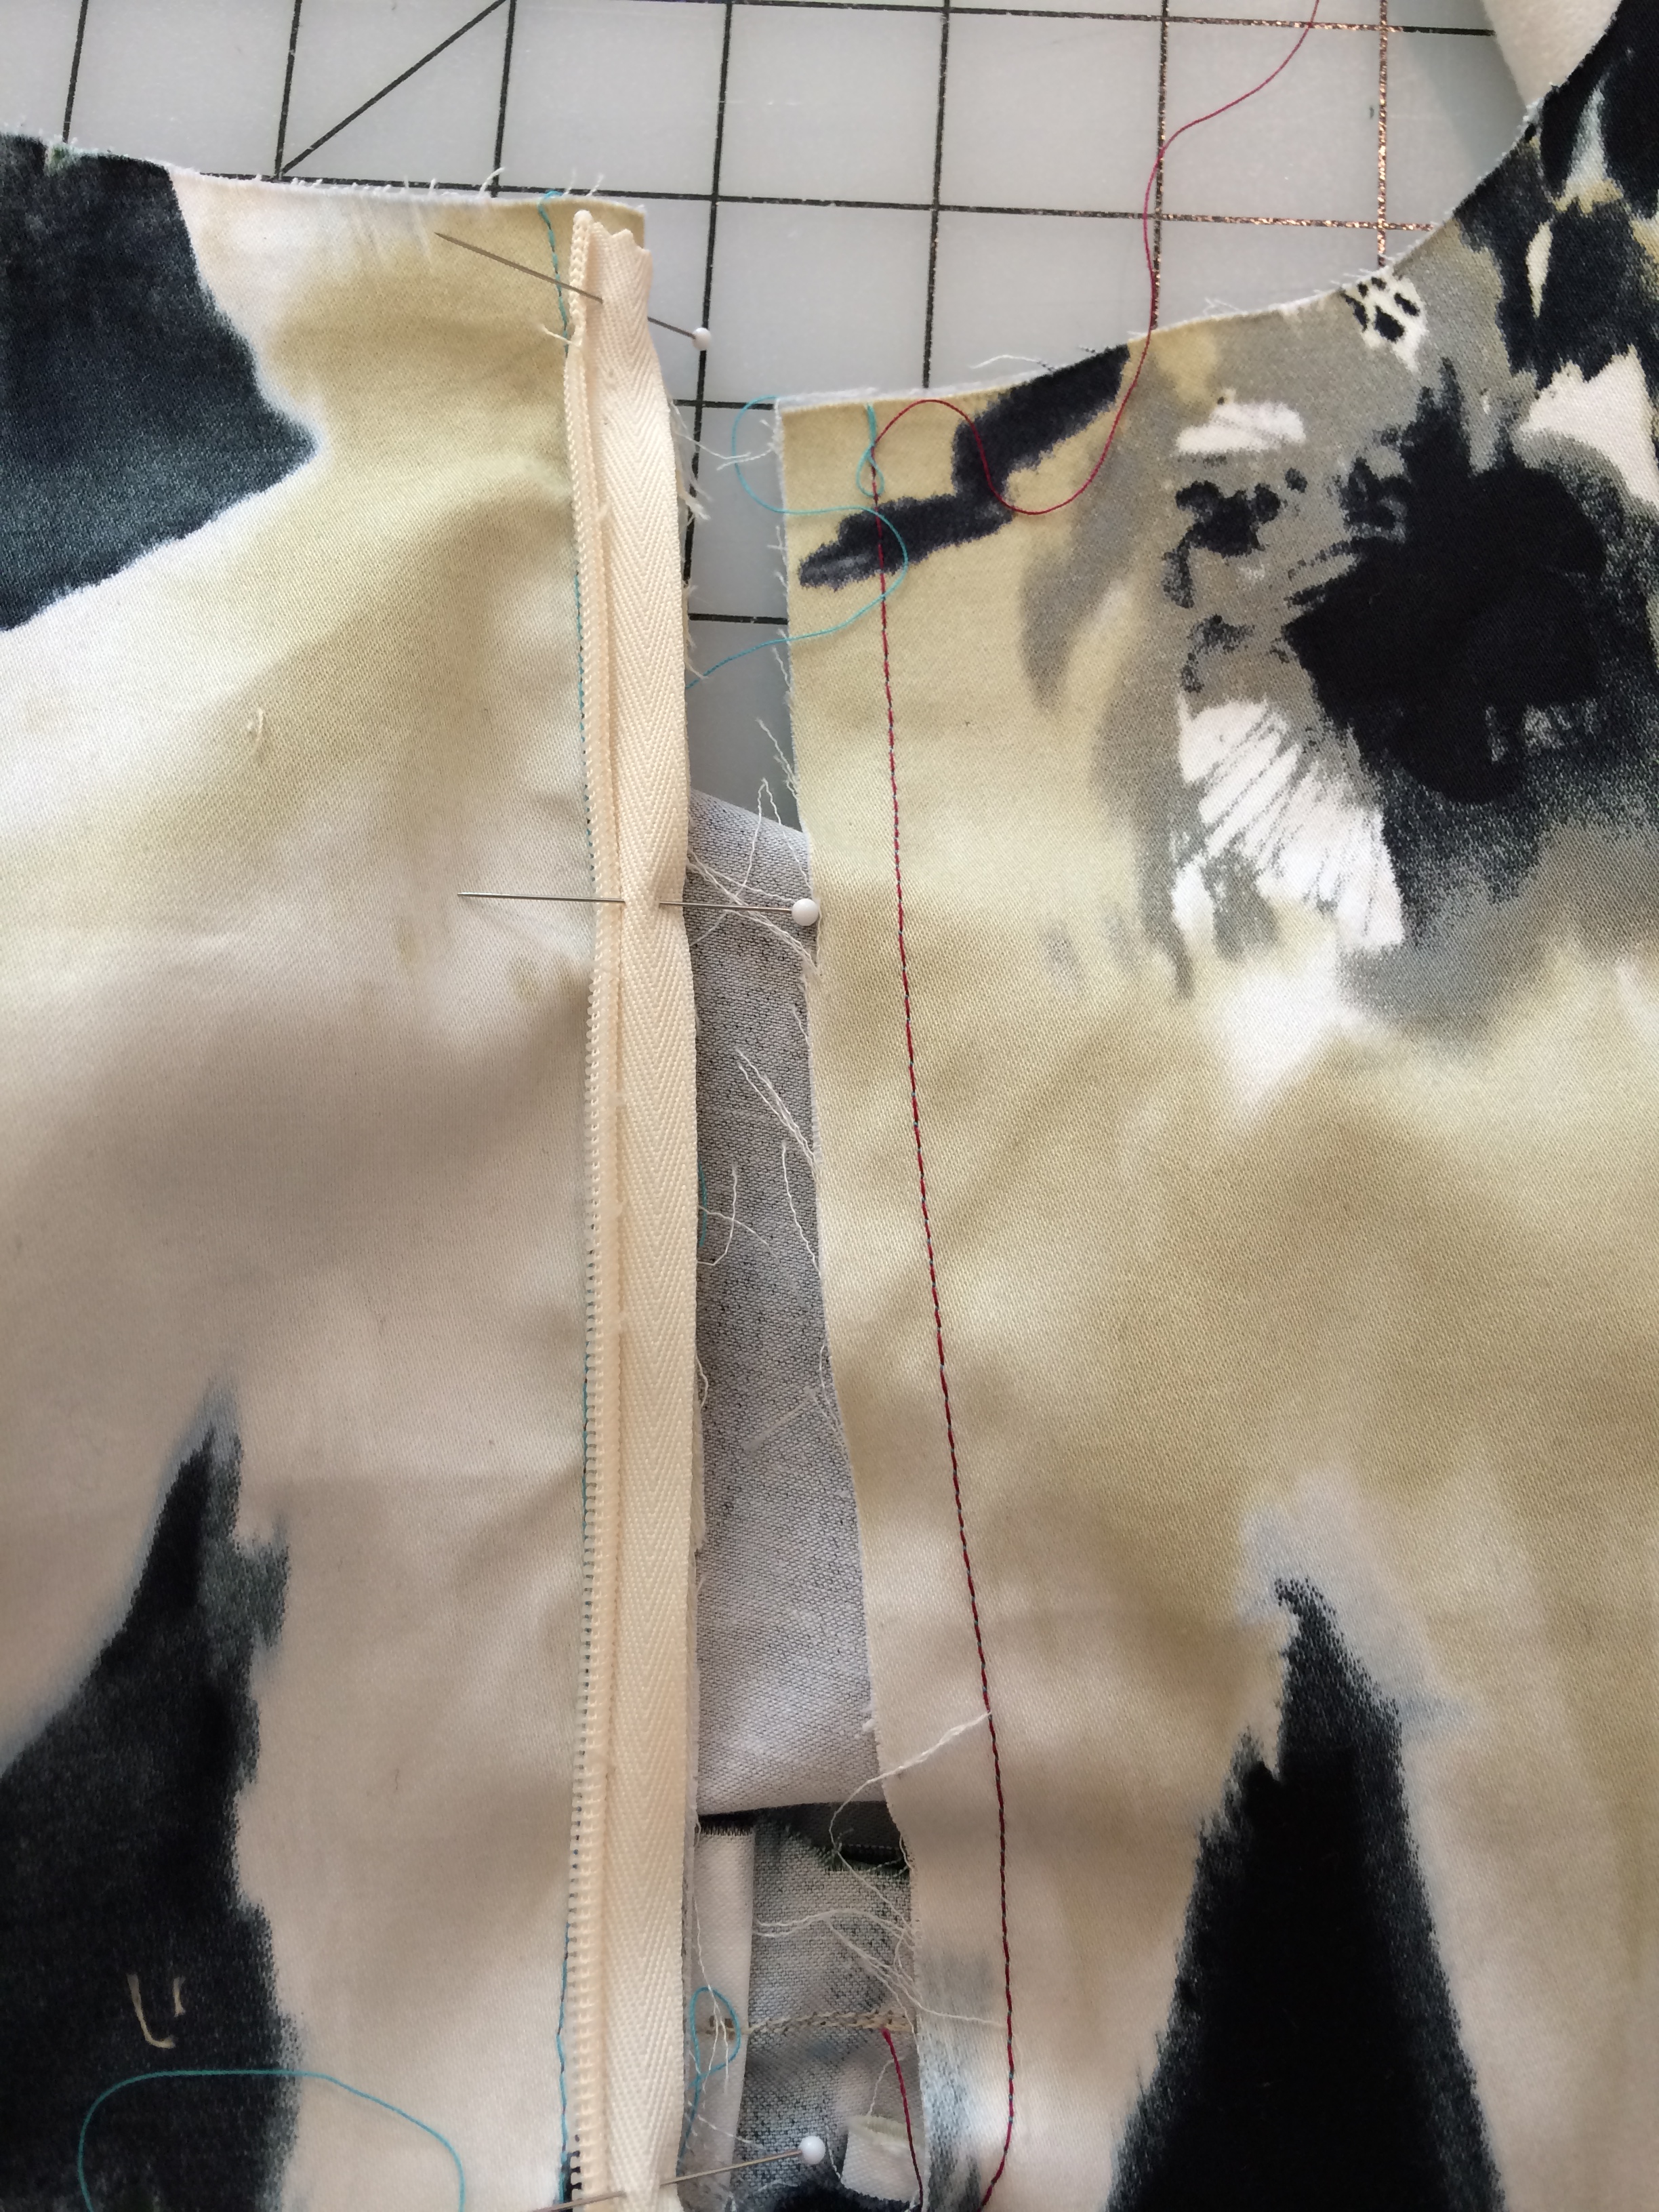
This project went very well – I was able to get the straps right and had some soft white cotton that worked great as a lining. Again, I installed an invisible zipper instead of a regular zipper, which the pattern called for. My new invisible zipper foot has been serving me well – definitely worth the money. I also made sure to cut the bottom section 2.5 inches shorter than the pattern, which gave me the length I wanted. For the straps, I used a textured trim I found at the fabric store. I wanted a contrast for the waist, so I picked a satin yellow ribbon. I’m wondering if white would have been a better choice. After I stitched it together, I realized I still had an issue of the bottom blousing out more than I liked. I didn’t want the illusion I was  expecting…so I knew I would need to do some adjusting.
I took in the material in two sections around each side seam. Because of the gathers, my alterations are not too obvious….I don’t think.

I’m not too impressed with the way the bow came out – I’m never good at those little decorative things. The bow on my muslin came out a lot better, probably because my mom helped me out with Continue reading “Wait, is it After Labor Day?”